
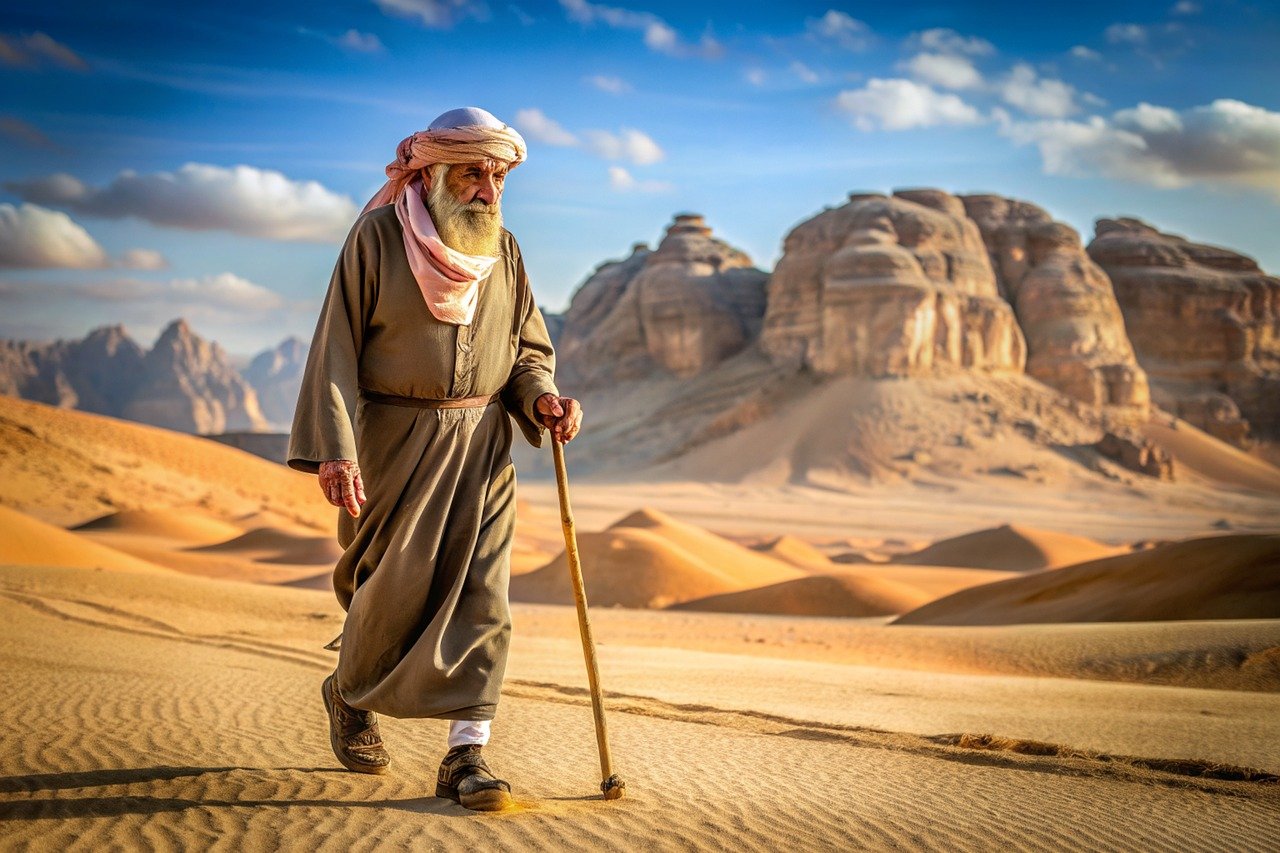
Creating Beautiful Wooden Walking Sticks: A Guide
Welcome to the fascinating world of crafting wooden walking sticks! Whether you're an avid hiker, a nature lover, or simply someone who appreciates the beauty of handcrafted items, this guide is tailored just for you. Creating a wooden walking stick is not just about functionality; it’s an opportunity to express your creativity and connect with nature. Imagine holding a piece of art that you crafted with your own hands, a unique blend of beauty and utility that stands out from the mass-produced options available in stores.
In this guide, we will journey through the essential aspects of crafting your very own walking stick. From selecting the right type of wood that not only looks good but also provides the durability you need, to understanding the tools required for the job, we’ll cover it all. We’ll also dive into design inspirations that can transform a simple stick into a stunning piece of art. So, grab your tools and let’s get started on this exciting adventure!
When it comes to crafting a wooden walking stick, the most crucial decision you'll make is selecting the right type of wood. Not all woods are created equal, and each species comes with its own unique characteristics that can greatly influence the final product. For instance, oak is renowned for its strength and durability, making it a popular choice among craftsmen. On the other hand, maple offers a beautiful grain pattern that can elevate the aesthetic appeal of your walking stick.
Consider the following wood species and their characteristics:
| Wood Species | Durability | Aesthetic Appeal | Weight |
|---|---|---|---|
| Oak | High | Rich grain | Heavy |
| Maple | Medium | Light color, fine grain | Light |
| Pine | Low | Soft, rustic look | Very light |
| Cherry | Medium | Warm color, smooth finish | Medium |
Choosing the right wood is not just about looks; it’s about ensuring your walking stick can withstand the test of time and the elements. So, take your time, explore different options, and pick a wood that resonates with your vision.
Before you dive into crafting, it’s essential to gather the right tools and materials. Having the right equipment can make the process smoother and more enjoyable. Here’s a quick overview of the tools you’ll need:
When it comes to crafting wooden walking sticks, you have the option to use either hand tools or power tools. Each has its own set of advantages and disadvantages. Hand tools, like chisels and hand saws, allow for more precision and control, making them ideal for detailed work. However, they can be time-consuming. On the flip side, power tools, such as drills and routers, can speed up the process significantly, but they require a bit more safety awareness and skill to handle effectively.
Here’s a list of some fundamental hand tools you’ll need:
- Chisels
- Saws (hand saw or coping saw)
- Sanding blocks
- Measuring tape
- Pencil for marking
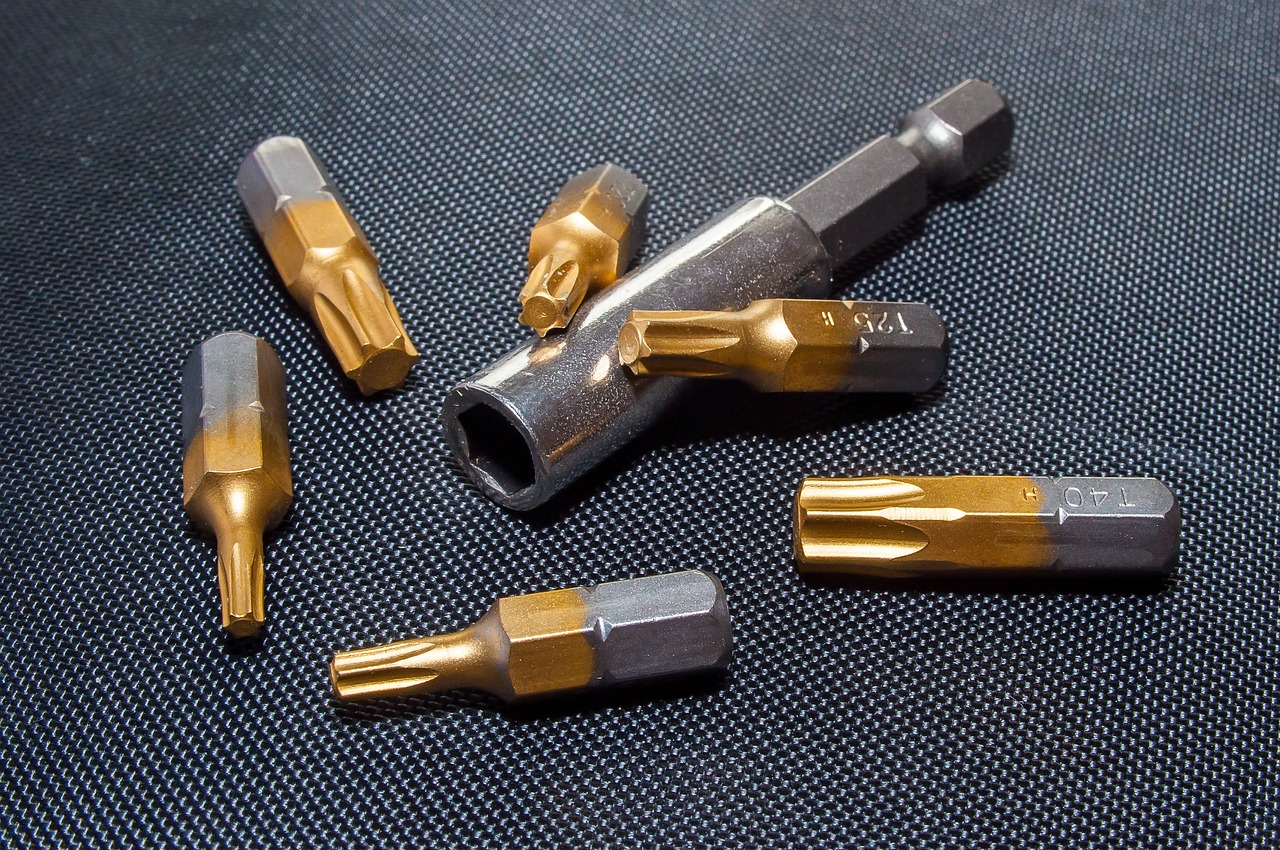
If you opt for power tools, consider adding the following to your toolkit:
- Drills for making holes or shaping
- Routers for adding decorative edges
- Sanders for smoothing surfaces
Regardless of the tools you choose, always prioritize safety. Wear protective gear such as goggles and gloves, and make sure to follow all safety guidelines.
Once your walking stick is shaped and ready, it’s time to consider finishing techniques. Proper finishing not only enhances the beauty of your stick but also protects it from wear and tear. Techniques like sanding, staining, and sealing can give your walking stick a polished look. Sanding helps to smooth out rough edges, while staining can add depth and character to the wood grain. Finally, sealing your walking stick will protect it from moisture and dirt, ensuring it lasts for years to come.
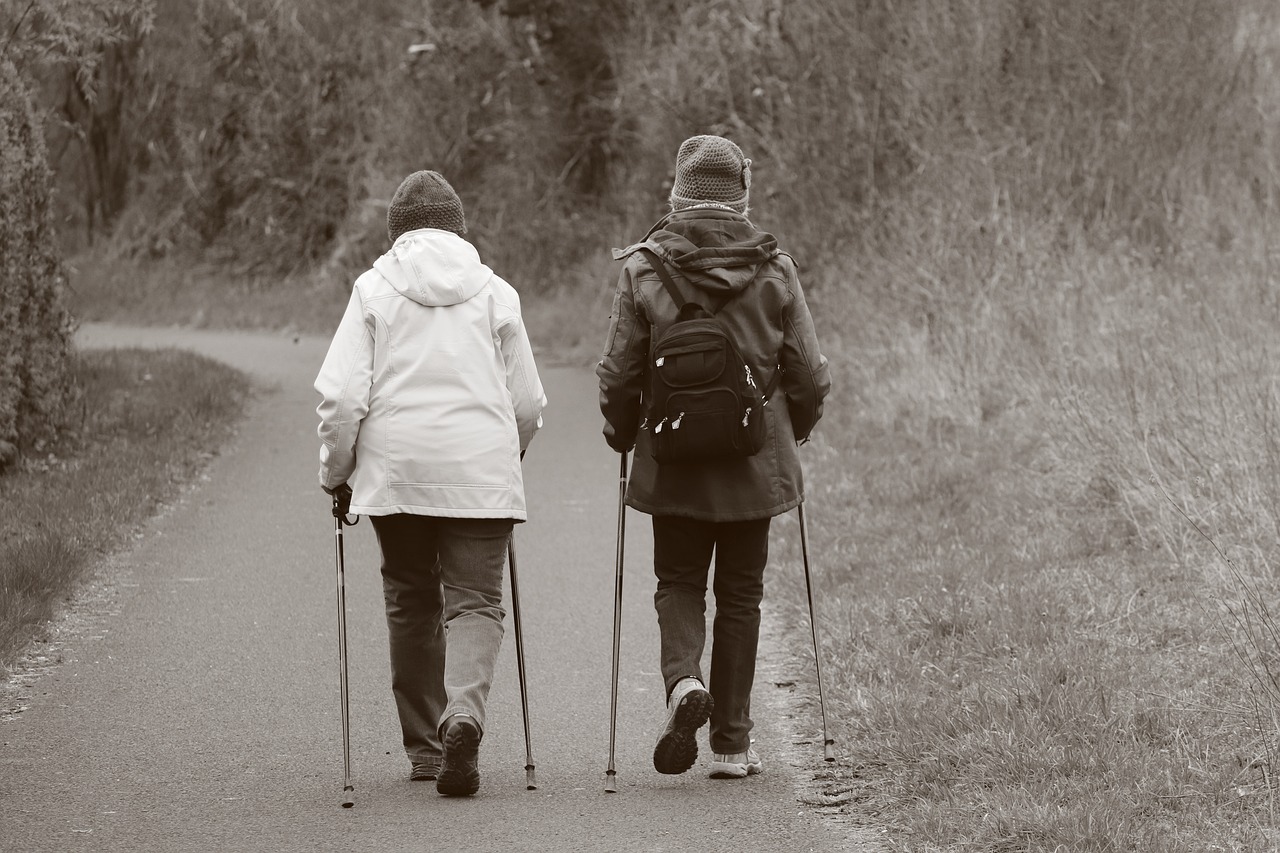
Your walking stick is a reflection of your personal style. When designing it, think about grip styles, decorative elements, and ergonomic features that can enhance its functionality. A well-designed walking stick should not only look good but also feel comfortable to use.
There are various grip styles available, from traditional to modern. Each style impacts the comfort and usability of your walking stick. For example, a contoured grip can provide better support for longer walks, while a straight grip may be more suitable for casual use. Explore different styles to find what feels best for you.
Incorporating decorative elements is a fantastic way to personalize your walking stick. Techniques like carving intricate designs, inlaying contrasting materials, or even painting vibrant colors can transform your stick into a unique masterpiece that showcases your creativity. Don’t be afraid to let your imagination run wild!
To ensure your wooden walking stick stands the test of time, proper maintenance is key. Regular cleaning, safe storage, and prompt repairs will keep it in optimal condition. Wipe it down after use to remove dirt and moisture, and store it in a cool, dry place. If you notice any damage, address it immediately to prevent further deterioration. Remember, a well-cared-for walking stick can be a cherished companion for years to come!
Q: Can I use any type of wood for my walking stick?
A: While you can technically use any wood, it's best to choose a durable species like oak or maple for longevity.
Q: Do I need special tools to make a walking stick?
A: Basic hand tools and some power tools can suffice, but having the right equipment will make the process easier.
Q: How can I make my walking stick unique?
A: Personalize your stick with decorative elements like carvings, inlays, or unique finishes that reflect your style.
Q: How do I maintain my wooden walking stick?
A: Regular cleaning, proper storage, and immediate repair of any damage will help keep your walking stick in great condition.

Choosing the Right Wood
When it comes to crafting a stunning wooden walking stick, selecting the right type of wood is not just important—it's absolutely crucial. The wood you choose will determine not only the stick's aesthetic appeal but also its durability and functionality. Imagine holding a walking stick that feels just right in your hand, with a finish that catches the light beautifully. That's the magic of choosing the right wood!
There are several wood species that are popular among crafters, each with its own unique characteristics. For instance, oak is known for its strength and durability, making it an excellent choice for a walking stick that will stand the test of time. On the other hand, maple offers a lighter weight while still providing good strength, which can be beneficial for those who might need to carry their stick for extended periods. Then there's cherry, which not only boasts a beautiful reddish hue but also ages gracefully, developing a rich patina over time.
Here’s a quick comparison of some popular wood types:
| Wood Type | Weight | Durability | Aesthetic Appeal |
|---|---|---|---|
| Oak | Heavy | High | Classic grain |
| Maple | Medium | Medium | Light color, smooth finish |
| Cherry | Medium | Medium | Rich reddish-brown |
| Pine | Light | Low | Rustic appearance |
When choosing wood, consider the climate where you live, too. Some woods are more resistant to moisture and temperature changes than others. For example, if you live in a humid area, opting for a denser wood like oak or mahogany could save you from future headaches related to warping or splitting. Think about how you plan to use your walking stick as well; if it's primarily for hiking, a sturdier wood will be beneficial, while a decorative stick for occasional use might allow for a lighter option.
Ultimately, the wood you select should resonate with your personal style and the purpose of the stick. Don't be afraid to experiment! Visit your local lumberyard or craft store, and feel the different woods in your hands. Picture how they would look transformed into a beautiful walking stick. It's a bit like dating—sometimes you just have to try a few before you find 'the one' that feels perfect for you.
Tools and Materials Needed
Before diving into the exciting world of crafting your own wooden walking stick, it's essential to gather the right tools and materials. Think of this stage as preparing your artist's palette; the quality of your tools and materials can significantly influence the final masterpiece. In this section, we'll explore the necessary equipment that will set you up for success, ensuring your crafting experience is both enjoyable and productive.
First off, you'll need to choose your wood. The type of wood you select not only affects the **durability** of your walking stick but also its **aesthetic appeal**. Popular choices include oak, maple, and cherry, each offering unique characteristics. Oak, for instance, is known for its strength and beautiful grain, while maple is lighter and offers a smooth finish. Cherry wood, on the other hand, ages beautifully, developing a rich patina over time. It's a good idea to consider how you want your walking stick to look and feel, as this will guide your choice of wood.
Now, let’s talk about the tools you'll need. You can categorize them into two main types: hand tools and power tools. Each has its advantages and can complement your crafting process. Hand tools, like chisels and saws, give you more control and can be perfect for intricate designs. On the other hand, power tools like drills and routers can save you time and effort, especially for larger projects. Understanding the balance between these tools can enhance your crafting experience and help you achieve the results you desire.
When deciding between hand tools and power tools, consider your own comfort level and the complexity of your design. Hand tools offer a tactile experience that many crafters cherish; they allow for a deeper connection with the material. However, power tools can significantly speed up the process, making them ideal for those who may not have the luxury of time. Ultimately, the choice comes down to personal preference and the specific requirements of your project.
Here’s a quick rundown of some essential hand tools that you will find invaluable during your crafting journey:
- Chisels: Perfect for carving out details and shaping the wood.
- Saws: A good handsaw or coping saw will help you make precise cuts.
- Sanders: These are crucial for smoothing out surfaces and edges, giving your walking stick a polished finish.
Power tools can be a game changer when it comes to efficiency. Here are some tools that can help speed up your crafting process:
- Drill: Essential for making holes for the grip or any decorative elements you wish to add.
- Router: Great for adding decorative edges or hollowing out parts of the stick.
However, remember that safety comes first! Always wear protective gear, such as goggles and gloves, when using power tools to prevent any accidents.
Once you've gathered your tools and materials, you're ready to embark on your crafting journey. The process of creating a wooden walking stick is not just about the finished product; it's about the experience, the creativity, and the satisfaction of making something uniquely yours. So, roll up your sleeves, and let’s get started!
Q: What type of wood is best for a walking stick?
A: The best type of wood depends on your preference for weight, appearance, and durability. Common choices include oak, maple, and cherry.
Q: Do I need power tools to make a walking stick?
A: While power tools can make the process faster and easier, they are not strictly necessary. Hand tools can be just as effective, especially for those who enjoy a more traditional crafting approach.
Q: How can I personalize my walking stick?
A: You can personalize your walking stick through various techniques such as carving, painting, or adding decorative elements like inlays.
Hand Tools vs. Power Tools
When it comes to crafting your beautiful wooden walking stick, choosing between hand tools and power tools can feel like standing at a crossroad. Each option has its own set of advantages and disadvantages, and understanding these can significantly enhance your crafting experience. Let’s dive into the nitty-gritty of both, shall we?
Hand tools, such as chisels, hand saws, and files, offer a level of precision and control that is often unmatched. They allow you to connect with the wood on a more personal level, almost like a dance between your hands and the material. When you use hand tools, you can feel the grain of the wood and make adjustments in real-time, creating a unique piece that reflects your craftsmanship. However, the downside is that they require more physical effort and time. If you’re in the mood for a leisurely project, hand tools might be your best friend. Just be prepared for a workout!
On the other hand, power tools, like drills and routers, can speed up the process dramatically. Imagine the thrill of watching your walking stick take shape in a fraction of the time it would take with hand tools! These tools are perfect for those who might be short on time or who are looking to create multiple sticks efficiently. However, they do come with a learning curve and require a bit of caution. Safety should always be your number one priority. Make sure to wear protective gear and follow the manufacturer’s instructions to avoid any mishaps.
To help you visualize the differences, here’s a quick comparison:
| Criteria | Hand Tools | Power Tools |
|---|---|---|
| Control | High | Moderate |
| Speed | Slow | Fast |
| Physical Effort | High | Low |
| Learning Curve | Low | Moderate to High |
| Cost | Generally lower | Generally higher |
Ultimately, the choice between hand tools and power tools boils down to your personal preference, the complexity of your design, and the time you have available. You might even find that a combination of both works best for you! Why not start with hand tools for the detailed work and finish up with power tools for efficiency? It’s all about finding that perfect balance that suits your crafting style.
- Can I use both hand tools and power tools in my project? Absolutely! Many woodworkers find that a combination of both provides the best results.
- Are hand tools better for beginners? Not necessarily. While they are easier to control, power tools can also be user-friendly with the right guidance.
- What safety gear should I wear when using power tools? Always wear safety goggles, ear protection, and a dust mask to protect yourself from debris and noise.

Essential Hand Tools
When it comes to crafting your own wooden walking stick, having the right tools is essential for both the process and the final product. Think of hand tools as your trusty companions on this woodworking journey; they allow you to shape your vision into reality. Here’s a closer look at some of the fundamental hand tools you’ll need, along with tips on how to use them effectively.
First up is the chisel, a versatile tool that will become your best friend. Chisels come in various sizes and shapes, allowing you to carve, shape, and detail your walking stick with precision. When selecting chisels, consider getting a few different sizes to accommodate various tasks. Remember, a sharp chisel is a safe chisel, so always keep your tools well-maintained.
Next, you’ll need a good saw. Whether you opt for a hand saw or a coping saw, this tool is crucial for cutting your wood to the desired length and shape. A hand saw gives you more control for intricate cuts, while a coping saw is perfect for more detailed work. Make sure to practice your sawing technique; smooth, even cuts will save you time and effort in the long run.
Another essential tool is the sander. Sanding is vital for achieving that smooth finish that not only looks great but also feels good in your hands. You can choose between a hand sander or a block sander, depending on the size of your walking stick and your comfort level. Start with a coarser grit sandpaper to remove any rough edges, and gradually move to finer grits for a polished look.
Additionally, a mallet can be incredibly useful when working with chisels. It allows you to apply force without damaging the chisel or your wood. Opt for a lightweight mallet to avoid fatigue, especially if you’re planning on spending several hours on your walking stick. Remember, the right tool can make all the difference!
To keep your workspace organized and efficient, consider using a workbench. A sturdy workbench provides a stable surface for all your crafting needs. You can easily clamp down your wood, allowing for safer and more accurate cuts. If you don’t have a workbench, a simple table can work in a pinch, but make sure it’s sturdy enough to handle the task.
In summary, having the right hand tools can significantly enhance your crafting experience. Here’s a quick recap of the essential tools:
- Chisels - for carving and detailing
- Saws - for cutting wood to size
- Sanders - for achieving a smooth finish
- Mallets - for applying force to chisels
- Workbench - for a stable crafting surface
By equipping yourself with these essential hand tools, you’ll be well on your way to creating a beautiful and functional wooden walking stick that reflects your personal style. Remember, the journey of crafting is just as important as the final product, so take your time, enjoy the process, and let your creativity flow!
Q: What type of wood is best for a walking stick?
A: Hardwoods like oak, maple, and cherry are excellent choices due to their durability and aesthetic appeal.
Q: Can I use power tools instead of hand tools?
A: Yes, power tools can speed up the process, but hand tools offer more control and finesse for detailed work.
Q: How do I maintain my wooden walking stick?
A: Regularly clean and wax your walking stick to protect the wood and maintain its appearance.
Power Tools Overview
When it comes to crafting beautiful wooden walking sticks, power tools can be a game changer. They not only save time but also provide precision that hand tools sometimes struggle to achieve. However, it’s essential to understand the various power tools available and how to use them safely. Let’s dive into some of the most common power tools that can enhance your crafting experience.
First on the list is the drill. A versatile tool, the drill is essential for creating holes for decorative elements or for attaching components. Whether you're using a corded or cordless model, make sure to have a variety of drill bits on hand to accommodate different sizes and types of holes. Remember, the right drill bit can make all the difference between a clean hole and a messy one!
Next, we have the router. This tool is fantastic for shaping edges and adding decorative grooves to your walking stick. It can transform a plain stick into a work of art with just a few passes. However, routers can be intimidating for beginners, so it's crucial to practice on scrap wood before tackling your main project. Always wear protective gear when using a router, as the bits spin at high speeds and can be dangerous.
Another important tool is the sander. Sanding is a vital step in achieving a smooth finish on your walking stick, and power sanders can significantly speed up this process. Whether you opt for a belt sander, orbital sander, or detail sander, each has its own advantages. For example, a belt sander is great for removing material quickly, while an orbital sander is perfect for finishing touches. Make sure to use the appropriate grit sandpaper to avoid damaging the wood.
Lastly, let’s not forget about the jigsaw. This handy tool is perfect for cutting curves and intricate shapes in your walking stick design. It allows for creativity and flexibility, enabling you to make unique designs that stand out. Just remember to use a fine-toothed blade for smoother cuts and to work slowly to maintain control.
Now that you have an overview of some essential power tools, it’s important to prioritize safety. Always wear protective eyewear and a dust mask when working with power tools, as wood dust can be harmful to your lungs. Additionally, make sure to read the manufacturer’s instructions for each tool to understand its specific safety features and operational guidelines.
In summary, power tools can significantly enhance your woodworking experience, making the process more efficient and enjoyable. By incorporating tools like drills, routers, sanders, and jigsaws into your crafting routine, you'll not only save time but also achieve a level of precision that can elevate your wooden walking stick from ordinary to extraordinary.
- What safety gear should I wear when using power tools? Always wear protective eyewear, a dust mask, and hearing protection to safeguard against debris, dust, and noise.
- Can I use power tools if I’m a beginner? Absolutely! Just take your time to learn how each tool works and practice on scrap wood before starting your main project.
- Are power tools necessary for making walking sticks? While hand tools can certainly get the job done, power tools can make the process faster and more precise.
Finishing Techniques
When it comes to crafting a wooden walking stick, the finishing touches are what truly transform a simple piece of wood into a stunning work of art. Finishing techniques not only enhance the visual appeal of your walking stick but also play a vital role in its durability and longevity. Imagine walking through the forest, your stick gleaming in the sunlight, a testament to your craftsmanship. So, let’s dive into the various methods that can elevate your creation!
First and foremost, sanding is an essential step in the finishing process. It’s akin to giving your walking stick a gentle massage, smoothing out any rough edges and imperfections. Start with a coarse grit sandpaper to remove any major blemishes, and gradually move to finer grits for a silky finish. The goal is to create a surface that feels as good as it looks. Remember, patience is key here; the more effort you put into sanding, the more rewarding the final result will be!
Once you’ve achieved that smooth surface, it’s time to consider staining. Staining allows you to add color and depth to your walking stick, bringing out the natural grain of the wood. There are various types of stains available, ranging from water-based to oil-based, each offering unique benefits. Water-based stains dry quickly and are easy to clean up, while oil-based stains penetrate deeper into the wood, providing a richer color. Choose a shade that resonates with you, whether it’s a deep mahogany or a light oak, and apply it evenly using a brush or cloth. Don’t forget to wipe off any excess to avoid a sticky finish!
After staining, sealing your walking stick is crucial. Sealing protects the wood from moisture and environmental damage, ensuring your stick remains in top condition for years to come. There are several sealing options available, including polyurethane, lacquer, and tung oil. Each has its own characteristics:
| Sealer Type | Benefits | Drawbacks |
|---|---|---|
| Polyurethane | Durable, water-resistant | Can be difficult to apply evenly |
| Lacquer | Quick-drying, high gloss | Less durable than polyurethane |
| Tung Oil | Natural finish, easy to apply | Requires multiple coats for full protection |
Choosing the right sealer depends on your desired finish and the conditions in which you’ll be using your walking stick. For example, if you plan to use it outdoors frequently, a durable polyurethane might be your best bet. If you prefer a more natural look, tung oil could be the way to go.
Finally, after sealing, consider applying a final polish to give your walking stick that extra shine. A good quality wood polish can enhance the color and provide a protective layer against scratches and dirt. Just remember to apply it sparingly; a little goes a long way!
In conclusion, the finishing techniques you choose for your wooden walking stick can make a world of difference in both aesthetics and durability. By taking the time to sand, stain, seal, and polish, you will create a walking stick that not only serves a functional purpose but also stands as a beautiful piece of art that reflects your personal style and craftsmanship.
- What type of wood is best for a walking stick? Hardwoods like oak, maple, and hickory are excellent choices due to their durability and strength.
- How long does the finishing process take? The finishing process can vary, but expect to spend several hours to a couple of days, depending on the number of coats and drying times.
- Can I customize the grip of my walking stick? Absolutely! You can shape the grip to fit your hand comfortably or add materials like leather for a better hold.

Designing Your Walking Stick
When it comes to , the sky is truly the limit! This is your chance to let your creativity shine and create a piece that not only serves a practical purpose but also reflects your unique personality. Think of your walking stick as a canvas; it can be as simple or as intricate as you wish. From the type of wood you choose to the decorative elements you add, every decision contributes to the final masterpiece.
One of the first considerations in your design process is the grip style. The grip is not only about aesthetics; it plays a crucial role in comfort and usability. There are various styles to choose from, including:
- Traditional grips: These often feature a crook or a knob that fits comfortably in the hand.
- Ergonomic grips: Designed to reduce strain, these grips are perfect for long walks.
- Custom grips: You can even carve a grip that perfectly fits your hand, adding a personal touch.
Next, think about the decorative elements you want to incorporate. This is where you can really let your imagination run wild! Techniques like carving, inlaying, and painting can add character and flair to your walking stick. For instance, you might choose to carve intricate patterns or even personal symbols into the wood. Inlaying materials like brass or colored resin can create stunning visual effects, while a simple paint job can make your stick stand out in a crowd.
Another important aspect of design is ergonomics. A well-designed walking stick should not only look good but also feel good to use. Consider the height of the stick; it should be proportional to your height for optimal support. A stick that is too short can lead to discomfort, while one that is too tall can be cumbersome. Additionally, think about the weight of the wood you choose. A heavier wood may feel sturdy but can become tiring to use over long distances.
Lastly, don't forget to consider the finishing touches. The finish can dramatically change the appearance of your walking stick. Whether you opt for a natural oil finish that highlights the wood grain or a glossy varnish for a more polished look, these choices affect both aesthetics and durability. A well-finished walking stick not only looks fantastic but also stands up to the elements, ensuring that your creation lasts for years to come.
Q1: What type of wood is best for a walking stick?
A1: The best type of wood depends on your preferences. Hardwoods like oak and maple are durable and provide a good grip, while lighter woods like pine are easier to carry.
Q2: How can I personalize my walking stick?
A2: You can personalize your stick through custom grips, unique carvings, and decorative inlays. Paint and stain can also add a personal touch.
Q3: How do I ensure my walking stick is the right height?
A3: To find the right height, stand straight and measure from the floor to the wrist bone. This measurement will help you select a walking stick that offers the best support.
Q4: What are some common maintenance tips for my walking stick?
A4: Regularly clean your walking stick with a damp cloth, avoid exposing it to extreme weather conditions, and apply a wood conditioner or oil to keep it looking great.
Grip Styles
When it comes to crafting your wooden walking stick, one of the most important aspects to consider is the grip style. The grip not only affects the comfort of your hand but also influences how effectively you can use the stick. Imagine walking for hours with a stick that feels awkward in your grip—it's not just uncomfortable; it can lead to fatigue and even injury. Therefore, choosing the right grip style is essential for both functionality and aesthetics.
There are several popular grip styles that you can choose from, each with its unique characteristics and benefits. Here’s a quick overview:
- Traditional Grip: This classic style is often shaped like a T or a J, providing a sturdy hold. It's favored by many for its simplicity and effectiveness.
- Ergonomic Grip: Designed to fit the natural curve of your hand, this grip style minimizes strain and maximizes comfort, making it ideal for longer walks.
- Contoured Grip: This style features a more sculpted design that cradles the hand, offering a more secure hold while adding a touch of elegance to your walking stick.
- Knob Grip: With a rounded top, this grip allows for a comfortable hold from multiple angles, making it versatile for various walking conditions.
Each grip style has its own set of advantages. For instance, if you’re planning on using your walking stick for extended periods, an ergonomic grip might be your best choice. It’s like wearing a well-fitted shoe—when it fits right, you can walk for miles without discomfort. On the other hand, if you prefer a more traditional look, a classic T-grip can add a nostalgic charm to your stick.
When designing your walking stick, consider how the grip will align with the overall aesthetic of the piece. You can even combine different materials for your grip, such as wrapping it in leather for a luxurious feel or using rubber for added traction. The grip can be a canvas for your creativity, allowing you to express your personal style while ensuring functionality.
Ultimately, the grip style you choose should resonate with your personal preferences and intended use. Take the time to try out different grips, if possible. It’s akin to test-driving a car; you want to feel comfortable and confident in your choice. Remember, the right grip can transform your walking stick from a mere tool into a cherished companion on your adventures.
Q: What is the best grip style for hiking?
A: For hiking, an ergonomic grip is often recommended as it provides comfort and reduces strain on long treks.
Q: Can I customize the grip of my walking stick?
A: Absolutely! You can choose different materials and designs to create a grip that reflects your style and comfort needs.
Q: How do I know if a grip style is right for me?
A: It’s best to try out different grips to see which one feels the most comfortable and secure in your hand while walking.
Adding Decorative Elements
When it comes to crafting your own wooden walking stick, can truly transform a simple piece of wood into a stunning work of art. Think of your walking stick as a blank canvas, waiting for your personal touch. Whether you want to carve intricate designs, inlay colorful materials, or apply a splash of paint, the possibilities are as vast as your imagination. Each decorative choice not only enhances the aesthetic appeal but also tells a story about you, the creator.
One popular method of decoration is carving. This technique allows you to create detailed patterns or images that can reflect your personality or interests. For instance, you might consider carving symbols that hold personal significance, like family crests or nature-inspired motifs. The beauty of carving lies in its depth and texture; it invites touch and admiration, making your walking stick a conversation starter.
Another fascinating approach is inlaying, where you embed different materials into the wood. Imagine using colorful stones, metal strips, or even pieces of other woods to create stunning contrasts. This technique can be particularly striking, as it adds a three-dimensional aspect to your design. Just picture a walking stick with a beautiful turquoise inlay, shimmering in the sunlight as you stroll through the park. It's not just a tool; it becomes a piece of art that showcases your craftsmanship.
Don't forget about the power of painting. A splash of color can breathe life into your walking stick. You might choose to paint the entire stick in a vibrant hue or apply a more subtle wash to highlight the wood's natural grain. Using non-toxic paints ensures that your decorative elements are not only beautiful but also safe. Additionally, you can incorporate stencils or freehand designs to create unique patterns that resonate with your style.
As you consider these decorative options, it's essential to think about how they will affect the overall functionality of your walking stick. For instance, while a beautifully carved handle may look stunning, it should still provide a comfortable grip. Balancing aesthetics with usability is key to creating a practical yet visually appealing piece. Remember, your walking stick is not just for support; it’s a reflection of you, so let your creativity shine!
To help you visualize the different decorative techniques, here’s a quick comparison table:
| Technique | Description | Pros | Cons |
|---|---|---|---|
| Carving | Creating designs by cutting into the wood | Unique texture and depth | Time-consuming and requires skill |
| Inlaying | Embedding materials into the wood | Stunning visual contrasts | Can be complex and requires precision |
| Painting | Applying color to the surface of the wood | Wide range of colors and styles | May require regular touch-ups |
In conclusion, adding decorative elements to your wooden walking stick is not just about aesthetics; it’s about expressing who you are. Each choice you make is a brushstroke in the masterpiece of your creation. So grab your tools, unleash your creativity, and let your walking stick tell your story!
- What type of wood is best for carving decorative elements? Hardwoods like oak, maple, or cherry are ideal for detailed carving due to their density and durability.
- Can I use any paint on my walking stick? It's best to use non-toxic, outdoor-grade paints to ensure safety and longevity.
- How can I protect my decorative elements? Applying a clear sealant can help protect your designs from wear and tear.
Maintenance and Care
Taking care of your wooden walking stick is not just about preserving its beauty; it's also about ensuring its functionality and longevity. Just like a cherished heirloom, your walking stick deserves a little TLC to keep it looking and working great for years to come. So, what exactly should you do to maintain this handcrafted piece of art? Let’s dive into some essential tips and tricks!
First and foremost, regular cleaning is crucial. Dust and dirt can accumulate, dulling the finish and potentially causing damage to the wood. A simple solution is to use a soft, damp cloth to wipe down your walking stick after each use. This removes any grime and helps maintain its luster. If your stick has intricate carvings or decorative elements, a gentle brush can help get into those hard-to-reach places. Just remember, never soak your walking stick in water, as excessive moisture can warp the wood.
Next, consider the storage conditions. A wooden walking stick should be kept in a cool, dry place away from direct sunlight. Exposure to heat can cause the wood to crack or split, while humidity can lead to mold and mildew. If you live in an area with fluctuating temperatures, try to store your walking stick in a protective case or bag to shield it from the elements.
Now, let’s talk about repairs. Over time, even the best-crafted walking sticks may need a little fixing up. If you notice any scratches or dents, don’t panic! Most minor imperfections can be addressed with a bit of sanding. Use fine-grit sandpaper to gently smooth out the affected area, and then apply a matching stain or finish to blend it in. For more significant damage, such as cracks, you might need to use wood glue to rejoin the pieces, followed by sanding and refinishing.
To further enhance the durability of your walking stick, consider applying a protective finish every couple of years. This could be a simple wood oil or a more complex varnish, depending on the look you want to achieve. A good finish not only protects against moisture but also enhances the natural grain of the wood, making your walking stick a true standout!
In summary, maintaining your wooden walking stick involves regular cleaning, proper storage, timely repairs, and protective finishing. By following these simple steps, you can ensure that your walking stick remains a beautiful and functional companion on all your adventures.
- How often should I clean my walking stick? It's best to clean your walking stick after each use to keep it in pristine condition.
- Can I use any wood finish on my walking stick? It's advisable to use finishes specifically designed for wood to ensure compatibility and durability.
- What should I do if my walking stick gets wet? If your walking stick gets wet, dry it immediately with a soft cloth and store it in a dry place to prevent warping.
- How can I remove scratches from my walking stick? Use fine-grit sandpaper to gently sand the scratched area and apply a matching stain or finish to blend it.
Frequently Asked Questions
- What type of wood is best for crafting a walking stick?
Choosing the right wood is essential for durability and aesthetics. Hardwoods like oak, maple, and walnut are popular choices due to their strength and beautiful grain patterns. If you're looking for something lighter, consider using bamboo or poplar, which are also great options!
- What tools do I need to start making a wooden walking stick?
To craft a wooden walking stick, you’ll need a few essential tools. Hand tools like chisels, saws, and sanders are fundamental. If you prefer a quicker process, power tools such as drills and routers can be incredibly helpful. Just remember, safety first!
- How do I finish my walking stick for a polished look?
Finishing techniques can really elevate your walking stick's appearance. Start with sanding to smooth the surface, then apply stain for color. Finally, seal it with a protective finish to enhance durability and shine. It’s like giving your stick a spa day!
- What are some popular grip styles for walking sticks?
Grip styles can greatly affect comfort and usability. Traditional styles include the T-grip, which offers a classic feel, while ergonomic grips provide better support for extended use. Experiment with different styles to find what feels best in your hand!
- Can I add decorative elements to my walking stick?
Absolutely! Adding decorative elements like carvings, inlays, or even paint can personalize your walking stick. It’s a fantastic way to showcase your creativity and make your stick truly one-of-a-kind!
- How should I maintain my wooden walking stick?
Proper maintenance is key to ensuring your walking stick lasts for years. Regularly clean it with a soft cloth, store it in a cool, dry place, and check for any signs of damage. If you notice any scratches or wear, a little sanding and re-staining can work wonders!


