
Crafting a Handmade Wooden Deck: A DIY Guide
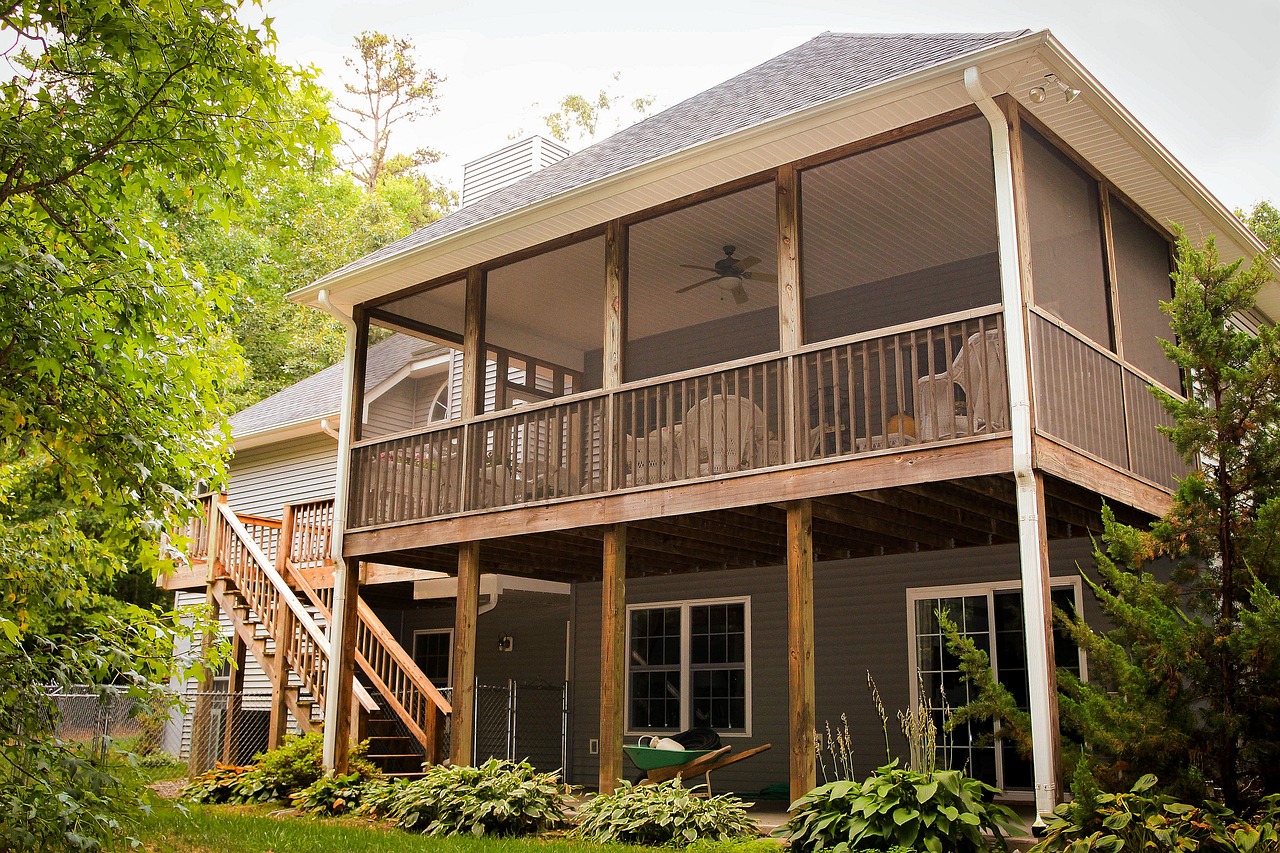
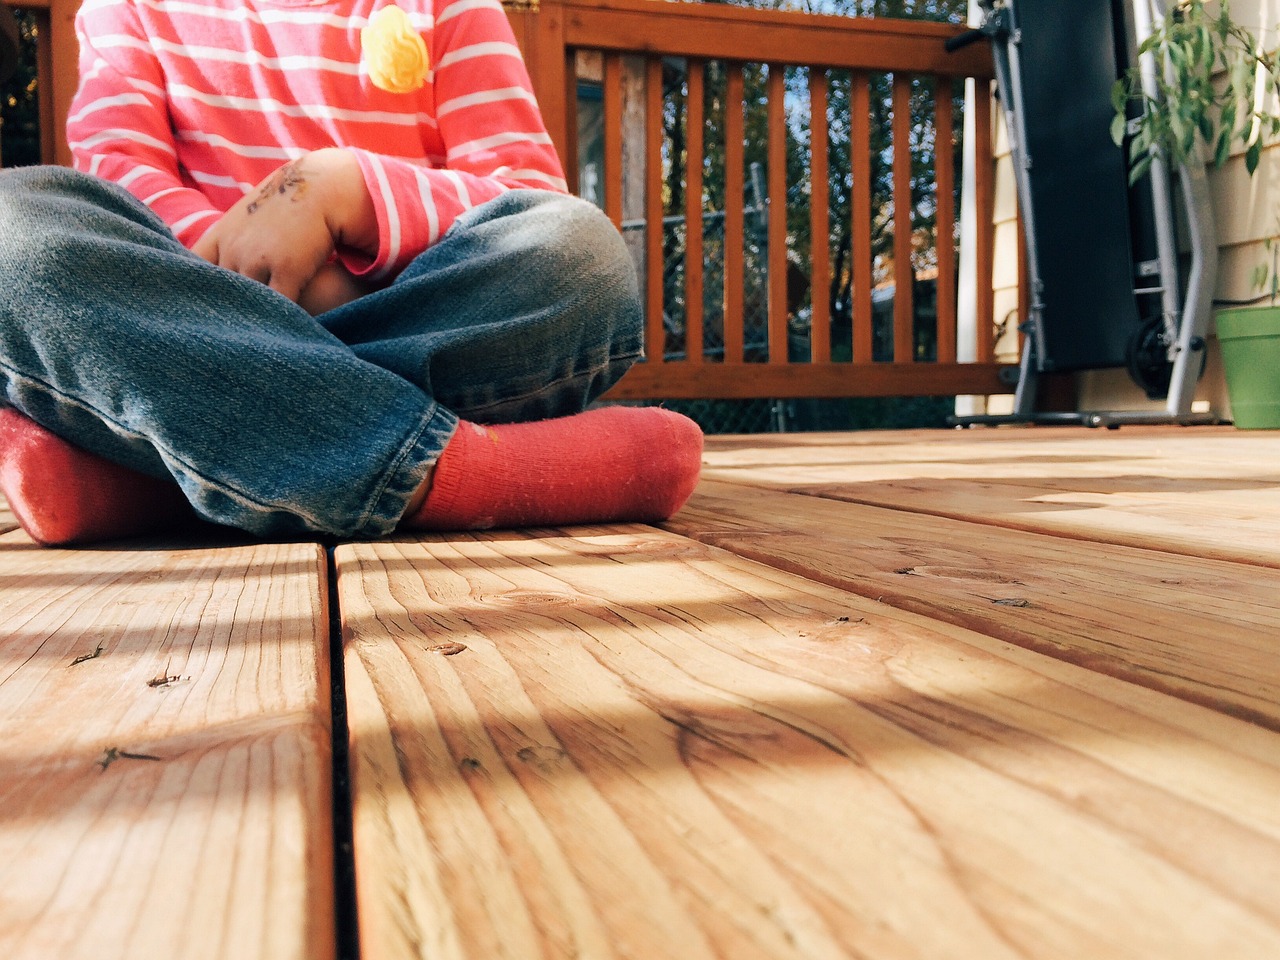
Are you dreaming of a stunning outdoor space where you can relax, entertain, and enjoy the beauty of nature? A handmade wooden deck can transform your backyard into a personal paradise. This guide will walk you through the essential steps, materials, and techniques needed to create a beautiful and durable wooden deck, perfect for enhancing your outdoor living space. Imagine sipping your morning coffee on a sunlit deck or hosting summer barbecues with friends and family; the possibilities are endless!
When it comes to building a deck, selecting the appropriate type of wood is crucial for both durability and aesthetics. You want a material that not only looks good but can also withstand the test of time and the elements. There are several wood options available, each with its own unique benefits:
- Pressure-Treated Lumber: This is one of the most popular choices due to its affordability and resistance to rot and insects.
- Cedar: Known for its natural beauty and aromatic scent, cedar is naturally resistant to decay and insects, making it a great option for outdoor projects.
- Redwood: Similar to cedar, redwood is not only visually appealing but also has natural oils that protect it from the elements.
- Composite Decking: If you’re looking for low maintenance, composite materials made from recycled wood and plastic can be a fantastic choice, though they may come at a higher initial cost.
When deciding on the wood for your deck, consider factors such as your budget, the climate in your area, and the overall look you want to achieve. Each wood type has its own charm, so take your time to choose wisely!
Before diving into your project, it's essential to gather all necessary tools and materials. Having everything ready will ensure a smooth building process and high-quality results. Here’s a quick overview of the must-have items:
Accurate measurements and cuts are vital for a successful deck. You’ll need the following tools to achieve precision:
- Tape Measure: For measuring lengths and widths accurately.
- Square: To ensure your cuts are at right angles.
- Circular Saw: Ideal for making straight cuts through your decking boards.
- Chop Saw: Perfect for cutting angles and making quick, precise cuts.
Understanding the difference between power tools and hand tools can help you decide which to use. Power tools can make the job faster and easier, but hand tools often provide more control and precision. Weigh the pros and cons of each to enhance your efficiency and craftsmanship. For instance, while a power drill can speed up the process of securing boards, a hand saw might give you more control for delicate cuts.
Creating a comprehensive materials checklist can streamline your building process. Here’s a detailed list of all necessary materials needed to complete your wooden deck:
| Material | Quantity |
|---|---|
| Decking Boards | Varies by size |
| Posts | 4-6 (depending on deck size) |
| Beams | 2-4 |
| Joists | As needed |
| Deck Screws | 1-2 boxes |
| Stain/Sealant | 1-2 gallons |
Safety should always be a priority when undertaking DIY projects. Remember to wear protective gear such as gloves, goggles, and a dust mask. Additionally, ensure your workspace is clear and well-ventilated. Following safety protocols will not only protect you but also make your project more enjoyable!
A well-thought-out layout can enhance the functionality and beauty of your deck. Before you start building, take some time to sketch out your design. Consider how you plan to use the space—will it be primarily for entertaining, relaxing, or perhaps a combination of both? This will guide your decisions on size and features.
Choosing the right shape and size for your deck can significantly impact its usability. For instance, a rectangular deck may be more straightforward to build, while a curved deck can add a unique touch. Think about the dimensions that will best fit your yard and lifestyle needs. A large deck can accommodate more guests but may require more maintenance!
Adding features like railings, built-in seating, or planters can enhance your deck's appeal. Consider incorporating a few of these creative ideas into your design:
- Railings: Not only do they provide safety, but they can also add a stylish element.
- Built-in Seating: This can save space and create a cozy atmosphere.
- Planters: Incorporating greenery can make your deck feel more inviting and alive.
Constructing a sturdy frame is essential for the longevity of your deck. The frame acts as the foundation, and without it, your deck won't stand the test of time. Begin by setting the posts correctly, as they will support the entire structure.
Properly setting the posts is crucial for deck stability. Use concrete to secure each post in place, ensuring they are level and evenly spaced. This will provide the necessary support for the beams and joists that will follow.
Beams and joists form the backbone of your deck. Learn how to install these structural components correctly to create a safe and durable deck framework. Make sure to space the joists evenly to provide adequate support for your decking boards.
Installing the decking boards is where your vision starts to take shape. Lay the boards down with care, ensuring they are spaced correctly for both aesthetics and water drainage. A well-installed deck will not only look great but will also perform well over time.
Proper spacing and alignment of decking boards are critical for aesthetics and water drainage. Generally, a gap of 1/8 inch between boards is recommended to allow for expansion and contraction. This will also help prevent water from pooling on the surface.
The final touches can elevate your deck's appearance. Consider staining or sealing your deck to protect it from the elements and enhance its natural beauty. A good finish can make all the difference, transforming a simple wooden deck into a stunning outdoor oasis!
Regular maintenance is key to preserving your wooden deck's integrity. Here are a few practical tips:
- Cleaning: Sweep and clean your deck regularly to prevent dirt and debris buildup.
- Sealing: Reapply sealant every 1-2 years to protect against moisture and UV damage.
- Inspection: Regularly check for loose boards or nails and repair them promptly.
Q: How long does it take to build a wooden deck?
A: The time it takes to build a wooden deck can vary depending on the size and complexity of the design. Generally, a simple deck can take anywhere from a few days to a couple of weeks to complete.
Q: Do I need a permit to build a deck?
A: In many areas, you will need a permit to build a deck, especially if it is elevated. Check with your local building department for specific regulations.
Q: How do I maintain my wooden deck?
A: Regular cleaning, sealing, and inspection are crucial for maintaining your wooden deck. Make sure to address any issues promptly to prolong its lifespan.

Choosing the Right Wood
When it comes to building a wooden deck, selecting the right type of wood is crucial for both durability and aesthetics. The choice of wood can significantly impact the overall look and lifespan of your deck, so it's essential to consider various options before making a decision. Different types of wood come with their own set of advantages and disadvantages, which can affect not only the appearance of your deck but also how well it withstands the elements over time.
One popular choice for decking is pressure-treated lumber. This wood is infused with chemicals to resist rot, insects, and decay, making it an excellent option for outdoor projects. However, its greenish hue may not appeal to everyone, and it often requires regular maintenance, such as staining or sealing, to maintain its appearance. On the other hand, cedar and redwood are naturally resistant to moisture and insects, giving them an edge in terms of longevity. They boast beautiful grain patterns and rich colors, but they can be more expensive than pressure-treated wood.
If you're looking for a more sustainable option, consider using composite decking. Made from a mix of recycled wood fibers and plastic, composite materials are designed to mimic the look of natural wood while offering superior resistance to fading, staining, and scratching. While the initial cost may be higher, the long-term savings on maintenance can make it a worthwhile investment.
To help you choose the right wood for your deck, here’s a quick comparison table:
| Type of Wood | Durability | Cost | Maintenance |
|---|---|---|---|
| Pressure-Treated Lumber | High | Low | Requires regular maintenance |
| Cedar | Moderate | Medium | Staining recommended |
| Redwood | High | High | Staining recommended |
| Composite Decking | Very High | High | Minimal maintenance |
Ultimately, the best choice for your deck will depend on your budget, desired aesthetics, and how much time you're willing to invest in maintenance. Think about the climate in your area as well; some woods perform better in humid environments, while others may fare well in dry conditions. Ask yourself: Do you want a classic wooden look, or are you more interested in durability and low maintenance? By weighing these factors, you can make an informed decision that will lead to a beautiful and lasting outdoor space.
Essential Tools and Materials
Before diving into the exciting world of deck building, it's crucial to gather all the that will set you up for success. Think of this as assembling your own toolkit for creating a masterpiece in your backyard. Having the right gear not only makes the process smoother but also ensures that you achieve high-quality results. So, let’s break it down and see what you’ll need to get started!
First off, you’ll need a variety of measuring and cutting tools. Precision is key when it comes to building a deck, as even the slightest miscalculation can lead to a wobbly structure. Here are some of the must-have measuring tools:
- Tape Measure: A 25-foot tape measure is perfect for measuring long spans.
- Square: A framing square will help ensure your corners are perfectly right-angled.
- Level: A level helps confirm that your surfaces are even, which is crucial for both aesthetics and safety.
When it comes to cutting, having the appropriate tools is equally important. You'll want to have:
- Circular Saw: Ideal for straight cuts on decking boards.
- Miter Saw: Perfect for angled cuts, especially for trim work.
- Jigsaw: Useful for cutting curves or intricate designs.
Now, let's talk about power tools vs. hand tools. Each has its own set of advantages and disadvantages. Power tools, like drills and saws, can speed up the process significantly, allowing you to cut and assemble your deck in a fraction of the time. However, hand tools, such as hammers and screwdrivers, can provide more control, especially in tight spots. It’s all about finding the right balance for your project. If you’re a novice, starting with hand tools might help you develop a better feel for the work.
Next up is the materials checklist. Having a comprehensive list of materials will streamline your building process and avoid those last-minute trips to the hardware store. Here’s a quick rundown of what you’ll typically need:
| Material | Description |
|---|---|
| Decking Boards | Choose quality wood that can withstand the elements. |
| Posts | Essential for supporting the deck structure. |
| Beams and Joists | These form the framework of your deck. |
| Fasteners | Deck screws or nails to secure everything together. |
| Sealant/Stain | To protect the wood and enhance its appearance. |
Lastly, but certainly not least, is safety precautions. Always prioritize your safety while working on your deck. Ensure you have safety glasses, gloves, and ear protection handy. It's easy to get caught up in the excitement of building, but taking a moment to gear up can prevent accidents and injuries.
With these tools and materials in hand, you'll be well on your way to crafting a stunning wooden deck that not only enhances your outdoor living space but also stands the test of time. Remember, preparation is half the battle, so take the time to gather everything you need before starting your project!
Q: What type of wood is best for outdoor decking?
A: The best types of wood for outdoor decking include cedar, redwood, and pressure-treated lumber, as they offer durability and resistance to the elements.
Q: Can I build a deck on my own?
A: Yes, many homeowners successfully build their own decks. However, having some basic carpentry skills and following safety precautions is essential.
Q: How often should I maintain my wooden deck?
A: It's recommended to clean and seal your deck every 1-3 years, depending on the weather conditions in your area.

Measuring and Cutting Tools
When it comes to building your handmade wooden deck, precision is key. The right can make all the difference between a deck that looks professional and one that appears haphazard. Imagine trying to put together a puzzle with pieces that don’t quite fit—frustrating, right? That’s exactly what can happen if your measurements are off. So, let’s dive into the essential tools you’ll need to ensure every plank fits perfectly.
First off, a reliable measuring tape is your best friend. Not only should it be long enough to measure the entire length of your deck, but it should also be sturdy enough to withstand the rigors of outdoor use. Look for one with clear markings and a locking mechanism to hold your measurements in place while you mark your cuts. Pair this with a carpenter's square for ensuring right angles. This tool is crucial for checking that your corners are square, which is vital for a sturdy structure.
Next, consider investing in a level. A level will help you ensure that your deck is not only visually appealing but also safe. A deck that isn’t level can lead to water pooling, which can cause damage over time. For larger projects, a laser level can be an excellent investment, providing precise leveling over long distances.
Now, let’s talk about cutting tools. A circular saw is a must-have for cutting your decking boards to size. It’s efficient and can handle the thickness of most decking materials. If you’re looking for cleaner cuts, a miter saw is another great option, especially for angled cuts. Just imagine how satisfying it will be to see those perfect angles come together!
For smaller cuts and more detailed work, a jigsaw can be incredibly handy. This tool allows you to cut curves and intricate designs, giving your deck a unique flair. However, always remember to use a fine-tooth blade for wood to avoid splintering.
Lastly, don’t overlook the importance of a safety gear checklist. While tools are important, protecting yourself while using them is paramount. Always wear safety goggles to protect your eyes from flying debris and a dust mask to avoid inhaling sawdust. Here’s a quick rundown of essential safety gear:
- Safety goggles
- Dust mask
- Ear protection (if using loud power tools)
- Work gloves
By equipping yourself with the right measuring and cutting tools, you’re setting the foundation for a successful deck-building project. Remember, taking the time to measure twice and cut once will save you a lot of headaches down the line. So gather your tools, double-check your measurements, and get ready to create a stunning outdoor space!

Power Tools vs. Hand Tools
When it comes to building your dream wooden deck, one of the most critical decisions you'll face is whether to use power tools or hand tools. Each type has its own set of advantages and disadvantages, and understanding these can help you make the best choice for your project. Imagine you're preparing a delicious meal; using a blender can speed up the process, but sometimes, the finesse of a chef's knife is what you truly need. Similarly, the right tools can make all the difference in your deck-building experience.
Power tools are like the fast cars of the DIY world. They can significantly reduce the time and effort required to complete your project. Tools such as circular saws, drills, and nail guns can help you achieve cuts and fastenings that are precise and quick. However, with great power comes great responsibility. These tools can be intimidating for beginners and require a solid understanding of safety practices to prevent accidents.
On the other hand, hand tools offer a different kind of charm. They allow for a more tactile experience, giving you complete control over your work. Tools like hand saws, chisels, and hammers can be less intimidating and are often more affordable. Plus, using hand tools can lead to a deeper appreciation of craftsmanship. It’s like the difference between typing on a keyboard and writing with a fountain pen; both get the job done, but the latter adds a personal touch.
To help you decide, here's a quick comparison:
| Feature | Power Tools | Hand Tools |
|---|---|---|
| Speed | Fast and efficient | Slower, more deliberate |
| Precision | High, but requires skill | Very high, offers control |
| Cost | Generally higher | Usually more affordable |
| Learning Curve | Steeper | Gentler |
Ultimately, the choice between power tools and hand tools depends on your personal preference, skill level, and the specific tasks at hand. If you're just starting out, you might want to begin with hand tools to build your confidence. As you gain experience, you can gradually incorporate power tools to speed up your work and tackle more complex projects. Remember, the goal is to enjoy the process of building your deck, so choose the tools that feel right for you!
- What power tools are essential for building a deck? A circular saw, drill, and nail gun are great starting points.
- Can I build a deck using only hand tools? Yes, it's possible! It may take more time, but it can be very rewarding.
- How do I ensure safety when using power tools? Always read the manual, wear safety gear, and maintain a clean workspace.
- What is the best way to learn how to use these tools? Consider taking a class, watching tutorial videos, or practicing on smaller projects.
Materials Checklist
Before you dive into the exciting world of deck building, it’s essential to have a comprehensive in hand. This will not only streamline your building process but also ensure you have everything you need to create a stunning and durable wooden deck. Think of this checklist as your treasure map; each item is a step closer to your outdoor oasis!
First and foremost, the type of wood you choose will set the tone for your deck. Popular options include pressure-treated lumber, cedar, and composite materials. Each type has its own unique benefits:
- Pressure-Treated Lumber: Affordable and resistant to rot and insects, making it a popular choice for many DIYers.
- Cedar: Naturally resistant to decay and insects, cedar offers a beautiful aesthetic with rich color and grain.
- Composite Materials: These are made from a blend of wood and plastic, providing durability and low maintenance.
Next, let’s talk about the structural components that form the backbone of your deck. You will need:
| Material | Quantity |
|---|---|
| Decking Boards | As needed based on your deck size |
| Joists | Typically spaced 16 inches apart |
| Beams | Depends on the size and design of your deck |
| Posts | 4x4 or 6x6, based on your design |
Additionally, don’t forget the essential fasteners and connectors. These small but mighty items are vital for holding everything together securely. You’ll need:
- Screws: Galvanized or stainless steel screws are ideal for outdoor use.
- Joist Hangers: These provide extra support for your joists.
- Post Anchors: Essential for securing your posts to the ground.
Finally, consider the finishing touches that will protect and beautify your deck. This includes:
- Wood Stain: To enhance the natural beauty of the wood.
- Sealer: To protect against moisture and UV damage.
- Paint: If you want to add a splash of color to your deck.
By gathering all these materials ahead of time, you’ll set yourself up for success. It’s like preparing for a big adventure; the more prepared you are, the smoother the journey will be. So, take the time to check off each item on your list before you start building. Happy decking!
1. What type of wood is best for a deck?
Choosing the right wood depends on your budget and aesthetic preference. Pressure-treated lumber is cost-effective, while cedar offers a beautiful finish. Composite materials are great for low maintenance.
2. How much does it cost to build a wooden deck?
Costs vary widely based on materials, size, and design. On average, you might expect to spend between $15 to $30 per square foot.
3. How long will my wooden deck last?
With proper maintenance, a well-built wooden deck can last anywhere from 10 to 30 years, depending on the type of wood used and the climate.
4. Do I need a permit to build a deck?
It often depends on local building codes. It's best to check with your local authorities to see if a permit is required for your project.
5. What maintenance does a wooden deck require?
Regular cleaning, sealing every few years, and checking for damage or wear and tear are key to keeping your deck in top shape.

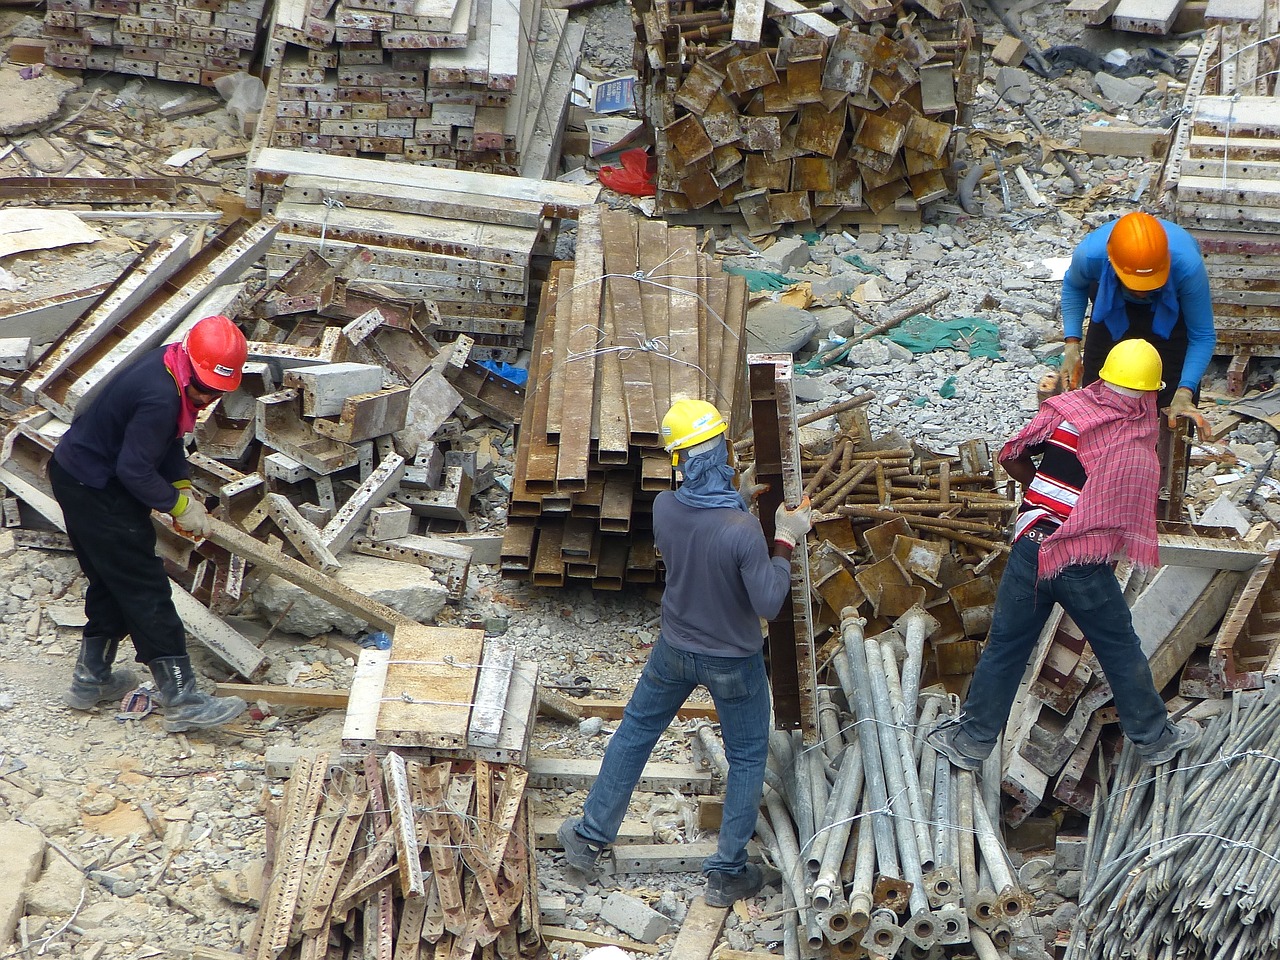
Safety Precautions
When diving into the world of DIY projects, especially something as rewarding as building your own wooden deck, safety should always be your top priority. After all, a little precaution can go a long way in ensuring that your project not only turns out beautifully but also keeps you safe throughout the process. Before you even pick up that hammer, take a moment to consider the following important safety tips.
First and foremost, always wear the proper personal protective equipment (PPE). This includes safety goggles to protect your eyes from dust and debris, ear protection if you’re using loud power tools, and gloves to shield your hands from splinters and sharp edges. It might seem like a hassle at times, but trust me, your future self will thank you!
Next, make sure your workspace is clean and organized. Clutter can lead to accidents, so take a few minutes to remove any unnecessary items from your work area. This includes tools that you’re not currently using, as well as any materials that could trip you up. A tidy workspace not only enhances safety but also boosts your efficiency, allowing you to focus on the task at hand.
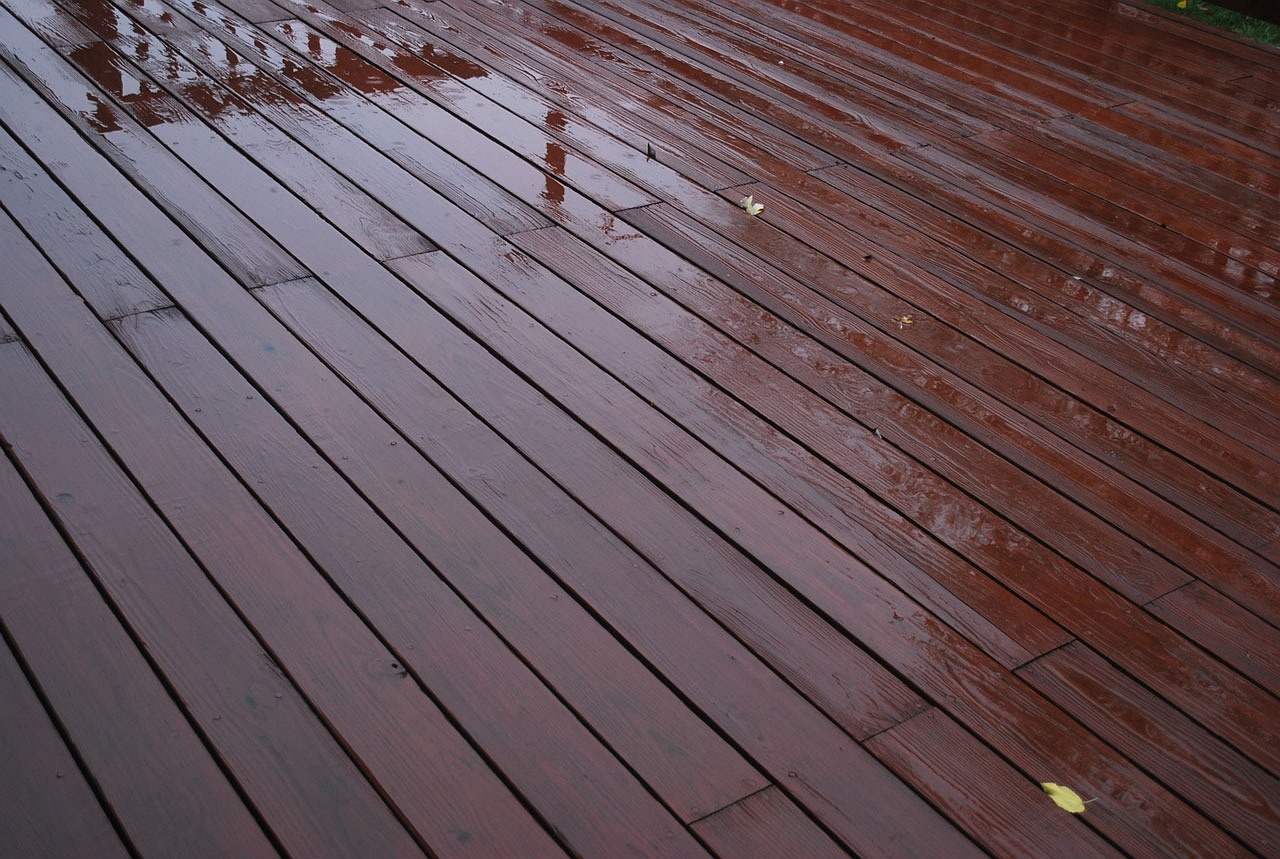
Moreover, be mindful of the weather conditions. If you're working outdoors, rain, snow, or even extreme heat can pose significant risks. Wet surfaces can be slippery, and working in extreme temperatures can lead to fatigue and poor decision-making. Always check the weather forecast before you start your project and plan accordingly. If conditions aren't ideal, it’s better to wait for a clearer day.
Additionally, when using power tools, familiarize yourself with their operation and safety features. Each tool has its own set of guidelines, and understanding them can prevent mishaps. For instance, ensure that all blades and bits are sharp and in good condition, as dull tools can slip and cause injuries. And never operate a power tool when you’re tired or distracted; your focus is crucial for safe handling.
Finally, it’s wise to have a first aid kit on hand. Accidents can happen, even to the most careful DIYers. Having a basic kit stocked with band-aids, antiseptic wipes, and other essentials can make a big difference in case of minor injuries. Remember, it’s always better to be over-prepared than underprepared!
By keeping these safety precautions in mind, you’ll not only protect yourself but also create a more enjoyable and successful building experience. So, gear up, stay safe, and let your creativity flow as you embark on your deck-building journey!
- What safety gear do I need for building a deck? Always wear safety goggles, gloves, and ear protection when using power tools.
- How can I prevent slips and falls while working? Keep your workspace clean and organized, and be cautious of wet surfaces.
- What should I do if I get injured while working? Make sure to have a first aid kit on hand and know how to treat minor injuries.
- Is it safe to work alone on a deck project? While it’s possible, it’s always safer to have someone nearby in case of emergencies.
Designing Your Deck Layout
When it comes to creating a stunning outdoor space, the layout of your deck plays a pivotal role. Imagine stepping out into your backyard, greeted by a beautifully designed wooden deck that complements your home and enhances your outdoor living experience. But how do you get there? The key lies in thoughtful planning and design. First, consider the shape and size of your deck. Are you looking for a cozy nook for intimate gatherings, or a sprawling space for entertaining? The dimensions and layout should reflect your lifestyle and the activities you envision enjoying on your deck.
Next, think about how your deck will interact with your home and garden. Will it flow seamlessly from your living room, or will it be a separate retreat? You might want to sketch out a rough design, marking where you envision furniture, plants, and pathways. This can help you visualize the space and ensure that everything fits harmoniously. And don’t forget to account for any existing features in your yard, such as trees or slopes, which could influence your design.
Incorporating unique features can also elevate your deck's design. Consider adding built-in seating or planters that not only enhance aesthetics but also provide functionality. For instance, a raised planter can add a splash of color and life to your deck while serving as a boundary or divider for different areas. Additionally, think about railings or decorative elements that can complement the overall style of your home. You might even want to consider multi-level decks if your property allows for it, creating distinct zones for dining, lounging, and gardening.
Now, let’s talk about deck orientation. The direction your deck faces can dramatically affect its usability. A south-facing deck will bask in sunlight for most of the day, making it perfect for sunbathers, while a north-facing deck may provide a cooler retreat during hot summer months. Consider how sunlight moves across your yard throughout the day and how that will impact your enjoyment of the space. You might also want to think about privacy. If your neighbors are close by, strategically placed planters or privacy screens can help create a more intimate atmosphere.
Finally, remember that your deck should reflect your personal style. Whether you prefer a rustic charm with natural finishes or a sleek, modern look, the materials and colors you choose will speak volumes about your taste. Don’t hesitate to play with textures and colors to create a deck that feels uniquely yours. A well-designed deck not only enhances your home’s curb appeal but also becomes a cherished space for making memories with family and friends.
- What is the best size for a deck? The ideal size depends on your available space and how you plan to use it. Consider your activities and furniture layout when determining the dimensions.
- How do I ensure my deck is functional? Think about flow and accessibility. Make sure there’s enough space for movement and that furniture can be arranged comfortably.
- What features should I include in my deck design? Consider built-in seating, planters, and railings to enhance both functionality and aesthetics.
- How can I add privacy to my deck? Use planters, trellises, or privacy screens to create a more intimate space.

Deck Shape and Size
When it comes to designing your wooden deck, the shape and size play a pivotal role in both functionality and aesthetics. Imagine your deck as the stage for your outdoor living experience; its dimensions and form set the scene for gatherings, relaxation, and enjoyment. So, how do you determine the best shape and size for your space? Let's dive into some key considerations that will help you make an informed decision.
Firstly, think about the available space in your yard. A small backyard might benefit from a compact, rectangular deck that maximizes the area without overwhelming it. Conversely, a larger yard can accommodate more elaborate shapes, such as curved decks or multi-level designs that create visual interest and distinct zones. The goal is to ensure your deck feels integrated with the landscape, rather than an afterthought.
Next, consider how you plan to use your deck. Will it be a cozy nook for morning coffee, or a lively entertainment space for summer barbecues? If you're envisioning hosting large gatherings, a larger deck with an open layout might be ideal. Alternatively, if you prefer intimate gatherings, a smaller, more enclosed design could enhance the cozy atmosphere. Think about the furniture you’ll want to include, as this will also influence the size. For example, if you plan to add a dining table, chairs, and perhaps a grill, you'll need ample space to accommodate these elements comfortably.
Another aspect to consider is the flow of your outdoor space. Ensure that your deck design allows for easy movement between the deck and your home, as well as access to other areas of your yard. A well-placed deck can create natural pathways, guiding guests through your outdoor oasis. Moreover, consider how the deck will interact with existing features like gardens, trees, or pathways. A deck that complements these elements can enhance the overall beauty of your property.
For those who are feeling a bit adventurous, here are a few popular deck shapes to consider:
- Rectangular Decks: The most common shape, ideal for straightforward layouts.
- Square Decks: Perfect for symmetry and balance, often used for smaller spaces.
- Curved Decks: Adds a unique touch and blends seamlessly with natural landscapes.
- Multi-Level Decks: Great for larger yards, allowing for different zones and levels of elevation.
In terms of size, a good rule of thumb is to aim for a deck that is at least 10 feet by 10 feet for a small seating area. For dining or entertaining, consider a minimum of 12 feet by 16 feet. However, these dimensions can vary based on your specific needs and yard size. Always keep in mind that larger decks require more materials and maintenance, so balance your vision with practicality.
Lastly, before finalizing your design, it’s wise to create a scale model or use design software to visualize your deck in the context of your yard. This can help you make adjustments before you start building, ensuring that your deck not only fits your space but also enhances your outdoor living experience.
Q: What is the best shape for a small backyard deck?
A: A rectangular or square shape often works best for small backyards, as it maximizes space while providing enough room for furniture.
Q: How do I determine the right size for my deck?
A: Consider how you plan to use the deck, the furniture you want to include, and the available space in your yard. A good starting point is a minimum of 10x10 feet for a small seating area.
Q: Can I incorporate curves into my deck design?
A: Absolutely! Curved decks can add a unique aesthetic and blend beautifully with your landscape. Just ensure you have the right tools and skills to achieve the desired shape.
Incorporating Features
When it comes to crafting a stunning wooden deck, the magic often lies in the details. Incorporating unique features can transform your deck from a simple outdoor space into a personal oasis that reflects your style and enhances usability. Think of your deck as a canvas; the features you choose to add are the brush strokes that bring it to life. So, what kind of features can you incorporate to elevate your deck's appeal?
First off, consider adding railings. Not only do they provide safety, especially if your deck is elevated, but they can also serve as a decorative element. You can opt for traditional wooden railings, or you could go modern with glass panels that offer an unobstructed view of your garden or landscape. Imagine sipping your morning coffee while basking in the beauty of your surroundings, all thanks to a well-placed railing!
Next, think about built-in seating. This feature is not just practical; it can also create a cozy atmosphere for gatherings. Picture this: you’re hosting a barbecue, and your friends are lounging comfortably on your deck, enjoying the sun and each other’s company. Built-in benches or even a wrap-around seating area can make your deck a hub of social activity. You can customize the seating with cushions that match your outdoor decor, providing both comfort and style.
Another fantastic feature to consider is planters. Integrating planters into your deck design can infuse your space with life and color. You can use them to grow herbs, flowers, or even small shrubs, making your deck not just a place to relax but also a small garden retreat. Imagine the aroma of fresh basil wafting through the air as you prepare a meal outdoors. Planters can be built into the deck itself or placed strategically around the edges, allowing for a seamless blend of nature and architecture.
Moreover, you might want to think about adding a pergola or an awning for some shade. This not only protects you from the sun but also adds an element of design that can be quite striking. A pergola adorned with climbing vines or hanging lights can create a magical atmosphere, perfect for evening gatherings or quiet nights under the stars.
Lastly, don't overlook the lighting. Installing ambient lighting can drastically change the mood of your deck. Whether it’s string lights, recessed lighting in the steps, or lanterns on the railings, lighting can make your deck usable even after the sun sets. Imagine hosting a dinner party where the soft glow of lights casts a warm ambiance, inviting everyone to relax and enjoy the evening.
In summary, the features you incorporate into your wooden deck can significantly enhance its functionality and aesthetic appeal. From railings and built-in seating to planters and lighting, each element adds a layer of charm and usability. So, as you plan your deck, think creatively about how these features can work together to create a space that is uniquely yours.
- What type of wood is best for decking? - Pressure-treated pine, cedar, and composite materials are popular choices due to their durability and resistance to decay.
- How do I maintain my wooden deck? - Regular cleaning, sealing, and staining are essential to protect your deck from the elements and keep it looking great.
- Can I build a deck on my own? - Yes, with the right tools, materials, and knowledge, building a deck can be a rewarding DIY project.
- What features can I add to my deck? - Consider railings, built-in seating, planters, lighting, and shade structures like pergolas.

Building the Deck Frame
Constructing a sturdy frame is essential for the longevity of your deck. Think of the frame as the skeleton of your deck; without it, everything else would simply fall apart! A well-built frame not only supports the weight of the deck but also ensures that it can withstand the elements, providing a safe space for you and your loved ones to enjoy. In this section, we’ll walk you through the step-by-step process of building a solid foundation for your wooden deck, ensuring that it stands the test of time.
The first step in building your deck frame is to set the posts. These posts are the vertical supports that will bear the weight of the entire structure. Properly setting the posts is crucial for deck stability. You’ll want to dig holes deep enough to provide a solid footing, typically about one-third of the post's length. For example, if your posts are 8 feet long, aim for a hole depth of at least 2.5 feet. Once the holes are dug, place the posts in and use a level to ensure they are perfectly vertical. A little tip here: mix concrete to secure the posts in place and allow it to cure for at least 24 hours before proceeding with the next steps.
Once your posts are securely set, it's time to install the beams and joists. The beams will sit on top of the posts and serve as the main horizontal supports, while the joists will run perpendicular to the beams, creating the framework that will hold your decking boards. For a typical deck, you'll want to space your joists no more than 16 inches apart to provide adequate support. When installing the beams, make sure they are level and securely attached to the posts using lag screws or metal brackets. This is where the strength of your deck begins to take shape, so take your time to ensure everything is aligned properly.
As you work on your frame, keep in mind a few important tips for success:
- Use pressure-treated wood for all structural components to resist rot and insects.
- Double-check all measurements before making cuts to avoid costly mistakes.
- Consider using a ledger board attached to your house for additional support if your deck is against a wall.
Finally, after you’ve installed the beams and joists, it’s crucial to check for any wobbling or instability. A good frame should feel solid and secure. If you notice any movement, take the time to reinforce the connections or add additional supports. Remember, a well-built frame is the backbone of your deck; it’s what will keep your outdoor oasis safe and enjoyable for years to come.
Q: How deep should the post holes be?
A: Generally, post holes should be about one-third the length of the posts, typically around 2.5 feet for an 8-foot post.
Q: What type of wood should I use for the frame?
A: It’s best to use pressure-treated wood for the frame, as it is designed to withstand moisture and resist rot.
Q: How far apart should the joists be?
A: Joists should be spaced no more than 16 inches apart to provide adequate support for the decking.

Setting the Posts
Setting the posts is one of the most critical steps in building your wooden deck. Think of the posts as the backbone of your structure; if they’re not properly set, your entire deck could become unstable. To get started, you’ll want to ensure that you have a solid plan in place. Measure your space accurately and mark the locations for each post using stakes and string. This will help you visualize the layout and ensure everything is aligned correctly.
When it comes to digging the holes for your posts, aim for a depth of at least 2 to 3 feet, depending on your local frost line and soil conditions. The deeper the hole, the more stability your posts will have. A good rule of thumb is to have one-third of the post buried underground. Use a post hole digger or a power auger for efficiency, especially if you’re working in tough soil.
Once your holes are dug, it’s time to set the posts. Place the post into the hole and make sure it is level. You can use a level tool for this to ensure that it stands straight. To keep it in place while you pour concrete, brace it with temporary supports. This is crucial because even a slight tilt can throw off the entire deck structure.
After positioning the post, fill the hole with concrete mix, ensuring that it surrounds the post completely. Typically, you’ll want to use a quick-setting concrete to speed up the process. Follow the manufacturer’s instructions for mixing and pouring. As the concrete sets, continue to check that the post remains level. This is where patience pays off; take the time to ensure everything is perfect before moving on.
After the concrete has cured, which usually takes about 24 to 48 hours, you can remove the braces. At this point, you’ll want to check the stability of each post again. If they feel solid and secure, you’re ready to move on to the next step of installing beams and joists. Remember, a well-set post is the foundation of a long-lasting deck, so don’t rush this part of the process!
Lastly, if you're looking for a visual representation, consider creating a simple table to summarize the steps involved in setting the posts:
| Step | Description |
|---|---|
| 1. Mark Locations | Use stakes and string to visualize post placement. |
| 2. Dig Holes | Dig holes 2-3 feet deep, depending on soil conditions. |
| 3. Set Posts | Place posts in holes and ensure they are level. |
| 4. Fill with Concrete | Pour quick-setting concrete around the posts. |
| 5. Cure and Check | Allow concrete to set and check stability. |
By following these steps carefully, you’ll ensure that your deck's foundation is rock-solid, setting the stage for a beautiful outdoor space that you can enjoy for years to come.
Q1: How deep should I set my deck posts?
A1: Ideally, you should set your deck posts at least 2 to 3 feet deep, depending on your local frost line and soil conditions.
Q2: What type of concrete should I use?
A2: Quick-setting concrete is recommended as it allows you to move on to the next steps more quickly while still providing strong support.
Q3: How can I ensure my posts are level?
A3: Use a level tool while setting the posts and brace them temporarily to maintain their position until the concrete cures.

Installing Beams and Joists
When it comes to building your wooden deck, one of the most critical steps is installing the beams and joists. These components serve as the backbone of your deck, providing the necessary support and stability to ensure that your outdoor oasis can withstand the test of time and the elements. Think of beams and joists as the skeleton of your deck; without them, your beautiful creation would merely be a pile of wood. So, let’s dive into how to get this vital part of your project done right!
First, it’s essential to understand the difference between beams and joists. Beams are the larger horizontal supports that bear the weight of the deck, while joists are the smaller, parallel boards that run perpendicular to the beams, supporting the decking boards above. The relationship between these two components is crucial for distributing weight evenly and preventing sagging or structural failure. To ensure a solid foundation, start by determining the spacing for your joists, which typically ranges from 16 to 24 inches apart, depending on the type of decking material you choose.
Next, you’ll want to install your beams. Begin by marking the locations where your beams will be placed. Use a level to ensure that they are perfectly horizontal. Secure the beams to the posts using metal brackets or lag screws, ensuring they are flush with the tops of the posts. This step is vital; if your beams are not level, your entire deck will be off-kilter, which can lead to water pooling and other issues. Once your beams are in place, it’s time to move on to the joists.
For the joists, cut them to the appropriate length based on your deck’s dimensions. Then, attach them to the beams using joist hangers, which provide additional support and stability. Make sure to use galvanized nails or screws to prevent rust and ensure longevity. As you install each joist, check for level and alignment. It’s a good idea to use a string line to help keep everything aligned perfectly. This might seem tedious, but trust me, your future self will thank you when you have a beautifully flat deck!
Once all your joists are installed, it’s time to check your work. Walk around on the framework to ensure there’s no wobbling or movement. If everything feels solid, congratulations! You’ve successfully laid the foundation for your deck. Remember, a sturdy frame is essential for the longevity of your outdoor space, so take your time with this step.
To summarize, the steps in installing beams and joists can be outlined as follows:
- Determine the spacing for your joists (16 to 24 inches apart).
- Install beams securely to the posts using brackets or lag screws.
- Cut joists to length and attach them to the beams with joist hangers.
- Ensure everything is level and aligned using a string line.
- Check for stability by walking on the framework.
By following these steps, you can create a robust and reliable framework for your deck that will support countless memories and gatherings for years to come. Happy building!
Q: How do I know if my beams and joists are strong enough?
A: It's essential to follow local building codes and guidelines for load-bearing requirements. Consult with a professional if you're unsure.
Q: Can I use recycled wood for beams and joists?
A: Yes, but ensure the wood is in good condition and free from rot or pests. Recycled wood can add character to your deck!
Q: How often should I inspect my deck's beams and joists?
A: It's a good idea to inspect your deck at least once a year for signs of wear, rot, or damage, especially after harsh weather.

Decking Installation Techniques
Installing the decking boards is where the magic truly happens! This is the moment when all your hard work in planning and building the frame comes to fruition. You can almost feel the excitement in the air as you lay down the boards that will transform your outdoor space into a stunning retreat. But hold on! Before you dive in, there are a few important techniques to keep in mind that can make all the difference between a mediocre deck and a breathtaking one.
First and foremost, proper board spacing is essential. You might be wondering, "Why does spacing matter?" Well, think of it like this: just as a well-placed piece of art can enhance the beauty of a room, the right spacing between your decking boards allows for proper drainage and prevents water from pooling. Typically, a spacing of about 1/8 inch to 1/4 inch is recommended, but this can vary based on the type of wood and the climate in your area. Remember, too tight and you risk warping; too loose and you create unsightly gaps!
Next up, let's talk about alignment. Imagine trying to paint a straight line without a guide—frustrating, right? The same principle applies here. Start by laying down the first board along the edge of your deck, ensuring it’s perfectly aligned with the frame. Use a level to check your work, and don't hesitate to make adjustments as needed. Once the first board is secured, it acts as your reference point for the subsequent boards, ensuring everything remains straight and true.
As you progress, consider the installation method you want to use. There are two common techniques: face screwing and hidden fastening systems. Face screwing involves driving screws directly through the boards, which is straightforward and effective, but it does leave visible screw heads. On the other hand, hidden fastening systems allow for a cleaner look, as they secure the boards from below, keeping the surface free of visible hardware. Both methods have their pros and cons, so choose based on your aesthetic preference and the level of effort you're willing to invest.
Once all the boards are in place, it’s time for the finishing touches. This is where you can really let your personality shine through! Think about whether you want to stain your deck for added color or seal it to protect against the elements. Staining not only enhances the natural beauty of the wood but also provides a protective layer that can extend its lifespan. If you opt for a sealant, ensure it’s suitable for outdoor use and follow the manufacturer's instructions for application.
To wrap it all up, the installation of your decking boards is a critical phase that requires attention to detail and a bit of creativity. With the right techniques in hand, you’ll not only create a functional outdoor space but also one that you can proudly show off to family and friends. So, roll up your sleeves, grab those boards, and let your DIY journey continue!
- How do I choose the right decking material? Consider factors like durability, maintenance, and aesthetic appeal. Popular choices include pressure-treated wood, composite, and hardwood.
- What is the best way to ensure my deck boards are level? Use a long level or a straight edge to check the alignment as you install each board, making adjustments as necessary.
- How often should I clean and maintain my deck? Regularly clean your deck at least twice a year and apply a sealant or stain every few years, depending on the material and exposure to the elements.
- Can I install decking boards in wet weather? It’s best to avoid installing decking in wet conditions, as moisture can affect the integrity of the wood and the adhesives used.

Board Spacing and Alignment
When it comes to installing decking boards, play a pivotal role in not only the aesthetics of your deck but also its functionality. Imagine your deck as a canvas; if the lines aren’t straight and the spacing isn’t even, the whole picture can look off. Proper alignment ensures that your deck boards fit snugly together, creating a seamless surface that is pleasing to the eye and safe for walking. So, how do you achieve that perfect alignment and spacing?
First off, it’s essential to understand that wood naturally expands and contracts with changes in temperature and humidity. This means that if you don’t allow for proper spacing between your boards, you might end up with warped or buckled decking over time. A general rule of thumb is to maintain a gap of about 1/8 inch to 1/4 inch between each board. This small allowance lets the wood breathe, preventing damage from moisture accumulation.
To help visualize this, consider using spacers during installation. These can be small pieces of wood or even specialized spacers available at your local hardware store. Place them between the boards as you lay them down; this ensures that the spacing remains consistent throughout the entire deck. Once you’ve got your boards laid out, take a step back and check their alignment. Are they straight? Are the gaps even? If something looks off, don’t hesitate to make adjustments before securing them in place.
Another tip is to use a chalk line to mark where each board will go. This simple tool can help you create a straight line that guides your installation. Simply snap the chalk line across the area where you’re laying the boards, and use it as a reference point to keep everything aligned. Remember, a well-aligned deck not only looks great but also functions better, providing a safer surface for you and your guests.
Finally, once all the boards are installed, it’s a good idea to check the entire surface for any discrepancies. If you notice any boards that are slightly out of alignment, you can gently pry them up and reposition them before securing them with screws. This attention to detail will pay off in the long run, as a beautifully aligned deck will enhance your outdoor living space and impress anyone who steps foot on it.
- What is the ideal spacing for decking boards?
The ideal spacing is typically between 1/8 inch and 1/4 inch to allow for wood expansion and contraction. - Can I use regular wood spacers for alignment?
Yes, regular wood pieces can work, but consider using specialized spacers for more consistency. - How can I ensure my boards stay aligned during installation?
Using a chalk line and spacers will help maintain alignment while you secure the boards. - What should I do if I notice misaligned boards after installation?
Gently pry up the misaligned boards and reposition them before securing them in place.

Finishing Touches
Once you've installed the decking boards, it's time to focus on the that can transform your wooden deck from ordinary to extraordinary. These final details not only enhance the visual appeal of your deck but also offer protection against the elements, ensuring its longevity. Think of finishing touches as the cherry on top of your DIY project; they can make all the difference!
One of the primary considerations in this phase is the choice of stain or sealant. Staining your deck can bring out the natural beauty of the wood while adding a layer of protection. You have a variety of options here, from transparent stains that showcase the wood grain to solid stains that provide a more uniform color. When selecting a stain, consider the following:
- Transparency: Do you want the wood grain to show through?
- Color: What hue complements your home and garden?
- Durability: How well does it withstand moisture and UV rays?
After applying the stain, a good sealant is essential. Sealants protect your deck from water damage, mold, and mildew. They create a barrier that prevents moisture from seeping into the wood, which can cause warping and decay over time. Make sure to choose a high-quality sealant that is compatible with the stain you've chosen. Remember to follow the manufacturer's instructions for the best results.
Another important aspect of finishing touches involves adding railings and lighting. Railings not only provide safety but can also enhance the style of your deck. You can choose from various materials, such as wood, metal, or even glass, depending on your aesthetic preference. Consider incorporating built-in lighting to illuminate your deck during evening gatherings. It not only sets the mood but also ensures safety as you navigate your outdoor space after dark.
Finally, don’t forget about the decorative elements! Adding potted plants, outdoor furniture, or even a fire pit can create a cozy atmosphere that invites you to spend more time outdoors. Think about how you want to use your deck and select furnishings that enhance your experience. For example, if you plan on entertaining, opt for comfortable seating and a table for dining.
In summary, the finishing touches on your wooden deck are crucial for both aesthetics and functionality. By carefully selecting stains, sealants, railings, lighting, and decorative elements, you can create a stunning outdoor space that reflects your style and meets your needs. So, roll up your sleeves, grab those finishing materials, and let your deck shine!
Q1: How often should I stain or seal my deck?
A1: It's generally recommended to stain or seal your deck every 1-3 years, depending on the climate and the type of stain used. Regular maintenance will help protect your investment.
Q2: Can I use a pressure washer to clean my deck?
A2: Yes, a pressure washer can be effective for cleaning your deck, but be cautious with the pressure settings to avoid damaging the wood. Always follow up with a proper sealing after washing.
Q3: What type of lighting is best for my deck?
A3: LED lights are a great choice for decks as they are energy-efficient and come in various styles. Consider solar-powered options for easy installation and lower energy costs.
Q4: How do I prevent my deck from warping?
A4: Regular sealing, proper drainage, and choosing high-quality wood can help prevent warping. Additionally, ensure your deck is built with adequate support to withstand weight and pressure.

Maintenance Tips for Longevity
Maintaining your wooden deck is not just about aesthetics; it's about ensuring its durability and functionality for years to come. Just like a car needs regular oil changes to run smoothly, your deck requires consistent care to withstand the elements and daily wear and tear. Here are some essential maintenance tips that will help you keep your deck looking beautiful and functioning well.
First and foremost, regular cleaning is crucial. Dirt, leaves, and debris can trap moisture, leading to mold and rot. To prevent this, sweep your deck frequently and give it a good wash at least once a year. Use a gentle cleanser specifically designed for wooden surfaces to avoid damaging the wood. A pressure washer can be effective, but be cautious with the settings; too much pressure can strip the wood of its protective layer.
Next up, consider applying a sealant or stain to your deck. This not only enhances the natural beauty of the wood but also adds a layer of protection against UV rays and moisture. It’s generally recommended to reapply sealant every one to three years, depending on your climate and the wood type. A good rule of thumb is to perform a water test: if water beads up on the surface, your sealant is still effective; if it soaks in, it’s time for a refresh.
Another important aspect of deck maintenance is inspecting for damage. Regularly check for loose boards, protruding nails, and signs of rot or insect infestations. Early detection can save you from costly repairs down the road. If you find any issues, address them immediately. For example, replace any warped or cracked boards and secure loose nails or screws to prevent accidents.
Lastly, don't forget about the furniture and accessories on your deck. If you have outdoor furniture, make sure to clean and cover it when not in use, especially during harsh weather conditions. This not only prolongs the life of your furniture but also keeps your deck looking tidy and inviting.
In summary, maintaining your wooden deck involves a combination of regular cleaning, protective treatments, damage inspections, and caring for your outdoor accessories. By following these tips, you can ensure that your deck remains a beautiful and functional part of your outdoor living space for many years.
- How often should I clean my wooden deck?
It's recommended to clean your deck at least once a year, but more frequent cleaning may be necessary in areas with heavy debris or moisture. - What type of sealant should I use?
Look for a sealant specifically designed for wood decks. Oil-based sealants typically offer better protection against moisture, while water-based options are easier to clean up. - How can I tell if my deck needs sealing?
If water soaks into the wood rather than beading up, it's time to reapply sealant. - What should I do if I find rot on my deck?
Remove any rotting wood and replace it with new boards. If the damage is extensive, you may need to consult a professional.
Frequently Asked Questions
- What type of wood is best for a wooden deck?
Choosing the right wood is essential for both durability and aesthetics. Popular options include pressure-treated pine, which is affordable and resistant to rot, and cedar, known for its natural resistance to insects and decay. For a more premium option, consider composite materials that combine wood fibers with plastic for enhanced durability.
- What tools do I need to build a wooden deck?
You'll need a variety of tools to ensure a smooth building process. Essential tools include a circular saw for cutting wood, a measuring tape for accuracy, and a level to ensure everything is even. Don’t forget safety gear like gloves and goggles!
- How do I ensure my deck is safe?
Safety is paramount when building a deck. Make sure to follow local building codes, use sturdy materials, and regularly check for any signs of wear or damage. Always wear appropriate safety gear and never work alone, especially when handling heavy materials.
- What design considerations should I keep in mind?
When designing your deck, think about the shape and size that best fits your outdoor space. Incorporate features like built-in seating or planters to enhance functionality. Consider how the deck will be used and aim for a design that complements your home’s style.
- How do I maintain my wooden deck?
Regular maintenance is key to extending the life of your deck. Clean it at least once a year, apply a protective sealant, and inspect for any signs of rot or damage. Keeping your deck clean and sealed will help it withstand the elements and maintain its beauty.
- What are the best finishing options for my deck?
Finishing touches can really elevate your deck's appearance. Consider using stains to enhance the wood’s natural color or sealants to protect it from moisture and UV rays. Choose a finish that complements your outdoor decor and offers the protection your deck needs.


