
Upcycle a Vintage Radio into a Nightstand
Have you ever thought about how a simple, old radio could transform into a stunning nightstand? This article explores the creative process of transforming an old radio into a stylish nightstand, highlighting materials, techniques, and tips for a successful upcycling project. Not only will you breathe new life into a forgotten piece of history, but you’ll also create a unique piece of furniture that tells a story. Imagine the satisfaction of taking something that might have ended up in a landfill and turning it into a functional and beautiful part of your home! Ready to dive in? Let’s get started!
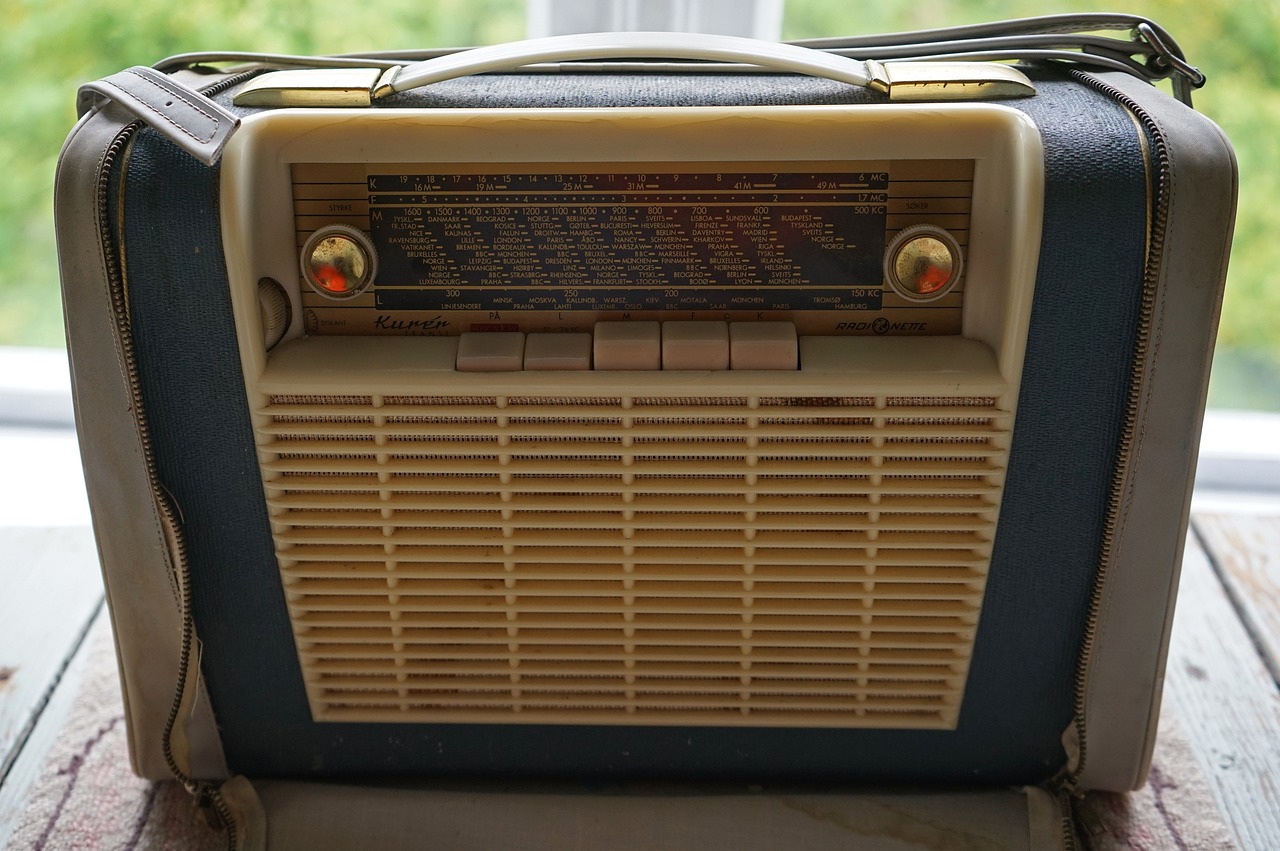
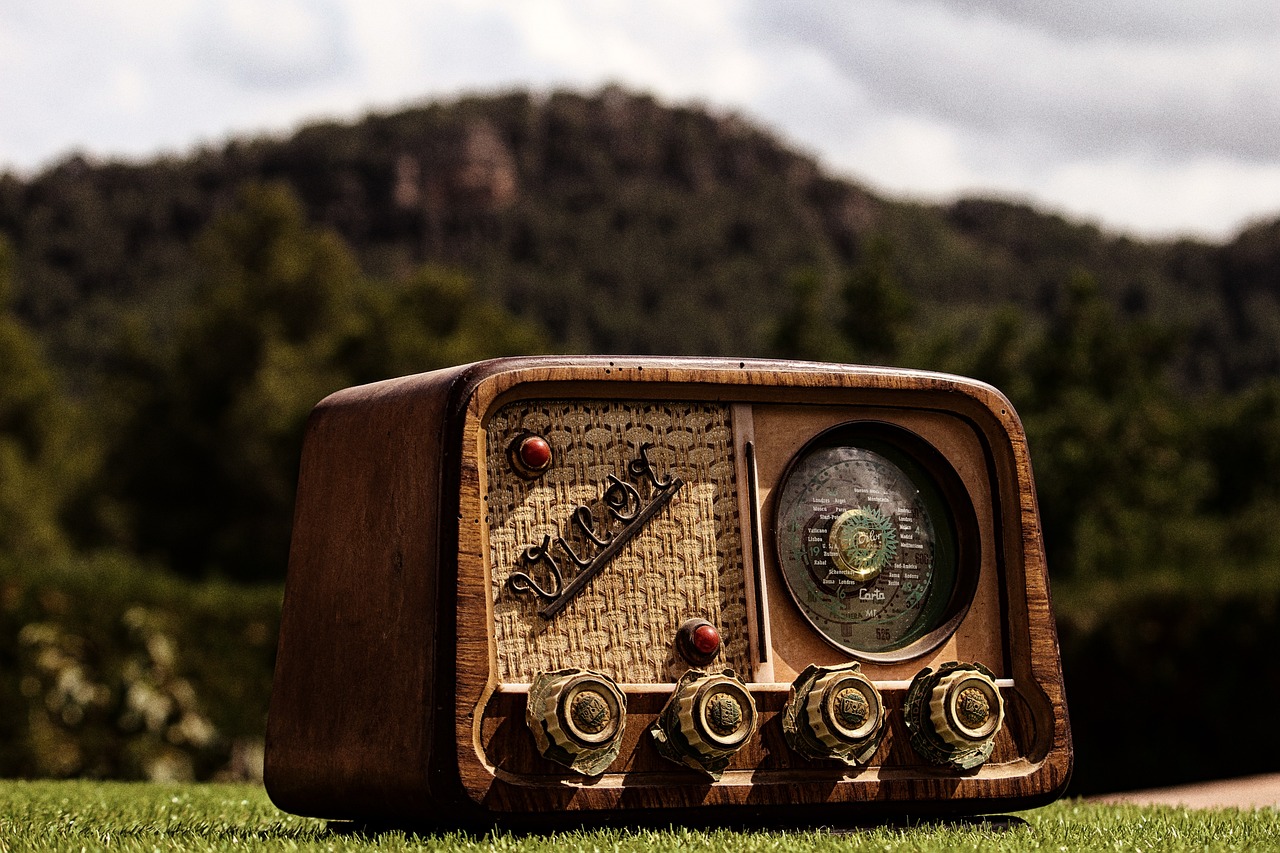
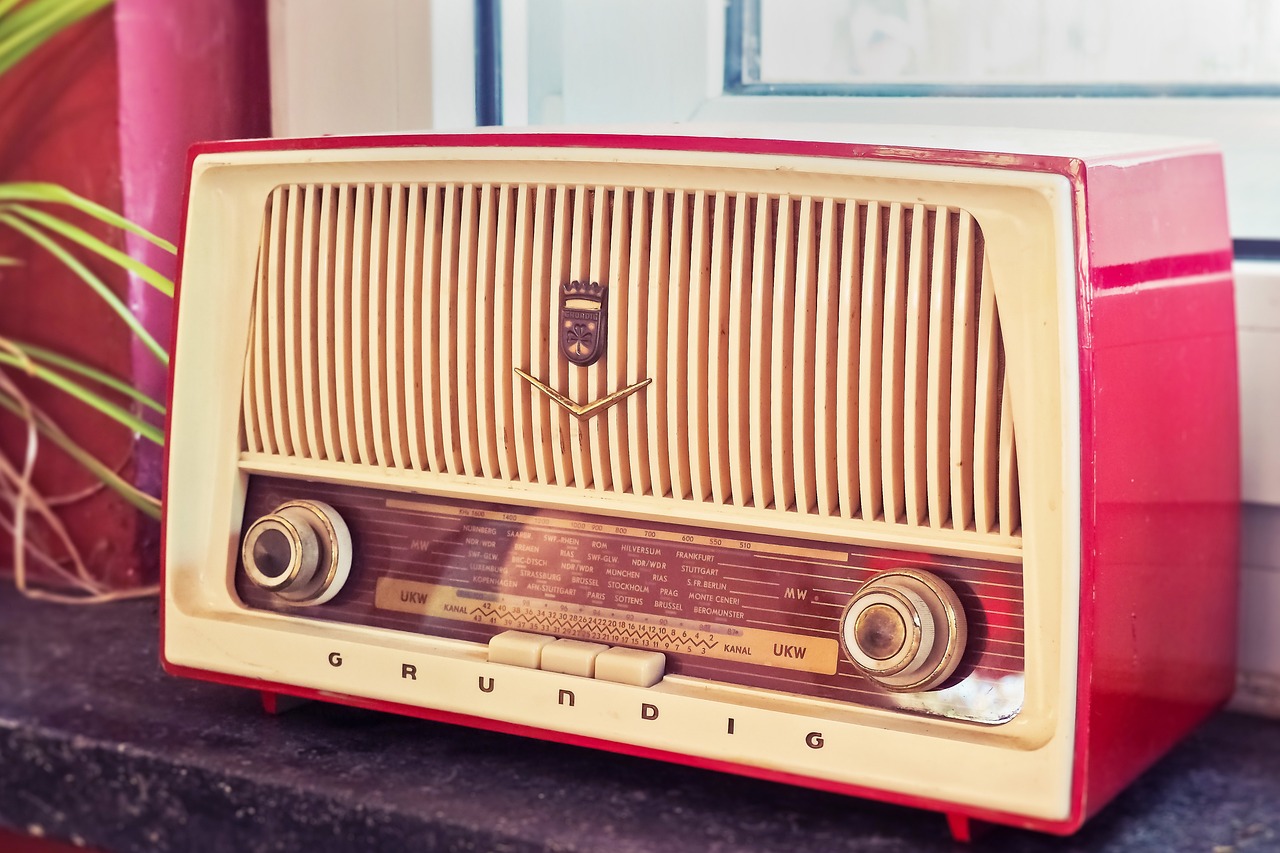
Selecting the perfect vintage radio is crucial for your upcycling project. You want to consider factors like size, style, and functionality to ensure it meets your needs as a nightstand. A radio that is too small may not serve its purpose well, while one that is too large could overwhelm your space. Look for radios that have a classic design, perhaps with wooden casings or intricate dials that can add character to your bedroom. Remember, the goal is to find a piece that not only fits your aesthetic but also offers enough surface area for your essentials—like a lamp, a book, or your phone. So, take your time browsing thrift stores, flea markets, or even your grandparents’ attic. You might just stumble upon a hidden gem!
Before embarking on your upcycling journey, it’s essential to gather all the necessary tools and materials. This includes basic woodworking tools such as a saw, screwdriver, and sandpaper, along with paint and any additional hardware needed to enhance your vintage radio nightstand. Here’s a quick rundown of what you’ll need:
- Tools: Saw, screwdriver, drill, sandpaper, paintbrushes
- Materials: Paint (choose your favorite color), wood glue, knobs or handles, protective finish
- Safety Gear: Gloves, mask, and goggles to protect yourself during the project
Having everything ready before you start will make the process smoother and more enjoyable. Plus, it’ll keep you from making unnecessary trips to the hardware store mid-project!
Proper preparation of the vintage radio is vital. Start by cleaning it thoroughly to remove any dust or grime that has accumulated over the years. You want to see the potential beneath the layers of neglect! Once it’s clean, assess the structure to ensure a sturdy foundation for your new nightstand. Look for any loose parts or damage that may need repair. This is also the perfect time to remove any electronic components, which we’ll cover in the next section. Remember, a well-prepared piece will yield better results in the end!
Explore various cleaning and restoration techniques to bring your vintage radio back to life. This may involve polishing the exterior, repairing any damage, and ensuring the wood is in good condition. Use a gentle wood cleaner and a soft cloth to avoid scratching the surface. For any scratches or dents, consider using wood filler or touch-up markers. The goal is to enhance the natural beauty of the wood while preserving its vintage charm. Think of it like giving your radio a spa day—it deserves to shine!
Learn how to safely remove electronic components from the radio. This step is essential to create a functional nightstand without any electrical hazards or complications. Make sure to unplug the radio and carefully disassemble it, taking note of where each part goes in case you want to keep some components for decorative purposes. This process might feel a bit daunting, but with patience and the right tools, you’ll have it stripped down in no time. Just remember to keep safety in mind; if you’re unsure about any part of the process, don’t hesitate to seek advice from a friend or a professional!
Now comes the fun part—planning the layout of your nightstand! Think about how to maximize functionality and aesthetics. Consider drawer placement, shelf design, and how to incorporate the radio's original features into the new design. Would you like to keep the radio dial visible? Or maybe use the speaker area as a shelf? Sketching out a few designs on paper can help visualize your ideas. This is your chance to let your creativity flow, so don’t hold back!
Adding paint or a finish can dramatically change the look of your upcycled nightstand. Choose colors and finishes that complement your bedroom decor while highlighting the vintage charm of the radio. Whether you opt for a bold statement color or a soft, muted tone, the right choice can make all the difference. After painting, don’t forget to seal your masterpiece with a protective finish to ensure it lasts for years to come!
Selecting the right type of paint is essential for durability and appearance. Consider options like chalk paint, spray paint, or traditional wood finishes, depending on your desired look. Chalk paint is fantastic for a matte finish and easy application, while spray paint can give a smooth, professional look. Just remember to follow the manufacturer’s instructions and allow adequate drying time between coats!
Finally, incorporate decorative elements such as knobs, stencils, or decals to personalize your nightstand. These touches can enhance the vintage appeal and make the piece uniquely yours. Think about adding vintage-style knobs or even stenciling a design on the side. The little details can transform your nightstand from ordinary to extraordinary, making it a true reflection of your style!
Q: How long does the upcycling process take?
A: The time can vary depending on your design and the condition of the radio, but you can typically complete the project in a weekend.
Q: Can I use any vintage radio for this project?
A: While most radios can be upcycled, it's best to choose one that has a sturdy structure and a design that appeals to you.
Q: Do I need any special skills to upcycle a vintage radio?
A: Basic woodworking skills are helpful, but many steps can be completed with common household tools and a bit of patience!
Choosing the Right Vintage Radio
This article explores the creative process of transforming an old radio into a stylish nightstand, highlighting materials, techniques, and tips for a successful upcycling project.
When it comes to upcycling a vintage radio into a nightstand, the first and perhaps most important step is choosing the right radio. This decision can significantly influence the final look and functionality of your new piece. Start by considering the size of the radio—ensure it fits well in your bedroom space without overwhelming the area. A compact radio can be perfect for smaller rooms, while a larger piece might serve as a stunning focal point in a more spacious environment.
Next, think about the style of the radio. Vintage radios come in various designs, from sleek Art Deco models to charming mid-century styles. The radio’s aesthetic should complement your existing decor. For instance, if your room features a modern design, a retro radio with clean lines might add a delightful contrast. Conversely, a radio with ornate details can enhance a more traditional setting.
Functionality is another crucial aspect to consider. Does the radio have any features that can be integrated into your nightstand design? Some vintage radios come equipped with drawers or compartments that can be repurposed for storage. Additionally, check the condition of the radio; a well-maintained piece will require less restoration work and will ultimately save you time and effort.
As you explore your options, you might find it helpful to make a comparison table to weigh the pros and cons of different radios. Here’s a simple example:
| Radio Model | Size | Style | Functional Features | Condition |
|---|---|---|---|---|
| Model A | Small | Art Deco | Drawer | Good |
| Model B | Medium | Mid-Century | None | Fair |
| Model C | Large | Retro | Compartment | Excellent |
In summary, choosing the right vintage radio involves a careful balance of size, style, and functionality. Take your time to explore different options, and don’t hesitate to visualize how each piece could fit into your design. Remember, the goal is to create a nightstand that not only serves a purpose but also tells a story, adding a unique charm to your bedroom.
Before starting the project, gather all essential tools and materials. This includes basic woodworking tools, paint, and any additional hardware needed to enhance your vintage radio nightstand.
Proper preparation of the vintage radio is vital. Clean it thoroughly, remove any electronic components, and assess the structure to ensure a sturdy foundation for your new nightstand.
Explore various cleaning and restoration techniques to bring your vintage radio back to life. This may involve polishing the exterior, repairing any damage, and ensuring the wood is in good condition.
Learn how to safely remove electronic components from the radio. This step is essential to create a functional nightstand without any electrical hazards or complications.
Plan the layout of your nightstand to maximize functionality and aesthetics. Consider drawer placement, shelf design, and how to incorporate the radio's original features into the new design.
Adding paint or a finish can dramatically change the look of your upcycled nightstand. Choose colors and finishes that complement your bedroom decor while highlighting the vintage charm of the radio.
Selecting the right type of paint is essential for durability and appearance. Consider options like chalk paint, spray paint, or traditional wood finishes, depending on your desired look.
Incorporate decorative elements such as knobs, stencils, or decals to personalize your nightstand. These touches can enhance the vintage appeal and make the piece uniquely yours.
Here are some common questions regarding the upcycling process:
- Can any vintage radio be upcycled? - While most vintage radios can be transformed, it's best to choose one that has a sturdy structure and minimal damage.
- What tools do I need for this project? - Basic woodworking tools, paint supplies, and any additional hardware for assembly are essential.
- How do I ensure my nightstand is safe to use? - Remove all electronic components and ensure the structure is stable before using it as a nightstand.

Gathering Necessary Tools and Materials
Before diving into the exciting world of upcycling your vintage radio into a stylish nightstand, it’s essential to gather all the necessary tools and materials. Think of this step as preparing your canvas before painting a masterpiece; having everything at your fingertips will streamline the process and keep frustrations at bay. You don’t want to be halfway through your project only to realize you’re missing a crucial item! So, let’s break down what you’ll need.
First and foremost, you’ll need some basic woodworking tools. This includes a screwdriver set, a drill, and a saw. Depending on the complexity of your design, you may also want to have a sander or a jigsaw handy for more intricate cuts. If you’re new to woodworking, don’t worry; these tools are user-friendly and can be mastered with a little practice.
Next, let’s talk about materials. You’ll need a few essential supplies to ensure your project is not only functional but also visually appealing. This includes:
- Paint - Choose a color that complements your bedroom decor.
- Wood glue - For any repairs or reinforcements.
- Varnish or sealant - To protect your finished piece.
- Knobs or handles - To replace or enhance the existing hardware.
Additionally, consider any decorative elements you might want to incorporate. Stencils, decals, or vintage hardware can add a personal touch that makes your nightstand truly unique. It’s like adding the cherry on top of your sundae; these little details can elevate your project from ordinary to extraordinary!
Lastly, don’t forget about safety gear. This includes gloves, goggles, and a mask if you’re working with paints or sawdust. Safety should always be your top priority, ensuring you can enjoy your creative process without any mishaps.
In summary, gathering your tools and materials is a crucial step in ensuring your upcycling project goes smoothly. With the right equipment and supplies, you’ll be well on your way to transforming that vintage radio into a stunning nightstand that not only serves a purpose but also tells a story. So, take a moment to gather everything you need, and let’s get ready to unleash your creativity!
Q: Can I use any vintage radio for this project?
A: While you can technically use any vintage radio, it's best to choose one that has a sturdy structure and enough space to serve as a nightstand. Look for radios with a flat top and a solid body.
Q: Do I need advanced woodworking skills for this project?
A: Not at all! Basic woodworking skills will suffice. With a bit of patience and practice, you can achieve great results. There are also plenty of online tutorials to help you along the way.
Q: What should I do if the radio has electrical components?
A: It’s crucial to remove any electrical components safely. If you’re unsure how to do this, consider consulting a professional or looking up tutorials specific to your radio model.
Q: How can I ensure the paint adheres properly to the radio?
A: Properly cleaning and sanding the surface before painting will help the paint adhere better. Additionally, using a primer can enhance the paint's longevity and finish.
Preparing the Radio for Upcycling
When it comes to upcycling a vintage radio, the preparation phase is where the magic begins. Think of this step as laying the foundation for a beautiful home; without a solid base, everything else might crumble. First and foremost, you’ll want to give your vintage radio a good cleaning. Dust and grime can accumulate over the years, so grab a soft cloth and some mild soap solution, and gently wipe down the exterior. This not only makes it look better but also helps you identify any areas that may need extra attention.
Once your radio is sparkling, it’s time to dive deeper. You’ll need to remove any electronic components that are lurking inside. This step is crucial for transforming your radio into a functional nightstand, as you don’t want any electrical hazards messing up your masterpiece. Before you start unscrewing anything, make sure to unplug the radio and take a moment to familiarize yourself with its internal layout. A quick look at the wiring can save you a lot of headaches later on. If you're unsure about where to start, consider taking a photo of the internal components for reference as you proceed.
As you start dismantling, keep in mind that some parts may be valuable or could be repurposed later. For instance, knobs and dials can add a nostalgic flair to your nightstand. So, as you carefully remove electronic components, set aside any bits that could enhance your design. It’s like treasure hunting—every piece has the potential to tell a story!
Next, assess the structure of your radio. Is it sturdy enough to hold your nighttime essentials, like a lamp or a stack of books? Check for any weak spots or damages that might need reinforcing. If the wood is chipped or cracked, don’t fret! This can often be repaired with wood filler or glue. Just like patching up a wall before painting, ensuring a solid structure is key to a successful transformation.
In summary, preparing your vintage radio for upcycling involves a few essential steps:
- Cleaning: Remove dust and grime to reveal its true beauty.
- Dismantling: Carefully take out electronic components and save any decorative parts.
- Assessment: Check for structural integrity and repair as necessary.
By following these steps, you’ll be well on your way to creating a stunning and functional nightstand that not only serves a purpose but also adds a unique touch to your bedroom decor. Remember, the more care you put into this preparation phase, the more rewarding the final result will be!

Cleaning and Restoration Techniques
When it comes to breathing new life into your vintage radio, play a pivotal role. The first step is to give your radio a good scrub down. Use a soft, damp cloth to wipe away any dust or grime that has accumulated over the years. For stubborn spots, consider a gentle cleaner that won't damage the finish. Remember, the goal is to reveal the beauty hidden beneath years of neglect.
Once the surface is clean, it’s essential to assess the wood condition. If you notice scratches or dull areas, you might want to use a wood polish or a fine-grit sandpaper to smooth them out. Polishing can bring back that rich luster that vintage wood is known for. Just be sure to follow the grain of the wood to avoid creating any unwanted marks.
For radios with a veneer finish, you’ll want to handle restoration with extra care. A veneer is a thin layer of wood that can easily be damaged. If the veneer is peeling or chipped, you can apply a wood glue carefully to reattach it. In cases where the veneer is too damaged, consider replacing it with a similar-looking wood veneer. This can be a bit tricky, but with patience, it can yield stunning results.
Another aspect of restoration involves the knobs and dials. These small details can make a huge difference in the overall look of your nightstand. If the knobs are tarnished, try using a metal polish to restore their shine. For plastic knobs, a simple wash with soap and water followed by a gentle buffing can work wonders. If any of the knobs are missing or broken, don’t fret! You can find replacements at vintage shops or online marketplaces.
Finally, consider applying a protective finish to ensure your hard work lasts. There are various options available, such as polyurethane or a natural oil finish. This not only enhances the appearance but also protects against future wear and tear. Remember, the key to a successful restoration is patience and attention to detail. Take your time, and your vintage radio will transform into a stunning nightstand that tells a story.
- How do I know if my vintage radio is worth restoring? If the radio has sentimental value or unique features, it’s worth considering restoration. Additionally, checking for rare models can add to its value.
- Can I use modern paints on my vintage radio? Yes, but be cautious! Choose paints that are suitable for the material of your radio and consider using a primer to ensure better adhesion.
- What should I do if I encounter electrical components that are damaged? If you’re not comfortable handling electrical repairs, it’s best to consult a professional. Safety should always be your top priority.
Removing Electronic Components
When it comes to upcycling a vintage radio into a nightstand, one of the most crucial steps is removing the electronic components. This process not only ensures that your new piece of furniture is safe to use, but it also allows you to create a functional and stylish nightstand that pays homage to its original design. Before diving into the removal process, it's essential to gather a few tools that will make your job easier. You’ll need a screwdriver, pliers, and possibly a soldering iron for any wires that may be soldered in place.
First and foremost, safety should be your top priority. Make sure the radio is unplugged and has been disconnected from any power source for at least 24 hours to ensure that any residual charge has dissipated. Once you’ve confirmed that it’s safe to proceed, you can start by gently removing the back panel of the radio. This panel is often held in place by screws, so use your screwdriver to carefully take it off. As you remove the panel, be cautious not to damage any components that you might want to keep for decorative purposes.
Next, locate the electronic components inside the radio. Typically, you will find a circuit board, speakers, and various wires. Take your time in identifying each component and consider taking pictures as you go along. This can be helpful for reassembly or for future reference. Begin disconnecting the wires attached to the components. If they are connected with screws or clips, use your screwdriver or pliers to remove them. If you encounter any soldered connections, a soldering iron will be necessary to melt the solder before you can safely detach the wires.
As you remove each component, place them in a designated container to keep everything organized. This is particularly important if you plan to use any parts for future projects or if you want to restore the radio at a later date. Once all electronic components are removed, take a moment to inspect the interior of the radio for any signs of damage or wear. This is also a good time to clean the inside, as dust and debris can accumulate over the years.
Finally, after ensuring that all electronic components have been safely removed and stored, you can proceed with the next steps of your upcycling project. Remember, the goal is to create a nightstand that not only looks great but also functions well in your space. By taking the time to carefully remove the electronic components, you’re setting the stage for a successful transformation.
- Can I keep some electronic components for decorative purposes? Yes, many people choose to keep certain elements like dials or speakers as part of the design.
- What should I do with the electronic components once removed? You can store them for future projects, sell them, or recycle them responsibly.
- Is it safe to remove electronic components without professional help? As long as you follow safety precautions and ensure the device is unplugged, it is generally safe to do it yourself.

Designing Your Nightstand Layout
When it comes to , the key is to strike a balance between functionality and aesthetics. Imagine this: you’ve just upcycled a vintage radio, and now you want it to serve not only as a stylish piece of furniture but also as a practical addition to your bedroom. So, how do you achieve that? Start by visualizing how you plan to use the nightstand. Will it hold a lamp, a book, or perhaps a glass of water? Consider these factors as you sketch out your design.
Begin by assessing the radio's original features. Does it have a drawer? Maybe a compartment for storing items? You can play around with these elements to enhance the overall look. For instance, if your vintage radio has a charming dial or speaker grill, think about how you can incorporate these into your new design. They can serve as focal points, adding character to your nightstand. This is where your creativity can truly shine!
Next, think about the layout of your nightstand. If you envision it as a multi-functional piece, you might want to include a small shelf for books or a drawer for personal items. Here’s a simple table to illustrate some layout ideas:
| Feature | Description |
|---|---|
| Drawer | A hidden compartment for storing essentials like chargers or journals. |
| Open Shelf | A space to display decorative items or keep frequently used books within reach. |
| Top Surface | Room for a lamp, clock, or personal items, ensuring easy access. |
As you lay out these features, it’s essential to keep proportions in mind. You don’t want a top-heavy nightstand that tips over at the slightest touch. Instead, aim for a harmonious design where each element complements the others. Consider the height of the nightstand in relation to your bed; it should be at a comfortable level for reaching over during the night.
Lastly, think about the materials you’ll use for the additional features. If you’re adding a shelf, perhaps a piece of reclaimed wood would work beautifully, maintaining that vintage charm. You can also paint or stain these additions to match or contrast with the radio. This is your chance to make the nightstand uniquely yours, so don’t shy away from experimenting with colors and textures!
In summary, designing your nightstand layout is a blend of creativity, functionality, and a touch of personal flair. By considering the original features of the vintage radio and planning thoughtfully, you can create a stunning piece that not only looks great but also serves your needs perfectly. So grab your sketchpad, let your imagination run wild, and get ready to create a nightstand that will be the envy of all your friends!
- What type of vintage radio is best for upcycling? Look for radios that are sturdy and have unique features, such as dials or speaker grills, which can enhance your nightstand's design.
- Do I need advanced woodworking skills to upcycle a radio? Basic woodworking skills are helpful, but many projects can be completed with simple tools and patience.
- How can I ensure the nightstand is stable? Make sure to assess the radio’s structure and reinforce any weak areas during the preparation phase.
Painting and Finishing Touches
Once you’ve completed the structural work on your upcycled vintage radio nightstand, it’s time to dive into the fun part: painting and adding finishing touches. This is where your creativity truly shines! The right color and finish can transform your project from a simple piece of furniture into a stunning focal point in your bedroom. So, how do you go about choosing the perfect paint and finishing touches? Let’s break it down.
First off, think about the overall aesthetic you want to achieve. Are you aiming for a rustic farmhouse vibe, or do you prefer a sleek, modern look? Your choice of paint will significantly impact the final appearance of your nightstand. For a vintage radio, you might want to consider using colors that complement its original design. Soft pastels or muted tones can enhance its retro charm, while bold colors can make it a statement piece.
When it comes to selecting paint, you have a few options:
- Chalk Paint: This is a fantastic choice for achieving a matte finish and a vintage look. It adheres well to most surfaces and requires minimal prep work.
- Spray Paint: If you’re looking for a quick and even application, spray paint can be your best friend. Just be sure to use it in a well-ventilated area!
- Traditional Wood Finishes: If you want to keep the natural wood look, consider using a wood stain or clear finish. This will protect the wood while showcasing its beauty.
After you’ve chosen your paint, preparation is key. Make sure the surface of your vintage radio is clean and free from dust or grease. A light sanding can also help the paint adhere better. Once prepped, apply your chosen paint with a brush or sprayer, making sure to follow the manufacturer's instructions for the best results. Don’t be afraid to apply multiple coats; this can add depth and richness to your color.
Now, let’s talk about the finishing touches! These are the little details that will make your nightstand uniquely yours. Consider adding decorative elements such as:
- Knobs: Vintage or modern knobs can completely change the look of your drawers. Look for pieces that resonate with the style of your radio.
- Stencils or Decals: If you want to add a personal touch, stencils or decals can be a fun way to incorporate patterns or quotes that reflect your personality.
- Protective Coating: Once everything is painted and dried, consider applying a clear protective coat to ensure durability. This will help your nightstand withstand everyday use while maintaining its beautiful appearance.
In conclusion, painting and adding finishing touches to your vintage radio nightstand isn’t just about aesthetics; it’s about infusing your personality into the piece. Take your time, experiment with different colors and elements, and most importantly, have fun with it! Your nightstand will not only be functional but also a beautiful representation of your creativity.
Q: Can I use any type of paint on my vintage radio?
A: While you can use various types of paint, it’s best to choose one that adheres well to wood surfaces. Chalk paint and spray paint are popular choices for their ease of use and finish.
Q: Do I need to sand the radio before painting?
A: Lightly sanding the surface can help the paint adhere better, so it’s a good idea to do so, especially if the wood is glossy or has a finish.
Q: How can I ensure my nightstand is durable after painting?
A: Applying a clear protective coating after painting can help seal the paint and protect it from scratches and wear.

Choosing the Right Paint
When it comes to upcycling your vintage radio into a nightstand, is a crucial step that can make or break your project. The paint not only enhances the aesthetics but also protects the wood and ensures durability. So, how do you know which paint to select? Well, it all boils down to a few key factors: the finish you desire, the condition of the wood, and the overall vibe you want to create in your bedroom.
First off, consider the finish. Are you going for a rustic, shabby-chic look, or do you want something sleek and modern? For a vintage feel, chalk paint is an excellent option. It adheres well to surfaces without the need for extensive prep work and gives a matte finish that exudes charm. On the other hand, if you prefer a glossy look, spray paint can provide a smooth, even coat that’s perfect for highlighting intricate details of the radio. Just remember, spray paint can be a bit tricky if you’re not used to it, so practice on a scrap piece first!
Next, think about the condition of the wood. If the wood is in great shape, you might want to use a clear wood finish to preserve its natural beauty while adding a layer of protection. However, if your vintage radio has seen better days with scratches or stains, a solid color paint can cover up imperfections and breathe new life into it. Always ensure that the wood is properly sanded and primed before applying paint for the best results.
Finally, consider the color scheme of your bedroom. You want your new nightstand to complement your existing decor, not clash with it. Earthy tones like greens and browns can create a warm, inviting atmosphere, while brighter colors like teal or mustard can add a pop of personality. If you’re feeling adventurous, consider using multiple colors or even a fun pattern to make your nightstand a statement piece!
In summary, the right paint can transform your vintage radio into a stunning nightstand that reflects your personal style. Whether you choose chalk paint for a rustic touch or a glossy spray paint for a modern twist, make sure it aligns with your vision for your space. Remember, this is not just about functionality; it’s about creating a piece that tells a story and enhances your bedroom's ambiance.
Adding Decorative Elements
When it comes to upcycling your vintage radio into a nightstand, the decorative elements you choose can truly make or break the final look of your creation. Think of these elements as the icing on a cake; they can elevate the overall aesthetic and add a personal touch that reflects your unique style. You might be wondering, "Where do I even begin?" Well, let's dive into some exciting options!
First off, consider the knobs. Knobs can completely transform the functionality and appearance of your nightstand. Look for vintage-style knobs that complement the radio's original charm. You could even mix and match different styles for a quirky, eclectic look. There are endless options available, from ceramic to glass, and even metallic finishes that can add a touch of elegance or a rustic vibe, depending on your vision.
Next, think about stencils or decals. These can be a fantastic way to incorporate patterns or quotes that resonate with you. For example, you could use a floral stencil to add a touch of nature or a bold graphic to give it a modern twist. Just imagine how a simple quote about dreams or adventure could inspire you every time you glance at your nightstand. The key is to choose designs that speak to your personality and enhance the overall theme of your bedroom.
Another creative option is to use decoupage. This technique allows you to apply decorative paper or fabric to the surface of your nightstand, creating a stunning visual effect. You can select vintage music sheets, colorful maps, or even pages from your favorite book. The possibilities are endless! Just remember to seal it with a protective finish to ensure durability.
Lastly, don't overlook the power of lighting. Incorporating a small lamp or fairy lights can add warmth and coziness to your newly upcycled nightstand. Choose a lamp that complements the vintage aesthetic of your radio or opt for string lights that can be draped around the edges for a whimsical touch. This not only enhances functionality but also creates a serene ambiance in your bedroom.
In summary, adding decorative elements to your vintage radio nightstand is all about expressing your creativity and making it uniquely yours. Whether you choose knobs, stencils, decoupage, or lighting, the right decorative touches can transform your project from ordinary to extraordinary. So, go ahead and let your imagination run wild!
Q: What type of paint works best for upcycling a vintage radio?
A: Chalk paint and spray paint are popular options for their ease of use and beautiful finishes. Choose based on your desired look and durability requirements.
Q: Can I keep the radio's original features?
A: Absolutely! Incorporating original features like dials or speakers can enhance the vintage charm of your nightstand, making it a unique conversation piece.
Q: Do I need any special tools for adding decorative elements?
A: Basic crafting tools like scissors, brushes, and adhesive will suffice for most decorative elements. If you're using knobs or hardware, a screwdriver may be necessary.
Frequently Asked Questions
- What type of vintage radio is best for upcycling into a nightstand?
When choosing a vintage radio for your nightstand project, look for one that has a sturdy structure and enough interior space to accommodate shelves or drawers. Styles like mid-century modern or classic wooden radios often work well, as they provide both aesthetic appeal and functionality.
- Do I need special tools to upcycle a vintage radio?
While you don’t need a full workshop, having some basic woodworking tools is essential. A saw, screwdriver, sandpaper, and paintbrushes will go a long way. If you plan to add shelves or drawers, you might also need a drill and some additional hardware like hinges and knobs.
- How do I prepare the vintage radio for upcycling?
Preparation is key! Start by cleaning the radio thoroughly to remove dust and grime. Then, carefully remove any electronic components, ensuring you’re not damaging the outer casing. Finally, inspect the structure to ensure it’s sturdy enough to support your new nightstand design.
- What cleaning and restoration techniques should I use?
For cleaning, a gentle wood cleaner or a mixture of vinegar and water works wonders. If there are scratches or dents, consider using wood filler or polish to restore the finish. Always test any cleaning solution on a small area first to avoid damaging the wood.
- Can I paint my vintage radio nightstand?
Absolutely! Painting can give your nightstand a fresh, modern look while highlighting its vintage character. Chalk paint, spray paint, or traditional wood finishes are great options, depending on the style you want to achieve. Just make sure to prep the surface properly before painting.
- How can I personalize my upcycled nightstand?
There are countless ways to add a personal touch! Consider adding decorative knobs, stencils, or decals that reflect your style. You might also want to incorporate the radio's original features, like the dial or speaker, into your design for a unique twist.


