
Creating Unique Wooden Carvings: Techniques and Tips
Wood carving is not just a hobby; it's an art form that allows you to express your creativity while connecting with nature. Whether you're a beginner looking to dip your toes into the world of woodworking or a seasoned artisan seeking to refine your skills, this article is packed with valuable techniques and tips to help you craft unique wooden carvings. Imagine transforming a simple block of wood into a stunning piece of art that tells a story or evokes emotions. Sounds exciting, right? Let’s dive into the fascinating world of wood carving!
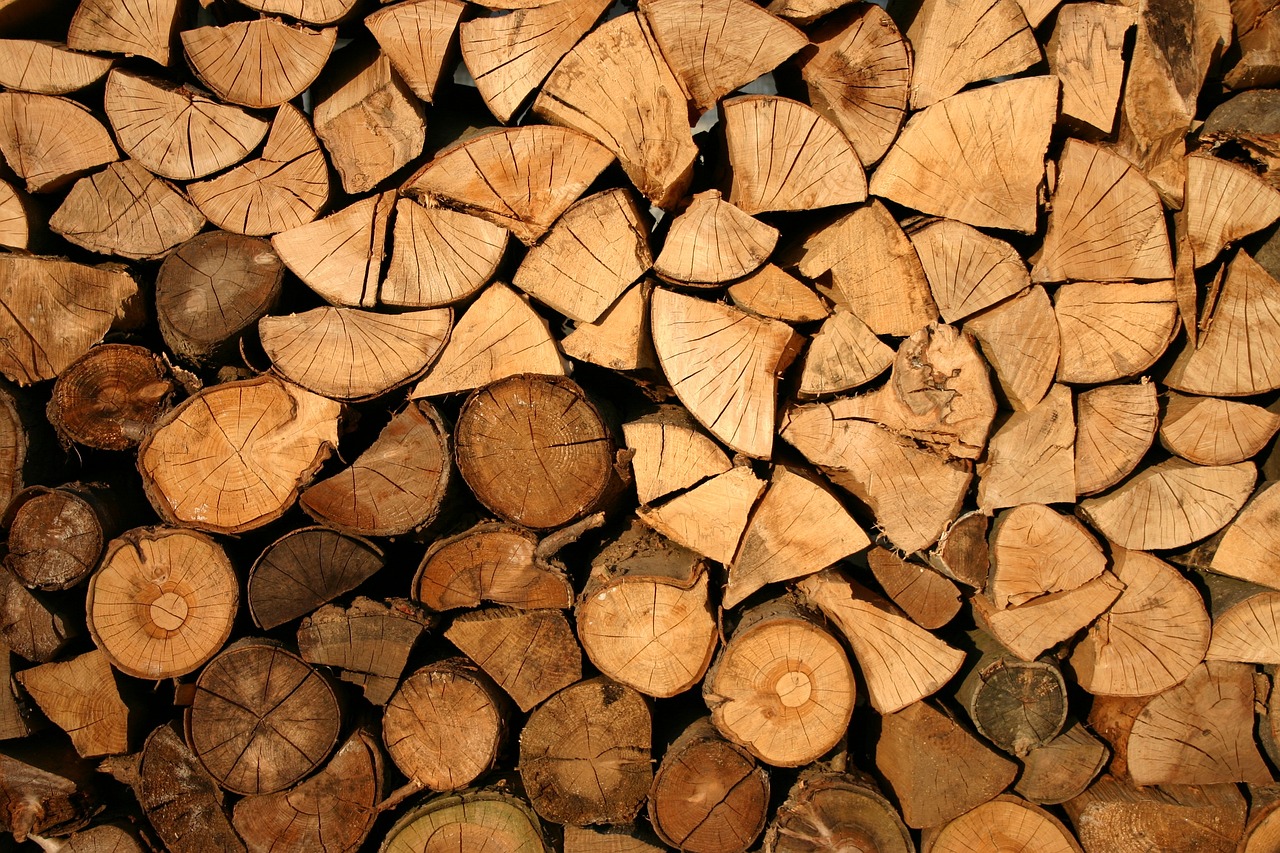
When it comes to wood carving, the type of wood you choose plays a significant role in the outcome of your project. Different types of wood come with their own unique characteristics, which can affect the carving techniques you use. For instance, softwoods like pine and cedar are easier to carve, making them ideal for beginners. On the other hand, hardwoods like oak and walnut, while more challenging, offer stunning finishes that can elevate your artistry. Knowing the properties of each wood type can significantly influence your carving experience and the final product.
Having the right tools is crucial for successful wood carving. Imagine trying to paint a masterpiece with a broken brush; it just won’t work! Similarly, a well-equipped workshop can make all the difference in your carving journey. Here’s a quick rundown of the essential tools you’ll need:
- Chisels: For shaping and detailing your wood.
- Gouges: Perfect for creating curves and hollows.
- Knives: Essential for fine details and smooth cuts.
- Sandpaper: For achieving that perfect finish.
Choosing the right tools for your projects can be overwhelming, but understanding their functions will help you make informed decisions.
Chisels and gouges come in various shapes and sizes, each serving a specific purpose. For example, a flat chisel is great for making straight cuts, while a V-gouge is perfect for detailing and creating sharp lines. Understanding how to use these tools will enable you to achieve detailed and intricate designs in your carvings. Don't be afraid to experiment with different shapes and sizes to find what works best for you!
Selecting the appropriate size of chisels and gouges is vital for the precision of your work. A larger chisel might be great for roughing out shapes, but when it comes to fine details, a smaller tool is essential. Consider the intricacy of your design and choose your tools accordingly. As a rule of thumb, always have a variety of sizes on hand to tackle different tasks!
Proper maintenance of your carving tools ensures longevity and performance. Just like a chef needs a sharp knife, a woodcarver needs sharp chisels and knives to create clean cuts. Here are some essential care tips:
- Regularly sharpen your tools using a whetstone or sharpening system.
- Clean your tools after each use to prevent rust and corrosion.
- Store them in a dry place to maintain their condition.
Mastering knife techniques is essential for achieving smooth cuts and fine details. Whether you're whittling away at a piece of wood or making delicate cuts for a more intricate design, your knife skills can elevate your carving game to the next level. Practice makes perfect! Start with simple shapes and gradually work your way to more complex designs. Remember, patience is key!
There are several techniques to explore when it comes to wood carving. Each method offers its own unique approach and style. Some popular techniques include:
- Relief Carving: This technique creates a three-dimensional effect by carving away the background, allowing for stunning visual depth in your artwork.
- Chip Carving: Focuses on creating intricate patterns using simple knife cuts, requiring precision and patience to achieve beautiful geometric designs.
- Whittling: A more casual form of carving that often involves creating small, simple figures or objects.
Finishing touches can make or break your carving project. After all that hard work, you want your piece to shine! Various finishing techniques, including sanding, staining, and sealing, can enhance the beauty and durability of your wooden carvings. Sanding is crucial for achieving a smooth finish, and knowing the right methods can help refine your work. Once you’ve sanded your piece, consider applying a stain or sealant to bring out the wood's natural beauty.
Discover different sanding methods and tools that can help prepare your work for staining or sealing. For instance, using a sanding block can help you maintain even pressure on flat surfaces, while sanding sponges are great for curves and contours. Always start with a coarser grit and gradually move to finer grits for the best results!
Selecting the right stains and sealants can enhance the natural beauty of wood. When choosing products, consider the type of wood you’re working with and the desired finish. Some stains can highlight the grain, while others can completely change the color of your wood. Always test on a small area first to ensure you love the look before committing!
1. What is the best wood for beginners?
Softwoods like pine and basswood are excellent choices for beginners due to their ease of carving.
2. How do I maintain my carving tools?
Regular sharpening and cleaning after each use will keep your tools in top shape.
3. Can I use power tools for carving?
Yes, power tools can speed up the process, but traditional hand tools offer more control for detailed work.

Understanding Wood Types
When it comes to wood carving, understanding the different types of wood is essential for achieving stunning results. Each type of wood possesses unique characteristics that can significantly influence your carving techniques and the final outcome of your projects. For instance, some woods are softer and easier to carve, while others are denser and require more effort and skill to manipulate. This diversity in wood types can be likened to choosing the right paint for a canvas; the medium you select can make all the difference in the quality and style of your artwork.
Let’s take a closer look at some popular wood types you might encounter:
| Wood Type | Characteristics | Best Uses |
|---|---|---|
| Basswood | Soft, lightweight, and easy to carve | Beginners, intricate carvings, and whittling |
| Butternut | Soft, with a warm color and pleasant aroma | Detailed carvings and decorative pieces |
| Cherry | Harder, fine grain that darkens with age | Furniture, fine art, and heirloom pieces |
| Oak | Dense, strong, and durable | Functional items, cabinetry, and outdoor projects |
Choosing the right wood type for your carving project can feel overwhelming, especially with so many options available. However, it’s crucial to consider the project’s requirements, your skill level, and the desired finish. For example, if you're just starting out, you might want to stick with softer woods like Basswood or Butternut, as they allow for easier manipulation and less risk of damaging your tools. On the other hand, if you're looking to create a lasting piece that will stand the test of time, opting for a harder wood like Cherry or Oak might be the way to go.
In addition to hardness and grain, the wood's moisture content is another vital factor to consider. Freshly cut wood, or "green wood," can be easier to carve, but it may warp or crack as it dries. On the contrary, seasoned wood, which has been properly dried, offers stability but may require more effort to carve. Understanding these nuances can help you select the perfect wood for your artistic vision.
Ultimately, the key to mastering wood carving lies in experimenting with different types of wood. Each carving session is an opportunity to discover new techniques and refine your skills. So, don’t be afraid to try out various woods; you might just stumble upon your new favorite material!
- What is the best wood for beginners? Basswood is often recommended for beginners due to its softness and ease of carving.
- Can I carve green wood? Yes, green wood can be carved, but it may warp as it dries, so be prepared for that possibility.
- How do I choose the right wood for my project? Consider factors like hardness, grain pattern, and the intended final look of your carving.
Essential Tools for Carving
This article explores various techniques and tips for crafting unique wooden carvings, helping both beginners and seasoned artisans enhance their skills and creativity in woodworking.
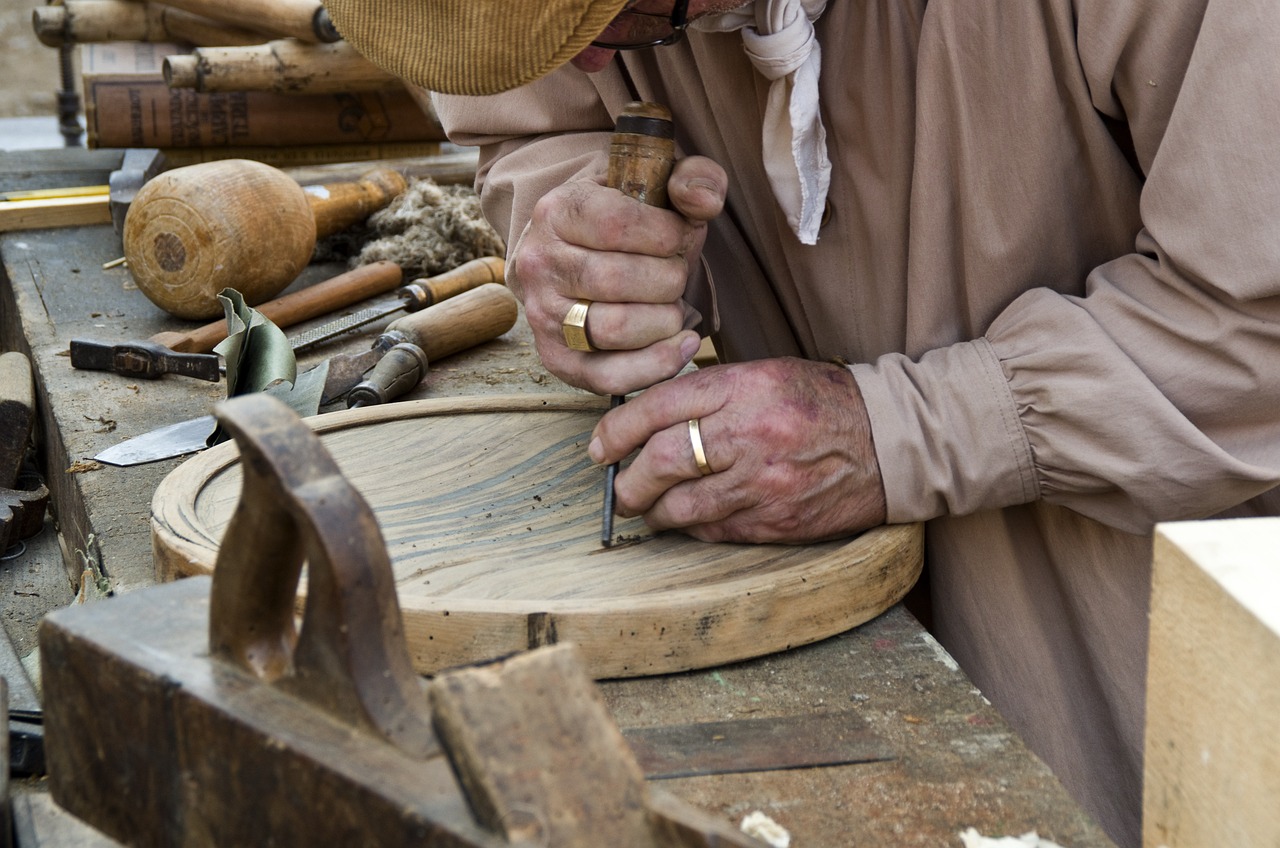
When it comes to wood carving, having the right tools can make all the difference between a frustrating experience and a fulfilling one. Imagine trying to paint a masterpiece with a brush that’s too coarse; the same principle applies to carving. A well-equipped workshop is crucial for successful wood carving, and understanding the essential tools you'll need is the first step in your artistic journey.
From chisels to knives, each tool serves a specific purpose and can significantly influence the outcome of your project. Here’s a breakdown of the essential tools you should consider having in your toolkit:
- Chisels: These come in various shapes and sizes, designed for different tasks. They are your primary tools for removing wood and shaping your design.
- Gouges: Similar to chisels but with a curved blade, gouges allow for more intricate designs and are perfect for adding depth to your carvings.
- Knives: A good carving knife is essential for fine details and delicate cuts. Mastering knife techniques can elevate your work to the next level.
- Mallet: This tool is used to strike chisels and gouges, providing the force needed to carve through tougher wood.
- Sharpening tools: Keeping your tools sharp is vital. A dull tool can lead to frustration and less precise cuts.
To help you better understand these tools, let’s take a closer look at chisels and gouges:
| Tool Type | Purpose | Best For |
|---|---|---|
| Chisels | Removing wood and shaping | General carving tasks |
| Gouges | Creating curves and depth | Detailed designs and relief carving |
Understanding the specific uses of chisels and gouges will enable you to achieve detailed and intricate designs in your carvings. For instance, if you're working on a relief carving, you might find that a gouge is more beneficial for creating depth, while a chisel can help you refine the edges. Choosing the right size of chisels and gouges is also vital for the precision of your work. Smaller tools are great for detailed areas, while larger tools can help remove more material quickly.
Lastly, don't forget about the importance of maintaining your tools. Proper care ensures longevity and optimal performance. Regularly sharpening your chisels and knives will keep them ready for action, allowing you to focus on your creativity rather than struggling with dull blades.
Q: What type of wood is best for beginners?
A: Softwoods like pine or basswood are great for beginners due to their ease of carving.
Q: How often should I sharpen my tools?
A: It depends on usage, but a good rule of thumb is to sharpen them after every few carving sessions.
Q: Can I use power tools for carving?
A: Yes, power tools can speed up the process, but they require a different skill set and safety precautions.
Q: What's the best way to learn carving techniques?
A: Consider taking a class or watching online tutorials to get hands-on experience and guidance.
Chisels and Gouges
When it comes to wood carving, chisels and gouges are your best friends. These tools are indispensable for any woodworker aiming to create detailed and intricate designs. But what exactly are they, and how can you use them effectively? Chisels are typically flat-edged tools that allow for precise cuts, while gouges have a curved blade that can scoop out wood, making them perfect for achieving depth and texture. Understanding the different shapes and sizes of these tools is crucial to mastering the art of carving.
To get started, it’s essential to familiarize yourself with the various types of chisels and gouges available. Here’s a quick breakdown:
| Tool Type | Shape | Use |
|---|---|---|
| Flat Chisel | Straight | For making clean, straight cuts. |
| Skew Chisel | Angled | For smoothing edges and creating fine details. |
| U-Gouge | Curved | For creating rounded shapes and hollows. |
| V-Gouge | V-shaped | For making sharp lines and intricate designs. |
Choosing the right chisel or gouge can feel overwhelming, especially for beginners. However, understanding their specific purposes can help you make informed decisions. For instance, if you're aiming to create a detailed relief carving, a U-gouge is ideal for scooping out material and creating depth. On the other hand, a V-gouge is perfect for adding fine lines and intricate details that can elevate your work from ordinary to extraordinary.
Additionally, the size of the tool matters significantly. Smaller chisels are excellent for intricate details, while larger ones can remove more material quickly. It's like choosing the right brush for painting; the finer the detail, the smaller the brush you need. A well-rounded set of chisels and gouges will give you the flexibility to tackle various projects, from simple whittling to complex carvings.
But there's more to it than just having the right tools. The way you hold and maneuver your chisels and gouges can greatly affect the outcome of your carving. A firm grip and steady hand are essential for precision. Moreover, always remember to carve with the grain of the wood. This not only makes your cuts cleaner but also helps prevent the wood from splintering, ensuring that your beautiful designs remain intact.
In conclusion, mastering the use of chisels and gouges is a journey that every woodcarver must embark on. With practice, patience, and the right tools, you can create stunning pieces that showcase your unique style and craftsmanship. So, grab your chisels and gouges, and let your creativity flow!
- What are the best types of wood for carving? Softwoods like pine and basswood are excellent for beginners, while hardwoods like oak and cherry are suited for more advanced projects.
- How do I maintain my chisels and gouges? Regularly sharpen your tools using a whetstone or sharpening system, and keep them clean and dry to prevent rust.
- Can I use chisels and gouges on any type of wood? While you can technically use them on any wood, softer woods are generally easier to carve and more forgiving for beginners.

Choosing the Right Size
When it comes to woodworking, selecting the right size of chisels and gouges is not just a matter of preference; it’s a crucial step that can significantly impact the precision and quality of your carvings. Imagine trying to carve intricate details with a tool that’s too large—it’s like trying to paint a masterpiece with a broom! The size of your tools should match the scale and complexity of your project, allowing you to navigate curves and corners with ease.
To make the best choice, consider the following factors:
- Project Scale: For larger projects, such as sculptures or furniture, you may need bigger chisels that can remove material quickly. Conversely, for delicate designs, smaller tools are essential.
- Detail Level: If your work involves fine details, opt for smaller chisels and gouges. They allow for greater control and precision, enabling you to create intricate patterns without overwhelming the wood.
- Wood Type: The hardness of the wood can influence your choice as well. Softer woods might allow for larger tools, while harder woods may require smaller, sharper tools to achieve the desired effect.
Furthermore, it's important to remember that having a variety of sizes in your toolkit can be beneficial. A well-rounded collection allows you to tackle different projects without being limited by your tools. For example, you might find that a medium-sized gouge works perfectly for general shaping, while a small v-gouge is ideal for adding those final touches of detail.
As you gain experience, you’ll develop a better understanding of which sizes work best for your style and projects. Don't hesitate to experiment; sometimes the best way to learn is by trial and error. Keep in mind that the right size tool is the one that feels comfortable in your hand and allows you to carve with confidence.
In conclusion, choosing the right size of chisels and gouges is not just about functionality; it’s about enhancing your creativity and ensuring that your artistic vision comes to life in every carving. So, next time you’re in your workshop, take a moment to assess your tools. Are they the right size for your current project? If not, it might be time to invest in some new additions to your toolkit!

Maintaining Your Tools
Maintaining your carving tools is not just about keeping them sharp; it's about ensuring they perform at their best for years to come. Think of your tools as your trusty sidekicks in the world of woodworking. Just like any good partnership, they require care and attention to function optimally. Regular maintenance will not only enhance the performance of your chisels and knives but also prolong their lifespan, saving you money in the long run.
First and foremost, keeping your tools clean is essential. After each carving session, take a moment to wipe down your tools with a soft cloth to remove any wood dust or resin that may have accumulated. This simple step prevents buildup that can dull the blades and affect your carving precision. Consider using a gentle solvent if you encounter stubborn residue, but always check the manufacturer's recommendations before applying any cleaning agents.
Sharpening is another critical aspect of tool maintenance. Dull tools can lead to frustration and subpar results. Invest in a good quality sharpening stone or a honing guide, and make it a habit to sharpen your tools regularly. A well-sharpened chisel or knife will glide through wood like a hot knife through butter, allowing you to achieve clean, precise cuts. Here’s a quick guide on how often to sharpen based on usage:
| Usage Frequency | Sharpening Frequency |
|---|---|
| Daily Use | Every session |
| Weekly Use | Every few sessions |
| Occasional Use | Before each major project |
Another important aspect of maintaining your tools is proper storage. Tools left out in the open can be susceptible to moisture and dust, which can lead to rust and degradation. Store your chisels and knives in a dedicated toolbox or a protective roll, ensuring they are separated to prevent nicks and scratches. If you live in a humid environment, consider adding a silica gel packet to your storage area to absorb excess moisture.
Lastly, don't overlook the importance of oiling your tools. Applying a light coat of mineral oil or camellia oil to the blades can create a protective barrier against rust and corrosion. This simple step can make a world of difference, especially for tools that are not used frequently. Just remember to wipe off any excess oil before using them, as you don’t want it to interfere with your carving process.
In summary, maintaining your tools is a blend of cleaning, sharpening, proper storage, and occasional oiling. By nurturing your tools, you’re not just preserving your investment; you’re also enhancing your carving experience. So, treat your chisels and knives with the respect they deserve, and they will reward you with beautiful, intricate carvings for years to come.
- How often should I sharpen my carving tools? It depends on usage; daily users should sharpen after each session, while occasional users can sharpen before major projects.
- What is the best way to clean my tools? Wipe them with a soft cloth after each use, and use a gentle solvent for stubborn residue.
- How should I store my carving tools? Store them in a toolbox or protective roll, ensuring they are separated to prevent damage.
- Is it necessary to oil my tools? Yes, applying a light coat of oil can protect against rust and corrosion, especially for tools that are not used often.
Knife Techniques
Mastering is essential for any woodcarver looking to elevate their craft. The knife is often considered one of the most versatile tools in woodworking, allowing for a range of cuts that can bring your designs to life. Whether you're a beginner or a seasoned artisan, understanding how to wield your knife effectively can make a world of difference in the quality of your carvings. So, what are some key techniques you should focus on? Let’s dive into the essentials!
First and foremost, grip is everything. A proper grip on your knife not only ensures safety but also provides better control over your cuts. Hold the knife firmly but not too tightly, allowing for fluid movements. Your dominant hand should guide the knife, while your other hand supports the wood, providing stability. Think of it as a dance between the knife and the wood; the more in sync you are, the smoother your performance will be.
Next, let’s talk about the different types of cuts you can make. Each cut serves a unique purpose and can dramatically affect the outcome of your carving. Here are some fundamental cuts to practice:
- Push Cuts: These are the most common cuts, where you push the knife away from your body. They are great for removing large amounts of material.
- Pull Cuts: In contrast to push cuts, pull cuts involve drawing the knife towards yourself. This technique offers more control and is ideal for detailed work.
- Stop Cuts: These cuts create a clear boundary in your carving. They are essential for defining shapes and preventing tear-out.
- Chop Cuts: Using a chopping motion, these cuts are effective for removing larger chunks of wood quickly.
Each of these cuts can be combined in various ways to achieve intricate designs. For instance, using a stop cut followed by a push cut can help you create sharp edges and defined shapes. Remember, practice makes perfect! Spend time experimenting with these cuts on scrap wood before tackling your main project.
Another crucial aspect of knife techniques is the angle of your cuts. The angle at which you hold your knife can drastically change the effect of your carving. A steeper angle can create deeper cuts, while a shallower angle can produce finer details. Visualize the wood as a canvas, and your knife as a brush—each stroke can bring out different textures and depths.
Finally, don’t forget about safety! Always carve away from your body and keep your fingers clear of the blade’s path. Using a carving glove can also provide an extra layer of protection, ensuring that your carving experience is both enjoyable and safe.
In summary, mastering knife techniques involves understanding grip, practicing various cuts, adjusting angles, and prioritizing safety. As you refine these skills, you’ll find that your ability to create unique and intricate wooden carvings will flourish. So grab your knife, find a piece of wood, and let your creativity flow!
Q1: What is the best type of knife for wood carving?
A1: The best knife for wood carving often depends on the specific project, but a whittling knife or a detail knife is highly recommended for beginners due to their versatility and ease of use.
Q2: How do I maintain my carving knife?
A2: Regularly sharpen your knife using a whetstone or a sharpening tool. Cleaning it after each use and storing it in a protective sheath can also prolong its lifespan.
Q3: Can I use regular kitchen knives for wood carving?
A3: While you can use kitchen knives in a pinch, they are not designed for wood carving. Investing in specialized carving knives is advisable for better control and safety.

Carving Techniques to Master
When it comes to wood carving, mastering various techniques is essential for any artisan looking to elevate their craft. Each method offers a unique way to express creativity and produce stunning artwork. Whether you're a beginner eager to learn or a seasoned carver looking to refine your skills, understanding these techniques will undoubtedly enhance your woodworking journey.
One of the most popular techniques is relief carving. This method involves carving away the background of the wood, allowing the subject to stand out in a three-dimensional effect. Imagine a beautiful landscape where trees and mountains emerge from the wood, creating a depth that captivates the viewer. Relief carving can range from simple designs to intricate scenes, providing endless possibilities for artistic expression.
Next up is chip carving, a technique that focuses on creating intricate patterns using simple knife cuts. This method is all about precision and patience. Picture yourself meticulously chipping away at the wood, revealing beautiful geometric designs that dance across the surface. Chip carving is perfect for those who enjoy detailed work, as it allows for the creation of stunning patterns that can enhance any wooden piece, from boxes to furniture.
Another technique worth mastering is whittling. This method is often seen as the foundation of wood carving. It involves removing small shavings of wood to create shapes and figures. Whittling is not just about the end product; it's about the process itself. It's a meditative practice, where each cut brings you closer to your vision. Many find joy in the simplicity of whittling, making it a beloved pastime for both beginners and experienced carvers alike.
As you explore these techniques, it's important to remember that practice makes perfect. Each carving style has its own learning curve, and the more you experiment, the more you'll discover your unique style. Don't hesitate to combine techniques; for instance, incorporating relief elements into your chip carvings can yield stunning results.
To help you visualize these techniques, here’s a simple comparison table:
| Technique | Description | Ideal For |
|---|---|---|
| Relief Carving | Creates a three-dimensional effect by carving away the background. | Artistic scenes and detailed designs. |
| Chip Carving | Focuses on intricate patterns using precise knife cuts. | Geometric designs and decorative pieces. |
| Whittling | Involves removing small shavings to create shapes and figures. | Simple projects and personal expression. |
In conclusion, mastering these carving techniques will not only improve your skills but also allow you to express your creativity in unique ways. So grab your tools, choose a technique, and start carving your way to beautiful creations!
Q: What is the best wood for beginners to start carving?
A: Basswood is often recommended for beginners due to its softness and ease of carving. It allows for smooth cuts and is forgiving for those still learning the ropes.
Q: How long does it take to master wood carving techniques?
A: Mastery varies from person to person. With regular practice, many people start feeling comfortable with basic techniques within a few months, while achieving true mastery can take years.
Q: Can I combine different carving techniques?
A: Absolutely! Many woodcarvers blend techniques to create unique designs. Don't hesitate to experiment and find what works best for your artistic vision.
Relief Carving
Relief carving is an incredibly captivating technique that allows artisans to create stunning, three-dimensional effects on a flat wooden surface. Imagine a beautiful landscape or a dynamic figure that seems to leap off the wood! This technique involves skillfully removing material from the background of the piece while leaving the subject matter raised, which creates a visual depth that can truly transform a simple block of wood into a work of art.
One of the most appealing aspects of relief carving is its versatility. You can create anything from intricate floral designs to detailed portraits, making it a favorite among woodworkers of all skill levels. However, achieving the desired effect requires a solid understanding of the tools and techniques involved. The process typically begins with sketching your design directly onto the wood, allowing you to visualize the final product. Once your design is in place, you can start carving away the background, gradually revealing the raised elements of your artwork.
When it comes to tools, a set of chisels and gouges is essential for relief carving. Each tool has a specific purpose, and using the right one can make a significant difference in the quality of your work. For example, flat chisels are perfect for removing larger sections of wood, while V-tools are excellent for creating fine details and textures. Here’s a quick overview of some essential tools for relief carving:
| Tool | Purpose |
|---|---|
| Flat Chisel | Used for removing larger areas of wood. |
| V-Tool | Ideal for creating fine lines and details. |
| Gouge | Perfect for carving curves and contours. |
As you dive deeper into relief carving, you'll discover various styles, such as low relief and high relief. Low relief carvings are less pronounced, with the design barely emerging from the background, while high relief carvings stand out significantly, creating a more dramatic effect. Each style offers its unique charm and can be used to convey different artistic expressions.
Another crucial aspect of relief carving is understanding light and shadow. The way light interacts with the raised areas of your carving can enhance the overall appearance, adding dimension and interest. This is where finishing techniques come into play. After completing your carving, applying the right stain or sealant can highlight the details and enhance the visual impact of your work.
In summary, relief carving is a rewarding technique that allows you to breathe life into wood. With practice, the right tools, and an understanding of your design, you can create stunning pieces that showcase your creativity and skill. So, grab your tools and let your imagination run wild as you explore the beautiful world of relief carving!
- What type of wood is best for relief carving? Softwoods like pine and basswood are often recommended for beginners due to their ease of carving.
- Do I need special tools for relief carving? While basic chisels and gouges are essential, investing in a few specialized tools can enhance your carving experience.
- How can I improve my relief carving skills? Practice regularly, study different techniques, and don’t hesitate to learn from experienced carvers.
Chip Carving
Chip carving is a fascinating wood carving technique that emphasizes the creation of intricate patterns and designs through the removal of small chips of wood. This method is not just about cutting; it's an art form that requires a blend of precision, creativity, and a keen eye for detail. Imagine sculpting a beautiful design out of a simple piece of wood, transforming it into a vibrant tapestry of shapes and patterns that tell a story. It's like painting, but instead of a canvas, you have the rich texture of wood to work with!
The beauty of chip carving lies in its simplicity and accessibility. With just a few basic tools, you can create stunning geometric designs that enhance the natural beauty of the wood. Typically, a sharp knife is all you need to get started. The technique involves making precise cuts at specific angles, allowing you to create a variety of shapes, from simple triangles to complex floral patterns. It’s akin to a dance—every cut must be deliberate, every movement calculated to achieve the desired effect.
Here are some key aspects to consider when diving into chip carving:
- Patterns and Designs: Start with simple patterns to build your confidence. As you become more comfortable, you can experiment with more complex designs. Many chip carvers find inspiration in nature, traditional motifs, or even geometric shapes.
- Wood Selection: The type of wood you choose can greatly affect your results. Softer woods like pine or basswood are often recommended for beginners due to their ease of carving. However, hardwoods can produce stunning results once you master the technique.
- Practice Makes Perfect: Like any skill, chip carving requires practice. Don’t be discouraged if your first few attempts don’t turn out as expected. Each chip you carve is a step toward improvement!
To truly excel in chip carving, it’s essential to understand the techniques involved. Here’s a brief overview of the steps:
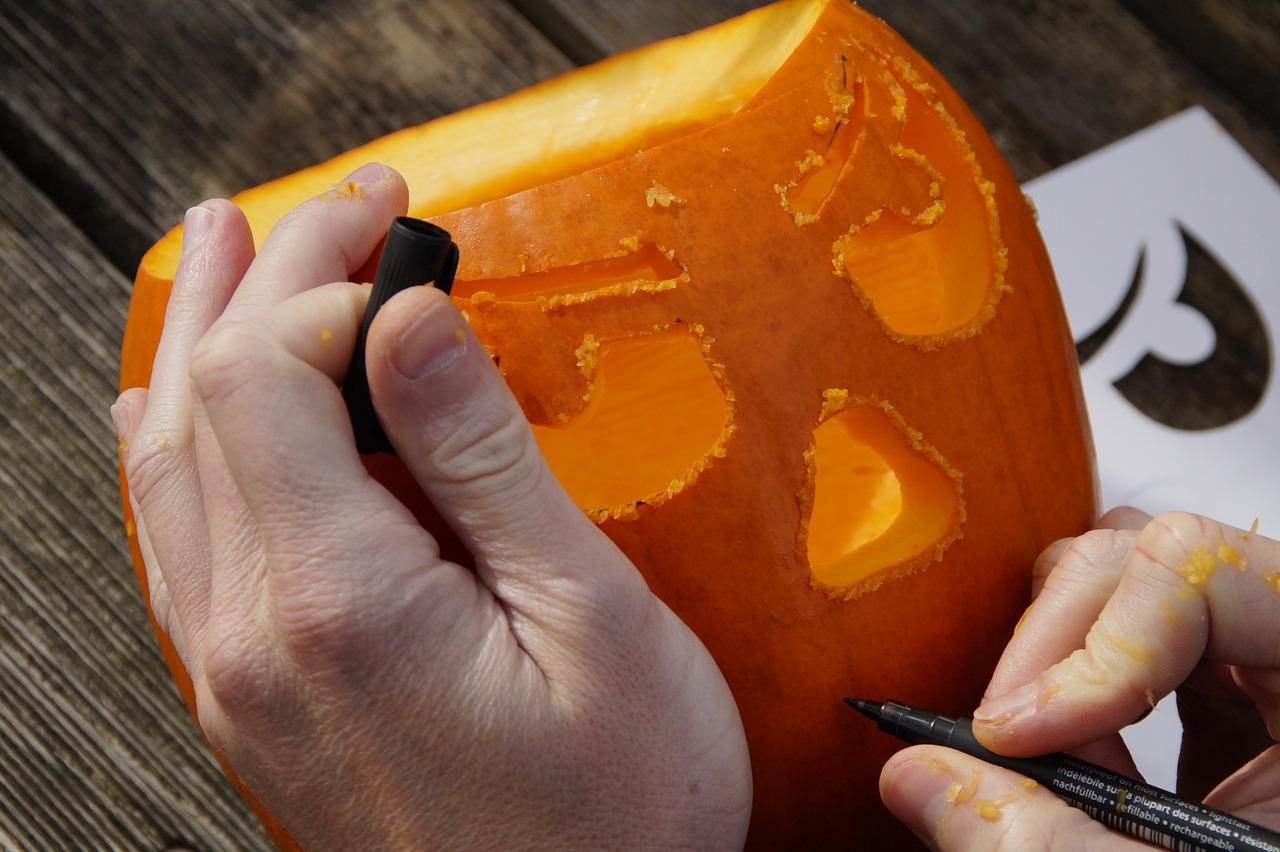
- Choose Your Design: Select a pattern that resonates with you. Sketch it out on paper before transferring it to your wood.
- Transfer the Design: Use carbon paper or a light pencil to trace your design onto the wood surface.
- Make Your Cuts: Start carving by making shallow cuts along the outline of your design. Gradually deepen your cuts to achieve the desired depth and detail.
- Refine Your Work: After the initial cuts, go back and refine the edges and details to enhance the overall appearance.
Chip carving is not just about technique; it’s also a form of self-expression. Each piece is unique, reflecting the carver's personality and style. As you become more proficient, consider incorporating your own designs, allowing your creativity to shine through. Whether you’re crafting a decorative box, a serving tray, or a wall hanging, the possibilities are endless!
As you embark on your chip carving journey, remember that patience and practice are your best friends. The more you carve, the more you’ll learn about the nuances of the wood and the tools you’re using. So grab your knife, choose your wood, and let your imagination run wild!
Q: What tools do I need to start chip carving?
A: You primarily need a sharp carving knife, a cutting board, and possibly a few chisels for more intricate designs. A good quality knife is essential for precision.
Q: Can I chip carve on any type of wood?
A: While you can technically chip carve on any wood, softer woods like pine or basswood are recommended for beginners due to their ease of carving.
Q: How do I maintain my carving tools?
A: Regularly sharpen your knives and chisels using a whetstone or honing guide. Keep them clean and dry to prevent rust.
Q: Is chip carving suitable for beginners?
A: Absolutely! Chip carving is a great starting point for new woodworkers. Start with simple patterns and gradually increase the complexity as your skills improve.
Finishing Techniques
When it comes to wood carving, are the cherry on top of your masterpiece. They can truly make or break your project, elevating your work from ordinary to extraordinary. Think of finishing as the final polish that brings out the natural beauty of the wood while also providing protection from the elements. In this section, we'll explore various methods that will not only enhance the aesthetic appeal of your carvings but also ensure their longevity.
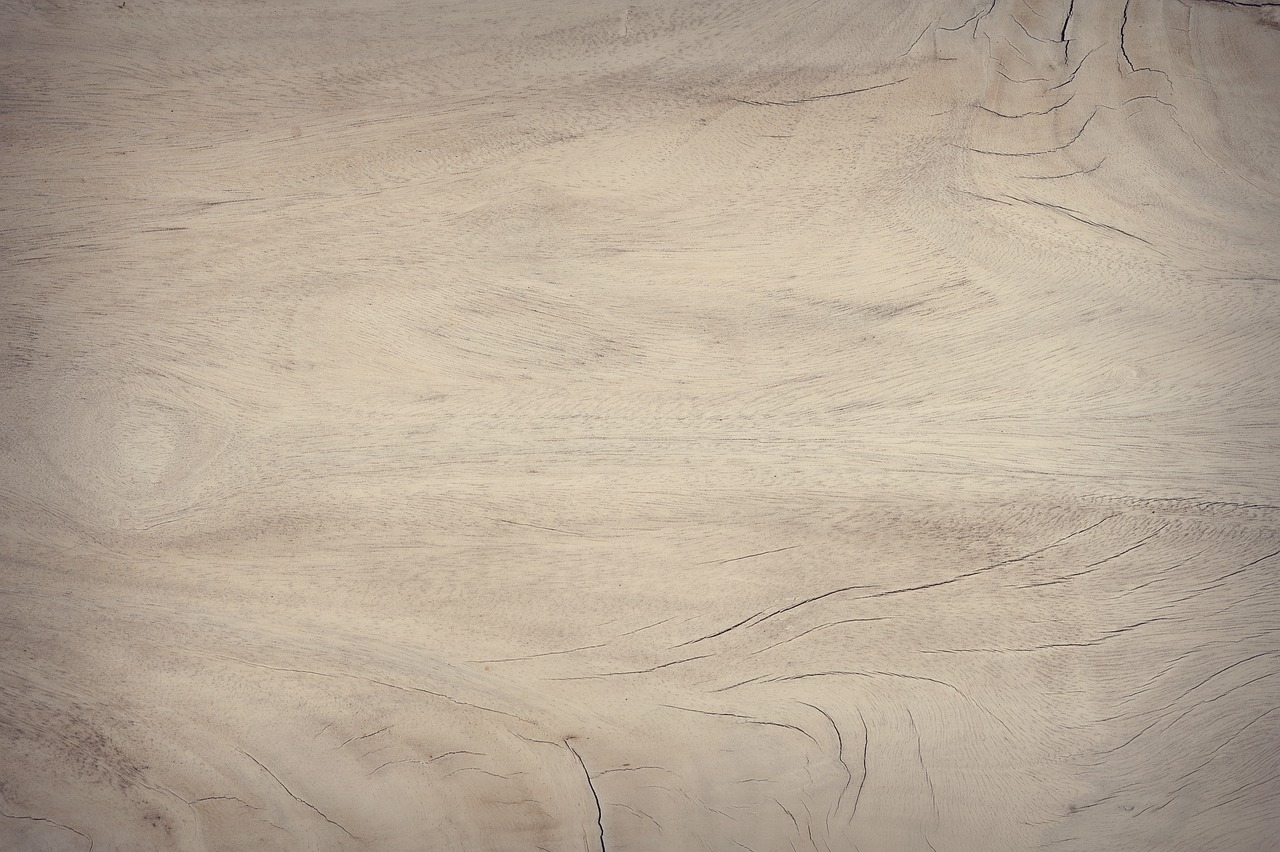
One of the most crucial steps in finishing is sanding. Sanding is essential for achieving a smooth surface, which is vital for both the look and feel of your carving. It helps to eliminate any rough spots, allowing your design to shine through. You can use different grits of sandpaper, starting with a coarser grit to remove imperfections and gradually moving to finer grits for that silky-smooth finish. For larger projects, consider using an electric sander, but for intricate details, hand sanding is often the way to go.
After sanding, it's time to think about staining. Stains can dramatically change the color of the wood, enhancing its natural grain and character. When choosing a stain, consider the type of wood you’re working with, as different woods absorb stains differently. For example, softer woods like pine tend to soak up more stain, resulting in a darker finish, while hardwoods like oak may require multiple coats to achieve the desired color. Always remember to test your stain on a scrap piece of wood before applying it to your masterpiece to ensure you achieve the look you want.
Once your stain has dried, the next step is to apply a sealant. Sealants are crucial for protecting your carvings from moisture, dirt, and wear. They create a barrier that preserves the wood's integrity and beauty. There are various types of sealants available, including oil-based, water-based, and polyurethane finishes. Each type has its pros and cons, so it’s essential to choose one that suits your specific project. For instance, oil-based sealants tend to provide a richer finish but take longer to dry, while water-based options dry quickly and are easier to clean up.
To summarize, the finishing process can be broken down into three main steps:
- Sanding: Achieve a smooth surface using various grits of sandpaper.
- Staining: Enhance the wood's color and grain with the right stain.
- Sealing: Protect your work with an appropriate sealant to ensure its longevity.
Finally, always remember that practice makes perfect. Don’t hesitate to experiment with different techniques and products to discover what works best for you. Finishing your wooden carvings is not just about protection; it’s an opportunity to express your creativity and bring your artistic vision to life!
Q: What is the best type of wood for carving?
A: The best type of wood for carving depends on your project. Softwoods like pine are great for beginners due to their ease of carving, while hardwoods like oak and walnut offer durability and beautiful grain patterns for more experienced carvers.
Q: How can I prevent my carving tools from rusting?
A: To prevent rust, keep your tools clean and dry after use. Applying a thin layer of oil can also help protect them from moisture.
Q: How long should I wait after staining before sealing?
A: It’s best to wait at least 24 hours after staining before applying a sealant. This allows the stain to fully dry and adhere to the wood.
Q: Can I use acrylic paint instead of stain?
A: Yes, you can use acrylic paint, but it will cover the wood grain rather than enhance it. If you want to see the wood's natural beauty, stick with stains.
Sanding Methods
Sanding is a crucial step in the wood carving process, transforming your rough-hewn masterpiece into a smooth, polished work of art. Whether you're a beginner or a seasoned woodworker, understanding the various can significantly enhance the quality of your carvings. Imagine the satisfaction of running your fingers over a beautifully finished surface, free of imperfections and splinters. That's the magic of effective sanding!
There are several methods you can employ when sanding your wooden carvings, each with its own advantages and ideal applications. The choice of method often depends on the type of wood, the intricacy of the design, and the desired finish. Here are some common sanding methods:
- Hand Sanding: This traditional method involves using sandpaper or sanding blocks to smooth the surface of the wood manually. It allows for greater control, especially in intricate areas where power tools might be too aggressive.
- Power Sanding: For larger projects or when time is of the essence, power sanders can be a game-changer. Orbital sanders and belt sanders can quickly remove material and smooth surfaces, but they require a steady hand to avoid damaging delicate details.
- Detail Sanding: For those hard-to-reach places or intricate designs, detail sanders or sanding sponges are invaluable. They can easily navigate curves and corners, ensuring that every part of your carving is beautifully finished.
Choosing the right method is only part of the equation; the grit of the sandpaper you use also plays a significant role in the final outcome. Sandpaper is available in various grits, ranging from coarse to fine. Starting with a coarser grit (around 80-120) helps to remove any major imperfections, while progressively moving to finer grits (220-400) will refine the surface and prepare it for finishing.
To illustrate the importance of grit selection, consider the following table:
| Grit Range | Purpose | Recommended Use |
|---|---|---|
| 60-80 | Coarse Sanding | Removing large imperfections and shaping wood |
| 120-150 | Medium Sanding | Preparing surfaces for finishing |
| 220-400 | Fine Sanding | Achieving a smooth finish before applying stain or sealant |
After sanding, it's essential to clean the surface to remove any dust and debris. A simple wipe-down with a damp cloth can do wonders, ensuring that your finish adheres properly and looks flawless. Remember, a well-sanded piece is the foundation for a stunning final product, so take your time and enjoy the process!
Q: How do I know when to switch to a finer grit?
A: You should switch to a finer grit once the surface feels smooth to the touch and all major imperfections have been removed. Typically, after using a coarse grit, you will notice a significant difference in texture.
Q: Can I use power sanders for detailed work?
A: While power sanders can speed up the sanding process, they may not be suitable for detailed work. It's best to use hand sanding or detail sanders for intricate areas to maintain control and avoid damage.
Q: What is the best way to clean the surface after sanding?
A: A damp cloth or tack cloth is ideal for cleaning the surface after sanding. This will help remove dust without leaving any residue that could interfere with finishing.
Choosing Stains and Sealants
When it comes to finishing your wooden carvings, selecting the right stains and sealants can significantly enhance their natural beauty while providing protection against wear and tear. Think of stains as a way to dress your wood, bringing out its unique character and grain patterns, while sealants act as a shield, guarding your masterpiece from moisture and damage. But how do you choose the right products for your specific projects? Let's dive into it!
First off, it's essential to consider the type of wood you are working with. Different woods absorb stains differently, which can dramatically affect the final appearance. For instance, softer woods like pine tend to soak up stains more readily, often resulting in a darker finish, while harder woods like oak may require a pre-stain conditioner to achieve an even color. It's always a good idea to test your chosen stain on a scrap piece of the same wood before committing to the entire project.
Next, think about the color you wish to achieve. The world of stains is vast, ranging from light, natural hues to rich, dark tones. You might want to create a warm, inviting look with a honey or walnut stain, or perhaps a cooler, more modern vibe with a gray or whitewash finish. Here’s a quick breakdown of common stain types:
| Stain Type | Description |
|---|---|
| Oil-Based Stains | Deep penetration and rich color; longer drying time. |
| Water-Based Stains | Quick drying and easy cleanup; less odor. |
| Gel Stains | Thick consistency; ideal for vertical surfaces. |
Once you’ve selected your stain, the next step is choosing a sealant. Sealants are crucial for protecting your carvings from environmental factors such as humidity, UV rays, and physical abrasion. There are several types of sealants available, including polyurethane, varnish, and lacquer. Each type has its pros and cons:
- Polyurethane: Durable and water-resistant, great for high-traffic items.
- Varnish: Offers a warm finish and is highly resistant to scratches.
- Lacquer: Dries quickly and creates a hard, glossy finish, but can be challenging to apply evenly.
Before applying any sealant, ensure your stained wood is completely dry. This will help avoid any unsightly blotches or streaks. Depending on the product you choose, you may need to apply multiple coats for optimal protection. Always follow the manufacturer's instructions regarding application techniques and drying times to achieve the best results.
In summary, choosing the right stains and sealants is a blend of art and science. By understanding the characteristics of your wood and the different products available, you can elevate your wooden carvings to a whole new level of beauty and durability. So, take your time, experiment with samples, and let your creativity shine through!
1. How do I know which stain to choose for my project?
Consider the type of wood, the desired color, and the intended use of the item. Testing on a scrap piece can help you decide.
2. Can I use water-based stains on oil-finished wood?
It’s generally not recommended as the water-based stain may not adhere properly. Always ensure compatibility.
3. How many coats of sealant should I apply?
It depends on the product, but typically, 2-3 coats are recommended for optimal protection.
4. How can I remove old stain before re-staining?
You can use a chemical stripper or sand the surface carefully to remove the old finish, but ensure you follow safety precautions.
Frequently Asked Questions
- What types of wood are best for carving?
When it comes to wood carving, different types of wood can make a world of difference! Softwoods like pine and basswood are great for beginners because they're easier to carve. Hardwoods like oak and cherry, on the other hand, offer beautiful finishes but require more skill. Ultimately, the best wood depends on your project and skill level.
- What essential tools do I need for wood carving?
To kickstart your wood carving journey, you’ll need a few essential tools. A good set of chisels and gouges is a must, along with a carving knife. Don’t forget safety gear like gloves and goggles! Having the right tools is like having a good map; it guides you to your destination smoothly.
- How do I maintain my carving tools?
Maintaining your carving tools is crucial for keeping them sharp and effective. Regularly sharpen your chisels and knives using a whetstone or honing guide. Also, clean them after each use to prevent resin build-up. Think of it like taking care of a trusty steed; a little maintenance goes a long way!
- What are the different carving techniques I should learn?
There are several carving techniques that can elevate your skills! Relief carving gives depth to your work, while chip carving focuses on intricate designs. Whittling is another fun technique that’s all about shaping wood into simple forms. Each method offers a unique way to express your creativity!
- How can I achieve a smooth finish on my carvings?
Sanding is your best friend when it comes to achieving a smooth finish! Use sandpaper of varying grits, starting from coarse and moving to fine. After sanding, applying a stain or sealant can enhance the wood’s natural beauty and protect it from wear. It’s like giving your carving a well-deserved spa day!
- What should I consider when choosing stains and sealants?
When selecting stains and sealants, consider the type of wood and the look you want to achieve. Some stains enhance the grain while others add color. Sealants protect your work from moisture and damage. Always test a small area first to see how it reacts with your wood; it’s like trying on clothes before buying!


