
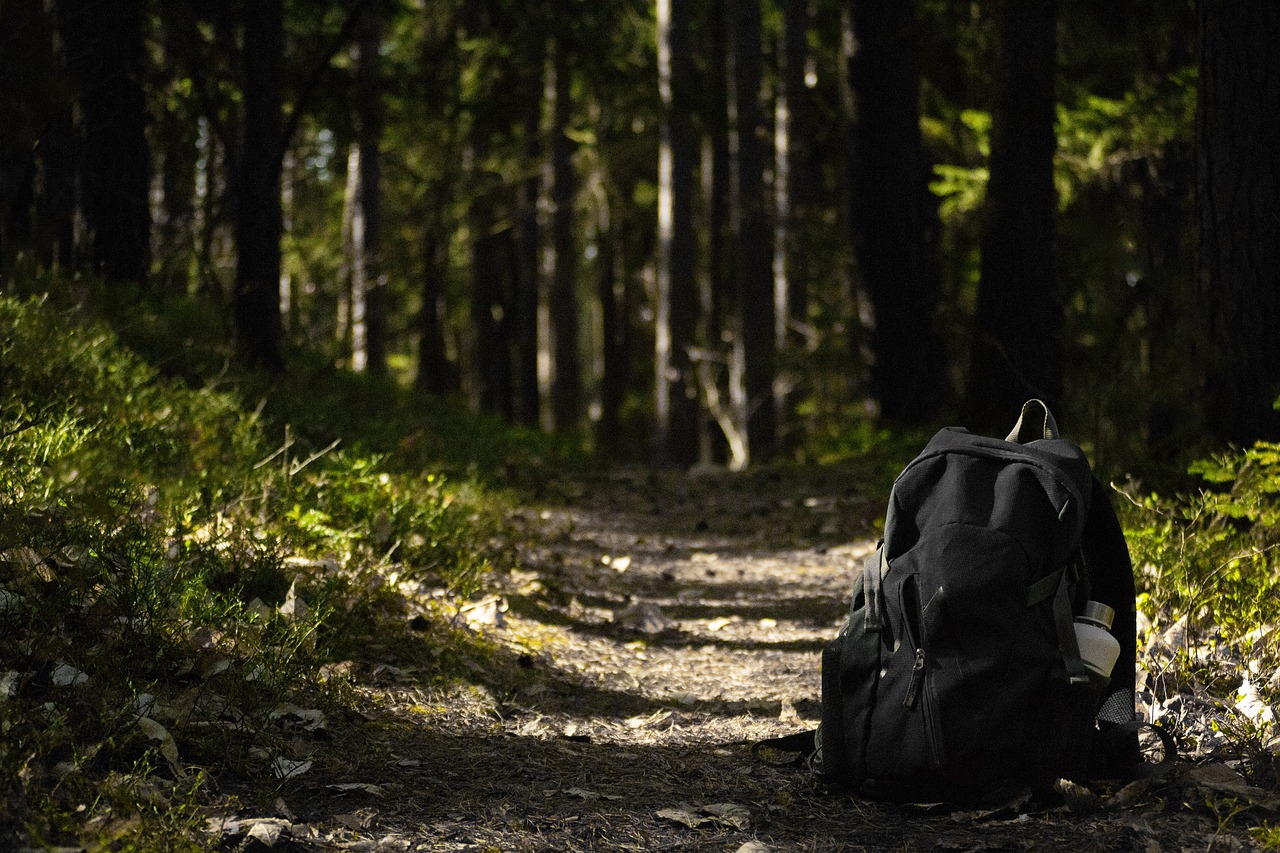
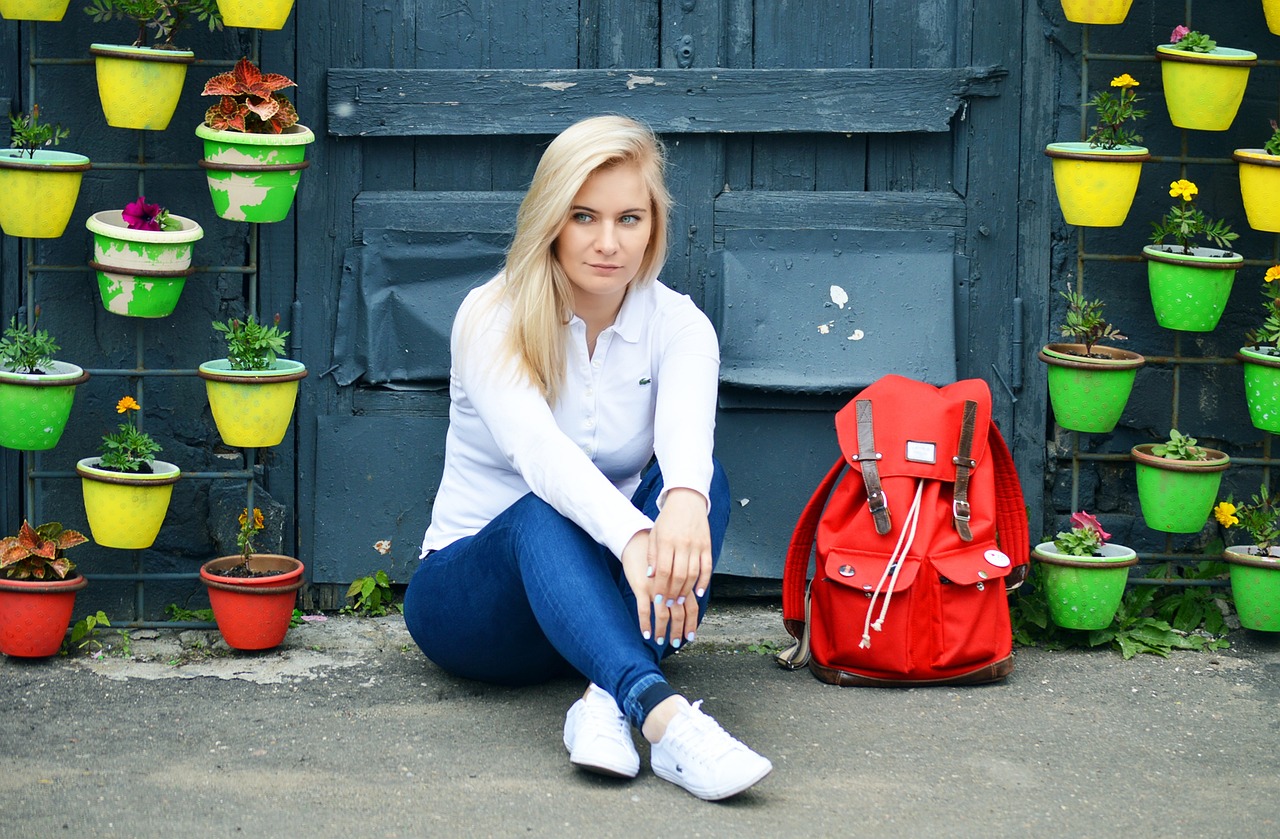
DIY: Upcycle a Drawstring Bag into a Trendy Backpack
Are you ready to unleash your creativity and transform a simple drawstring bag into a stylish backpack? With a little bit of effort and some basic sewing skills, you can create a trendy accessory that not only showcases your unique style but also contributes to a more sustainable lifestyle. This article will guide you through the process step-by-step, ensuring that you have all the tips and tricks you need to make your DIY project a success. So, grab your materials and let’s dive into this fun and fulfilling upcycling adventure!
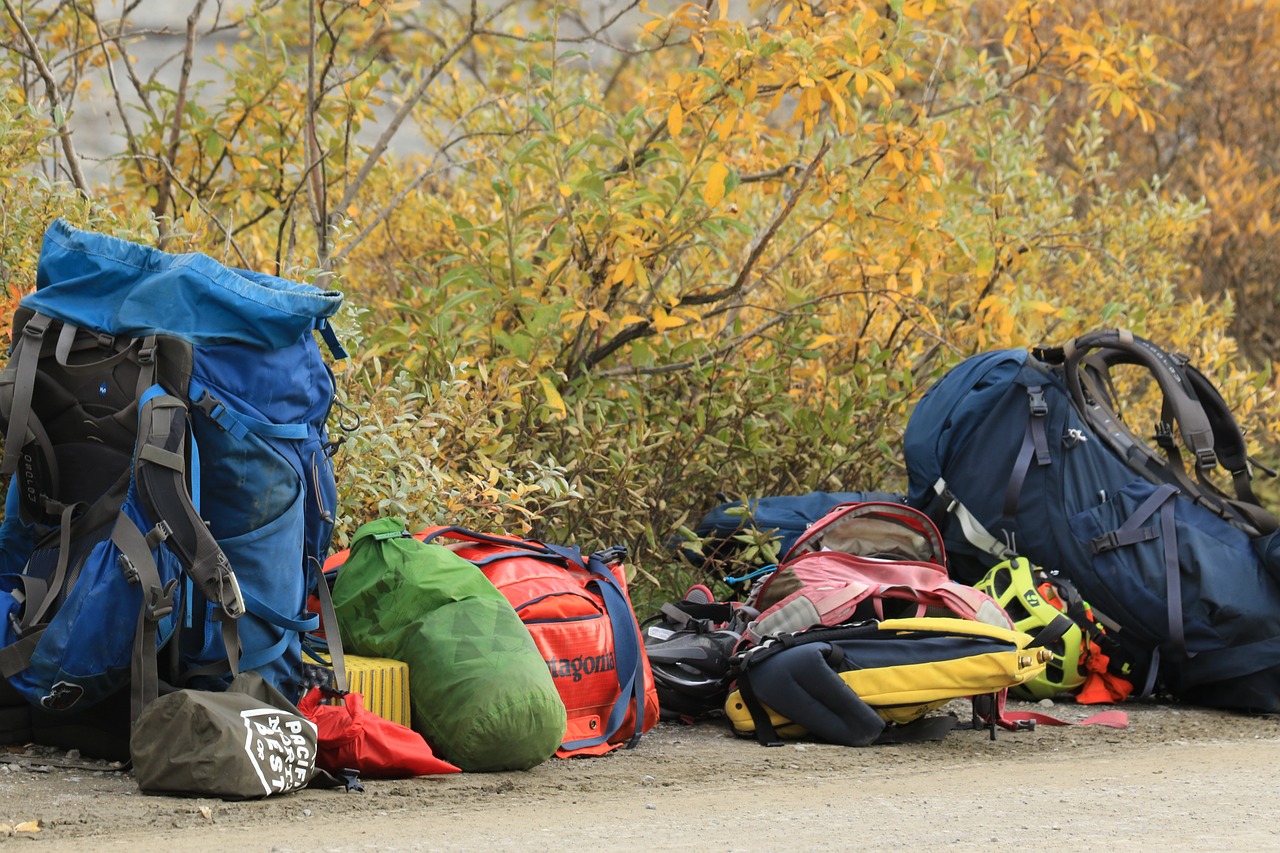
Before diving into your project, it's crucial to select the right drawstring bag. The size, material, and design of the bag will significantly impact the final outcome of your backpack. For instance, a larger bag provides more space for your essentials, while a smaller one can offer a chic, compact look. Consider the material as well; heavy-duty fabrics like canvas are durable and will hold up well as a backpack. Take a moment to reflect on your personal style. Do you prefer bold colors, or are you more into subtle patterns? Your choice here will set the foundation for your new accessory!
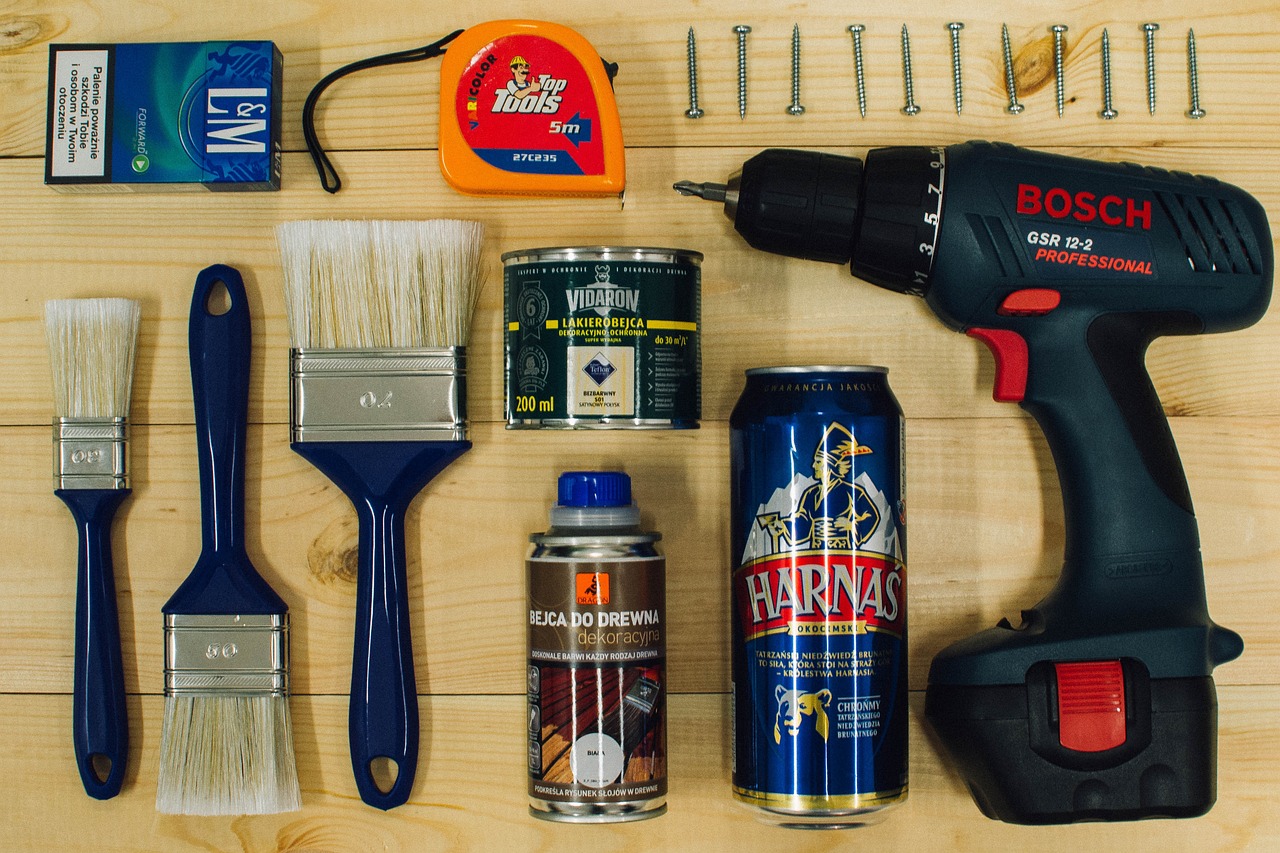
Once you’ve chosen your drawstring bag, it’s time to gather all the necessary materials for your transformation. This includes sewing tools, fabric patches, and any decorative elements you want to use to personalize your new backpack. Here’s a quick rundown of what you’ll need:
- Sewing Tools: Scissors, needles, threads, and a sewing machine.
- Fabric Patches: Choose patches that resonate with your style.
- Decorative Elements: Consider buttons, fabric paint, or even embroidery thread.
Familiarizing yourself with the essential sewing tools will enhance your crafting experience. Scissors will help you cut fabric and thread, while needles and threads are necessary for stitching everything together. If you have access to a sewing machine, it can save you a lot of time and effort, making the entire process smoother.
Choosing the right thread and needle is crucial for ensuring durability and a polished finish. Opt for strong threads that can withstand daily wear and tear. If your drawstring bag is made of thicker fabric, ensure you select a needle that can handle the material without breaking. For instance, a heavy-duty needle is ideal for canvas bags.
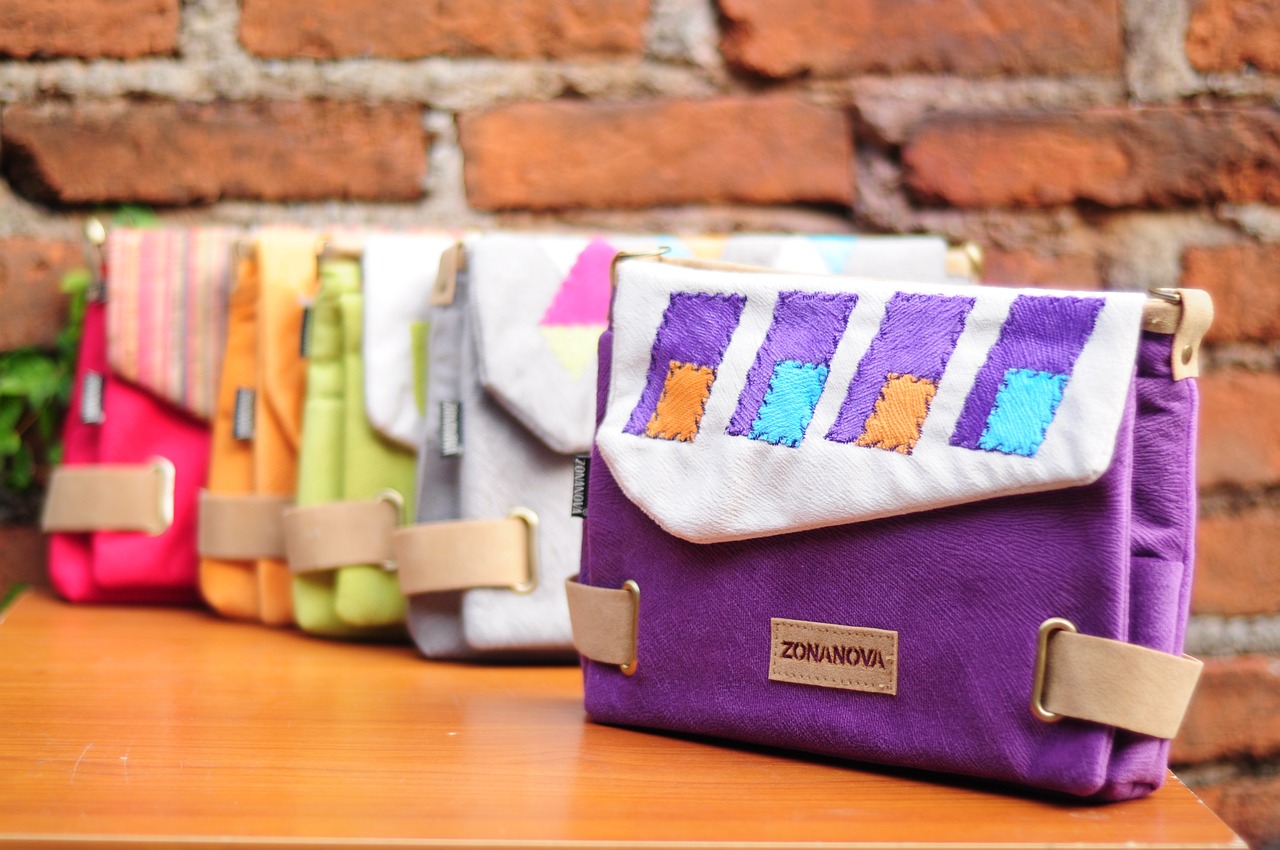
To truly make your backpack your own, consider adding some decorative items. This could be anything from fun patches to a splash of fabric paint. Think of it as giving your backpack a personality! Personalizing your bag not only enhances its visual appeal but also makes it a conversation starter.
Before you start the transformation, it’s essential to prepare your drawstring bag. Give it a good wash to remove any dirt or odors that may have accumulated. Once clean, iron it to ensure a neat appearance. A well-prepared bag will make the sewing process much easier and yield better results.
Now that you have everything ready, let’s follow a detailed step-by-step process to convert your drawstring bag into a trendy backpack. Understanding each stage is key to a successful outcome, so pay close attention!
Start by carefully removing the existing drawstring and any hardware. This will prepare your bag for its new design and functionality as a backpack. Take your time with this step to avoid damaging the fabric, as you’ll want the bag to remain intact for the next stages of the transformation.
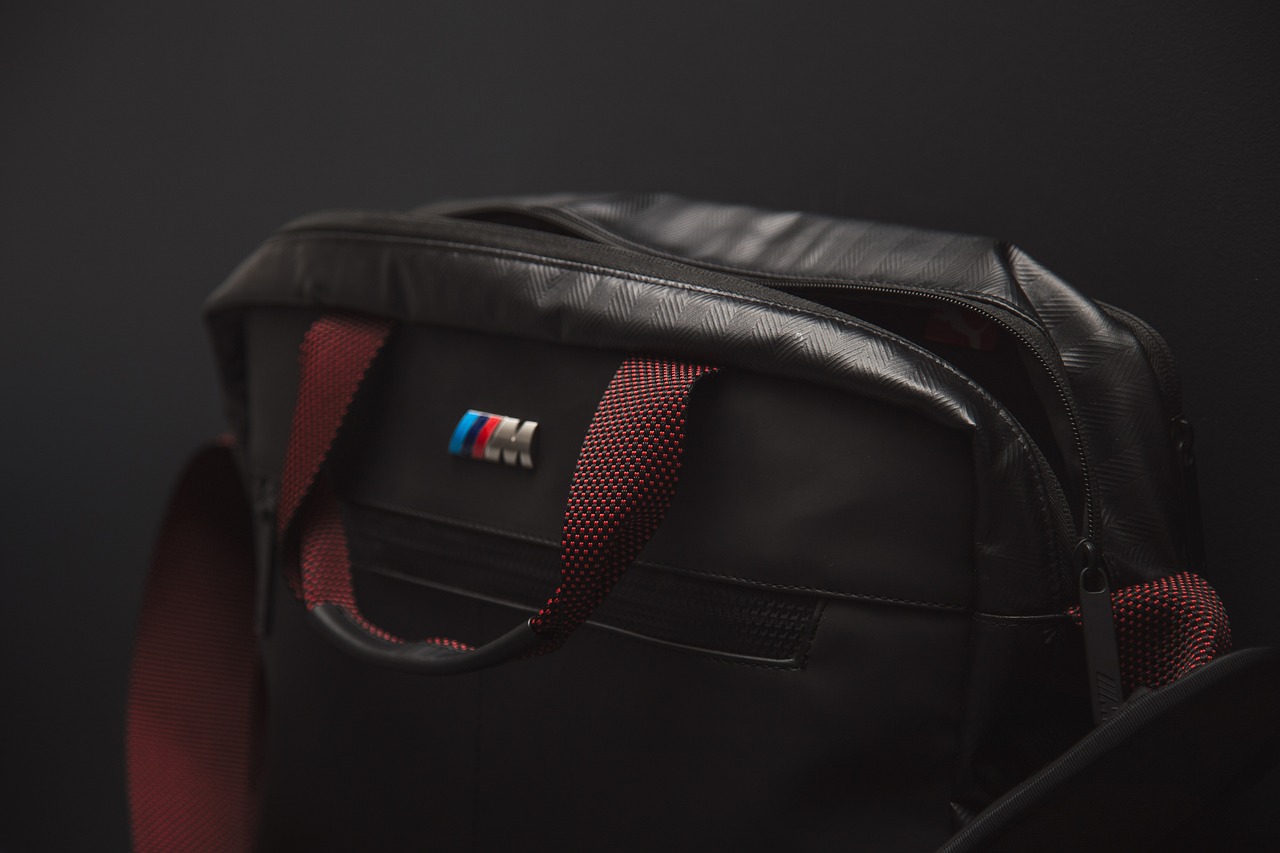
Next, you’ll learn how to attach sturdy straps and reinforcements. This is where your backpack starts to take shape! Choose strong fabric for the straps, and make sure they are securely stitched to the bag. This will ensure that your backpack is both functional and stylish, making it suitable for everyday use.
As you near the end of your project, it’s time for the final touches. Add personal elements that reflect your style, whether it's a unique patch or a splash of color with fabric paint. These little details will ensure your backpack stands out from the crowd and showcases your creativity.
1. Can I use any drawstring bag for this project?
Yes, you can use any drawstring bag, but it's best to choose one that is durable and in good condition for the best results.
2. How long does the transformation process take?
Depending on your sewing skills and the complexity of your design, the process can take anywhere from a few hours to a whole day.
3. Do I need advanced sewing skills?
Not at all! Basic sewing skills are sufficient. This project is perfect for beginners looking to enhance their DIY skills.
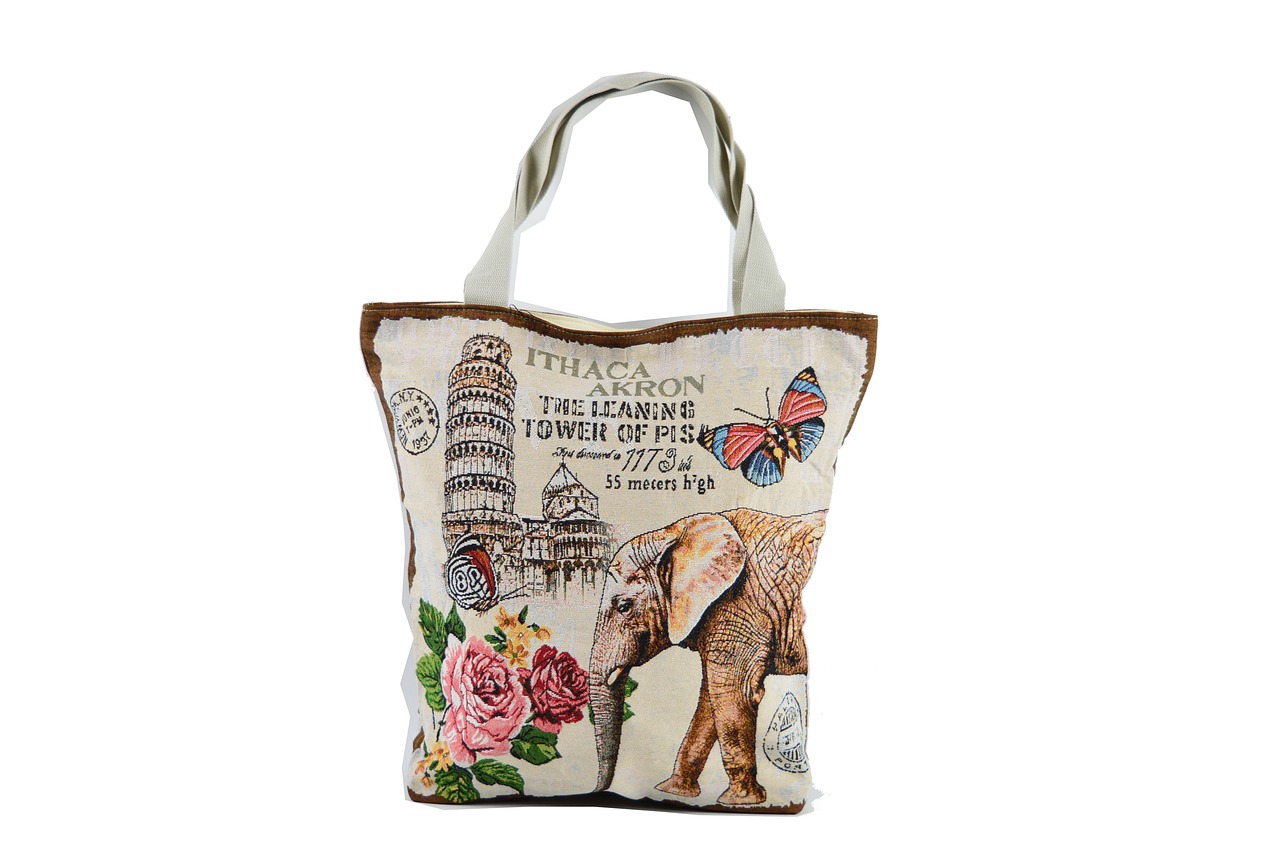
Choosing the Right Drawstring Bag
When it comes to upcycling a drawstring bag into a trendy backpack, the first and perhaps most crucial step is . This decision can significantly influence the overall look and functionality of your backpack. So, what should you consider? Let’s dive into the essential factors that will help you pick the perfect bag for your project.
First and foremost, consider the size of the drawstring bag. A bag that is too small might not accommodate your daily essentials, while one that is too large may become cumbersome to carry. Aim for a size that strikes a balance between practicality and style. For instance, a medium-sized bag can hold your books, a water bottle, and personal items without being overly bulky. It's like finding the sweet spot in a candy store—you want just enough to satisfy without overwhelming your senses!
Next, the material of the drawstring bag plays a vital role in your upcycling journey. Look for durable fabrics such as canvas, denim, or even recycled materials. These fabrics not only ensure longevity but also give your backpack a trendy vibe. Imagine transforming a simple canvas bag into a stylish accessory that can withstand the rigors of daily use—it's like turning a plain potato into a gourmet dish!
Additionally, don't forget about the design of the bag. This is where you can let your personality shine through! Opt for patterns or colors that resonate with your style. If you're feeling adventurous, you might even choose a bag with a fun graphic or a unique print that stands out. The right design can elevate your backpack from ordinary to extraordinary, making it a statement piece that reflects who you are.
To summarize, here are the key factors to consider when choosing your drawstring bag:
- Size: Ensure it fits your essentials comfortably.
- Material: Look for durability and style.
- Design: Choose something that showcases your personality.
In conclusion, selecting the right drawstring bag is the foundation of your upcycling project. By paying attention to size, material, and design, you’ll set yourself up for success in creating a fashionable backpack that not only meets your needs but also stands out in a crowd. So, take your time, explore your options, and get ready to transform that bag into something truly special!
Gathering Necessary Materials
Before diving into your exciting DIY project of transforming a simple drawstring bag into a trendy backpack, it’s crucial to gather all the necessary materials. Having everything at your fingertips not only streamlines the process but also enhances your overall crafting experience. Imagine trying to assemble a puzzle without all the pieces—frustrating, right? So, let’s make sure you’re well-prepared!
First and foremost, you’ll need some essential sewing tools. These are the backbone of your project and will help you navigate through the transformation smoothly. Here’s a quick rundown of what you should have:
- Scissors: Sharp and reliable for cutting fabric and thread.
- Needles: A variety of hand sewing needles and a sewing machine needle suitable for your fabric type.
- Thread: Choose strong, durable thread that matches the color of your drawstring bag.
- Measuring Tape: For accurate measurements when adding straps and reinforcements.
- Fabric Clips: These will hold your fabric in place while you sew, making your life a little easier.
In addition to these tools, consider gathering some decorative elements to personalize your backpack. This is where your creativity can really shine! You might want to include:
- Fabric Patches: These can add a fun, unique touch to your backpack.
- Buttons: Use them as embellishments or functional closures.
- Fabric Paint: Let your artistic side out by painting designs or patterns on your bag.
Next, don’t forget about the drawstring bag itself. When selecting your bag, keep in mind its size, material, and overall design. A larger bag offers more space for your belongings, while a sturdy material like canvas or denim ensures durability. Choosing a bag with a fun print or color can also make your finished backpack pop!
Lastly, a few other optional items can enhance your backpack’s functionality and style:
| Item | Purpose |
|---|---|
| Reinforcement Fabric | To strengthen areas where straps are attached. |
| Velcro or Snap Fasteners | For easy closure and access to your items. |
| Reflective Tape | For added safety during nighttime outings. |
By gathering these materials ahead of time, you’ll be setting yourself up for a successful and enjoyable crafting experience. So take a moment to collect everything you need, and get ready to unleash your creativity!
Essential Sewing Tools
This article provides a step-by-step guide on transforming a simple drawstring bag into a fashionable backpack, offering creative tips and techniques to enhance your DIY skills while being eco-friendly.
Selecting a suitable drawstring bag is essential for your upcycling project. Consider size, material, and design to ensure it meets your needs and complements your style.
Before starting your project, gather all the materials you will need, including sewing tools, fabric patches, and any decorative elements to personalize your new backpack.
Familiarizing yourself with the essential sewing tools required for this project is crucial for a smooth crafting experience. Here’s a breakdown of the most important tools you'll need:
- Scissors: A good pair of fabric scissors is vital for cutting your materials cleanly. Dull scissors can lead to frayed edges and make your project look unprofessional.
- Needles: Different fabrics require different types of needles. For heavier materials, like canvas, a thicker needle is necessary, while lighter fabrics may need a finer needle.
- Thread: Choose a strong thread that matches the color of your drawstring bag. Polyester thread is a good all-rounder, but cotton thread works well for natural fabrics.
- Sewing Machine: If you're serious about upcycling, a sewing machine can save you a lot of time and effort. Make sure to familiarize yourself with its settings and functions.
- Measuring Tape: Accurate measurements are the backbone of any sewing project. Use a flexible measuring tape to ensure your dimensions are spot on.
Having these tools at your disposal will make the process not only easier but also more enjoyable. Imagine trying to sew without a sharp pair of scissors—it would be like trying to bake a cake without flour! So, gather these essentials and get ready to unleash your creativity.
Choosing the right thread and needle is crucial for durability. Opt for strong threads and needles that match your drawstring bag's fabric type for best results. For instance, if you’re working with denim or heavy canvas, using a heavy-duty needle and thread will ensure that your backpack can withstand daily wear and tear.
Consider adding decorative items like patches, buttons, or fabric paint to personalize your backpack and make it uniquely yours. This not only enhances its visual appeal but also allows you to express your personality. Think of it as dressing your backpack in a way that tells your story—every patch or button can represent a memory or a moment in time.
Before transforming your bag, prepare it by cleaning and ironing it. This ensures a neat appearance and makes the sewing process easier.
Follow a detailed step-by-step process to convert your drawstring bag into a trendy backpack, ensuring you understand each stage for a successful outcome.
Begin by carefully removing the existing drawstring and any hardware, preparing the bag for its new design and functionality as a backpack.
Learn how to attach sturdy straps and reinforcements to ensure your backpack is both functional and stylish, making it suitable for everyday use.
Complete your trendy backpack with final touches, adding personal elements that reflect your style and ensuring it stands out from the crowd.
Q: Can I use any drawstring bag for this project?
A: While you can technically use any drawstring bag, it's best to choose one made from durable material to ensure your backpack lasts.
Q: Do I need to be an expert in sewing to complete this project?
A: Not at all! This project is designed for all skill levels. Just take your time and follow the steps carefully.
Q: What if I don't have a sewing machine?
A: You can still hand sew your backpack. It might take a bit longer, but it’s completely doable!
Thread and Needle Selection
When it comes to transforming your drawstring bag into a trendy backpack, choosing the right thread and needle is not just a minor detail; it's a crucial step that can significantly affect the durability and overall look of your finished product. Imagine putting in all that effort only to have your seams unravel after a few uses! To avoid this, you need to consider several factors.
First off, the type of fabric your drawstring bag is made from will dictate the kind of thread and needle you should use. For instance, if your bag is made from a lightweight material like cotton, a standard all-purpose thread will do just fine. However, if you're working with heavier fabrics such as canvas or denim, you'll want to opt for a heavier-duty thread designed to handle the strain. This ensures that your stitches hold up under pressure, especially if you plan to carry heavier items.
Next, let’s talk about needle selection. Needles come in various sizes and types, each tailored for specific fabrics. A universal needle is great for most projects, but if you're sewing through multiple layers or thicker materials, a jeans needle can be a game-changer. It has a thicker shaft and a sharp point, allowing it to penetrate dense fabrics without causing damage. If you're unsure about which needle to use, here's a quick comparison:
| Type of Needle | Best For | Recommended Thread |
|---|---|---|
| Universal Needle | Light to medium-weight fabrics | All-purpose thread |
| Jeans Needle | Heavyweight fabrics like denim and canvas | Heavy-duty thread |
| Ballpoint Needle | Knit fabrics | Stretch thread |
Finally, don’t forget about the thread color. While you might be tempted to go for a thread that matches your fabric perfectly, consider using a contrasting color for a fun pop that can add character to your backpack. This little detail can elevate your DIY project from basic to absolutely stunning! Remember, the right thread and needle not only ensure your backpack is functional but also make it a stylish accessory that reflects your unique personality.

Optional Decorative Items
When it comes to personalizing your newly transformed backpack, the sky's the limit! Adding decorative items not only enhances the visual appeal of your backpack but also showcases your unique personality. Think of it as adding the final brush strokes to a masterpiece; these embellishments can truly make your backpack stand out.
There are several options you can consider for decoration, depending on your style and the vibe you want to achieve. For instance, fabric patches are a fantastic way to express your interests or hobbies. You could choose patches that represent your favorite bands, travel destinations, or even quirky sayings that make you smile. These patches can be sewn or ironed onto your backpack, adding a pop of color and character.
Another fun option is to use buttons. Vintage buttons can add a nostalgic touch, while bright, modern buttons can create a playful look. You can mix and match different sizes and colors for a funky, eclectic style. If you’re feeling particularly creative, why not try fabric paint? With a little bit of artistic flair, you can paint designs, quotes, or even abstract patterns directly onto your backpack. This method allows for complete customization, giving you a one-of-a-kind accessory that no one else will have.
Additionally, consider using ribbons or lace to add texture and a feminine touch. You can weave them through the straps or around the edges of the bag for a delicate look. If you prefer a more rugged aesthetic, think about incorporating metal studs or rivets. These can add an edgy vibe to your backpack, making it perfect for a casual outing or a concert.
Whatever decorative items you choose, remember that the goal is to make your backpack reflect who you are. So gather your materials, unleash your creativity, and have fun with it! The more personal touches you add, the more special your backpack will become, turning a simple upcycling project into a cherished accessory.
Here are some common questions you might have about upcycling a drawstring bag into a trendy backpack:
- Can I use any drawstring bag for this project? Yes, as long as it is made of sturdy material and has enough space for your needs.
- Do I need sewing experience to complete this project? While some basic sewing skills are helpful, this project is beginner-friendly and can be tackled with a little patience.
- What if I don’t have a sewing machine? You can sew by hand, but it may take a bit longer. Just ensure your stitches are secure.
- How can I wash my upcycled backpack? It’s best to hand wash it gently and air dry to maintain the integrity of your decorations.
Preparing the Drawstring Bag
Before diving into the exciting transformation of your drawstring bag, it's essential to prepare it properly. Think of this step as laying the foundation for a sturdy building; without it, your backpack might not hold up as well as you'd like. Start by giving your bag a thorough cleaning. You want to ensure that any dust, dirt, or lingering odors are removed, as these can affect the final look and feel of your trendy backpack. A simple wash in cold water should do the trick, but always check the care label to avoid damaging the fabric.
Once your bag is clean, the next step is to iron it. Yes, I know, ironing might sound like a chore, but trust me, it makes a world of difference! A smooth, wrinkle-free surface is much easier to work with and gives your backpack a polished appearance. Set your iron to the appropriate setting based on the fabric type—cotton, nylon, or polyester—and gently press out any creases. This step is crucial, as it allows you to see the full potential of your drawstring bag, making it easier to visualize your design.
While preparing, take a moment to inspect your drawstring bag for any damages or weak spots. Look for frayed edges or loose seams that might need reinforcement. If you spot any issues, grab your sewing kit and make quick repairs. This proactive approach not only extends the life of your backpack but also ensures that it can handle daily wear and tear once it's transformed.
Now, let’s talk about the design. As you prepare your bag, think about how you want to personalize it. Do you envision adding some vibrant fabric patches or maybe some unique buttons? Consider sketching out your ideas on paper or using design software to visualize the final product. This creative brainstorming will guide you in selecting the right materials and decorative elements later on.
Lastly, gather all your materials in one place. This includes your cleaned and ironed drawstring bag, sewing tools, and any decorative items you've decided on. Having everything ready to go will streamline your crafting process and keep you focused on the fun part—transforming your bag into a stylish backpack!
- Can I use any drawstring bag for this project? Yes, as long as it’s in good condition and made from a durable material.
- What if my drawstring bag is too small? You can always opt for a larger bag or combine two smaller bags to create a unique design.
- Do I need advanced sewing skills? Not at all! Basic sewing skills will suffice, and there are plenty of tutorials available to help you along the way.
- How can I make my backpack waterproof? Consider using waterproof fabric or applying a waterproof spray to your finished backpack.
Step-by-Step Transformation Process
Transforming your drawstring bag into a trendy backpack is not just a fun project; it’s a way to express your creativity while being eco-friendly. The process may seem daunting at first, but with a little patience and the right guidance, you’ll find it quite rewarding. So, let’s dive into the step-by-step transformation process that will breathe new life into your old bag!
First things first, you need to remove the drawstring. This step is crucial as it prepares your bag for its new role. Gently cut the stitching that holds the drawstring in place, making sure to avoid damaging the fabric. Once the drawstring is out, you’ll have a clean slate to work with. Don't rush this step; a careful approach will save you time and effort later on.
Next, it’s time to add straps and reinforcements. This is where your backpack starts to take shape! You'll want to choose straps that are not only stylish but also durable enough to carry your essentials. Consider using fabric or webbing that matches or complements your bag's original design. To attach the straps, measure and mark where you want them to be placed on the bag. It’s typically best to position them about 2-3 inches from the top edge. Once marked, sew the straps securely to the bag, ensuring they can withstand the weight of your belongings.
As you sew, think about the reinforcements. Adding a piece of fabric at the stress points, such as where the straps attach to the bag, will enhance durability. You can use a contrasting fabric for a pop of color or stick with something that blends in for a more subtle look. This step not only adds to the bag's strength but also provides an opportunity to showcase your personal style.
Now, let’s talk about the closure mechanism. Unlike a drawstring bag, a backpack typically features a zipper or flap closure. If you’re opting for a zipper, carefully cut an opening at the top of the bag and sew in the zipper. If you prefer a flap, you can repurpose the existing fabric from the drawstring bag to create a flap that folds down over the top, securing your items inside. This is a great way to protect your belongings while adding a unique touch to your design.
Once the main structure is in place, it’s time for the final touches. This is where you can really let your personality shine! Think about adding pockets for organization. You can sew on small fabric patches or use existing pockets from the drawstring bag. Don’t forget about embellishments like buttons or fabric paint to make your backpack truly one of a kind. The sky's the limit!
Finally, give your new backpack a good press with an iron to remove any wrinkles and ensure everything lies flat. Your upcycled drawstring bag has now been transformed into a stylish backpack that not only looks great but also serves a practical purpose.
And there you have it! With just a few simple steps, you’ve turned a basic drawstring bag into a trendy backpack. Remember, the key to a successful DIY project is to enjoy the process and let your creativity flow.
- How long does the transformation process take? It typically takes about 2-4 hours, depending on your sewing skills and the complexity of your design.
- Can I use any drawstring bag for this project? Yes! Just make sure it’s made of durable material and is large enough to accommodate your desired backpack size.
- Do I need advanced sewing skills? Not necessarily! Basic sewing skills will suffice, but the more you practice, the better you’ll get!
Removing the Drawstring
To kick off the transformation of your drawstring bag into a trendy backpack, the first step is to carefully remove the existing drawstring. This step is crucial because the drawstring will no longer serve its purpose once we switch to a backpack style. Grab a pair of scissors and locate the drawstring's entry points, usually found at the top of the bag. Gently cut the threads that hold the drawstring in place, being cautious not to damage the fabric of the bag itself.
Once you've snipped the drawstring, you may notice some hardware attached, such as plastic or metal ends. These can often be removed with a bit of finesse—just slide them off the drawstring before discarding it. It's important to ensure that the bag remains intact and the fabric is not frayed or damaged during this process. After all, we want a clean and polished look for our new backpack!
Now that the drawstring is out of the way, take a moment to inspect the bag. Is there any wear and tear that needs attention? If you see any frayed edges or holes, this is a good time to reinforce those areas. You can use some fabric glue or a sewing machine to stitch up any weak spots, ensuring that your new backpack will withstand daily use. Remember, a little preparation goes a long way in DIY projects!
As you proceed, consider how the bag's structure will change. Without the drawstring, the top of the bag will now be open, which can lead to items spilling out if not secured properly. So, keep this in mind as you plan the next steps, particularly when adding straps and closures later on.
In summary, removing the drawstring is not just about cutting threads; it's about preparing your bag for a new life as a stylish backpack. Take your time, be gentle, and pay attention to the details. This will set the stage for a successful transformation!
- Can I use any drawstring bag for this project? Yes! Just ensure it's made from durable material and is the right size for your needs.
- What if I don't have a sewing machine? You can sew by hand, but it may take longer. Just be patient and use strong stitches!
- How can I personalize my backpack? You can add patches, fabric paint, or even buttons to make it uniquely yours.
Adding Straps and Reinforcements
Now that you've removed the drawstring and prepared your bag, it’s time to get into the exciting part—adding straps and reinforcements! This step is crucial because it not only enhances the functionality of your new backpack but also contributes to its overall aesthetic. Think of the straps as the backbone of your creation; they need to be sturdy enough to support whatever you plan to carry while also being stylish enough to match your unique flair.
First, you’ll want to select the right material for your straps. Consider using strong fabrics like canvas or nylon, as these materials are durable and can withstand daily wear and tear. If you're feeling adventurous, you could even repurpose old belts or fabric from other bags to create a unique look. When cutting your straps, aim for a length that provides comfort when worn. Generally, a length of about 30 to 36 inches works well for most people, but feel free to adjust based on your personal preference.
Next, you’ll need to attach the straps securely to the bag. This is where reinforcements come into play. To ensure that the straps can handle the weight of your belongings, consider using a reinforcement patch. This is simply a piece of fabric that you sew onto the inside of the bag where the straps will attach. Not only does this provide extra strength, but it also helps to prevent any tearing that might occur over time.
Here’s a quick guide on how to attach your straps:
- Step 1: Position the straps at the desired angle on the bag. Typically, you’d want them to be about 2 to 3 inches from the top.
- Step 2: Use pins to hold the straps in place while you sew.
- Step 3: Sew a box stitch (a square or rectangle pattern) around the base of the straps. This will provide the necessary strength to withstand the weight.
- Step 4: For added security, consider sewing an “X” pattern across the box stitch.
After securing the straps, check to see how they feel. Put the bag on your back and make sure it sits comfortably. If it feels off, don’t hesitate to adjust the strap length or position until it’s just right. Remember, this backpack is going to be your new companion, so comfort is key!
In addition to straps, think about adding some reinforcement to the bottom of your bag. This area often bears the brunt of wear and tear, so consider sewing a layer of durable fabric or even leather to the base. Not only does this help protect your bag, but it also adds a stylish touch that can really make your backpack stand out.
Lastly, if you're feeling particularly crafty, you can add some decorative elements to your straps. Think about incorporating colorful thread for a pop of color or even adding some fun patches that reflect your personality. This is your chance to let your creativity shine and make your backpack truly one-of-a-kind!
Q: How do I choose the right fabric for my straps?
A: Look for durable materials like canvas or nylon. If you want something unique, consider repurposing old belts or fabric from other bags.
Q: What is a reinforcement patch, and why do I need it?
A: A reinforcement patch is a piece of fabric sewn inside the bag where the straps attach. It provides extra strength and helps prevent tearing.
Q: How can I ensure my backpack is comfortable to wear?
A: Make sure to adjust the strap length to fit your body. Try the bag on and make adjustments as needed for comfort.
Q: Can I add decorative elements to my straps?
A: Absolutely! Adding colorful thread, patches, or other embellishments can personalize your backpack and make it stand out.
Final Touches and Personalization
Now that you’ve transformed your humble drawstring bag into a fabulous backpack, it’s time for the final touches. This is where you can truly make your backpack a reflection of your personality and style. Think of this stage as the cherry on top of your DIY sundae—without it, your creation might feel a bit incomplete. So, what are some fun ways to personalize your new accessory?
First off, consider adding some decorative patches. These can be anything from quirky designs that make you smile to meaningful symbols that resonate with your life experiences. You can either sew them on or use fabric glue for a quick fix. If you're feeling extra creative, why not try your hand at fabric painting? A splash of color or a unique design can really set your backpack apart from the rest.
Another great way to add a personal touch is by incorporating custom straps. Instead of the standard straps, you might opt for something a little more unique, like braided fabric or even a repurposed belt. This not only enhances the aesthetic but also adds a layer of uniqueness that screams, “This is mine!” Also, don’t forget about functionality; ensure that whatever you choose is sturdy enough to handle your daily adventures.
For those who love to accessorize, consider attaching some charm keychains or pins. These small additions can make a big difference and are an easy way to change up your look whenever you feel like it. Plus, they can serve as conversation starters! Imagine walking into a café, and someone compliments your backpack—now you’ve got a chance to share your DIY journey.
Lastly, think about incorporating some reflective elements for safety. If you plan on using your backpack during evening outings or for biking, adding reflective tape or patches can enhance visibility, making your stylish creation practical as well as fashionable.
In summary, the final touches and personalization of your backpack are where the magic happens. By adding your unique flair through patches, custom straps, accessories, and safety features, you ensure that your backpack is not just a functional item, but a true representation of who you are. Now, let’s move on to some Frequently Asked Questions to help you with any lingering queries!
- Can I use any type of drawstring bag for this project?
While most drawstring bags can be upcycled, it's best to choose one made from durable materials to ensure longevity. - What if I don’t know how to sew?
No worries! You can use fabric glue for most of the steps, or you could enlist the help of a friend who’s handy with a needle and thread. - How do I clean my upcycled backpack?
Most fabric backpacks can be machine washed on a gentle cycle, but always check the care label first. For delicate decorations, hand washing is recommended.
Frequently Asked Questions
- What type of drawstring bag is best for upcycling into a backpack?
When selecting a drawstring bag for your upcycling project, consider factors like size, material, and design. A medium to large-sized bag made from durable fabric like canvas or nylon is ideal. This ensures that your new backpack can hold your essentials while maintaining a stylish look!
- Do I need advanced sewing skills to complete this project?
No, you don’t need to be a sewing expert! This project is designed for all skill levels. As long as you’re comfortable using basic sewing tools and following instructions, you’ll be able to create a trendy backpack. Plus, it’s a great way to improve your skills!
- What materials do I need to gather before starting?
Before diving into your DIY project, gather essential materials such as sewing tools (scissors, needles, thread, and a sewing machine), fabric patches, and any decorative items you want to personalize your backpack. Having everything on hand will make the process smoother and more enjoyable!
- How do I ensure the backpack is durable?
To make sure your backpack is strong and durable, choose high-quality thread and needles that match your drawstring bag's fabric type. Reinforcing the straps and seams during the sewing process will also add extra strength, ensuring your backpack can withstand daily use!
- Can I add my personal style to the backpack?
Absolutely! This is one of the best parts of the project. You can add patches, buttons, or even fabric paint to make your backpack uniquely yours. Let your creativity shine and create a piece that reflects your personality!
- What if I make a mistake while sewing?
Don’t worry! Mistakes are part of the learning process. If you make a mistake, simply unpick the stitches and try again. Sewing is all about practice, and every error is an opportunity to improve your skills!
- Can I use this method for other types of bags?
Yes! The techniques used in this project can be adapted for various types of bags. Feel free to experiment with different styles and materials to create unique bags that suit your needs!


