
DIY: Repurpose a Door into a Rustic Coffee Table
Have you ever looked at an old door and thought, "What can I do with this?" Well, you're in for a treat! Transforming an outdated door into a stunning rustic coffee table not only breathes new life into forgotten materials but also adds a unique flair to your living space. Imagine the stories that door could tell, now serving as a centerpiece in your home! In this article, we will guide you through the entire process—from choosing the right door to personalizing your finished product. So, roll up your sleeves, grab your tools, and let's dive into the world of DIY!
First things first: selecting the perfect door is crucial for your coffee table project. You might be wondering, "What should I look for?" Well, consider factors like size, style, and material. A door that complements your home décor will make your coffee table not just functional but also a conversation starter. For instance, a solid wood door can provide a sturdy base, while a vintage door with character can add charm and personality. Take a moment to explore your options, and don't hesitate to let your creativity shine!
Gathering the right tools and materials is key to a successful DIY project. You wouldn't want to start building your masterpiece only to realize you're missing a crucial tool, right? Below is a list of essential items you'll need:
- Hand Tools: These are your best friends during the project.
- Saws and Drills: Perfect for cutting and assembling your coffee table.
- Sanding Tools: Essential for achieving that smooth finish.
- Finishing Materials: To enhance and protect your table's appearance.
A comprehensive list of essential hand tools will ensure you have everything necessary for cutting, sanding, and assembling your coffee table. Familiarize yourself with each tool's purpose and usage. For instance, a circular saw is great for making straight cuts, while a jigsaw is perfect for intricate designs. A good set of screwdrivers and a hammer will also come in handy when you’re putting everything together.
Discovering the types of saws and drills best suited for cutting and assembling your door coffee table is essential. A miter saw is excellent for precise angled cuts, while a power drill will make your life easier when it comes to driving screws into the wood. Understanding their functions will help you work efficiently and safely, ensuring that your project turns out just as you envisioned.
Sanding tools are vital for achieving a smooth finish on your table. You'll want to use a combination of sanding blocks, orbital sanders, and various grades of sandpaper. Start with a coarser grit to remove any imperfections, and gradually move to finer grits for that perfect finish. This step is crucial; it’s like giving your coffee table a spa day!
Explore various finishing materials that can enhance the appearance of your coffee table. From stains to sealants, these products will protect your table while adding character. A rich stain can highlight the natural grain of the wood, while a clear sealant will protect it from spills and scratches. This is where you can let your personality shine through; choose colors that resonate with you and your home.
This section provides a detailed, step-by-step guide to constructing your rustic coffee table. Follow these instructions carefully to ensure a sturdy and aesthetically pleasing final product. Remember, patience is key—great things take time!
Learn how to prepare your door for the transformation, including cleaning, sanding, and any necessary repairs. Proper preparation is vital for a successful project outcome. Make sure to remove any hardware and clean the surface thoroughly. If there are any dents or scratches, now is the time to fix them. A well-prepped door will lead to a stunning final product!
Discover the best methods for assembling your coffee table, including attaching legs or a base. Step-by-step instructions will ensure a solid and attractive final product. You might want to use hairpin legs for a modern touch or chunky wooden legs for a more rustic feel. Whatever you choose, make sure everything is securely fastened to withstand the test of time.
Adding personal touches can make your coffee table truly unique. This section explores various ways to customize your table, from paint colors to decorative elements. Think about what resonates with you—maybe a bright pop of color or a distressed finish that tells a story. The options are endless!
Explore different staining and painting techniques that can enhance the rustic charm of your coffee table. Choose colors that complement your home and reflect your personal style. You could go for a classic walnut stain or a bold teal paint. The choice is yours, and the right color can make all the difference!
Consider adding decorative elements like stencils, hardware, or additional shelving. These details can elevate your coffee table's design and functionality, making it a standout piece in your living space. Maybe add a shelf underneath for books or incorporate some vintage knobs for that extra flair.
Q: Can I use any type of door for this project?
A: While you can use various types of doors, solid wood doors work best for durability and aesthetics.
Q: What is the best way to clean the door before starting?
A: Use a mixture of warm water and mild soap to clean the door thoroughly, removing any grime or old paint.
Q: How can I ensure my coffee table is stable?
A: Make sure to securely fasten the legs and check for wobbling after assembly. Adjust as necessary for stability.

Choosing the Right Door
When it comes to transforming an old door into a stunning rustic coffee table, selecting the right door is absolutely crucial. Think of it as the foundation of your project; just like a house, if the foundation isn't solid, everything else can come tumbling down. So, what should you consider when choosing your door? Let's break it down!
First off, size matters. You want to ensure that the door is the right dimensions for your coffee table. A standard coffee table height is around 18 inches, but you can adjust this based on your personal preference or the height of your couch. Measure your space to see what fits best. A door that’s too small might look out of place, while one that’s too large can overwhelm your living area.
Next, think about the style. Do you want a vintage look, or are you leaning towards a more modern aesthetic? Look for doors that match the vibe of your home. For example, a reclaimed barn door can add a rustic charm, while a sleek, flat-panel door might suit a contemporary space better. It's all about finding that perfect balance between functionality and style.
Additionally, consider the material of the door. Solid wood doors are typically the best choice for durability and aesthetics. They can withstand wear and tear while providing a beautiful finish. However, if you find a hollow-core door that catches your eye, don’t dismiss it right away. Just be aware that it may not be as sturdy, so you’ll need to reinforce it during assembly. Here’s a quick comparison of materials:
| Material | Durability | Weight | Cost |
|---|---|---|---|
| Solid Wood | High | Heavy | Higher |
| Hollow-Core | Medium | Light | Lower |
| Composite | Medium | Medium | Medium |
Lastly, don’t forget about the condition of the door. Inspect it for any damage, such as cracks, rot, or warping. If you find any imperfections, don’t worry! Many can be fixed with a little sanding or wood filler. Just remember, the better the condition of the door, the less work you’ll have to do later on.
In summary, choosing the right door for your rustic coffee table involves considering size, style, material, and condition. Take your time to find a door that not only fits well in your space but also resonates with your personal style. It’s the first step in creating a unique piece that you’ll cherish for years to come!
Essential Tools and Materials
When it comes to embarking on your DIY journey of transforming an old door into a stunning rustic coffee table, gathering the right tools and materials is absolutely essential. Imagine trying to bake a cake without the right ingredients; the same principle applies here. You want to ensure you have everything you need at your fingertips to make the process smooth and enjoyable. First off, let's talk about the tools. You'll need a variety of hand tools to cut, sand, and assemble your masterpiece. Some of the basic tools you should have include a saw, a drill, and various sanding tools. Each of these plays a crucial role in shaping and finishing your coffee table.
In addition to hand tools, you'll also want to gather finishing materials that will add the perfect touch to your project. A good quality stain or paint can elevate the look of your table, while sealants will protect it from wear and tear. Think of these materials as the icing on the cake; they not only enhance the aesthetics but also ensure durability. To make it easier for you, here's a quick breakdown of the essential tools and materials you'll need:
| Tool/Material | Purpose |
|---|---|
| Saw | To cut the door to the desired size |
| Drill | For making holes and assembling parts |
| Sanding Tools | To smooth surfaces before finishing |
| Stain or Paint | To enhance the aesthetic appeal |
| Sealant | To protect the finished table |
Now, let’s dive a bit deeper into the types of hand tools you'll need. A saw is indispensable for cutting the door down to size. You can choose between a circular saw for straight cuts or a jigsaw for more intricate shapes. Next up is the drill, which is key for making holes for screws and other fasteners. It's also handy for assembling the table legs or base. And don’t forget about sanding tools! Achieving a smooth finish is vital, and using a combination of power sanders and hand sanding will help you get that perfect texture.
Once you have your tools sorted, it's time to think about the finishing materials. Choosing the right stain or paint can significantly affect the final look of your coffee table. You might want to opt for a natural wood stain to highlight the rustic charm of the door, or perhaps a bold color that makes a statement in your living room. Sealants are equally important; they protect your table from spills and scratches, ensuring it remains beautiful for years to come.
In conclusion, having the right tools and materials is the foundation of a successful DIY project. By preparing ahead of time and gathering everything you need, you set yourself up for a fun and rewarding crafting experience. So, roll up your sleeves, gather your supplies, and get ready to create a coffee table that not only serves a purpose but also tells a story!
Q: What type of door is best for this project?
A: Solid wood doors work best due to their durability and aesthetic appeal. However, you can also use hollow-core doors if you're looking for a lighter option.
Q: Can I use paint instead of stain?
A: Absolutely! Using paint allows for a more colorful and personalized touch. Just make sure to use a primer for better adhesion.
Q: How do I ensure my table is sturdy?
A: Make sure to securely attach the legs and use corner brackets for added support. Proper assembly is key to stability.

Hand Tools
When embarking on your journey to transform an old door into a stunning rustic coffee table, having the right hand tools is not just important—it's essential. The right tools can make the difference between a frustrating experience and a smooth, enjoyable project. So, let’s dive into the must-have hand tools that will help you cut, sand, and assemble your coffee table with ease.
First and foremost, you'll need a circular saw or a hand saw for cutting the door to your desired dimensions. A circular saw is particularly handy for making straight cuts quickly and efficiently, while a hand saw gives you more control, especially in tight spaces. If you're new to using these tools, don't worry! Just take your time, measure twice, and cut once—it's a mantra that holds true in DIY projects.
Next on the list is a drill. This tool is indispensable for creating holes for screws or for attaching hardware. A cordless drill is particularly useful as it provides the freedom to move around without being tethered to an outlet. Make sure to have a variety of drill bits on hand, as different tasks will require different sizes and types.
Once you have your door cut and ready, you'll want to smooth any rough edges. This is where sanding tools come into play. A hand sander or an orbital sander will help you achieve that buttery-smooth finish. Pair it with various grades of sandpaper—coarse for initial sanding and finer grits for finishing touches. Remember, the smoother the surface, the better the final finish will be!
In addition to the primary tools mentioned above, a few other hand tools can make your life easier. Consider adding a measuring tape for precise measurements, a square to ensure your cuts are straight, and a level to make sure your table sits perfectly flat. Each of these tools plays a vital role in ensuring that your coffee table is not only beautiful but also sturdy and functional.
To summarize, here’s a quick overview of the essential hand tools you'll need:
| Tool | Purpose |
|---|---|
| Circular Saw | For cutting the door to size. |
| Drill | For creating holes and attaching hardware. |
| Sanding Tools | For smoothing surfaces. |
| Measuring Tape | For accurate measurements. |
| Square | For ensuring straight cuts. |
| Level | For checking table stability. |
Having these hand tools at your disposal will not only streamline your project but also empower you to tackle any challenges that arise along the way. Remember, the right tools in the right hands can turn a simple DIY project into a rewarding and enjoyable experience. So gear up, and let’s get crafting!

Saws and Drills
When it comes to transforming that old door into a stunning rustic coffee table, having the right tools can make all the difference. Among these, saws and drills stand out as essential. They not only help you cut and shape your materials but also ensure that your assembly is sturdy and reliable. So, let’s dive into the types of saws and drills that will be your best friends in this DIY journey!
First up, let’s talk about saws. The most common saws you might consider for this project are:
- Circular Saw: Perfect for making straight cuts on the door, this tool is a must-have for any DIY enthusiast. It’s powerful and can handle thick materials with ease.
- Jigsaw: If you're looking to create intricate designs or curves, a jigsaw is your go-to. It allows for more flexibility in cutting shapes that can add a personal touch to your table.
- Miter Saw: Great for making angled cuts, especially if you plan to add decorative trim or unique leg designs to your coffee table.
Now, onto drills. A good drill is crucial for assembling your coffee table, especially when it comes to attaching legs or any additional features. Here are a couple of options:
- Cordless Drill: This versatile tool is ideal for drilling holes and driving screws without the hassle of cords. It's portable and powerful, making it perfect for DIY projects.
- Drill Press: If you're aiming for precision and consistency, a drill press can be a valuable addition to your toolkit. It allows you to drill perfectly straight holes, which is great for structural integrity.
Before you start using these tools, it’s essential to familiarize yourself with their functions. Each tool has its unique strengths, and understanding how to use them safely and effectively will not only make your project smoother but also enhance your overall woodworking skills. Always remember to wear appropriate safety gear, like goggles and gloves, to protect yourself while you work.
In summary, having the right saws and drills is crucial for your DIY coffee table project. By choosing the right tools, you’ll not only ensure a successful build but also enjoy the process of creating something beautiful and functional for your home. So gather your tools, and let’s get ready to transform that door into a stunning centerpiece!
Q1: Can I use any type of door for this project?
A1: While you can technically use any door, it's best to choose a solid wood door for durability and aesthetic appeal. Hollow-core doors may not provide the stability you want for a coffee table.
Q2: Do I need advanced woodworking skills to complete this project?
A2: Not at all! This project is designed for beginners as well as experienced DIYers. As long as you follow the steps carefully and take your time, you’ll do great!
Q3: How can I ensure my coffee table is stable?
A3: Stability comes from proper assembly and choosing the right legs or base. Make sure to secure all parts tightly and consider using brackets for added support.
Q4: What type of finish is best for a rustic look?
A4: For a rustic finish, consider using wood stains in earthy tones. You can also use a matte sealant to protect the wood while maintaining that natural look.

Sanding Tools
When it comes to transforming your old door into a stunning rustic coffee table, are your best friends. They play a crucial role in ensuring that your table has a smooth, professional finish that not only looks great but also feels great. Imagine running your hand over a beautifully sanded surface, free of splinters and rough edges—it's a game changer! So, let's dive into the world of sanding tools and how they can elevate your DIY project.
First off, you'll want to consider the different types of sanders available. Each tool serves a unique purpose, and understanding their functions will help you choose the right one for your needs. Here are the most common types of sanding tools you might consider:
- Orbital Sander: This is a versatile tool that is great for general sanding tasks. It moves in a circular motion, making it perfect for smoothing out large surfaces quickly.
- Belt Sander: Ideal for heavy-duty sanding, a belt sander can remove material quickly and is perfect for rough surfaces. However, it requires a bit more skill to handle effectively.
- Detail Sander: If your coffee table has intricate details or hard-to-reach areas, a detail sander is your go-to tool. It’s compact and allows for precision work.
Now, let's not forget about sandpaper! The type of sandpaper you choose can make a significant difference in the outcome of your project. Sandpaper comes in various grits, which refer to the coarseness of the paper. For your coffee table, you'll likely want a progression of grits, such as:
| Grit | Use |
|---|---|
| 60-80 | For heavy sanding and removing old finishes. |
| 120-150 | For smoothing the surface after initial sanding. |
| 220+ | For final sanding and achieving a smooth finish. |
As you sand, remember to work with the grain of the wood whenever possible. This will help you avoid scratches and ensure a more polished look. Additionally, take your time! Rushing through the sanding process can lead to uneven surfaces and less-than-stellar results. Think of sanding as the foundation of your project; the better the foundation, the more beautiful the final product will be.
Lastly, safety should always be a priority. Make sure to wear a dust mask and safety goggles while sanding to protect your lungs and eyes from fine particles. After all, you want to enjoy your new coffee table without any health concerns!

Finishing Materials
When it comes to giving your rustic coffee table that final touch, play a crucial role. They not only enhance the beauty of the wood but also provide protection against wear and tear. Think of finishing materials as the icing on the cake; they can make all the difference in how your table looks and lasts over time. The right finish can highlight the natural grain of the wood, while also offering durability to withstand daily use.
There are several types of finishing materials you can consider. Each has its unique characteristics and benefits, allowing you to choose one that best suits your style and needs. Here’s a quick overview of some popular options:
| Finishing Material | Description | Best For |
|---|---|---|
| Wood Stain | A colored finish that penetrates the wood, enhancing its natural grain. | Adding color while maintaining the wood's texture. |
| Polyurethane | A protective coating that creates a hard, durable surface. | Protection against scratches and spills. |
| Varnish | A clear finish that provides a glossy look and is resistant to moisture. | Creating a shiny, water-resistant surface. |
| Shellac | A natural finish that dries quickly and provides a warm glow. | Giving a classic look to your table. |
Before applying any finish, it's essential to prepare the surface properly. Make sure your table is clean and free of dust. If you've sanded the wood, wipe it down with a damp cloth to remove any sanding residue. Once the surface is prepped, you can start applying your chosen finish. For stains, use a brush or cloth to apply evenly, and don't forget to wipe off excess to avoid blotches. For protective coatings like polyurethane or varnish, consider using a brush or a spray for a smooth application.
Remember, patience is key when it comes to finishing. Allow each coat to dry thoroughly before applying another. This will ensure a beautiful, long-lasting finish that will make your coffee table a centerpiece in your living space.

Step-by-Step Construction Process
Now that you have your door and all the necessary tools and materials, it's time to dive into the exciting part: constructing your rustic coffee table! This step-by-step guide will walk you through the entire process, ensuring you create a stunning piece that not only serves a practical purpose but also adds character to your living space. Remember, the key to a successful project is patience and attention to detail, so let's get started!
The first step in the construction process is preparing the door. Begin by thoroughly cleaning the door to remove any dust, dirt, or old paint. A clean surface is essential for ensuring that any finishes you apply later adhere properly. Once cleaned, inspect the door for any damage. If you notice any cracks or holes, use wood filler to repair them. After the repairs are made, grab your sanding tools. Start with a coarse sandpaper to smooth out rough areas, then gradually move to a finer grit to achieve a polished finish. This sanding process not only improves the appearance of the door but also helps the stain or paint adhere better.
Next up is the actual assembly of the table. This part can be a bit tricky, but don't worry! Begin by deciding on the height of your coffee table. A standard height is typically around 18 inches, but you can adjust this based on your preferences. Once you've determined the height, you’ll need to attach the legs or base. If you're using pre-made legs, simply measure and mark where they will be attached to the door. If you're feeling creative, you might consider building a base from reclaimed wood or even using metal piping for a more industrial look. Secure the legs with screws, ensuring they are sturdy and level. A tip here is to use a square to check that everything is aligned correctly.
Once the legs are attached, it’s time to add any additional features you might want. Some people choose to add a lower shelf for extra storage, which can be achieved by attaching another piece of wood across the legs. If you want to get a little fancy, consider adding decorative brackets or corner accents to enhance the rustic vibe. Remember to pre-drill any holes to avoid splitting the wood!
After the assembly is complete, the final step is to finish your coffee table. This is where you can really let your creativity shine! Choose a stain or paint that complements your existing décor. A classic walnut stain can give your table a warm, rich look, while a bright color can make it a statement piece in your living room. Apply the stain or paint evenly, and don’t forget to let it dry completely between coats. Once you’re satisfied with the color, apply a sealant to protect your table from spills and scratches. This will ensure your coffee table remains beautiful for years to come.
In summary, transforming a door into a rustic coffee table is a rewarding DIY project that combines creativity with functionality. By following these steps carefully, you’ll not only have a unique piece of furniture but also a great conversation starter in your home. So roll up your sleeves, unleash your inner craftsman, and enjoy the process!
Curious about the DIY door coffee table project? Here are some frequently asked questions to help you along the way:
- Can I use any type of door? Yes, you can repurpose any door that suits your style, but solid wood doors work best for durability.
- What if my door is too heavy? Consider using lighter materials for the legs or base to balance the weight.
- How do I maintain my coffee table? Regularly dust and clean it with a damp cloth, and reapply the sealant as needed to keep it looking fresh.
- Can I customize the size of my table? Absolutely! Just adjust the height and width based on your preferences and the door's dimensions.
Preparing the Door
Before diving into the exciting world of DIY, it's essential to prepare your door properly. Think of this stage as laying the groundwork for a masterpiece; without a solid foundation, even the most beautiful designs can crumble. Start by giving your door a thorough cleaning. Use a gentle cleaner and a soft cloth to wipe away any dust, grime, or old paint. This step is crucial because it helps the new finish adhere better, ensuring a smooth and polished look in the end.
Next, you'll want to inspect the door for any damage. Look for dents, scratches, or any signs of wear that could detract from your coffee table's appearance. If you find any imperfections, don’t fret! A little wood filler can work wonders. Simply apply it to the damaged areas, let it dry, and then sand it down until it’s flush with the surface. This attention to detail will make a significant difference in the final product.
Speaking of sanding, this is where the magic really happens. Sanding not only smooths out the surface but also prepares the wood to absorb stains or paints more effectively. Start with a coarser grit sandpaper (around 80-120 grit) to remove any rough spots and gradually move to a finer grit (220 grit) for a silky finish. Remember to sand in the direction of the wood grain to avoid scratches that can show through your finish later.
Once the door is sanded to perfection, it’s time to wipe it down again to remove any dust created during the sanding process. A clean, dust-free surface is essential for achieving a professional-looking finish. You can use a tack cloth or a damp rag for this step. After ensuring the door is clean, let it dry completely before moving on to the next stages of your project.
Lastly, consider the edges of the door. If they are sharp or rough, you might want to soften them slightly with sandpaper. This not only enhances the overall aesthetic but also makes the table safer to use, especially if you have children or pets around. By taking these steps, you are setting yourself up for success as you transform that old door into a stunning rustic coffee table that will be the centerpiece of your living room.
In summary, preparing your door involves:
- Cleaning the surface thoroughly
- Inspecting for damage and repairing as needed
- Sanding to create a smooth surface
- Wiping down to remove dust
- Softening sharp edges for safety
By following these preparation steps, you're not just getting the door ready; you're investing in the quality and longevity of your new coffee table. So roll up your sleeves, grab those tools, and let’s get crafting!

Assembling the Table
Assembling your rustic coffee table is where the magic truly happens! It's the moment when all the preparation pays off, and you watch your vision come to life. First things first, before you dive into the assembly process, make sure you have a clean workspace. A clutter-free area will help you focus and keep your materials organized. Now, let's get into the nitty-gritty of putting everything together!
Start by flipping your prepared door upside down. This will be the top of your coffee table, and it’s important to ensure it’s clean and free of dust. If you’re using legs, you’ll want to select a sturdy option that can support the weight of your table, such as wooden legs or metal hairpin legs. Attach the legs to the corners of the door using screws. Make sure to pre-drill holes to prevent the wood from splitting. As you secure each leg, take a moment to check that they are all level. A wobbly table is the last thing you want!
Now, if you’re feeling a bit adventurous, consider adding a lower shelf to your coffee table. This can be a great way to enhance functionality while adding a touch of style. To do this, measure the distance between the legs and cut a piece of wood (or even another door) to fit snugly in between. Secure it with brackets or more screws, ensuring it’s level and sturdy. This shelf can serve as a perfect spot for magazines, books, or decorative items, making your coffee table not only beautiful but also practical.
Once the legs and any additional shelves are attached, it’s time to give your table a thorough inspection. Check all screws and joints to ensure everything is tight and secure. You don’t want any surprises later on! If you notice any rough edges or uneven surfaces, now is the time to sand them down. A smooth finish will not only look better but will also prevent splinters and enhance the overall safety of your table.
Finally, after assembling your table and ensuring everything is secure, it’s a good idea to apply a protective finish. This could be a clear sealant or a wax that complements the wood. Not only will this help protect your table from spills and scratches, but it will also enhance the natural beauty of the wood. Remember, this is your masterpiece, so take the time to make it perfect!
- What type of wood is best for a coffee table? - Hardwoods like oak, maple, or walnut are great choices for durability and aesthetics.
- Can I use a hollow-core door for this project? - Yes, but keep in mind that hollow-core doors may not be as sturdy as solid wood doors.
- How do I ensure my table is level? - Use a level tool during assembly and adjust the legs as needed.
- What kind of finish should I use? - A polyurethane finish is ideal for durability, while a natural oil finish can enhance the wood's appearance.

Personalizing Your Coffee Table
When it comes to making your rustic coffee table a true reflection of your personality, the sky's the limit! Personalizing your coffee table not only enhances its aesthetic appeal but also gives it a unique charm that can spark conversations. Think of your coffee table as a blank canvas, waiting for your creative touch. You can choose to stain it in a rich mahogany, paint it in a vibrant teal, or even leave it in its natural wood state for a more organic feel. The choice is yours!
One of the most exciting aspects of personalizing your coffee table is selecting the right staining and painting options. For instance, if you want to keep that rustic vibe, consider using a dark stain that highlights the wood grain. Alternatively, if you’re feeling adventurous, why not try a distressed paint technique? This method not only adds character but also gives the table a vintage look. You can achieve this by applying a base coat of paint, followed by a lighter top coat that you lightly sand down to reveal the darker color underneath.
In addition to staining and painting, adding decorative elements can truly elevate your coffee table’s design. Think about incorporating stencils or decals that resonate with your style. For example, if you love nature, you might stencil some leaves or flowers onto the surface. Hardware such as decorative handles or corner brackets can also enhance the rustic feel. Furthermore, consider adding additional shelving or compartments to the design. This not only increases functionality but also provides an opportunity to display your favorite books, magazines, or decorative items.
To give you some inspiration, here’s a quick table outlining some popular personalization options:
| Personalization Option | Description |
|---|---|
| Staining | Enhances the wood grain and adds depth. Choose from dark, medium, or light stains. |
| Painting | Allows for vibrant colors. Consider techniques like distressing or ombre for added flair. |
| Stenciling | Adds unique designs or patterns. Great for personal messages or motifs. |
| Decorative Hardware | Brings an industrial touch. Use handles, knobs, or brackets to enhance design. |
| Additional Shelving | Increases functionality and provides space for personal items or decor. |
Remember, the goal is to create a coffee table that feels like a piece of you. As you explore your options, don’t hesitate to mix and match techniques. Maybe you’ll find that a combination of a rustic stain with some modern hardware creates the perfect balance in your space. The key is to have fun and let your creativity flow!
Q: How do I choose the right stain for my coffee table?
A: Consider the existing colors in your room and the type of wood. Test a small area first to see how it looks.
Q: Can I use regular paint on wood?
A: Yes, but it’s best to use paint specifically designed for furniture to ensure durability.
Q: What if I make a mistake while staining or painting?
A: Don’t worry! Sanding the area down can often fix mistakes, or you can apply a new coat over it.
Q: How can I protect my coffee table after personalizing it?
A: Consider applying a clear sealant to protect against spills and scratches.

Staining and Painting Options
When it comes to giving your rustic coffee table a unique flair, staining and painting are two of the most impactful options you can consider. The right finish can transform an old door into a stunning centerpiece for your living room, reflecting your personal style and enhancing your home décor. Have you ever walked into a room and felt instantly drawn to a piece of furniture? That’s the power of a well-chosen stain or paint color. So, let’s dive into the world of colors and finishes!
First off, let’s talk about staining. Stains are fantastic for highlighting the natural beauty of the wood while adding depth and character. They come in a variety of shades, from light honey tones to deep mahogany. When selecting a stain, consider the overall aesthetic of your room. For instance, if you have a lot of dark furniture, a lighter stain can create a beautiful contrast. On the other hand, if your space is filled with light colors, a darker stain can add a sense of warmth and coziness.
Here’s a quick tip: always test your stain on a small, inconspicuous area of the door first. This way, you can see how the wood reacts and ensure it’s the shade you envisioned. Remember, the final color can vary based on the wood type and grain, so don’t skip this crucial step!
Now, if you’re leaning towards paint, the possibilities are endless! You can go for a classic white or soft gray for a clean, modern look, or opt for bold colors like teal or mustard yellow to make a statement. Chalk paint is particularly popular for DIY projects because it adheres well to surfaces without extensive prep work and gives a lovely matte finish. If you want to achieve a vintage vibe, consider distressing the paint after it dries to reveal some of the wood underneath.
Another option is to use a two-tone approach. Imagine a table with a stained top and painted legs—this combination can create a visually striking piece that draws the eye. You can also play with textures by using different types of paint, such as satin or semi-gloss, to add dimension to your table.
For those who want to go the extra mile, consider incorporating a wash technique. This involves diluting your paint with water to create a translucent effect, allowing the wood grain to show through while adding a hint of color. It’s a great way to achieve a rustic yet refined look.
Lastly, don’t forget about the finishing touches! After staining or painting, applying a clear sealant will protect your work from scratches and spills while enhancing the color. Polyurethane is a popular choice for its durability, but if you prefer a more natural option, consider using a beeswax finish for a soft sheen.
In summary, whether you choose to stain or paint your coffee table, the right finish can elevate your DIY project to new heights. Just remember to keep your home’s overall style in mind, and don’t be afraid to experiment with different techniques and colors. Your coffee table is not just a piece of furniture; it’s a canvas for your creativity!
- How long does the stain or paint take to dry? - Generally, most stains and paints will dry within 1-4 hours, but it's best to wait 24 hours before applying a second coat or sealant.
- Can I use leftover paint from other projects? - Absolutely! Just make sure the leftover paint is suitable for wood surfaces and that you like the color combination with your décor.
- What if I make a mistake while staining or painting? - Don’t worry! You can usually sand it down and start over, or you can embrace the imperfections as part of the rustic charm.

Adding Decorative Elements
When it comes to making your rustic coffee table a true centerpiece of your living space, is where the magic happens. Think of your coffee table as a blank canvas, waiting for your personal touch. You can transform it from just a piece of furniture into a stunning expression of your style. So, how do you go about this? Let’s dive into some creative ideas!
One of the simplest ways to enhance your table's aesthetic is through stencils and paint. Imagine using a delicate floral stencil in a soft white or pastel hue to create a charming, vintage look. Just grab some acrylic paint, a stencil brush, and let your creativity flow! If you're feeling bold, you might opt for a geometric pattern in vibrant colors to give your coffee table a modern twist. The choice is yours!
Another fantastic way to add character is by incorporating hardware accents. Consider attaching decorative drawer pulls or knobs to the sides of your table. Not only do they serve a functional purpose, but they can also bring a touch of elegance or whimsy to your design. For instance, vintage knobs can enhance the rustic vibe, while sleek, modern handles can add a contemporary flair. The key is to choose hardware that complements the overall aesthetic of your home.
Additionally, think about the functional elements you can incorporate. Adding a lower shelf can provide extra storage for books, magazines, or even decorative baskets. This not only makes your coffee table more practical but also adds another layer of design. You could use reclaimed wood for the shelf to keep with the rustic theme or paint it a contrasting color for a pop of interest.
Now, let’s not forget about the importance of decorative accessories. A few carefully chosen items can really tie your table together. Here are some ideas you might consider:
- Candles: Use an assortment of candles in varying heights for a cozy atmosphere.
- Books: Stack some of your favorite reads or coffee table books for a personal touch.
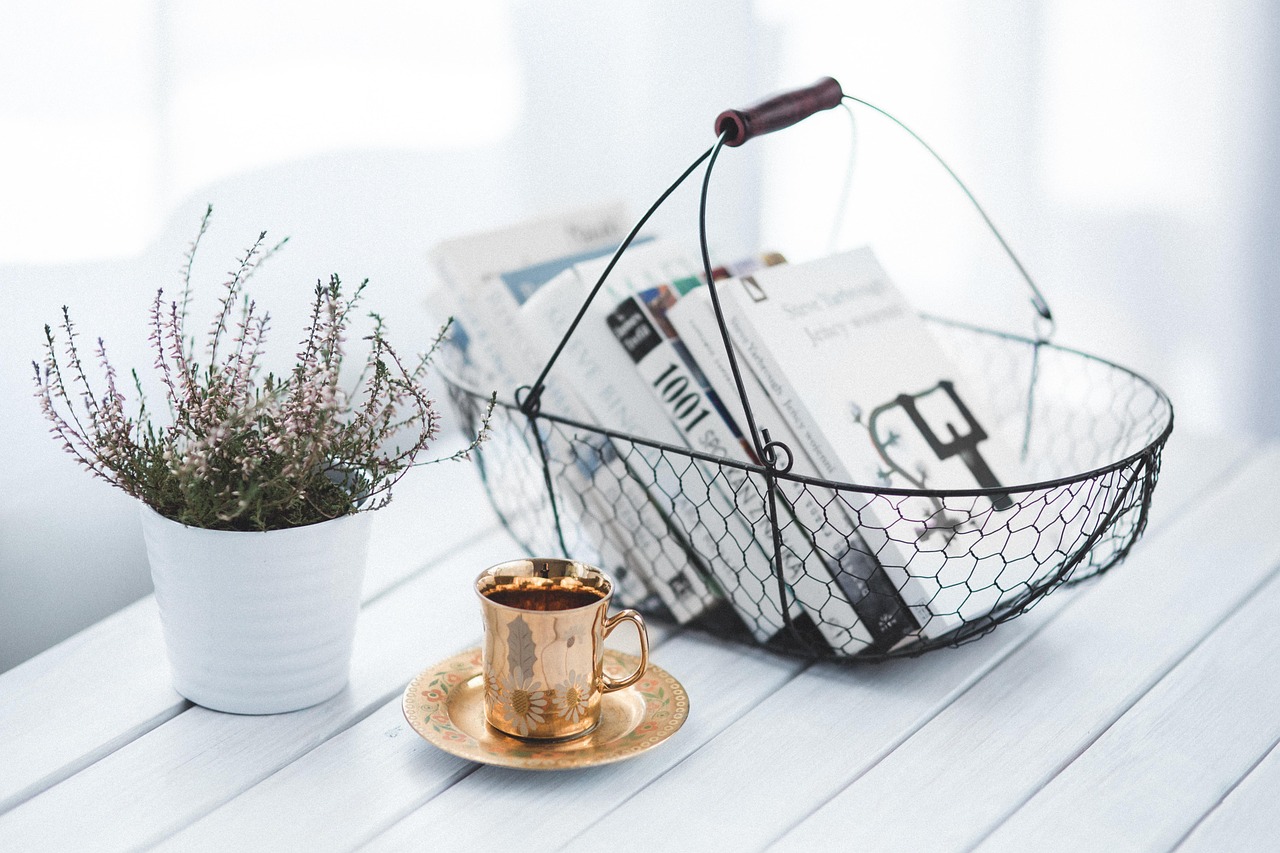
- Plants: A small potted plant or succulent can bring life to your table and improve air quality.
- Trays: Use a decorative tray to corral smaller items and keep things organized.
Finally, remember that the arrangement of these elements is just as important as the items themselves. Play around with different layouts until you find one that feels balanced and inviting. You might want to create a focal point with a larger item, like a statement vase, and then build around it with smaller accents. The goal is to create a harmonious look that reflects your unique style.
Q: Can I use any type of paint on my coffee table?
A: While you can use various types of paint, it’s best to opt for acrylic or chalk paint for a durable and attractive finish. Make sure to use a primer if you're painting over a surface that might bleed through.
Q: How do I maintain the decorative elements on my coffee table?
A: Regular dusting and occasional deep cleaning will help keep your decorative items looking fresh. For plants, ensure they are getting the right amount of sunlight and water.
Q: Are there any specific themes I should consider for decorating?
A: It really depends on your personal style! You could go for a rustic farmhouse theme, a modern minimalist look, or even a bohemian vibe. The key is to choose elements that resonate with you and your home’s décor.
Frequently Asked Questions
- What type of door is best for making a coffee table?
When choosing a door for your coffee table, consider factors like size, style, and material. A solid wood door works best for durability and aesthetics. Look for doors with unique textures or designs that can enhance the rustic charm of your table.
- Do I need special tools for this DIY project?
While you don’t need professional-grade tools, having the right hand tools is essential. Basic tools like a saw, drill, sander, and measuring tape will suffice. Make sure to familiarize yourself with how to use each tool safely and effectively.
- How can I ensure my coffee table is sturdy?
To ensure your coffee table is sturdy, pay close attention to the assembly process. Use strong brackets for attaching the legs and ensure all screws are tightened properly. Additionally, consider reinforcing the table with a base or cross supports for extra stability.
- What finishing materials should I use?
For a rustic coffee table, you can use wood stains, sealants, or paints. Choose a stain that enhances the natural grain of the wood or a paint color that complements your décor. Don’t forget to apply a protective sealant to prolong the life of your table!
- Can I personalize my coffee table?
Absolutely! Personalizing your coffee table is a fun way to make it unique. You can add custom paint designs, stencils, or decorative hardware. Consider adding shelves or decorative elements to enhance both the functionality and style of your table.
- How long does the entire process take?
The time it takes to complete your coffee table project can vary based on your experience level and the complexity of your design. Generally, you can expect to spend a weekend on the entire process, from preparation to finishing touches.
- Is it difficult to repurpose a door into a coffee table?
Not at all! With some basic DIY skills and the right tools, repurposing a door into a coffee table can be a rewarding project. Just follow the step-by-step instructions carefully, and don’t hesitate to ask for help if needed!


