
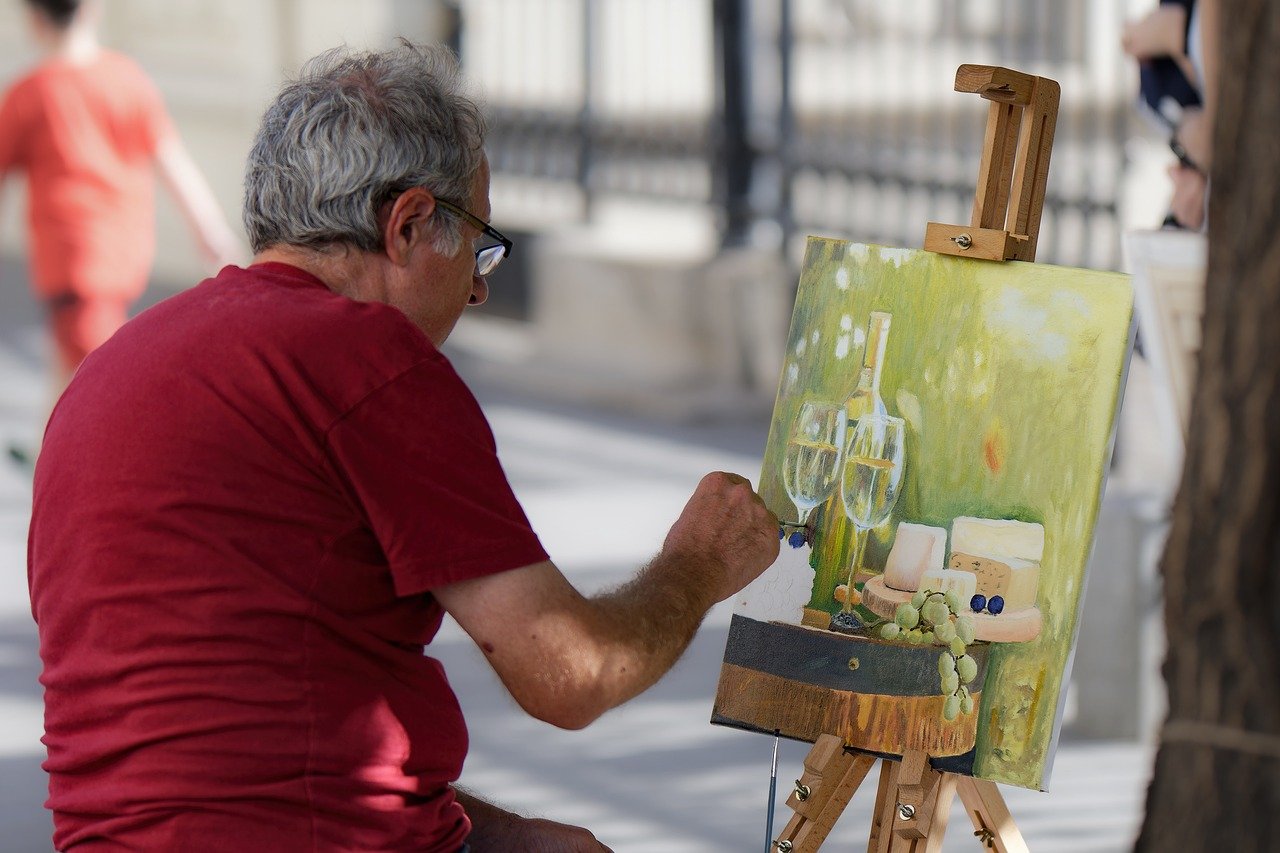
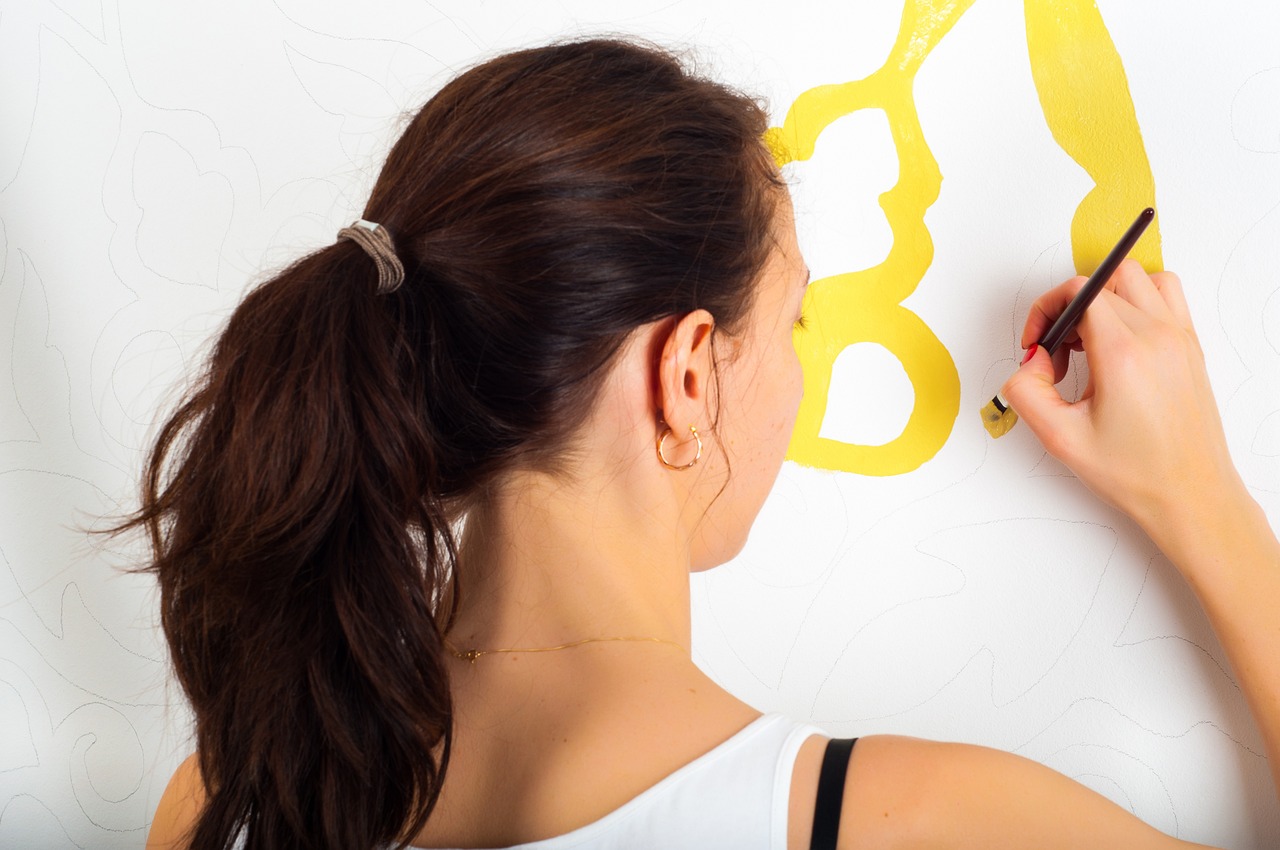
How to Make a DIY Canvas Painting for Your Home Decor
Are you ready to unleash your inner artist and transform your living space? Creating a DIY canvas painting is not just a fun project; it's a fantastic way to add a personal touch to your home decor. Imagine walking into a room and being greeted by a vibrant piece of art that you crafted with your own hands! In this article, we will explore the step-by-step process of making your own canvas painting, from choosing the right materials to applying those all-important finishing touches. So, roll up your sleeves, grab your brushes, and let’s dive into the colorful world of DIY art!
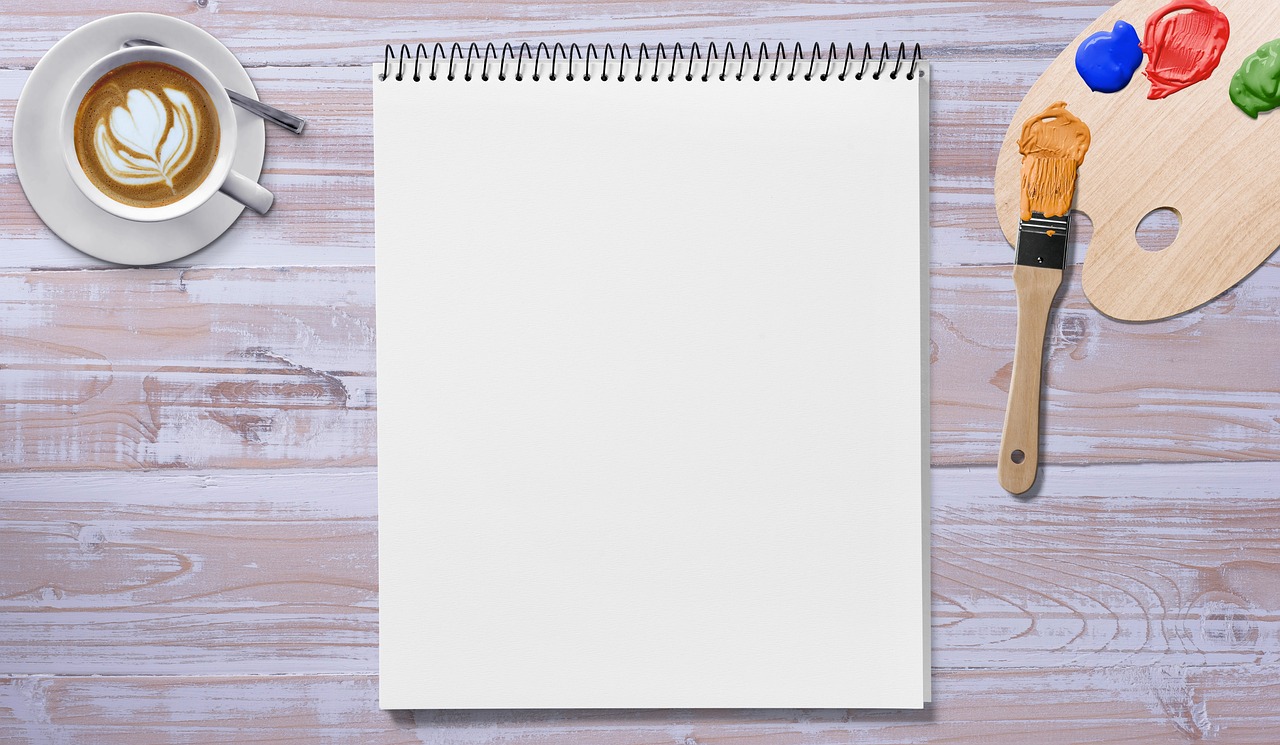
Selecting the appropriate canvas is crucial for your painting project. Think of the canvas as the blank page of your story; it sets the stage for your creativity. You can choose from various types of canvases, including stretched canvases, canvas boards, and even canvas paper. Each type has its own unique qualities, and your choice should reflect the painting technique you plan to use. For instance, if you’re going for a bold acrylic painting, a stretched canvas will give you the durability and texture you need. On the other hand, if you want to experiment with watercolors, canvas paper might be your best bet. Remember, the right canvas can elevate your artwork from ordinary to extraordinary!
Before diving into your painting adventure, it's essential to gather all the necessary materials. Having everything at your fingertips will keep your creative flow uninterrupted. Here’s a quick rundown of what you’ll need:
- Canvas: Choose your preferred type and size.
- Paints: Acrylics, oils, or watercolors—your choice!
- Brushes: Different shapes and sizes for various techniques.
- Palette: For mixing your colors.
- Water or solvent: Depending on your paint type, for cleaning brushes.
- Protective gear: Gloves, masks, and aprons to keep you safe.
Having these materials ready will not only save you time but also enhance your overall painting experience.
Understanding the different types of paints available can help you choose the right one for your project. Each type of paint has its own characteristics and can produce different effects. Here’s a brief overview:
| Type of Paint | Characteristics | Best For |
|---|---|---|
| Acrylic | Fast-drying, water-soluble, versatile | Bold colors, layering, textured effects |
| Oil | Slow-drying, rich colors, blends well | Realistic portraits, detailed landscapes |
| Watercolor | Transparent, fluid, delicate | Soft landscapes, floral designs |
Choosing the right paint will set the tone for your artwork and help you achieve the desired effect.
The right brushes and tools can significantly impact your painting's outcome. Think of brushes as the instruments of your creativity; each one serves a different purpose. For example, flat brushes are great for broad strokes and filling in large areas, while round brushes are perfect for detail work. Additionally, consider using palette knives for creating texture or sponges for unique effects. Having a variety of brushes will allow you to experiment and find your unique style!
Safety is important when working with art supplies. While painting can be a joyful experience, some materials can be harmful if not handled properly. Always wear protective gloves to avoid skin irritation, and consider using a mask if you’re working with oil paints or sprays. An apron can help protect your clothes from unexpected splatters. Remember, a little precaution goes a long way in ensuring a fun and safe creative session!
Creating an organized and comfortable workspace is key to a successful painting experience. Find a well-lit area where you can spread out your materials without feeling cramped. Consider using a drop cloth to protect your floors from paint spills. Arrange your supplies in a way that they are easily accessible, and keep a glass of water nearby to rinse your brushes. A clutter-free environment will help you focus on your art and let your creativity flow!
There are various painting techniques you can employ to enhance your artwork. Techniques like layering, blending, and creating texture can take your canvas from basic to breathtaking. Don’t be afraid to experiment and find what resonates with you!
Layering colors adds depth and dimension to your painting. Think of it like building a cake; each layer adds flavor and complexity. Start with a base layer and gradually add more colors on top, allowing each layer to dry before adding the next. This technique can create stunning visual effects and transform your artwork into a masterpiece!
Adding texture to your canvas can make your artwork more interesting. Use tools like palette knives, sponges, or even your fingers to create unique textures. Experiment with different materials, such as sand or fabric, to add dimension to your piece. The more you play with texture, the more captivating your artwork will become!
Once your painting is complete, adding finishing touches is essential. This is where your artwork truly comes to life. Consider applying a varnish to protect your painting and enhance its appearance. Varnishing not only provides a protective layer but also adds a beautiful sheen to your artwork, making the colors pop!
Varnishing protects your artwork and enhances its appearance. There are different types of varnishes available, including gloss, matte, and satin finishes. Choose the one that best suits your style and desired effect. To apply, use a clean brush and work in thin, even layers to avoid drips. Let it dry completely before displaying your masterpiece!
Choosing the right frame can elevate your artwork. A well-chosen frame not only protects your painting but also complements your home decor style. Consider options like floating frames for a modern look or ornate frames for a classic touch. Whatever you choose, make sure it enhances your artwork and draws attention to your creativity!
Q: Do I need to have painting experience to create a DIY canvas painting?
A: Absolutely not! Everyone starts somewhere, and creating art is all about expressing yourself. Just have fun and enjoy the process!
Q: What if I make a mistake while painting?
A: Mistakes are part of the creative journey. You can always paint over areas or incorporate them into your design. Embrace the imperfections!
Q: How do I clean my brushes after using oil paints?
A: Use a solvent like turpentine or mineral spirits to clean oil paint brushes. Always follow up with soap and water to ensure they're thoroughly cleaned.
Q: Can I use acrylic paints on canvas paper?
A: Yes, acrylic paints work well on canvas paper. Just ensure that the paper is thick enough to handle the moisture from the paint.
Now that you have all the tools and techniques at your fingertips, it’s time to embark on your painting journey. Remember, the most important part is to enjoy the process of creating something uniquely yours!
Choosing the Right Canvas
When diving into the world of DIY canvas painting, one of the first and most crucial decisions you'll face is . The canvas you select can significantly influence the outcome of your artwork, so it’s essential to understand the different types available and how they align with your artistic vision. There are several factors to consider, including the canvas material, texture, and size. Each of these elements plays a vital role in how your paint adheres and how your finished piece will look.
First off, let’s talk about the materials. Canvases typically come in two main types: cotton and linen. Cotton canvases are generally more affordable and are excellent for beginners. They are versatile and work well with various paint types, making them a popular choice. On the other hand, linen canvases are considered more professional due to their durability and superior texture. They tend to hold paint better and provide a more refined finish, but they can also be pricier. So, if you're looking to invest in your art, linen might be the way to go.
Next, consider the texture of the canvas. You can find canvases that are stretched or panel based. Stretched canvases are typically mounted on wooden frames and are ready to paint on right out of the box. They provide a slight give, which can be beneficial for certain techniques. On the other hand, canvas panels are flat and can be more stable for detailed work. They are also easier to store and transport, making them a great option for artists on the go.
Size matters too! The dimensions of your canvas will affect your composition and the overall impact of your artwork. Larger canvases can create a dramatic effect and are perfect for bold statements, while smaller canvases are fantastic for intricate details and more intimate pieces. Think about where you plan to display your artwork; this can guide your choice in size. Whether you want a show-stopping centerpiece or a subtle accent, choosing the right size is essential.
To summarize, here are the key points to consider when selecting your canvas:
- Material: Cotton for beginners; linen for a professional finish.
- Texture: Stretched for flexibility; panel for stability.
- Size: Choose based on your intended display and composition needs.
Ultimately, selecting the right canvas is about aligning your choice with your artistic goals. Don't hesitate to experiment with different types of canvases to find what works best for you. After all, the journey of creating art is just as important as the final product!

Gathering Your Materials
Before diving into the exciting world of canvas painting, it's crucial to gather all the necessary materials. Think of it as assembling your secret weapon arsenal—each item plays a vital role in bringing your creative vision to life. Imagine trying to bake a cake without flour or eggs; it's just not going to happen! Similarly, having the right supplies at your fingertips will make your painting experience not only smoother but also more enjoyable.
First, let's talk about the essentials. You'll need a canvas, of course! Canvases come in various sizes and textures, so choose one that resonates with your artistic style and the space you want to decorate. Whether you opt for a small canvas to create a charming accent piece or a large one to make a bold statement, the choice is yours. Remember, the canvas is your blank playground, waiting for your creativity to unfold.
Next up, you can't forget about paints. The type of paint you choose will significantly impact your artwork. Here’s a quick overview:
- Acrylic Paints: Fast-drying and versatile, perfect for beginners.
- Oil Paints: Rich in texture and color, but they require more drying time.
- Watercolors: Great for soft, flowing designs, but they need a special paper.
Once you've decided on your paint, it's time to select your brushes. The right brushes can make all the difference, similar to how a chef needs the right knives to create a culinary masterpiece. Different brushes serve different purposes, from flat brushes for bold strokes to round brushes for detailed work. Investing in a few quality brushes will pay off as you explore various techniques.
Don’t forget about your tools! Besides brushes, you might want to include palette knives, sponges, or even your fingers for unique textures. Each tool can add a different flavor to your painting, so don't be afraid to experiment. And speaking of safety, protective gear is essential. Wearing gloves and a mask can protect you from fumes and stains, ensuring that you can focus solely on your artistic expression without worrying about your health.
Finally, setting up your workspace is crucial. A clean, organized area will help you channel your creativity without distractions. Make sure you have good lighting and a comfortable chair, because trust me, you don't want to be shifting around awkwardly while trying to paint. Consider using a table or easel that gives you enough space to spread out your materials. And hey, maybe even play some of your favorite tunes to set the mood!
In summary, gathering your materials is the first step to creating a stunning DIY canvas painting. With the right canvas, paints, brushes, tools, and protective gear, you're well on your way to unleashing your inner artist. So, are you ready to start this colorful journey?
Types of Paints
When it comes to creating a stunning DIY canvas painting, one of the most critical decisions you'll make is choosing the right type of paint. Each paint type has its unique characteristics that can dramatically affect your artwork's final look and feel. Let's dive into the three most popular types of paints used in canvas painting: Acrylics, Oils, and Watercolors.
Acrylic paints are a favorite among many artists due to their versatility and quick drying time. These water-based paints can be easily thinned with water, allowing for a variety of techniques, from washes to thick impasto. They are perfect for beginners and seasoned artists alike, as they can mimic the appearance of oils while providing the ease of use associated with watercolors. Plus, the vibrant colors and ability to layer make acrylics an excellent choice for creating depth in your artwork.
On the other hand, oil paints have a rich history and are cherished for their depth of color and blending capabilities. They take much longer to dry, which allows artists to work on their pieces over extended periods, blending colors seamlessly. However, this slow drying time can also be a drawback for those who prefer to work quickly. Oil paints require solvents for thinning and cleaning, which means you'll need to be mindful of ventilation and safety. The luscious texture and depth that oil paints provide can truly elevate your canvas painting, making it a worthwhile option if you have the patience to work with them.
Lastly, we have watercolors, which are often associated with delicate and transparent artworks. While they are typically used on paper, many artists have begun experimenting with watercolors on canvas to achieve unique effects. Watercolors require a different approach, as they are activated with water and can create beautiful washes and gradients. However, they can be less forgiving than acrylics and oils, as mistakes are harder to correct. If you're interested in exploring a softer, more ethereal style, watercolors might be the perfect medium for your next canvas project.
To help you understand the differences better, here's a quick comparison:
| Type of Paint | Drying Time | Texture | Best For |
|---|---|---|---|
| Acrylic | Fast | Thick or thin | Beginners, vibrant art |
| Oil | Slow | Rich, creamy | Blending, depth |
| Watercolor | Varies | Transparent | Delicate, soft art |
Ultimately, the choice of paint will depend on your personal style, the effect you want to achieve, and how much time you're willing to invest in the process. Don't hesitate to experiment with different types of paints to discover what resonates with you the most. After all, art is all about exploration and expression!
- Can I mix different types of paint? While it's not recommended to mix oil and water-based paints, you can blend acrylics with acrylic mediums or use acrylics and watercolors in separate layers.
- How do I clean my brushes after using oil paints? Use a solvent like turpentine or mineral spirits to clean your brushes thoroughly, followed by soap and water.
- Can I use acrylic paints on canvas that has been primed for oil? Yes, but it's best to use an acrylic gesso primer for optimal results.
Brushes and Tools
When it comes to painting, the brushes and tools you choose can make a world of difference in the outcome of your artwork. Think of brushes as the instruments of your creativity; each type serves a unique purpose that can help you achieve different effects. For example, a flat brush is fantastic for making bold strokes and filling large areas, while a round brush is perfect for detailed work and fine lines. If you're looking to create texture, consider using a fan brush or even a palette knife, which can add a delightful twist to your canvas.
Here’s a quick rundown of some essential brushes and their uses:
| Brush Type | Best For |
|---|---|
| Flat Brush | Bold strokes, filling areas |
| Round Brush | Detail work, fine lines |
| Fan Brush | Creating texture, foliage |
| Filbert Brush | Soft edges, blending |
| Palette Knife | Mixing colors, adding texture |
In addition to brushes, there are a few other tools that can enhance your painting experience. For instance, a palette is essential for mixing your colors, while a water container is necessary for cleaning your brushes if you're using water-based paints. A good easel can also make a huge difference, providing you with a comfortable height and angle to work on your canvas without straining your back.
Don't forget about other handy tools like sponges for creating unique textures or stencils for adding patterns. These tools can help you explore your creativity further and experiment with different techniques. Just remember, the best tool is the one that feels right in your hand and allows you to express your artistic vision!
- What type of brush is best for beginners? A round brush is often recommended for beginners due to its versatility.
- Can I use old brushes for my painting? Yes, as long as they are clean and in good condition, old brushes can still work well.
- How do I clean my brushes after painting? Use warm soapy water for acrylics and mineral spirits for oil paints.
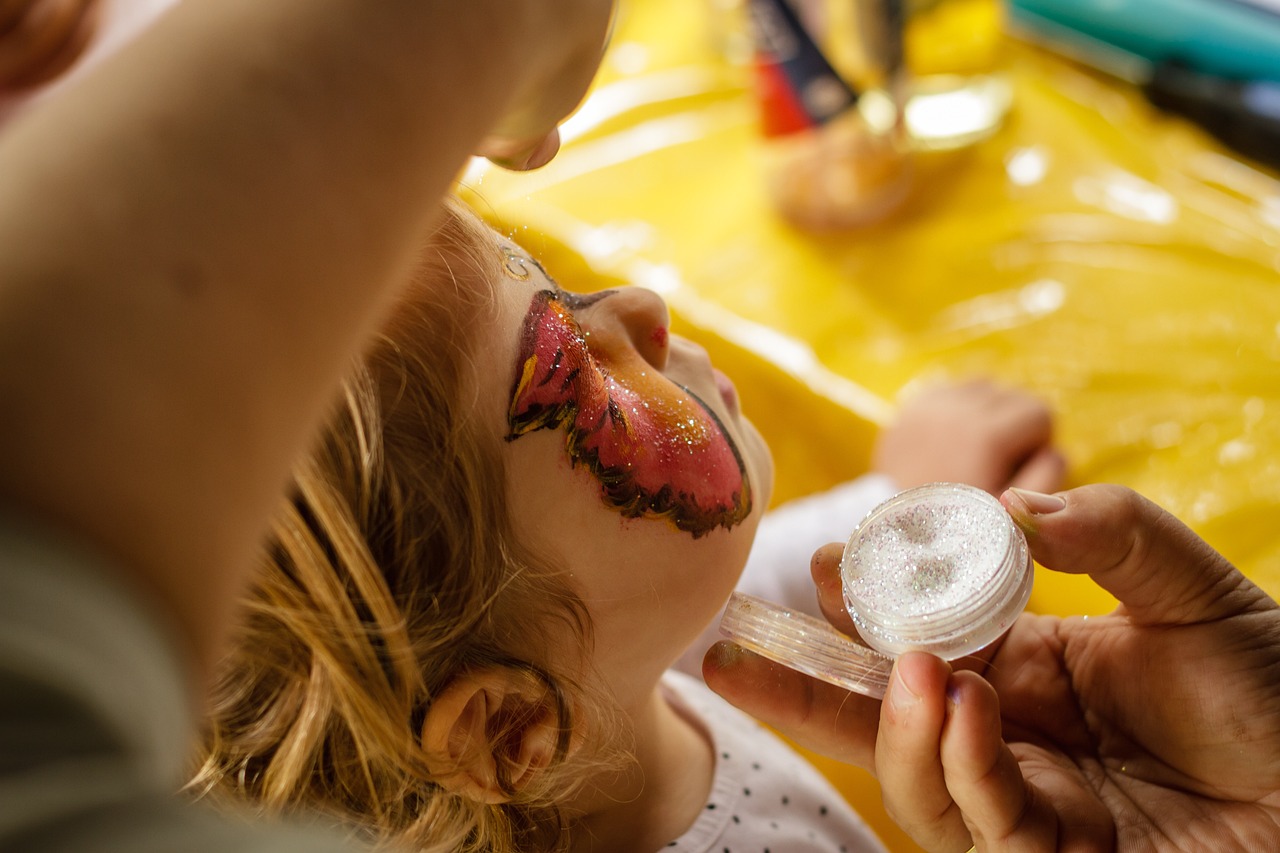
Protective Gear
When diving into the colorful world of DIY canvas painting, it’s easy to get lost in the excitement of mixing paints and creating masterpieces. However, amidst all the fun, it’s crucial not to overlook safety. Using the right is essential to ensure that you stay safe and enjoy your creative journey without any mishaps. Think of it like wearing a seatbelt in a car; it might feel unnecessary at times, but it can make all the difference in keeping you safe.
First and foremost, consider investing in a good pair of gloves. Whether you opt for disposable latex gloves or reusable nitrile ones, they can protect your skin from harsh chemicals and dyes present in some paints. You wouldn’t want to end up with paint stains on your hands that refuse to come off, right? Plus, gloves can prevent skin irritation that might arise from prolonged exposure to certain materials.
Next on the list is a mask. This is especially important if you’re working with spray paints or any materials that release fumes. A simple dust mask might suffice for light applications, but for more intense projects, consider using a respirator with appropriate filters. It’s like having a shield that guards you from harmful particles in the air, allowing you to breathe easy while you create.
Another key aspect of protective gear is eye protection. Safety goggles can be a painter’s best friend, especially when working with splatters or when you’re mixing paints vigorously. You wouldn’t want a rogue drop of paint ruining your vision or causing discomfort, would you? Goggles can provide that extra layer of safety, ensuring that your eyes are shielded from any unexpected surprises.
Lastly, don’t forget about protective clothing. An old shirt or apron can save your favorite outfit from becoming a canvas itself. It’s best to wear something that you don’t mind getting a little messy. Think of it as an artist’s uniform—something that signifies your dedication to the craft while also keeping your clothes paint-free.
In summary, while the thrill of painting can be exhilarating, taking a few moments to gear up properly can ensure that your experience remains enjoyable and safe. So, before you plunge into your next creative endeavor, remember to don your gloves, mask, goggles, and protective clothing. After all, a true artist knows that safety and creativity can go hand in hand!
Here are some common questions about protective gear for DIY canvas painting:
- Do I really need to wear gloves? Yes, gloves protect your skin from paint and chemicals, especially during long painting sessions.
- What type of mask should I use? A dust mask is fine for light work, but for spray paints or strong fumes, a respirator is recommended.
- Can I use regular glasses instead of goggles? Regular glasses don’t provide the same level of protection as safety goggles, which are designed to shield your eyes from splashes and debris.
- Is it safe to paint indoors? If you’re using materials with strong fumes, ensure proper ventilation and wear a mask.
Setting Up Your Workspace
When it comes to unleashing your creativity, the first step is to set up a workspace that inspires you. Think of your workspace as your personal canvas where ideas come to life. A well-organized and comfortable area can make a world of difference, transforming the mundane task of painting into an exciting adventure. So, let’s dive into how to create that perfect environment!
First, choose a location that is well-lit and has enough space for your materials and movements. Natural light is ideal because it helps you see the true colors of your paints, but if that’s not possible, a bright lamp will do just fine. Make sure your workspace is free from distractions—this means turning off the TV and keeping your phone in another room if you can. You want to be in the zone, right?
Next, consider the surface you’ll be working on. A sturdy table or easel is essential to hold your canvas securely. You don’t want your masterpiece wobbling or sliding around while you’re trying to create! If you’re using a table, protect it with a drop cloth or old newspapers to catch any spills or splatters. Trust me, your table will thank you later!
Now, let’s talk about organization. Having your materials at hand will streamline your painting process. Arrange your paints, brushes, and tools in a way that makes sense to you. For instance, you could group your paints by color or type, and keep your brushes in a container where they’re easy to grab. This not only saves time but also keeps your creative flow uninterrupted. Here’s a quick overview of what you might want to have on your table:
| Material | Purpose |
|---|---|
| Acrylic Paints | Fast-drying and versatile for various techniques |
| Brushes | Different sizes for detailed work and broad strokes |
| Palette | Mix colors and create new shades |
| Water Container | Clean brushes and dilute paints |
| Drop Cloth | Protect surfaces from paint spills |
Lastly, don’t forget to include a few personal touches in your workspace. Maybe hang some of your favorite artwork on the wall for inspiration or play some of your favorite music in the background. This is your creative sanctuary, so make it a place where you feel comfortable and motivated to create!
So there you have it! Setting up your workspace is all about creating an environment that fosters creativity. With the right lighting, organization, and personal touches, you’ll be ready to dive headfirst into your DIY canvas painting adventure!
Techniques for Painting
When it comes to painting, the techniques you choose can truly transform your artwork from ordinary to extraordinary. Just like a chef has a variety of cooking methods at their disposal, a painter has a toolbox filled with techniques that can add depth, emotion, and richness to their canvas. Whether you're a seasoned artist or a curious beginner, understanding these techniques can elevate your DIY canvas painting experience.
One of the most popular techniques is layering colors. This method involves applying multiple layers of paint to create a sense of depth and dimension in your artwork. Imagine building a cake—each layer adds flavor and complexity, making the final product much more delightful. In painting, this means starting with a base color and gradually adding lighter or darker shades to create shadows and highlights. This technique can be particularly effective in landscapes or portraits, where light plays a significant role in how we perceive objects.
Another technique that can bring your painting to life is creating texture. Just as a textured fabric can add interest to an outfit, texture in art can draw the viewer in and create a tactile quality. You can achieve texture in various ways, such as using palette knives, sponges, or even household items like bubble wrap. For instance, applying thick paint with a palette knife can create bold, raised areas on your canvas. Alternatively, using a sponge can give you a soft, blended look, perfect for backgrounds or skies.
To help you visualize some of these techniques, here’s a quick comparison of different painting methods:
| Technique | Description | Best For |
|---|---|---|
| Layering Colors | Building up layers of paint to create depth. | Landscapes, portraits |
| Creating Texture | Using tools to add physical texture to the canvas. | Abstract art, dynamic backgrounds |
| Blending | Smoothing colors together for a seamless transition. | Skies, skin tones |
Finally, don't underestimate the power of blending. This technique involves smoothing colors together to create a seamless look, much like how a good song flows from one note to another. Blending is especially useful when painting skies or skin tones, where harsh lines can detract from the realism of your artwork. A good brush or even your fingers can be used for blending, allowing you to create soft transitions that make your painting feel cohesive.
In summary, mastering these painting techniques—layering, creating texture, and blending—can significantly enhance your DIY canvas painting. Each method offers unique possibilities for expression and creativity, so don’t hesitate to experiment and find what resonates with you. Remember, art is a personal journey, and the more you explore these techniques, the more your unique style will shine through!
- What type of paint is best for beginners? Acrylic paints are often recommended for beginners due to their versatility, quick drying time, and ease of use.
- Can I use regular brushes for painting on canvas? While regular brushes can work, investing in good quality artist brushes will yield better results and make the painting process more enjoyable.
- How do I know when my painting is finished? Trust your instincts! If you feel that your painting conveys what you intended and you enjoy looking at it, it’s likely finished.
Layering Colors
Layering colors is one of the most exciting techniques in DIY canvas painting, and it’s like building a delicious multi-layer cake—each layer adds flavor and complexity to the overall masterpiece. When you layer colors, you create depth and dimension that can transform a flat canvas into a vibrant piece of art that truly pops. But how do you achieve this magical effect? It’s simpler than you might think!
First, start with a base layer. This can be a solid color or a light wash that sets the tone for your painting. Think of it as the foundation of your artwork. Once this layer is dry, you can begin to add additional colors. Here’s where the fun begins! Use a variety of brushes to apply your colors, ranging from broad strokes for larger areas to finer brushes for detailed work. The key is to allow each layer to dry completely before adding the next one. This prevents the colors from muddying together and helps maintain their vibrancy.
When selecting your colors, consider using a color wheel to help you choose complementary shades that will enhance each other. For example, if you start with a warm yellow base, layering with cool blues and greens can create a stunning contrast. Remember, layering isn't just about adding more color; it's about creating a harmonious balance. You can also experiment with transparency by mixing your paint with a medium. This allows the underlying colors to show through, creating a beautiful visual effect.
Here’s a quick breakdown of the layering process:
- Start with a base layer: Choose a light color that sets the mood.
- Build up layers: Apply darker or contrasting colors on top, allowing each to dry.
- Experiment with techniques: Use dry brushing, glazing, or even sponging to add texture and interest.
Moreover, don't hesitate to play with opacity. Some layers can be more transparent than others, allowing the colors beneath to shine through. This technique can add a sense of luminosity to your painting. For instance, if you want to create a sunset, you might start with a bright orange base and then layer translucent purples and pinks to mimic the sky's natural glow.
Lastly, trust your instincts! Art is subjective, and what works for one person may not work for another. Don’t be afraid to experiment and make mistakes; they often lead to the most beautiful discoveries. So grab your brushes, unleash your creativity, and let the layers unfold!
Q: How long should I wait between layers?
A: It’s best to wait until each layer is completely dry, which can take anywhere from 15 minutes to a few hours depending on the type of paint and thickness of the layer.
Q: Can I use different types of paint for layering?
A: Yes, you can mix acrylics, oils, and watercolors, but be mindful of their drying times and properties. Acrylics dry fast, while oils take longer, which may affect your layering process.
Q: What if I don’t like how a layer looks?
A: Don’t panic! You can always paint over it once it’s dry. Just remember to use a lighter color if you're trying to cover a darker one.
Creating Texture
Texture is the secret ingredient that can transform your canvas painting from flat and lifeless to vibrant and captivating. Imagine running your fingers across a piece of art and feeling the hills and valleys that add depth and intrigue. Creating texture is not just about aesthetics; it's about inviting your audience to interact with your work on a sensory level. There are various techniques you can use to achieve texture, each with its own unique effect. Let’s dive into some popular methods that can elevate your DIY canvas painting.
One of the simplest ways to create texture is through the use of palette knives. These tools allow you to spread paint in thick layers, giving your artwork a three-dimensional feel. You can scrape, swipe, or dab paint onto the canvas, creating peaks and valleys that catch the light beautifully. This technique is especially effective with acrylic paints, which dry quickly and hold their shape well.
Another technique involves the use of sponges or rags. By dabbing these materials into your paint and then onto the canvas, you can create a soft, mottled texture that adds visual interest. This method works particularly well for backgrounds or for creating natural elements like foliage or clouds. The randomness of the sponge technique can evoke a sense of spontaneity and energy in your work.
Mixed media is another exciting avenue for creating texture. By incorporating materials such as sand, fabric, or even paper into your painting, you can build layers that add depth and complexity. For example, using sand mixed with paint can create a gritty surface that mimics the feel of a beach or desert. Experimenting with different materials can yield surprising results and make your artwork truly one-of-a-kind.
Don’t forget about the impact of brush techniques on texture. Using a dry brush technique, where you apply paint with a minimal amount of paint on a dry brush, can create a scratchy, textured finish. This can be particularly effective for landscapes or abstract pieces where you want to evoke a sense of movement or chaos.
To give you a clearer picture of how these techniques can be combined, here’s a quick overview of some popular texture-creating methods:
| Technique | Description | Best For |
|---|---|---|
| Palette Knife | Spreading thick paint for a three-dimensional effect. | Abstracts, Landscapes |
| Sponge Dabbing | Dabbing paint with a sponge for a mottled look. | Backgrounds, Natural Elements |
| Mixed Media | Incorporating materials like sand or fabric into the paint. | Unique Textures, Collage Art |
| Dry Brush | Using a dry brush with minimal paint for a scratchy finish. | Landscapes, Abstracts |
As you experiment with these techniques, remember that the beauty of art lies in its imperfections. Don’t be afraid to make mistakes or try something new. Texture can be a powerful way to express your feelings and ideas, so let your creativity flow. Once you have mastered these techniques, your canvas will not only be a feast for the eyes but also a tactile experience that invites viewers to engage with your work on a deeper level.
- What materials do I need to create texture in my painting? You can use palette knives, sponges, brushes, and mixed media materials like sand or fabric.
- Can I create texture with watercolors? Yes, you can use techniques like salt application or layering to create texture in watercolor paintings.
- Is it necessary to use protective gear when creating texture? While it’s not always necessary, wearing gloves and a mask can protect you from paint fumes and mess.
Finishing Touches
Once you've poured your heart and soul into creating a stunning canvas painting, it's time to add those all-important that will elevate your artwork from good to breathtaking. Think of this stage as the cherry on top of a delicious sundae; it’s the detail that makes everything pop and draws the eye. In this section, we’ll explore how to properly varnish your painting, select the perfect frame, and find the best way to display your masterpiece in your home.
First up, let's talk about varnishing. This step is crucial, not just for aesthetics but also for protection. Varnish acts as a shield against dust, UV rays, and moisture, ensuring that your artwork remains vibrant for years to come. There are generally two types of varnishes you can choose from: gloss and matte. Gloss varnish enhances colors and adds a shiny finish, while matte varnish gives a more subdued, elegant look. When applying varnish, make sure to work in a well-ventilated area and use a soft brush for an even coat. Allow it to dry completely before handling your canvas again.
Now, onto framing. Choosing the right frame can truly transform your DIY canvas painting. A well-chosen frame not only complements your artwork but also ties it into the overall decor of your space. Here are some options to consider:
- Wooden Frames: These add a natural, rustic feel and can be stained or painted to match your decor.
- Metal Frames: Perfect for a modern aesthetic, these frames offer a sleek look and are available in various finishes.
- Floating Frames: These give the illusion that your artwork is floating within the frame, adding a contemporary twist.
When selecting a frame, consider the colors and style of your painting. You want the frame to enhance, not overpower, your artwork. Additionally, think about the thickness and material of the frame; a heavier frame can lend gravity to a bold piece, while a lighter frame might suit a delicate painting better.
Finally, let’s discuss displaying your artwork. The way you showcase your painting can make a significant impact on how it is perceived. Consider the following tips for displaying your canvas:
- Lighting: Good lighting can enhance the colors and details of your painting. Natural light works wonders, but if that’s not an option, consider using spotlights or picture lights.
- Placement: Hang your artwork at eye level for maximum impact. If you're grouping multiple pieces, maintain a consistent spacing for a cohesive look.
- Complementary Decor: Surround your painting with decor that complements its colors and style, creating a harmonious atmosphere in the room.
In summary, the finishing touches of varnishing, framing, and displaying your DIY canvas painting are what breathe life into your artwork. These steps not only protect your creation but also enhance its beauty and ensure it becomes a cherished part of your home decor. So, take your time with these details, and watch your painting transform into a stunning focal point in your space!
Q1: How long should I wait before varnishing my painting?
A1: It's best to wait at least two weeks after painting to allow the paint to fully cure before applying varnish.
Q2: Can I use any type of frame for my canvas painting?
A2: While you can technically use any frame, it's recommended to choose one that complements the style and colors of your artwork for the best visual impact.
Q3: What if my painting has texture? Will varnish affect it?
A3: Varnish can enhance the texture of your painting, but it's important to apply it carefully to avoid filling in the texture. Use a soft brush and apply in thin layers.
Varnishing Your Painting
Once you've poured your heart and soul into creating a stunning canvas painting, the last thing you want is for it to lose its vibrancy or become damaged over time. This is where varnishing comes into play! Varnishing not only protects your artwork from dust, dirt, and UV rays but also enhances the colors, giving your masterpiece that extra pop. Think of varnish as a magical shield that preserves your creative expression for years to come.
There are several types of varnishes available, and choosing the right one can make a significant difference in the final look of your painting. Generally, varnishes can be categorized into three main types: glossy, matte, and satin. Each type has its unique characteristics:
| Varnish Type | Finish | Best For |
|---|---|---|
| Glossy | Shiny and reflective | Bright colors and bold designs |
| Matte | Non-reflective and soft | Subtle colors and textured artworks |
| Satin | Between glossy and matte | General use, balancing shine and softness |
Before you start varnishing, make sure your painting is completely dry. Applying varnish to a wet painting can lead to unwanted smudges and streaks, ruining all your hard work. Once you’re ready, here’s a quick guide on how to apply varnish:
- Choose the Right Varnish: Decide whether you want a glossy, matte, or satin finish based on your painting style.
- Prepare Your Workspace: Work in a well-ventilated area to avoid inhaling fumes. Lay down a drop cloth to catch any drips.
- Use a Clean Brush: A clean, soft brush will help you apply the varnish smoothly without leaving brush strokes.
- Apply Evenly: Start from one end of the canvas and work your way across, applying a thin, even layer of varnish.
- Let it Dry: Allow the varnish to dry completely before applying a second coat if desired. Most varnishes will dry to the touch within a few hours, but it's best to wait at least 24 hours before handling.
Remember, varnishing is not just about protection; it’s also about enhancing the beauty of your artwork. A well-varnished painting can transform a simple canvas into a striking focal point in your home decor. So, take your time and enjoy the process! After all, your painting deserves that final touch of magic.
Q: How long should I wait before varnishing my painting?
A: It’s best to wait at least 24 hours after the paint has dried completely. For oil paintings, wait a minimum of six months to ensure all layers are fully cured.
Q: Can I use spray varnish instead of liquid varnish?
A: Yes! Spray varnish can provide an even coat and is easier to apply for larger pieces. Just ensure you are in a well-ventilated area.
Q: Is it necessary to varnish my painting?
A: While it’s not strictly necessary, varnishing provides essential protection and enhances the visual appeal of your artwork, making it a worthwhile step.
Framing Options
Choosing the right frame for your DIY canvas painting can be a game changer in how your artwork is perceived. A well-selected frame not only enhances the visual appeal of your piece but also complements your home decor style. Think of framing as the finishing touch that ties everything together, much like the perfect accessory to an outfit. So, what are your options? Let’s dive into some popular framing choices!
First off, you have the classic wooden frames. These frames come in various finishes, from natural wood to painted options, allowing you to match them with your interior design. Wooden frames can exude warmth and elegance, making them a timeless choice. On the other hand, if you're leaning towards a more modern aesthetic, consider metal frames. They offer a sleek, contemporary look and are often more durable than their wooden counterparts. Imagine your vibrant canvas popping against a minimalist metal frame—it’s a stunning contrast!
Another option to consider is the floating frame. This style gives the illusion that your artwork is suspended within the frame, creating a unique visual effect that draws the eye. It’s perfect for those who want to showcase their canvas without overwhelming it with a bulky frame. For a more rustic or eclectic vibe, you might explore shadow box frames. These frames allow for depth, making them ideal for mixed media artworks or pieces that incorporate three-dimensional elements.
When deciding on a frame, you should also take into account the color and size of your artwork. A frame that is too large can overshadow your painting, while a frame that is too small can make it feel cramped. Additionally, think about the matting. Adding a mat can create a buffer between the artwork and the frame, enhancing the overall presentation. Here’s a quick table summarizing the different framing options:
| Frame Type | Style | Best For |
|---|---|---|
| Wooden Frame | Classic, Warm | Traditional Artworks |
| Metal Frame | Modern, Sleek | Contemporary Pieces |
| Floating Frame | Unique, Minimalist | Canvas Art |
| Shadow Box Frame | Eclectic, Depth | Mixed Media Art |
Ultimately, the frame you choose should reflect your personal style and the mood you wish to convey with your artwork. Don’t hesitate to experiment with different options until you find the perfect match. After all, framing is not just about protection; it’s about showcasing your creativity in the best light possible!
Q: How do I measure my canvas for framing?
A: Measure the height and width of your canvas, and consider adding an extra inch or two for the frame’s overlap. This ensures your artwork fits snugly without being damaged.
Q: Should I choose a frame before or after painting?
A: It’s often best to decide on the frame after completing your painting. This way, you can select a frame that complements your finished piece.
Q: Can I frame my canvas without a stretcher?
A: Yes, you can use a flat frame or a shadow box frame to display a canvas without a stretcher, but make sure the canvas is properly secured.
Frequently Asked Questions
- What type of canvas should I choose for my painting?
Choosing the right canvas depends on the type of paint you plan to use. For acrylics, a pre-stretched cotton canvas is ideal, as it can handle the moisture. If you're using oils, a primed canvas is essential to prevent the oils from seeping through. For watercolors, consider a watercolor paper instead, as it absorbs water better.
- What materials do I need to get started with a DIY canvas painting?
To kick off your DIY canvas painting journey, you'll need a few essential supplies: a canvas, paints (acrylic, oil, or watercolor), brushes of various sizes, a palette for mixing colors, a cup of water for rinsing brushes, and some paper towels. Don't forget protective gear like gloves and a mask to keep yourself safe while painting!
- How do I create texture in my painting?
Creating texture can really make your artwork pop! You can use various tools like palette knives, sponges, or even your fingers to add dimension. Techniques such as impasto, where you apply thick layers of paint, or incorporating materials like sand or fabric into your paint can also enhance the texture of your canvas.
- Is varnishing necessary for my painting?
Yes, varnishing is an important step! It not only protects your artwork from dust and UV rays but also enhances the colors and gives it a finished look. Choose a varnish that suits your paint type, and remember to apply it in thin, even coats for the best results.
- What framing options should I consider for my canvas painting?
When it comes to framing, you have a variety of options! A simple wooden frame can add a rustic touch, while a sleek metal frame offers a modern vibe. Floating frames are also popular, as they create a stunning visual effect. Just make sure the frame complements your painting and the overall decor of your space!


