
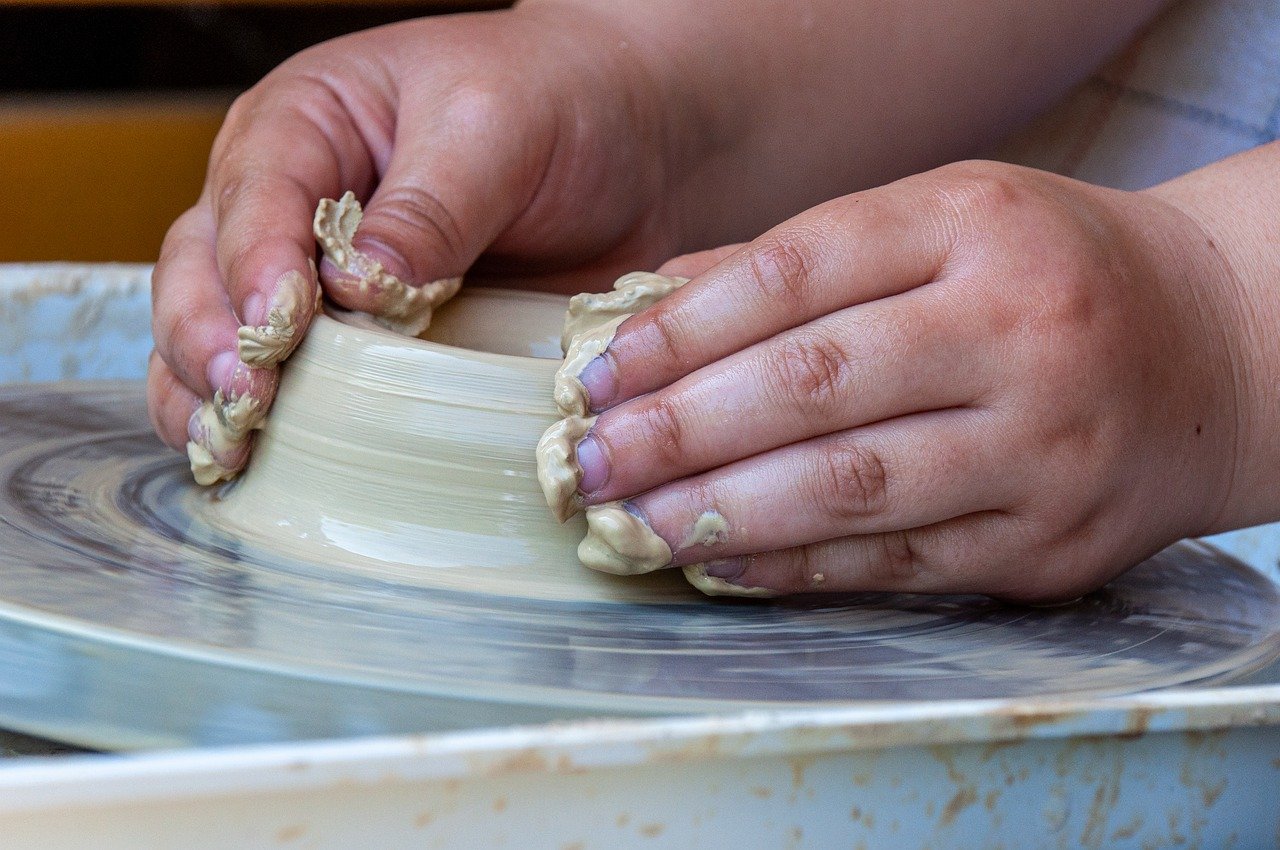
Creating Magic with Glazes: A Pottery Glazing Guide
Welcome to the enchanting world of pottery glazing, where creativity meets science! Glazing is not just a finishing touch; it's a transformative process that can elevate your ceramic pieces from ordinary to extraordinary. Whether you’re a seasoned potter or a curious beginner, understanding glazes is essential to unlock the full potential of your creations. This guide will take you on a journey through the various techniques, types of glazes, and valuable tips that can help you achieve stunning results. So, grab your tools and let's dive into the magic of glazes!
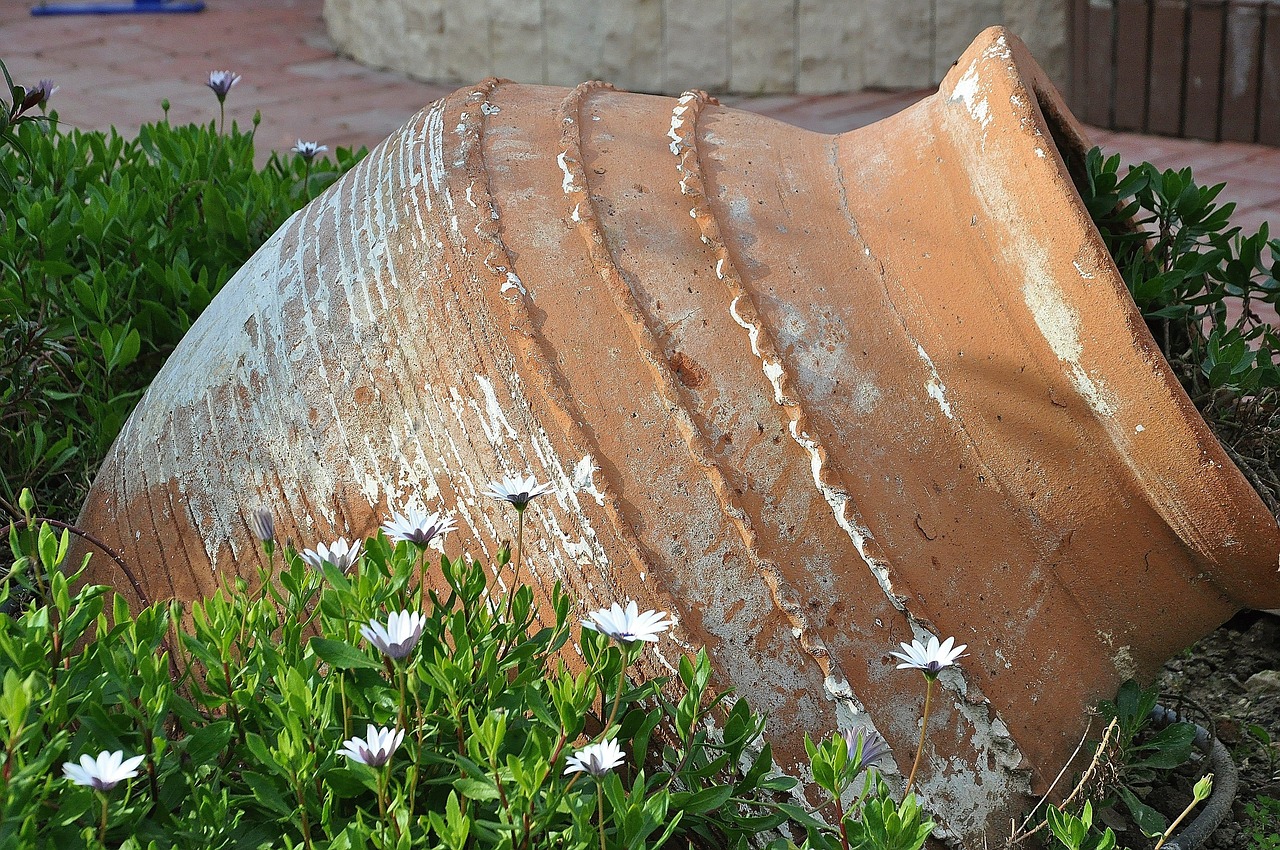
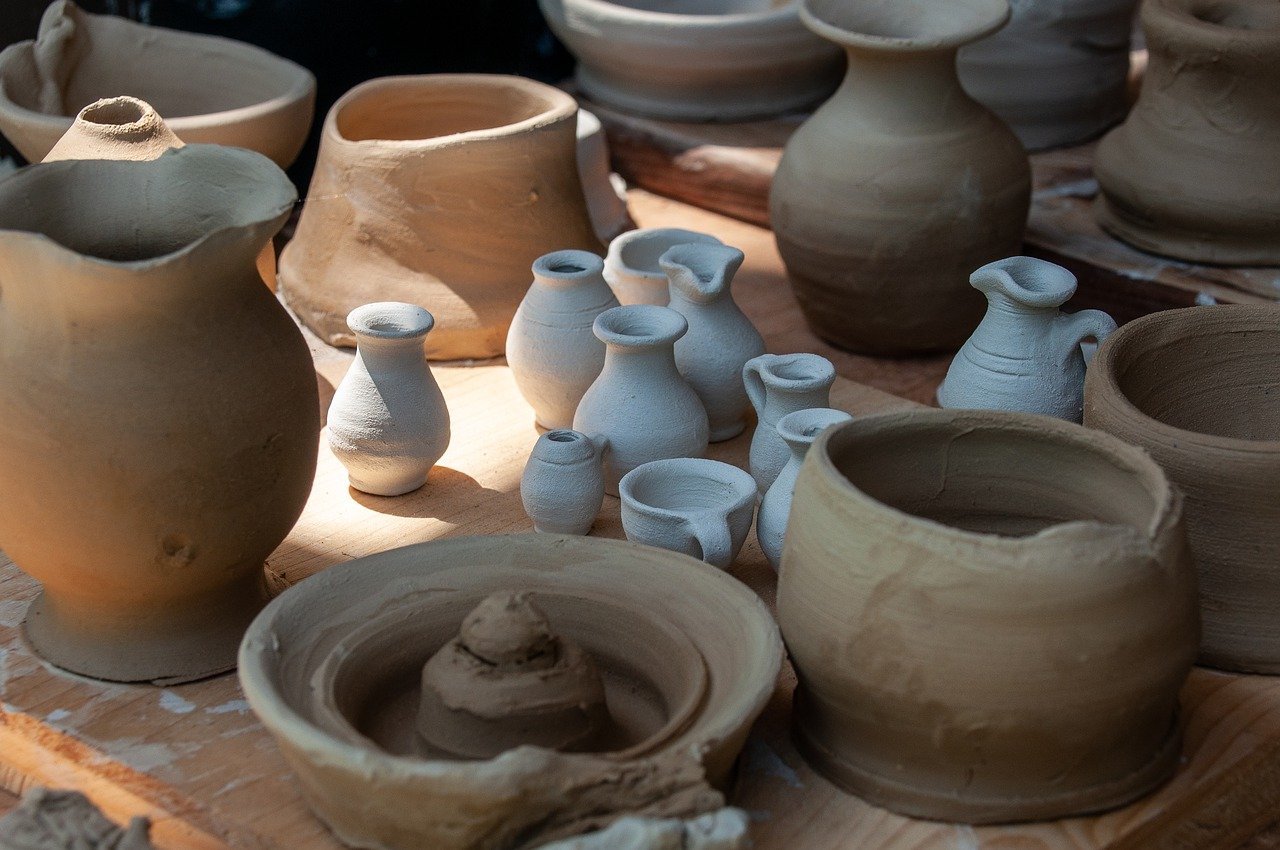
Glazes are a vital component of pottery, providing both aesthetic appeal and functional properties. At its core, a glaze is a glassy coating that is fused onto the surface of ceramics through the process of firing. This glassy layer not only enhances the visual attractiveness of your pottery but also serves practical purposes, such as making the surface waterproof and ensuring durability. The science behind glazes involves a delicate balance of materials, including silica, alumina, and fluxes, which together create a wide variety of finishes and textures. Understanding how these components interact will empower you to experiment and innovate in your glazing practices.
There are numerous glaze types available, each with unique characteristics that can dramatically alter the appearance of your pottery. Here’s a quick overview of some of the main categories:
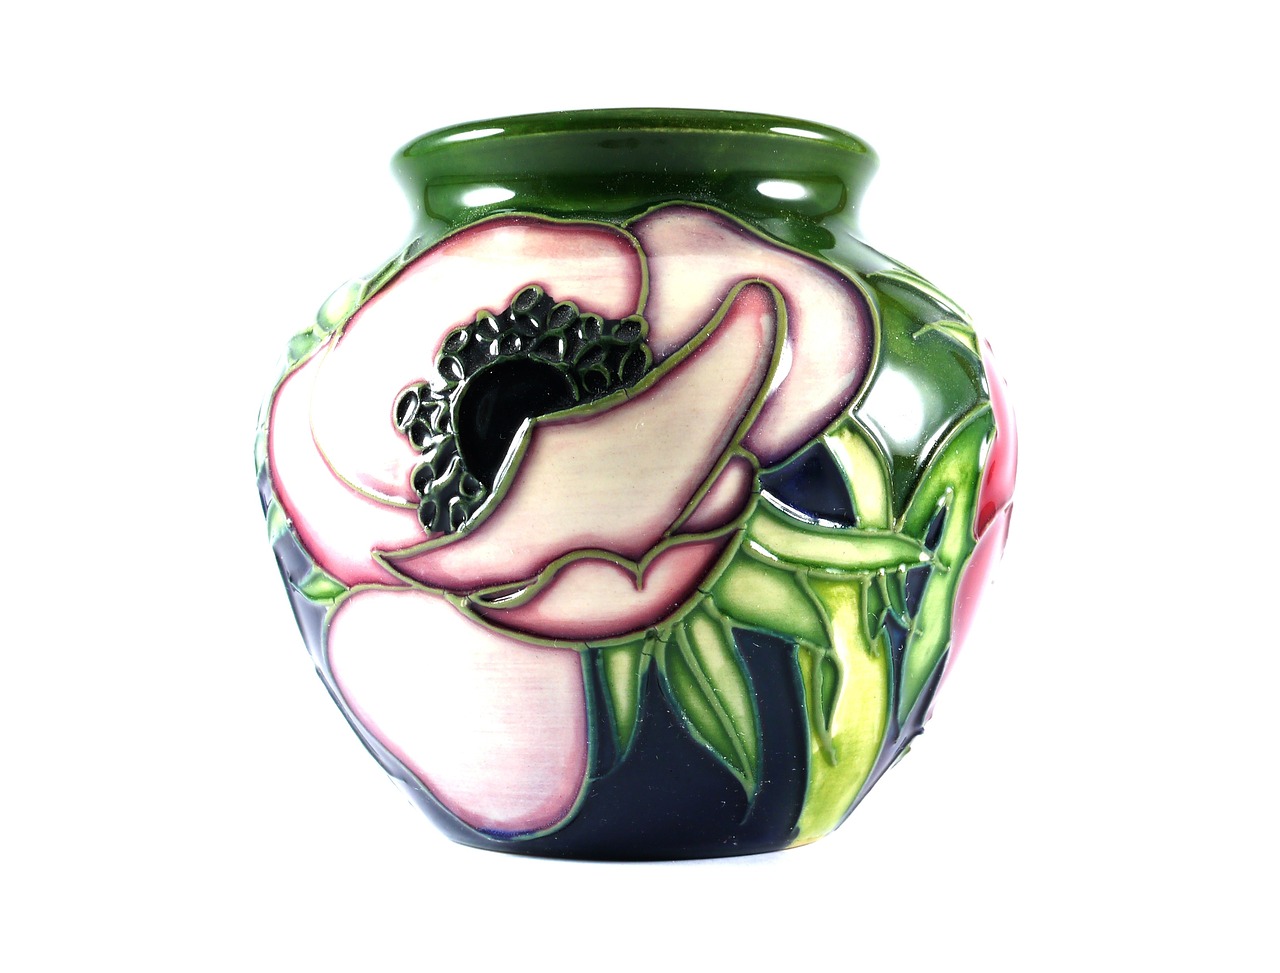
- Glossy Glazes: These glazes create a shiny finish that enhances colors and patterns.
- Matte Glazes: Offering a soft, non-reflective finish, these glazes add depth and warmth to your pieces.
- Transparent Glazes: These allow the underlying clay or decoration to show through, adding complexity to your design.
- Opaque Glazes: These completely cover the underlying surface, providing solid color and texture.
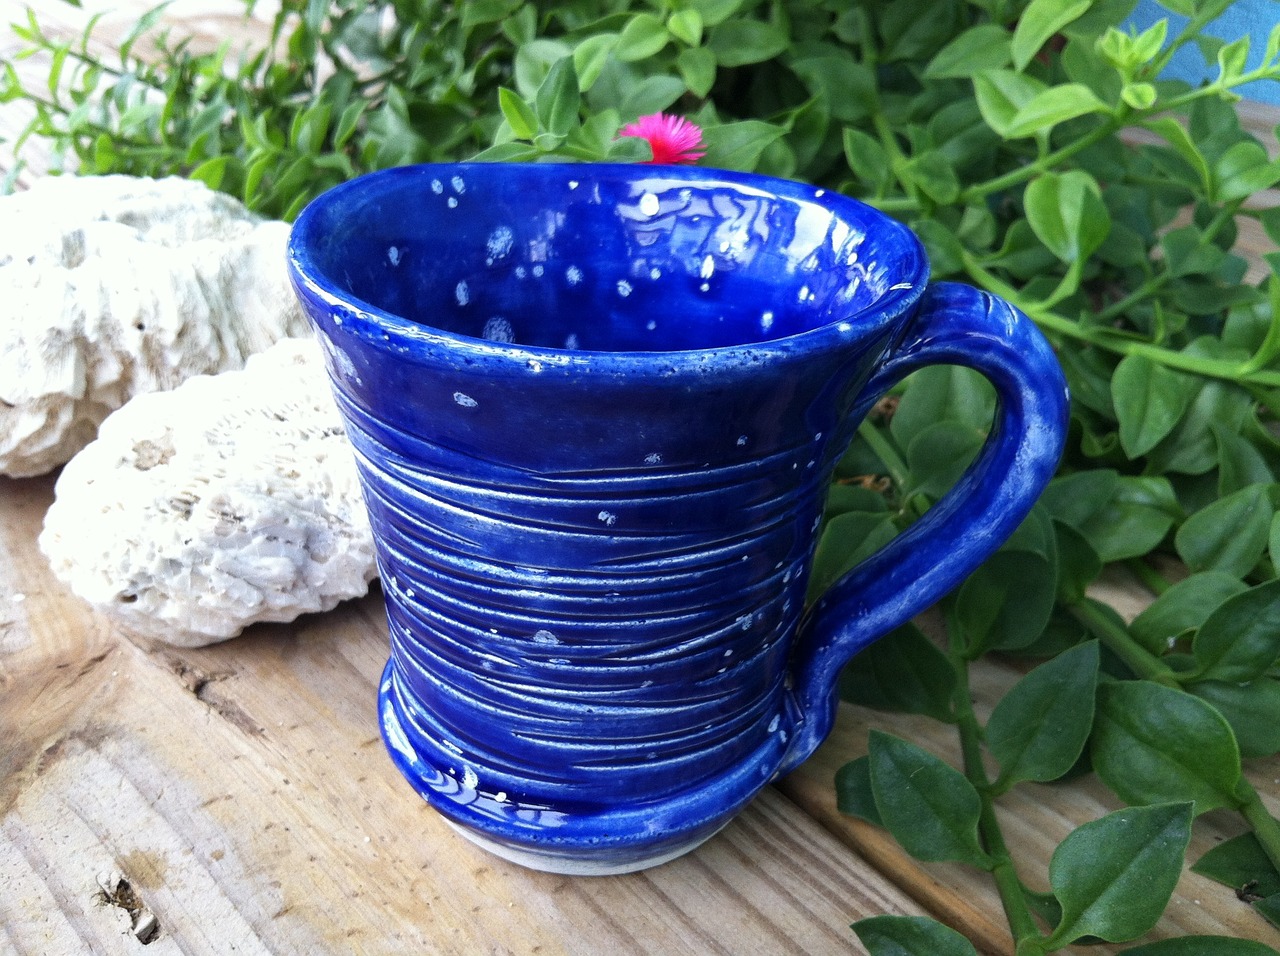
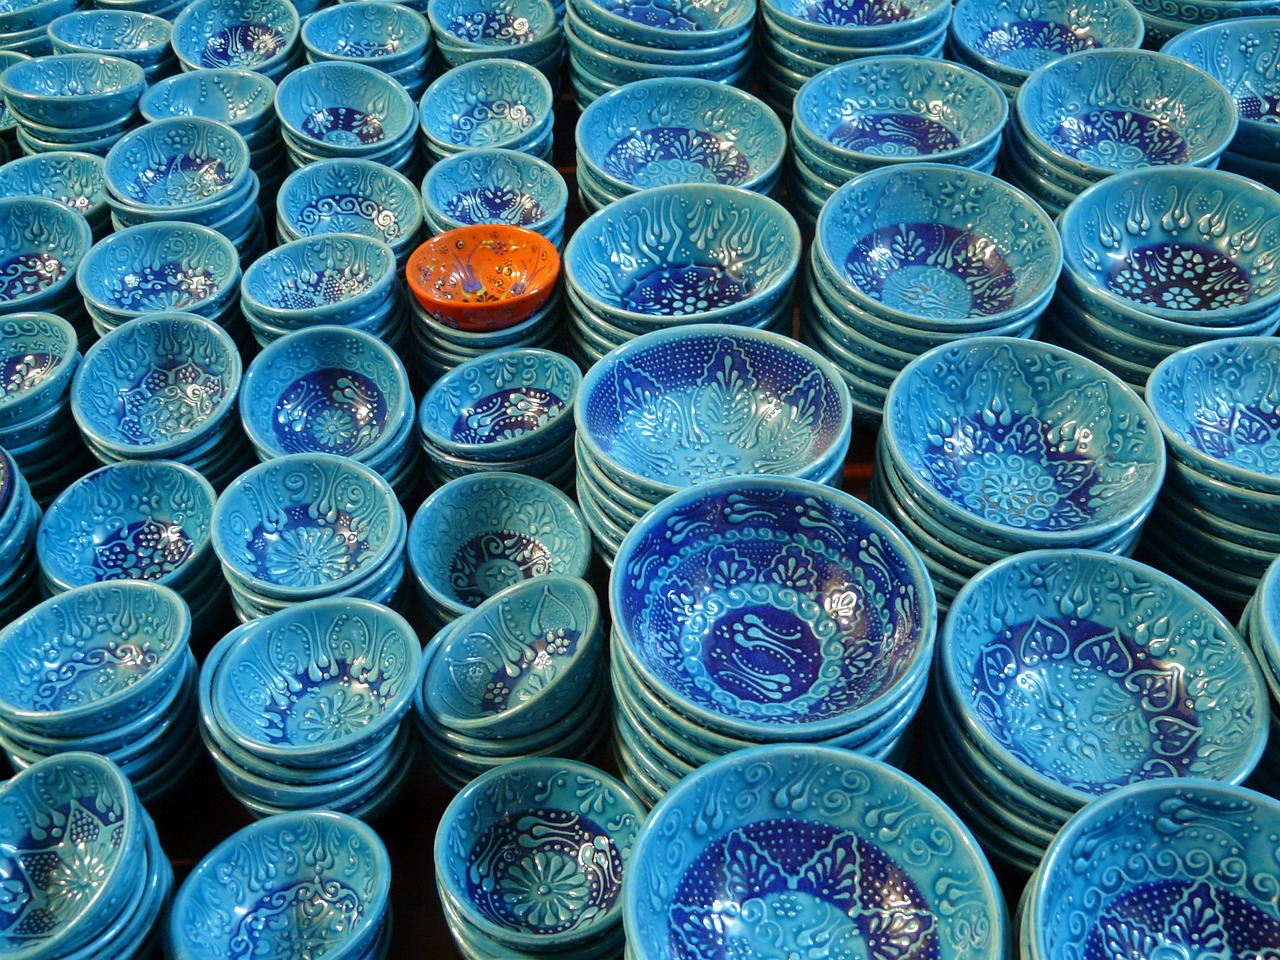
Glossy glazes are a favorite among potters for their ability to create a vibrant, shiny finish that really makes colors pop. Imagine your pottery glimmering under the light, each hue dancing in a beautiful display! Achieving a flawless glossy surface requires attention to detail and technique. The application process is crucial, as improper techniques can lead to unsightly defects. But fear not! With practice, you can master this art.
Proper application is essential for achieving that perfect glossy finish. Here are some popular techniques you can try:
- Dipping: Immerse your piece into a bucket of glaze for an even coat.
- Brushing: Use a brush to apply glaze for more control over coverage.
- Spraying: A spray gun can create an even layer, especially for larger pieces.
Even experienced potters may encounter problems with glossy glazes. Common issues include:
- Running: This happens when the glaze is too fluid, causing it to drip down the piece.
- Uneven Surfaces: This can result from improper application or inconsistent thickness.
To correct these issues, ensure you’re following the recommended thickness guidelines and consider adjusting your application technique.
Matte glazes provide a soft, non-reflective finish that can add a unique depth and character to your pottery. They offer a tactile quality that glossy glazes simply can’t match. However, working with matte glazes comes with its own set of challenges. While they can create stunning effects, they may require more careful handling and firing techniques to achieve the desired results.
Understanding color theory is essential for creating visually appealing pottery. Just like a painter mixes colors on a canvas, potters can blend glazes to create unique shades and effects. The interaction of colors in glazes can lead to beautiful, harmonious combinations or, conversely, disastrous clashes. Learning how to select and mix colors will greatly enhance your artistic expression.
Mixing glazes can yield unique shades and effects that can set your work apart. Experimenting with different combinations can be a delightful adventure! Start by blending small amounts of glaze to see how they interact before applying them to larger pieces.
Testing is crucial when experimenting with glaze colors. It’s important to create test tiles to evaluate how your chosen combinations will look after firing. This step can save you from potential disappointments and help refine your glazing techniques.
Firing is a critical step in the glazing process that affects the final outcome of your pottery. The right firing technique can enhance the beauty of your glazes and ensure their durability. There are various firing methods, each with its own unique characteristics and results.
Electric kilns are popular among potters for their precision and ease of use. They allow for controlled firing schedules, which can be beneficial for achieving specific glaze effects. However, it’s important to understand their limitations and how to optimize your firing for the best results.
Gas kilns offer unique effects and are favored for certain glaze types. The reduction atmosphere created in gas kilns can lead to stunning color variations and textures, making them a favorite for adventurous potters. Understanding how to operate and optimize your gas kiln will open up a world of possibilities for your glazing journey.
Q: What is the best way to apply glaze?
A: The best method often depends on the piece and personal preference. Dipping, brushing, and spraying are all effective techniques. Experiment to find what works best for you!
Q: How do I fix a glaze that ran during firing?
A: Unfortunately, once fired, it can be difficult to fix a running glaze. However, you can try to avoid this by ensuring your glaze is applied at the correct thickness and by adjusting your firing schedule.
Q: Can I mix different brands of glaze?
A: Yes, but always test first! Different brands may have different compositions, which can lead to unexpected results.
Q: How do I store leftover glaze?
A: Store leftover glaze in a sealed container to prevent it from drying out. Make sure to label it with the name and any mixing information for future reference.
Understanding Glazes
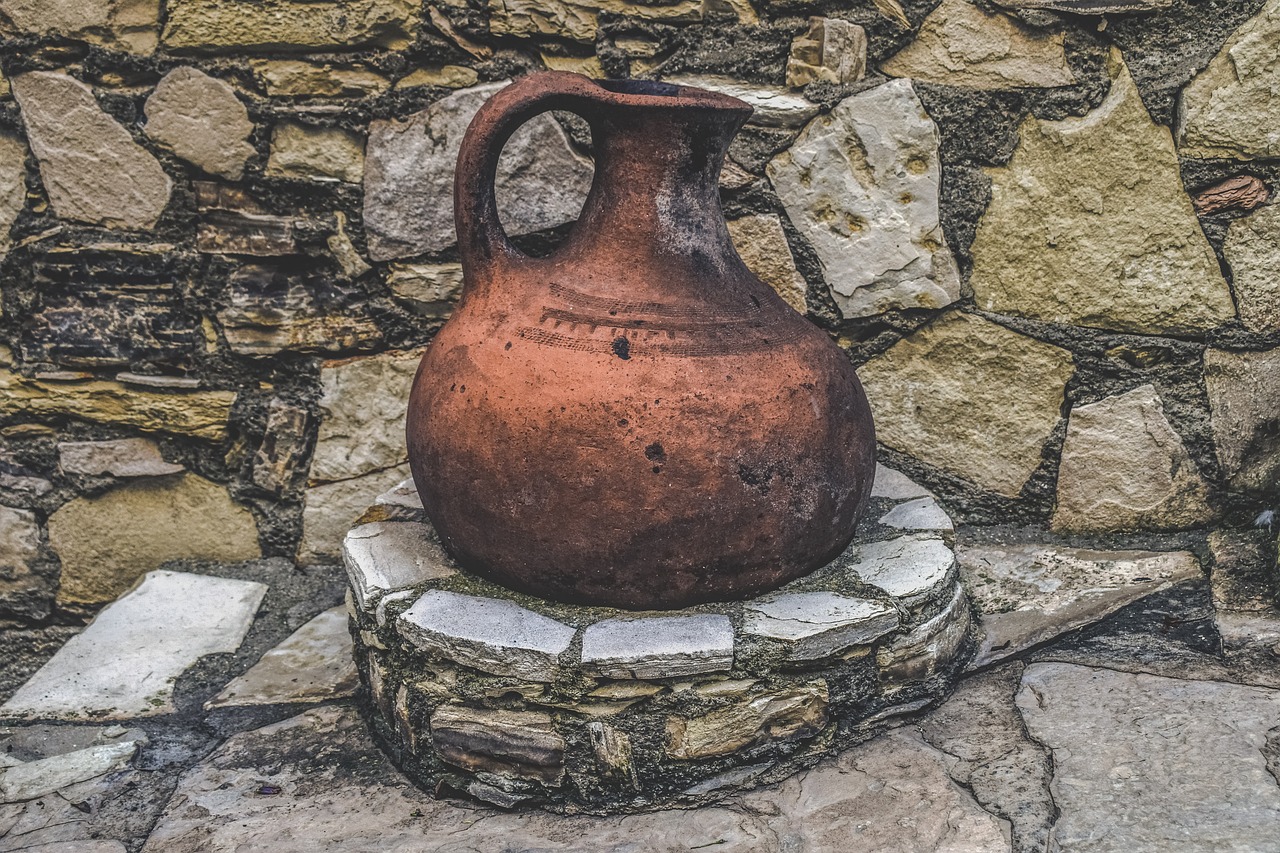
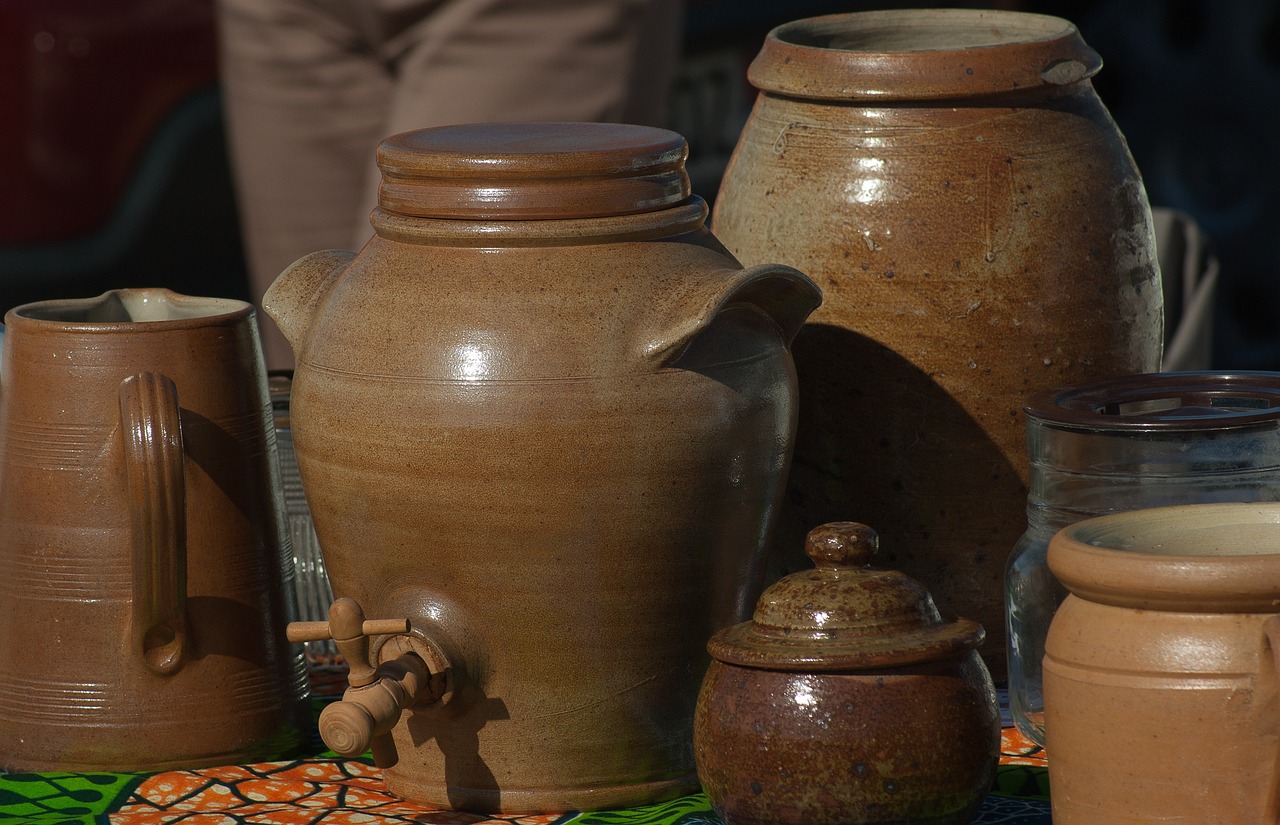
Glazes are not just a pretty face in the world of pottery; they are the magical layer that transforms a simple clay piece into a stunning work of art. Think of glazes as the icing on a cake—while the cake itself is delicious, it’s the icing that adds the flair and makes it visually irresistible. In pottery, glazes serve both aesthetic and functional purposes, enhancing the beauty of the ceramic while also providing a protective coating that makes it more durable and usable.
At their core, glazes are a mixture of silica, flux, and alumina, which, when fired in a kiln, melt and form a glassy surface. This transformation is a fascinating interplay of chemistry and artistry. The science behind glazes involves understanding how different ingredients interact at high temperatures, which can lead to an array of effects, colors, and finishes. For instance, the addition of certain metal oxides can change the color of the glaze, while variations in firing temperature can affect the texture and sheen.
When potters apply glazes, they are not just slapping on a color; they are engaging in a delicate dance of creativity and precision. The way a glaze is applied—whether through dipping, brushing, or spraying—can significantly impact the final look. Moreover, the firing process is equally crucial, as it determines how the glaze will react and ultimately set. This means that potters must have a solid grasp of both the materials they are using and the techniques involved in glazing.
To truly appreciate glazes, it’s essential to understand their various types and characteristics. Here are a few key categories:
- Glossy Glazes: These glazes produce a shiny finish that enhances colors and patterns, making them pop.
- Matte Glazes: Providing a soft, non-reflective finish, matte glazes can add depth and texture to pottery.
- Transparent Glazes: These allow the clay body or underglaze decoration to show through, creating a layered effect.
- Opaque Glazes: Offering full coverage, opaque glazes hide the clay body completely, allowing for bold colors and designs.
Each type of glaze has its unique charm and challenges, making the exploration of glazes a thrilling journey for any potter. As you delve deeper into the world of glazing, you’ll discover that mastering this art is about more than just technique; it’s about experimentation, patience, and a willingness to embrace the unexpected. Every piece you create is a new opportunity to learn and evolve as an artist, and the right glaze can elevate your work to new heights.
In conclusion, understanding glazes is fundamental for any potter looking to enhance their craft. By appreciating the science behind glazes, experimenting with different types, and honing your application techniques, you can create breathtaking ceramic pieces that not only showcase your skills but also tell a story through color and texture.
Types of Glazes
When it comes to pottery glazing, understanding the different is essential for any ceramic artist. Each type of glaze possesses its own unique characteristics, allowing potters to achieve a variety of finishes and effects. Choosing the right glaze can be the difference between a piece that simply looks good and one that truly captivates the viewer. In this section, we'll explore the main categories of glazes, including their uses and effects, to help you make informed decisions for your ceramic creations.
Glazes can generally be divided into three primary categories: glossy, matte, and transparent. Each of these types brings something different to the table. For instance, glossy glazes are known for their shiny, reflective surfaces that enhance colors and patterns, making them a popular choice for vibrant and eye-catching pieces. On the other hand, matte glazes offer a softer, non-reflective finish that can add depth and subtlety to your work, creating a more organic feel. Transparent glazes, as the name suggests, allow the underlying clay body or underglaze decoration to show through, providing a beautiful layering effect.
| Type of Glaze | Characteristics | Common Uses |
|---|---|---|
| Glossy | Shiny finish, enhances colors | Functional ware, decorative pieces |
| Matte | Soft, non-reflective finish | Artistic pieces, rustic pottery |
| Transparent | Clear, allows underlying colors to show | Layering effects, highlighting textures |
In addition to these primary types, there are also specialized glazes such as crystalline glazes, which create stunning, three-dimensional patterns, and raku glazes, known for their unique surfaces produced during the raku firing process. Each specialized glaze type can add a distinctive flair to your pottery, making it essential to experiment and discover what works best for your artistic vision.
As you delve deeper into the world of pottery glazing, remember that the application technique you choose can significantly impact the final appearance of your piece. Whether you opt for dipping, brushing, or spraying, the method can enhance or diminish the effects of the glaze. So, while exploring different types of glazes, don’t forget to consider how you’ll apply them. The right combination of glaze type and application technique can lead to truly magical results!
Glossy Glazes
are like the icing on the cake when it comes to pottery. They create a shiny finish that not only enhances the colors and patterns of your ceramic pieces but also adds a layer of protection. Imagine how a glossy glaze can transform a simple clay mug into a vibrant, eye-catching work of art! The way light reflects off a glossy surface can make colors pop and give your pottery a professional, polished look. But achieving that flawless glossy finish isn't as simple as it seems; it requires a bit of know-how and practice.
One of the most significant advantages of using glossy glazes is their ability to highlight details. Whether you’re working on intricate designs or bold patterns, glossy finishes can accentuate every curve and line. However, it's essential to understand that not all glossy glazes are created equal. Some may be more prone to running or pooling, while others might dry with a perfectly smooth surface. Therefore, knowing your glaze and how it behaves during the firing process is crucial to achieving the desired results.
When it comes to application techniques, there are several methods to consider. Each has its pros and cons, and the choice often depends on the specific project you're working on. Here are some common techniques:
- Dipping: This method involves immersing your pottery piece into a bucket of glaze. It's quick and ensures an even coating, but it requires careful control to avoid drips.
- Brushing: Brushing on glaze allows for more precision, especially for detailed work. However, it can lead to uneven thickness if not done carefully.
- Spraying: Spraying is excellent for larger pieces and can create a smooth finish. It requires specific equipment and practice to master.
Despite the many benefits, working with glossy glazes can present challenges. Common issues potters face include running glazes, where the glaze slides down the pottery during firing, creating unsightly drips. Another problem could be an uneven surface, which can result from improper application techniques. To combat these issues, potters should:
- Ensure even application by using the right technique for the piece.
- Experiment with glaze thickness to find the perfect balance.
- Test different firing temperatures, as this can significantly affect the final appearance.
In summary, glossy glazes are a fantastic way to elevate your pottery, providing both beauty and functionality. With the right techniques and a little practice, you can achieve stunning results that will leave your audience in awe. So, roll up your sleeves, grab your brushes, and get ready to create some magic!
Q: Can I mix different glossy glazes together?
A: Yes, mixing glossy glazes can result in unique effects, but it's essential to test combinations on a small scale first to see how they interact.
Q: How do I fix a running glaze?
A: To fix a running glaze, adjust your application technique, consider reducing the glaze thickness, or modify your firing temperature.
Q: Are glossy glazes food-safe?
A: Most glossy glazes are food-safe once properly fired, but always check the manufacturer's specifications to ensure safety.
Application Techniques
When it comes to applying glossy glazes, technique is everything! The way you apply glaze can dramatically influence the final appearance of your pottery. Whether you’re a seasoned potter or just starting, mastering these application techniques can help you achieve that stunning finish you’re aiming for. Let’s dive into the three primary methods: dipping, brushing, and spraying, each with its own set of advantages and considerations.
Dipping is one of the most popular techniques for applying glaze. It involves immersing your piece directly into a bucket of glaze, allowing for a uniform coating. This method is particularly effective for larger pieces, as it ensures an even layer without the brush strokes that can sometimes mar the surface. However, it's important to control the depth of the dip to avoid running or pooling, which can lead to unsightly drips once fired. A good rule of thumb is to submerge the piece for about 3-5 seconds, then gently shake off any excess glaze before setting it down to dry.
Brushing is another effective technique, especially for smaller items or intricate designs. With a brush, you have more control over where the glaze is applied, allowing for detailed work and creative patterns. However, this method can lead to uneven surfaces if not done carefully. To achieve a flawless finish, it’s crucial to use a soft brush and apply multiple thin layers rather than one thick coat. This helps prevent drips and ensures a smooth, even finish. Remember to let each layer dry before applying the next one to maintain clarity and vibrancy in your colors.
Spraying is a technique that has gained popularity due to its ability to create smooth, even coats with minimal texture. Using a spray gun, you can achieve a fine mist of glaze that covers your pottery evenly. This method is particularly useful for large pieces or when you want to achieve a specific effect, such as a gradient or a soft blend of colors. However, it does require some practice and the right equipment, including a spray booth to contain overspray. Always remember to wear a mask and work in a well-ventilated area to protect yourself from inhaling glaze particles.
Regardless of the technique you choose, the key to successful glazing lies in practice and experimentation. Don’t be afraid to try different methods and combinations to see what works best for your style. And remember, even the best potters encounter challenges along the way. Embrace the learning process, and you’ll find that each piece you create brings you closer to mastering the art of glazing!
- What is the best technique for beginners? Dipping is often recommended for beginners due to its simplicity and ability to achieve an even coat.
- Can I mix different glazing techniques? Absolutely! Many potters combine techniques for unique effects, such as brushing details on a dipped piece.
- How do I avoid drips when glazing? Ensure you apply thin layers and control the amount of glaze on your piece. Shake off excess glaze after dipping.
- What safety precautions should I take when spraying glaze? Always use a mask and work in a well-ventilated area to avoid inhaling glaze particles.

Common Issues
When it comes to glazing pottery, even the most seasoned potters can run into a few bumps along the way. Understanding these can save you time, frustration, and materials. One of the most prevalent problems is the issue of running glaze. This occurs when the glaze is too fluid and drips down the piece during firing, leading to unsightly streaks or even pooling at the bottom. To prevent this, ensure that you are using the right consistency for your glaze. A glaze that is too thin can cause running, while a glaze that is too thick may not adhere properly.
Another common issue is the appearance of uneven surfaces. This can happen for a variety of reasons, such as inconsistent application or firing temperature fluctuations. To achieve a smooth, even finish, it’s essential to apply the glaze uniformly. Techniques like brushing in one direction or using a spray gun can help you achieve that seamless look. Additionally, be mindful of your kiln’s temperature; an uneven firing can lead to variations in how the glaze reacts.
Sometimes, potters may also experience crawling, where the glaze pulls away from the clay body during firing, creating bare spots. This can be particularly frustrating, especially if you’ve invested time and effort into your piece. Crawling is often caused by dust or oil on the surface of the pottery before glazing. Always ensure your work is clean and dry before applying glaze. If crawling does occur, consider adjusting your glaze formulation or application method.
Lastly, let’s not forget about bubbles and pinholes, which can mar the surface of your finished piece. These imperfections often arise from trapped air or moisture in the glaze. To minimize this, you can use a sieve to strain your glaze before application, ensuring a smooth mixture. Furthermore, allowing your glaze to settle and degas before use can significantly reduce the likelihood of bubbles forming during firing.
In summary, while glazing can be a magical process, it’s crucial to be aware of these common issues. By understanding the causes and solutions, you can enhance your pottery-making experience and create pieces that not only look stunning but are also free from flaws.
- What causes glaze to run?
Glaze can run if it is too fluid or applied too thickly. Adjusting the consistency and application technique can help prevent this issue. - How can I prevent uneven glaze surfaces?
Ensure uniform application and monitor firing temperatures to minimize variations. - What is crawling in glaze?
Crawling occurs when the glaze pulls away from the clay body, often due to dust or oil on the surface. Keeping your work clean can help prevent this. - How do I avoid bubbles in my glaze?
Straining your glaze and allowing it to settle can reduce the chances of bubbles and pinholes.
Matte Glazes
Matte glazes are a fascinating choice for potters looking to create pieces with a soft, non-reflective finish. Unlike their glossy counterparts, matte glazes absorb light rather than reflect it, resulting in a more subtle and understated aesthetic. This unique characteristic can add depth and texture to your ceramic work, making it a preferred option for pieces that demand a more organic feel. Imagine a beautifully crafted bowl with a velvety surface that invites touch; that’s the magic of matte glazes!
One of the significant advantages of using matte glazes is their ability to showcase intricate surface textures. When applied to textured pottery, matte glazes can highlight the details in ways that glossy glazes may obscure. This quality makes them particularly popular for sculptural pieces or items that feature elaborate carvings. However, achieving the perfect matte finish isn't without its challenges. Potters often face issues such as uneven surfaces or a lack of color vibrancy, which can be frustrating.
To navigate these challenges effectively, it's essential to understand the composition and application of matte glazes. Most matte glazes contain a higher proportion of silica and other materials that contribute to their unique finish. When applied correctly, they can provide a rich, deep color that enhances the overall design of the piece. Here are some tips to consider:
- Surface Preparation: Ensure your pottery surface is clean and free of dust or oils before applying the glaze. This preparation helps the glaze adhere better and results in a more even finish.
- Application Technique: Dipping or spraying is often recommended for matte glazes, as these methods can provide a more uniform coat compared to brushing.
- Layering: Sometimes, applying multiple thin layers of matte glaze can enhance the depth of color and texture, creating a more dynamic finish.
Despite their challenges, matte glazes offer a unique opportunity to explore creativity in pottery. They can be combined with various underglazes or stains to achieve striking effects. For instance, layering a matte glaze over a colored underglaze can produce a beautiful contrast, allowing the underlying color to peek through just enough to create visual interest. This technique can transform a simple piece into a stunning work of art.
In summary, matte glazes are an excellent choice for potters who wish to create pieces that embody a soft elegance. They offer the potential for depth, texture, and a unique aesthetic that can elevate any ceramic work. While they may require a bit more finesse and experimentation to master, the results are often worth the effort. So, grab your tools, experiment with different techniques, and let your creativity flow with the enchanting world of matte glazes!
Here are some common questions about matte glazes that might help you on your pottery journey:
- Can I use matte glazes on functional ware? Yes, matte glazes can be used on functional pottery, but be sure to check if they are food-safe and suitable for the intended use.
- How do I fix an uneven matte glaze application? If you notice an uneven finish, you can sand down the surface gently and reapply the glaze to achieve a more uniform look.
- What are some popular brands of matte glazes? Some well-known brands include Amaco, Laguna, and Spectrum. Each offers a variety of colors and finishes to explore.
Color Theory in Glazing
Understanding color theory is essential for creating visually appealing pottery. Just like a painter selects colors to evoke emotions or tell a story, potters must consider how different glazes interact with one another. The way colors blend and contrast can dramatically alter the final appearance of your ceramic pieces. Imagine standing in front of a beautiful sunset; the way the colors transition and complement each other creates a breathtaking scene. Similarly, mastering color combinations in glazing can elevate your pottery from ordinary to extraordinary.
When it comes to glazing, colors can be categorized into three main types: primary, secondary, and tertiary. Primary colors (red, blue, and yellow) are the building blocks of all other colors. By mixing these, you create secondary colors (green, orange, and purple), and further mixing these results in tertiary colors, which add depth and complexity to your palette. Understanding these relationships is key to achieving harmonious and visually stunning results.
One fascinating aspect of color theory in glazing is the concept of temperature. Colors can be categorized as warm (reds, oranges, yellows) or cool (blues, greens, purples). Warm colors tend to advance visually, making them perfect for pieces you want to stand out, while cool colors recede, creating a calming effect. Using a balance of both can create a dynamic interplay in your pottery. For instance, a warm orange glaze can pop against a cool blue background, drawing the viewer's eye and creating a sense of movement.
Another crucial element to consider is the opacity of your glazes. Transparent glazes allow the underlying clay body or previous layers of glaze to show through, creating depth and complexity. On the other hand, opaque glazes cover the surface completely, providing a solid color that can be striking in its own right. Mixing transparent and opaque glazes can yield stunning results, allowing you to play with layers and textures.
To illustrate the significance of color theory in glazing, let’s take a look at a simple
| Color Combination | Effect |
|---|---|
| Warm + Cool | Creates contrast and visual interest |
| Analogous Colors | Creates harmony and cohesion |
| Complementary Colors | Enhances vibrancy and energy |
Mixing glazes can yield unique shades and effects, but it’s essential to test your combinations before applying them to your final pieces. Testing is crucial in the glazing process, as colors can change dramatically during firing. Always keep a record of your glaze recipes and results; this way, you can replicate successful combinations or adjust those that didn’t turn out as expected.
In summary, mastering color theory in glazing is like learning a new language. It opens up a world of possibilities for your pottery. By understanding how colors interact, you can create pieces that not only catch the eye but also evoke emotions and tell stories. So, the next time you sit down to glaze, think of it as a creative adventure, where each color choice is a step towards your masterpiece.
- What is the best way to test glaze colors?
Using test tiles is the most effective method. Apply different glaze combinations to small tiles and fire them to see the final results.
- How do I achieve a specific color in glazing?
Experiment with mixing glazes and always keep notes on your recipes to replicate successful results.
- Can I layer different glazes?
Yes, layering glazes can create depth and unique effects, but be sure to test how they interact before applying them to your work.
Mixing Colors
Mixing colors in pottery glazing is like being a painter on a blank canvas; it opens up a world of possibilities! The beauty of glazes lies not only in their individual hues but also in how they interact when blended. When you mix glazes, you're not just combining colors; you're creating a unique palette that can transform your ceramic pieces into stunning works of art. However, it’s important to understand that not all glazes will yield the same results when mixed. Some might react beautifully, while others may produce unexpected outcomes. This is why experimenting with different combinations is so essential.
One of the first things to consider when mixing colors is the base glaze. This is the primary glaze that will dictate the overall finish and texture of your piece. Once you’ve selected your base glaze, you can start thinking about accent colors. These are the glazes that will add depth and interest to your work. Here are a few tips to keep in mind:
- Start Small: Always begin with small test batches. This way, you can see how the colors interact without wasting too much material.
- Document Your Process: Keep a record of your ratios and combinations. This will help you replicate successful mixes in the future.
- Understand Compatibility: Some glazes are more compatible than others. Research or consult with experienced potters to find combinations that work well together.
When it comes to the actual mixing process, it’s crucial to achieve a uniform consistency. You want to avoid any clumps or inconsistencies that could affect the final result. Use a sieve to strain your mixed glaze to ensure a smooth application. Additionally, consider the firing temperature of your glazes. Different glazes may require different firing temperatures, and mixing them could lead to unexpected results if not carefully monitored.
After mixing, always create test tiles to see how your new glaze combination looks after firing. This is the best way to gauge the final appearance, as the colors can change dramatically in the kiln. Remember, the journey of mixing colors is as much about the process as it is about the outcome. Enjoy the exploration and let your creativity shine!
Q: Can I mix any glazes together?
A: Not all glazes are compatible. It's essential to research and test combinations before committing to a larger batch.
Q: How do I know if my glaze mixture will work?
A: Always test your mixtures on small tiles before applying them to your main pieces. This way, you can see how they react after firing.
Q: What should I do if my mixed glaze comes out differently than expected?
A: Take notes on your mixing ratios and firing conditions. Adjust your ratios based on the results for future attempts.
Testing Glaze Combinations
When it comes to pottery glazing, the excitement of experimentation can be both thrilling and daunting. Testing glaze combinations is like being a chef in a kitchen filled with vibrant ingredients, each promising a unique flavor. The right mix can elevate your pottery from ordinary to extraordinary, but it requires a methodical approach. So, how do you ensure that your glaze combinations yield the results you envision? Let’s dive into the essential steps for effective testing.
First and foremost, always use test tiles. These small, unglazed pieces of clay are your best friends in the glazing world. They allow you to experiment without committing to a full piece. A simple test tile can reveal how different glazes interact, how they change during firing, and how they look together once cooled. When preparing your test tiles, make sure to label them clearly with the glaze names and the specific combinations you are testing. This way, you can keep track of what works and what doesn’t.
Next, consider the firing temperature. Different glazes react differently under varying temperatures, which can significantly affect the final outcome. For instance, some glazes may look stunning at a high temperature but turn dull at a lower one. Therefore, it’s crucial to note the firing temperature you intend to use and how it interacts with your glaze combinations. You might find it helpful to create a simple
| Test Tile | Glaze Combination | Firing Temperature | Result |
|---|---|---|---|
| Tile 1 | Blue + White | 2200°F | Glossy Finish |
| Tile 2 | Green + Transparent | 2100°F | Matte Finish |
| Tile 3 | Red + Yellow | 2300°F | Unexpected Reaction |
Another key factor in testing is the application method. Whether you are dipping, brushing, or spraying your glazes can make a significant difference in how they interact. For example, a brushed application may create streaks that enhance the texture, while dipping might produce a more uniform coat. Be sure to keep notes on your application techniques alongside your test results, as this will inform your future glazing endeavors.
Lastly, don’t be afraid to embrace failure. Not every combination will yield a masterpiece, and that’s perfectly okay! Each test is a learning opportunity. Sometimes, the most unexpected results can lead to the discovery of something truly unique. So, keep an open mind and enjoy the process. As you refine your skills in testing glaze combinations, you’ll find that the journey itself can be just as rewarding as the final piece.
- How do I know which glazes to combine? Start by researching color theory and understanding how different colors interact. Experimentation is key!
- Can I mix commercial glazes with homemade glazes? Yes, but be cautious! Test them together on a tile to see how they react.
- What if my glaze combination turns out muddy? This can happen if the colors clash. Take note of the ratios and try adjusting them in your next test.
- Is it necessary to fire test tiles at the same temperature as my final pieces? Yes, firing temperature can drastically change the appearance of glazes, so always test at the same temperature.
Firing Techniques
Firing is one of the most critical steps in the pottery glazing process, as it transforms your beautifully applied glazes into stunning, durable finishes. The way you fire your pottery can significantly influence the final appearance and functionality of your pieces. Understanding the various is essential for any potter looking to achieve the best results. Let’s dive into the different methods and their unique impacts on your ceramics!
There are two primary types of kilns used in pottery: electric kilns and gas kilns. Each type offers distinct advantages and can produce different effects on your glazes. For instance, electric kilns are renowned for their precision and ease of use. They allow potters to control temperature with great accuracy, which is crucial for achieving consistent results. On the other hand, gas kilns can create unique atmospheric effects that can enhance certain glaze types, providing an artistically rich finish that’s often sought after.
Electric kilns are a favorite among many potters due to their user-friendly nature. They operate on electricity, making them accessible for home studios and smaller workshops. One of the main advantages of electric kilns is their ability to maintain a steady temperature throughout the firing process. This consistency is vital for ensuring that glazes melt properly and achieve their intended look. However, it’s important to note that electric kilns can sometimes limit the type of effects you can create, especially when it comes to reduction firing, which is often needed for certain glazes.
To optimize your firing schedule in an electric kiln, consider the following tips:
- Preheat the kiln: Gradually preheating the kiln can help prevent thermal shock, especially for thicker pieces.
- Use a slow ramp-up: Allowing the temperature to rise slowly can lead to better glaze results and prevent bubbling.
- Monitor the cooling phase: A controlled cooling process can enhance the final appearance of glazes, particularly those that are sensitive to temperature changes.
Gas kilns, on the other hand, are often favored for their ability to produce remarkable atmospheric effects. These kilns use gas as their fuel source, which can create a reduction atmosphere during firing. This reduction can change the way glazes interact with the clay body, leading to vibrant and unpredictable results. Many potters find that gas kilns allow for a greater range of creative expression, especially when experimenting with different glaze combinations.
When using a gas kiln, it’s essential to be mindful of the following:
- Control the atmosphere: Adjusting the gas supply can help achieve the desired reduction or oxidation atmosphere.
- Firing schedule: Gas kilns may require different firing schedules compared to electric kilns, so be prepared to adapt your approach.
- Safety measures: Always prioritize safety when working with gas, ensuring proper ventilation and monitoring for leaks.
In conclusion, the firing technique you choose can greatly affect the outcome of your pottery. Whether you opt for the precision of an electric kiln or the atmospheric effects of a gas kiln, understanding the nuances of each method will empower you to create stunning ceramic pieces. Remember, experimentation is key! Don’t hesitate to try different approaches and discover what works best for you.
Q: What is the ideal firing temperature for most glazes?
A: The ideal firing temperature can vary depending on the type of glaze and clay body you are using. Generally, most glazes are fired between 1828°F (1000°C) and 2345°F (1285°C).
Q: Can I use both electric and gas kilns for the same project?
A: While it is possible, it’s essential to understand that each kiln type produces different effects. It’s usually best to stick with one type for a specific project to achieve consistent results.
Q: How do I know if my glaze has been fired correctly?
A: A well-fired glaze should have a smooth, even surface without any bubbling or crawling. If your glaze appears dull or rough, it may indicate an issue during the firing process.
Electric Kilns
Electric kilns have become a staple in the pottery community, renowned for their precision and ease of use. Imagine having a reliable friend who always knows the right temperature to bake your creations to perfection; that’s what an electric kiln offers! These kilns operate using electric heating elements, allowing for consistent temperature control throughout the firing process. This consistency is critical because it helps in achieving the desired glaze effects and ensures that your pottery is durable and functional.
One of the most significant advantages of electric kilns is their ability to provide a controlled environment. Unlike gas kilns, which can be influenced by external factors such as wind and temperature, electric kilns maintain a stable atmosphere. This stability is particularly beneficial when working with glazes that require specific firing conditions. For instance, if you’re using a glaze that needs a slow ramp-up in temperature to avoid crazing, an electric kiln can accommodate that need perfectly.
However, it’s important to note that electric kilns also come with their limitations. They generally reach a maximum temperature of about cone 10, which is sufficient for most stoneware and porcelain but may not be ideal for certain high-fire glazes. Additionally, the cost of electricity can be a factor in your decision-making process, as firing a kiln can consume a significant amount of energy. Nevertheless, many potters find that the benefits outweigh the drawbacks, particularly for those working in small studios or home setups.
To optimize your electric kiln experience, proper firing schedules are essential. A typical firing schedule might include the following stages:
| Stage | Temperature (°F) | Duration |
|---|---|---|
| Ramp Up | 200 - 1800 | 1-3 hours |
| Soak | 1800 | 15-30 minutes |
| Cool Down | 1800 - 200 | 4-8 hours |
This table illustrates a basic firing schedule for an electric kiln, but it’s crucial to adjust your timings based on the specific glazes and clay bodies you’re working with. Remember, patience is key in pottery; rushing the cooling process can lead to unwanted cracks or defects in your work.
In conclusion, electric kilns are an excellent choice for both novice and experienced potters. They offer a reliable, user-friendly way to achieve stunning results in your ceramic creations. By understanding their strengths and limitations, and by fine-tuning your firing schedules, you can unlock a world of possibilities in your pottery journey.
Gas Kilns
When it comes to pottery, are like the secret ingredient in a chef's recipe—essential for achieving unique and stunning results. Unlike electric kilns, which provide a more controlled and consistent atmosphere, gas kilns introduce a dynamic firing environment that can greatly influence the final appearance of your glazes. The beauty of gas kilns lies in their ability to create a reduction atmosphere, which can enhance the vibrancy of certain glazes and produce unexpected, breathtaking effects.
One of the standout features of gas kilns is their ability to reach high temperatures quickly. This efficiency not only saves time but also allows potters to experiment with various firing techniques. The flames in a gas kiln dance around the pottery, creating a captivating interplay of heat and atmosphere that can lead to rich, complex surfaces. For instance, reduction firing can result in deep, earthy tones and stunning metallic finishes that are often sought after in the pottery community.
However, mastering a gas kiln requires a bit of skill and understanding. It’s essential to know how to control the flame and the amount of oxygen in the kiln. Too much oxygen can lead to oxidation, dulling the colors of your glazes, while not enough can create a rich, dark palette. This delicate balance is what makes firing in a gas kiln both an art and a science.
Here are some key points to consider when working with gas kilns:
- Ventilation: Ensure your workspace is well-ventilated, as gas kilns produce combustion gases that can be harmful if not properly managed.
- Temperature Control: Familiarize yourself with the kiln's temperature gauge and learn how to adjust the gas flow to achieve the desired heat levels.
- Test Firing: Always conduct test firings with new glazes to understand how they react in a gas environment.
In summary, gas kilns offer potters a unique opportunity to explore the fascinating world of glaze effects and color interactions. By understanding the intricacies of gas firing, you can unlock a treasure trove of artistic possibilities that will elevate your pottery to new heights. So, if you're ready to dive into the world of gas kilns, prepare for a thrilling journey that combines creativity, technique, and a bit of magic!
Q: What are the main differences between electric and gas kilns?
A: Electric kilns provide a consistent and controlled environment, ideal for beginners. In contrast, gas kilns allow for greater experimentation with reduction firing, offering unique glaze effects.
Q: How do I maintain a gas kiln?
A: Regular maintenance includes checking gas connections, cleaning burners, and ensuring proper ventilation. It's crucial to follow the manufacturer's guidelines for safety and efficiency.
Q: Can I use any glaze in a gas kiln?
A: While many glazes can be used, some are specifically formulated for gas firing. Always test your glazes first to see how they react in a gas atmosphere.
Frequently Asked Questions
- What are glazes and why are they important in pottery?
Glazes are a vital component of pottery that not only enhance the aesthetic appeal of ceramic pieces but also provide functional properties. They create a protective layer over the clay, making it waterproof and durable while adding color and texture to the finished product.
- What are the different types of glazes?
There are several types of glazes, including glossy, matte, and transparent. Glossy glazes create a shiny finish that enhances colors and patterns, while matte glazes offer a soft, non-reflective surface. Transparent glazes allow the underlying clay body or underglaze decoration to show through, adding depth and interest.
- How do I achieve a flawless glossy finish?
Achieving a flawless glossy finish requires proper application techniques such as dipping, brushing, or spraying. It's essential to apply an even coat and avoid over-application, which can lead to running or pooling. Additionally, using high-quality glazes and ensuring correct firing temperatures will help achieve that perfect shine.
- What common issues can occur with glossy glazes?
Common issues with glossy glazes include running, uneven surfaces, and pinholes. To correct these problems, ensure that the glaze is mixed well and applied evenly. If running occurs, try adjusting the thickness of the application or the firing temperature.
- How do matte glazes differ from glossy glazes?
Matte glazes differ from glossy glazes primarily in their finish. While glossy glazes reflect light and create a shiny surface, matte glazes provide a soft, non-reflective finish that can add depth and texture to pottery. Matte glazes can also be more forgiving in hiding imperfections.
- Why is color theory important in glazing?
Color theory is essential in glazing because it helps potters understand how colors interact and complement each other. By grasping the basics of color mixing and harmony, potters can create visually appealing pieces that stand out and resonate with viewers.
- What is the best way to test glaze combinations?
The best way to test glaze combinations is to create test tiles. Apply different glaze combinations on small tiles and fire them to see the results. This allows potters to experiment without risking their main pieces and helps in finding the perfect color blends.
- What firing techniques should I consider?
Firing techniques can significantly impact the outcome of your glazes. Electric kilns are popular for their precision and ease of use, while gas kilns can produce unique effects and are favored for certain types of glazes. Understanding the characteristics of each kiln type will help you optimize your firing schedules and achieve the desired results.
- What are the advantages of using electric kilns?
Electric kilns offer precise temperature control and are user-friendly, making them suitable for both beginners and experienced potters. They provide consistent firing results, which is crucial for achieving the desired effects in glazes. However, they may have limitations in terms of the types of glazes that can be effectively used.
- Can I use gas kilns for all types of glazes?
While gas kilns can be used for many types of glazes, they are particularly favored for certain glaze types that require reduction firing. Gas kilns can create unique visual effects that electric kilns may not replicate, but they require more skill and experience to operate effectively.


