
Adventures in Upcycling: A DIY Tutorial
Welcome to the exciting world of upcycling! If you’ve ever looked at an old item and thought, "I can’t throw this away," then you’re already on the path to becoming an upcycling enthusiast. This article explores the creative world of upcycling, offering practical tips and inspiring ideas to transform everyday items into beautiful, functional pieces. Join us on this sustainable journey of creativity and resourcefulness, where we will not only reduce waste but also unleash our imagination! Upcycling is not just about saving the planet; it’s about making something uniquely yours.
So, what exactly is upcycling? At its core, upcycling is the process of creatively reusing materials to create new products. It’s a fantastic way to reduce waste and minimize our environmental impact. Imagine turning an old wooden pallet into a chic coffee table or transforming glass jars into stunning candle holders. Not only does upcycling promote sustainability, but it also encourages us to think outside the box and tap into our creative potential. It’s like giving a second life to items that might otherwise end up in a landfill, and in the process, we can express our style and personality.
Before you dive into the world of upcycling, it's crucial to gather the right tools. Think of these tools as your creative arsenal, ready to assist you in your DIY adventures. Here’s a brief rundown of the essential tools and materials you’ll need:
- Basic Hand Tools: Scissors, screwdrivers, and pliers are your best friends.
- Adhesives: A good quality glue or adhesive spray can work wonders.
- Paint and Brushes: Transform any surface with a splash of color.
- Sandpaper: Smooth out rough edges for a polished finish.
- Protective Gear: Safety goggles and gloves ensure a safe crafting experience.
With these tools in hand, you're ready to embark on your upcycling journey!
When it comes to upcycling, the possibilities are endless. You might be surprised at the variety of materials that can be transformed into something fabulous. Here are some common items you can consider:
- Glass jars and bottles
- Old furniture
- Textiles and clothing
- Cardboard boxes
- Wood pallets
Each of these materials has its own potential waiting to be unlocked, so keep your eyes peeled for items that can be given a new lease on life!
Transforming old furniture can breathe new life into your home. Have you ever thought about how a simple coat of paint can turn a drab dresser into a stunning statement piece? Here are a few creative ideas to get you started:
- Chic Coffee Tables: Use an old trunk or a wooden pallet to create a rustic coffee table.
- Repurposed Chairs: Reupholster an old chair with vibrant fabric for a fresh look.
- Bookshelf Makeover: Paint an old bookshelf and add decorative paper to the back for a pop of color.
These projects not only enhance your living space but also showcase your personal style.
Old clothes and fabric scraps can be repurposed into new creations that are both stylish and functional. For instance, you can turn a pair of jeans into a trendy tote bag or use fabric scraps to create unique home decor items. Here are a few ideas to spark your creativity:
- Patchwork Pillows: Sew together fabric scraps to create one-of-a-kind pillows.
- Fabric Baskets: Weave strips of fabric into baskets for storage.
- Upcycled Clothing: Transform old shirts into fashionable headbands or scarves.
Textile upcycling not only helps reduce waste but also allows you to express your creativity in a fun and unique way.
While upcycling can be a fun and fulfilling activity, safety should always be a priority. Here are some essential safety tips to keep in mind:
- Always wear protective gear when using tools.
- Work in a well-ventilated area, especially when painting or using adhesives.
- Keep your workspace organized to avoid accidents.
- Be cautious with sharp objects and tools.
By following these safety tips, you can ensure a fun and secure crafting experience.
Ready to get your hands dirty? Let’s dive into some beginner-friendly upcycling projects that will inspire your creativity while demonstrating the ease of transforming everyday items!
Learn how to turn old containers into beautiful decorative planters. This step-by-step guide will help you create unique pieces that enhance your indoor or outdoor space. Start with a glass jar, an old tin can, or even a wooden box. Here’s how:
- Clean the container thoroughly.
- Paint or decorate it as desired.
- Add drainage holes if necessary.
- Fill with soil and your favorite plants.
These DIY planters not only look great but also provide a home for your plants, making your space feel more inviting!
Upcycle items to create functional storage solutions. Think about the clutter in your home – wouldn’t it be nice to have stylish organizers that are eco-friendly too? Here’s a simple project idea:
1. Gather old boxes or containers.
2. Cover them with decorative paper or fabric.
3. Label each box for easy organization.
These stylish storage solutions will help declutter your space while adding a touch of personality to your home.
Q: What types of materials can I upcycle?
A: Almost anything can be upcycled! Common materials include glass jars, old furniture, textiles, and cardboard. Just look around your home and see what you can transform!
Q: Do I need special skills to start upcycling?
A: Not at all! Upcycling is all about creativity and experimentation. Start with simple projects and gradually build your skills as you go.
Q: Where can I find inspiration for upcycling projects?
A: Inspiration can come from anywhere! Browse social media platforms, DIY blogs, and even Pinterest. You can also visit local thrift stores for ideas.
Q: Is upcycling expensive?
A: Upcycling can be very affordable! Many projects use items you already have at home, making it a cost-effective way to create new things.
Understanding Upcycling
Upcycling is more than just a trendy buzzword; it's a powerful way to creatively reuse materials that would otherwise end up in a landfill. Imagine turning an old wooden pallet into a chic coffee table or transforming glass jars into stunning candle holders. Upcycling not only reduces waste but also encourages a sense of creativity and resourcefulness. By giving new life to items that have outlived their original purpose, we not only save money but also contribute to a more sustainable future.
The significance of upcycling goes beyond just aesthetics; it plays a crucial role in promoting sustainability. In today's fast-paced consumer culture, where everything seems disposable, upcycling serves as a reminder that we can cherish and repurpose what we already have. This practice not only helps in reducing the demand for new products but also minimizes the environmental impact associated with manufacturing processes. By upcycling, you’re making a statement that you value creativity and sustainability over mindless consumption.
Moreover, the beauty of upcycling lies in its accessibility. You don’t need to be a professional artist or designer to embark on this journey. With a little imagination and some basic tools, anyone can dive into the world of upcycling. Whether you’re a seasoned DIY enthusiast or just starting, the possibilities are endless. You can upcycle a variety of materials, including:
- Furniture
- Textiles
- Glass and plastic containers
- Wood scraps
- Old electronics
Each of these materials holds potential for transformation. For instance, an old chair can become a vibrant garden planter, while worn-out jeans can be turned into a stylish tote bag. The only limit is your imagination! Upcycling fosters a culture of creativity, where each project tells a unique story and reflects the personality of its creator.
In conclusion, understanding upcycling is crucial in our modern world, where sustainability is becoming increasingly important. By embracing this creative process, you not only contribute to reducing waste but also encourage others to think outside the box. So, why not take a moment to look around your home? You might just find a treasure waiting to be upcycled!
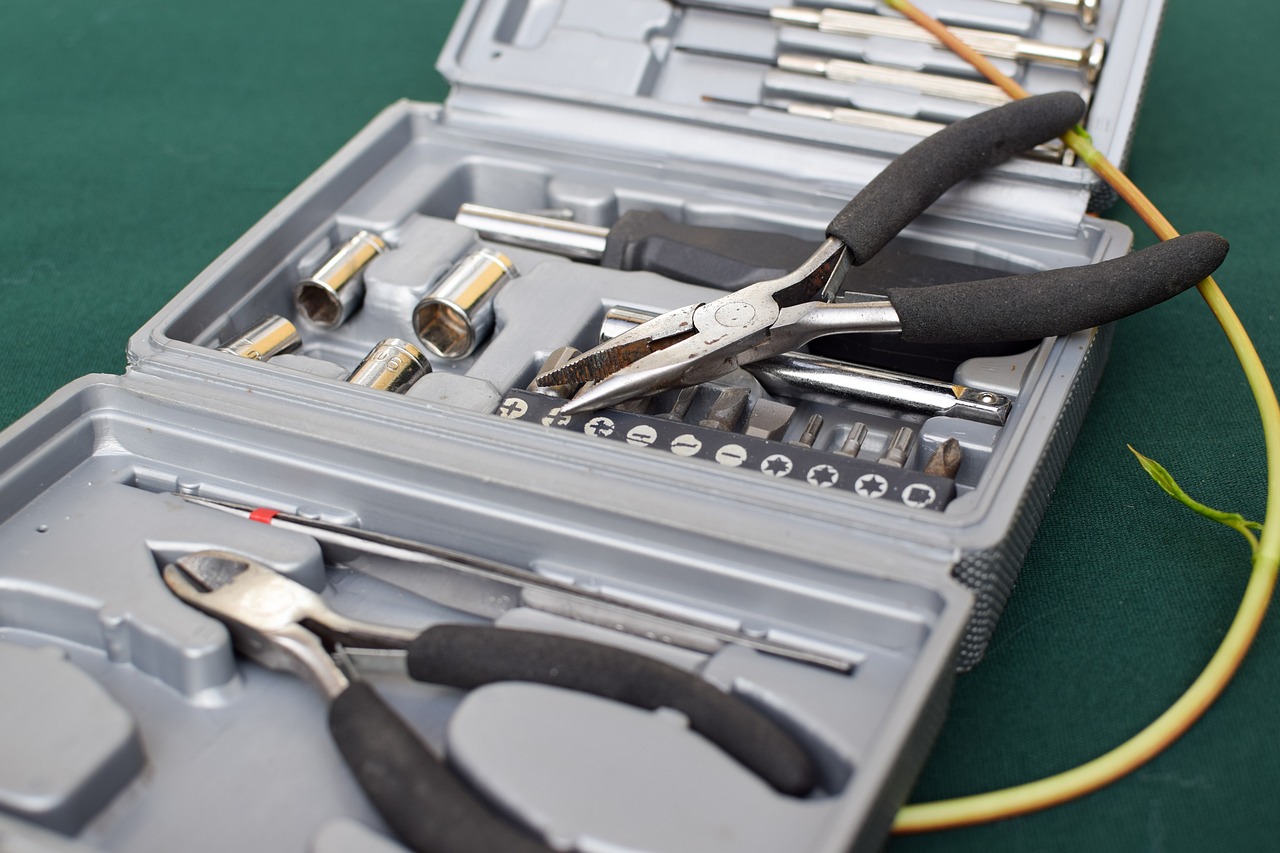
Essential Tools for Upcycling
Before diving headfirst into the exciting world of upcycling, it's crucial to gather the right tools. Think of these tools as your trusty sidekicks in a thrilling adventure, ready to help you transform mundane items into stunning creations. Whether you're a seasoned DIY enthusiast or a curious beginner, having the right equipment can make all the difference. Not only does it streamline your process, but it also enhances your creativity and efficiency. So, what do you need to embark on this sustainable journey? Let’s explore the essential tools for upcycling!
First and foremost, you’ll want to invest in a good set of basic hand tools. These include items like scissors, a utility knife, and a measuring tape. Imagine trying to create a masterpiece without the right instruments; it would be like a painter without a brush! Additionally, having a sturdy cutting mat can protect your surfaces and keep your workspace organized.
Next up, let’s talk about adhesives. A reliable glue gun is a must-have for any upcycling project. It’s like magic in a tube, allowing you to bond materials together quickly and effectively. For fabric projects, fabric glue or sewing supplies might be more appropriate, so keep those handy as well. And don't forget about paint! Whether you’re looking to refresh an old piece of furniture or add a splash of color to a decorative item, paint can completely transform the look of your project. Consider using eco-friendly paint options to keep your upcycling efforts sustainable.
When it comes to larger projects, tools like a saw or a drill can be incredibly beneficial. These tools allow you to cut and assemble items with precision. If you're not familiar with using power tools, don't worry! There are plenty of tutorials available online to help you learn the ropes. Just remember, safety first! Always wear protective gear such as goggles and gloves when working with power tools.
Lastly, keep your workspace tidy and organized. A toolbox or a dedicated storage area for your upcycling supplies can save you time and frustration. You can even upcycle old boxes or containers to create your own storage solutions! It’s all about being resourceful and creative.
In summary, here’s a quick rundown of essential tools you’ll need for your upcycling projects:
- Basic hand tools (scissors, utility knife, measuring tape)
- Cutting mat
- Glue gun and adhesives
- Paint and painting supplies
- Power tools (saw, drill) for larger projects
- Storage solutions for organization
So, gather your tools, unleash your creativity, and get ready to embark on an exciting upcycling adventure. Remember, the only limit is your imagination!

Common Materials for Upcycling
When it comes to upcycling, the possibilities are as vast as your imagination. You might be surprised to learn that many everyday items lying around your home can be transformed into something beautiful and functional. By creatively reusing materials, not only do you reduce waste, but you also contribute to a more sustainable lifestyle. So, what are some common materials you can use for your upcycling projects? Let’s dive in!
First up, we have glass jars. These versatile containers can be used in countless ways, from stylish storage solutions to unique candle holders. With just a bit of paint or twine, you can turn an ordinary jar into a stunning centerpiece for your dining table. Similarly, wooden pallets are another popular choice. They can be disassembled and reassembled into chic furniture pieces like coffee tables or garden benches. The rustic charm of pallet wood adds character to any space.
Another fantastic material is old furniture. Before you decide to toss that worn-out chair or table, consider giving it a makeover! With some sanding, painting, or reupholstering, those tired pieces can become the highlight of your home. Fabric scraps are also invaluable in the world of upcycling. Whether you have old clothes or leftover fabric from previous projects, these scraps can be transformed into everything from trendy tote bags to colorful quilts. The only limit is your creativity!
Let’s not forget about tin cans. These humble containers can be turned into decorative planters, utensil holders, or even lanterns with a bit of imagination and some DIY skills. If you have a knack for crafting, paper products like cardboard boxes and old magazines can also be upcycled into stunning art pieces or functional storage solutions. With a little glue and some paint, you can create something truly unique.
As you explore these materials, keep in mind that the key to successful upcycling is to look at things with a fresh perspective. What might seem like junk to one person could be a treasure to another. So gather your supplies, unleash your creativity, and let the upcycling adventure begin!
1. What is the difference between upcycling and recycling?
Upcycling involves creatively reusing materials to create something new and valuable, while recycling generally refers to breaking down materials to make new products. Upcycling retains the original form of the material, often enhancing its aesthetic or functional value.
2. Can I upcycle anything?
While most household items can be upcycled, it’s important to consider the condition and material of the item. Avoid items that are damaged beyond repair or contain harmful substances, such as certain plastics.
3. Do I need special skills to start upcycling?
Not at all! Upcycling can be as simple or as complex as you want it to be. Many projects only require basic crafting skills, and there are plenty of tutorials available online to help you along the way.
4. Where can I find materials for upcycling?
You can find materials for upcycling in your own home! Look for items you no longer use, or visit thrift stores, garage sales, and flea markets for inspiration. Keep an eye out for unique pieces that spark your creativity!
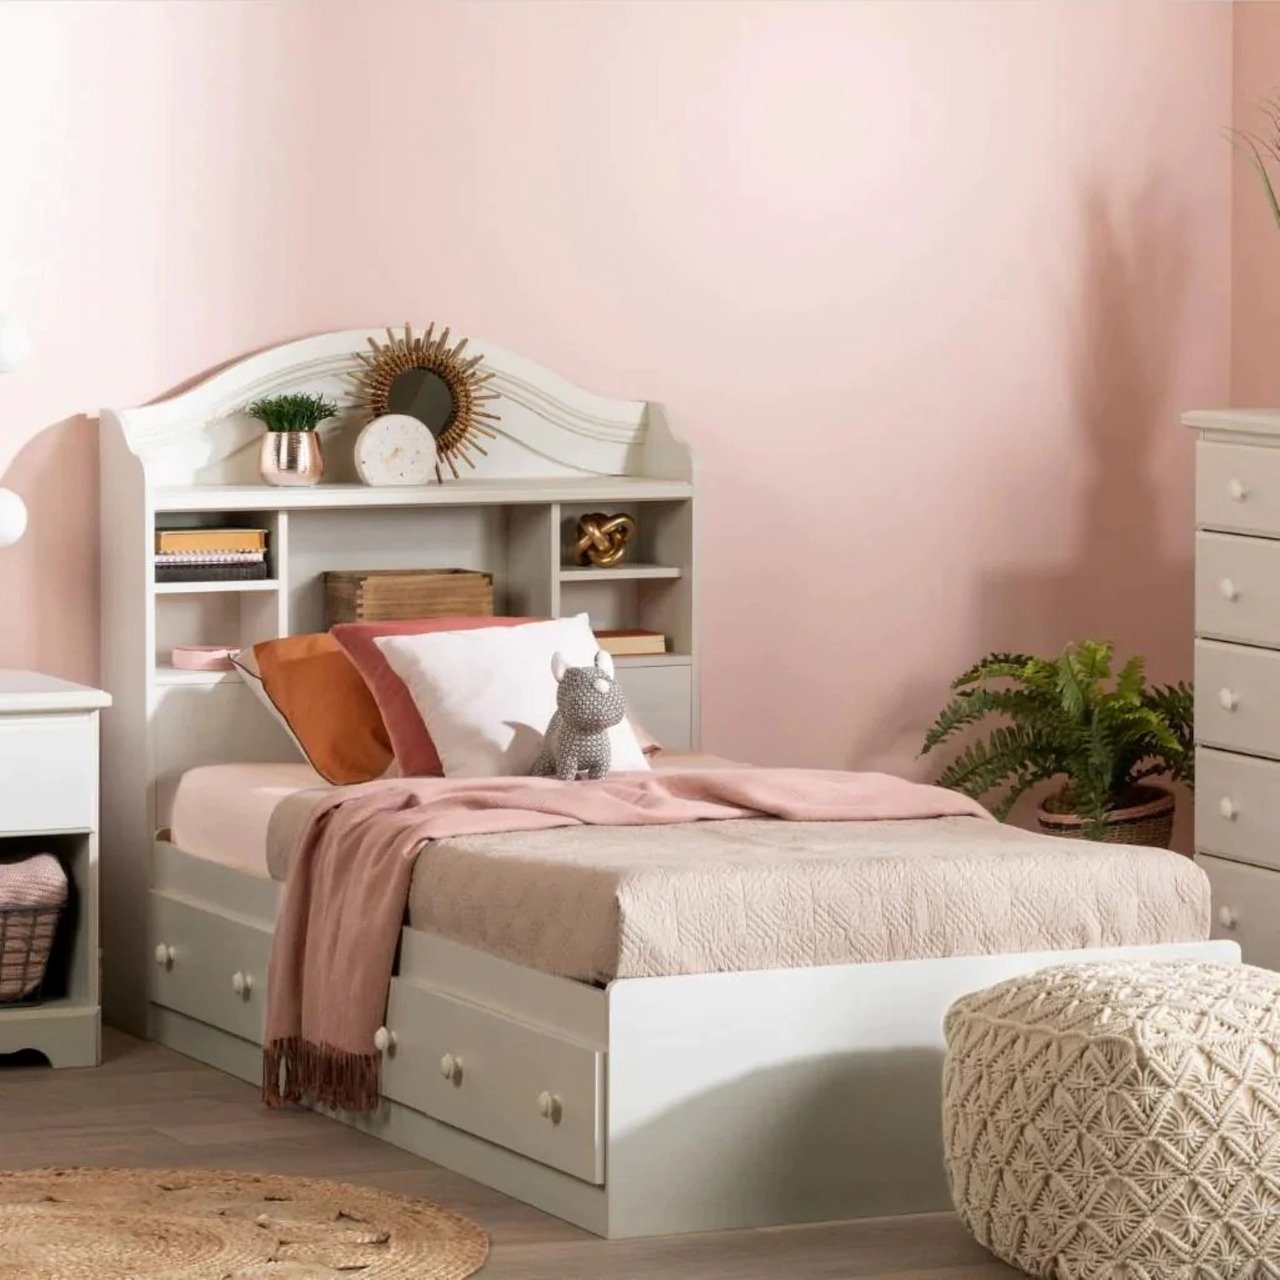
Furniture Upcycling Ideas
Transforming old furniture can be an exhilarating journey that not only revitalizes your living space but also showcases your creativity. Imagine walking into a room and seeing a piece of furniture that tells a story—your story! Upcycling furniture is more than just a trend; it’s a movement towards sustainability and self-expression. So, let’s dive into some exciting ideas that will inspire you to breathe new life into your old, tired pieces.
One of the most popular furniture upcycling projects is giving a fresh coat of paint to an outdated dresser. Instead of tossing it out, consider how a splash of color can completely change its vibe. You might opt for a bold hue like deep teal or a soft pastel to match your decor. Additionally, adding some new hardware can elevate the look, making it feel like a brand-new piece. Remember, the key is to let your personality shine through!
Another innovative idea is to repurpose an old ladder into a unique bookshelf. Picture this: a rustic wooden ladder leaning against the wall, with books and decorative items artfully placed on each rung. Not only does this create an eye-catching focal point, but it also serves as a functional storage solution. If you don’t have an old ladder, check local thrift stores or garage sales; you’d be surprised at what you can find!
If you have an old chair that’s seen better days, consider reupholstering it with vibrant fabric. This is a fantastic way to add a pop of color to your space. Choose a fabric that complements your room's palette, and don't shy away from patterns! A floral print can bring a touch of whimsy, while a geometric design can add a modern flair. The process may seem daunting, but with a little patience and some online tutorials, you’ll be amazed at what you can achieve.
For those who love a bit of rustic charm, turning an old trunk into a coffee table is a brilliant option. Not only does this provide a unique piece of furniture, but it also offers hidden storage for blankets, books, or games. Simply sand down the surface, apply a coat of varnish, and you have a stunning conversation starter that combines style and functionality.
Lastly, consider creating a multi-functional piece by combining two different furniture items. For instance, you can attach an old tabletop to a set of vintage nightstands to create a chic vanity. This not only maximizes space but also allows you to showcase your creativity. The possibilities are endless!
In conclusion, upcycling furniture is not just about saving money; it’s about crafting pieces that resonate with your style and values. So, gather your tools, unleash your creativity, and let your imagination run wild! Remember, every piece has potential; it just needs a little love and a fresh perspective.
Q: What tools do I need for furniture upcycling?
A: Basic tools include a screwdriver, sandpaper, paintbrushes, and a staple gun for upholstery projects. Depending on the project, you might also need wood glue or a drill.
Q: Can I upcycle furniture without prior experience?
A: Absolutely! Many upcycling projects are beginner-friendly. Start with simple tasks, like painting or reupholstering, and gradually take on more complex projects as you gain confidence.
Q: Where can I find furniture to upcycle?
A: Look for items at thrift stores, garage sales, or even your own home! Sometimes, all it takes is a little creativity to see the potential in what you already have.
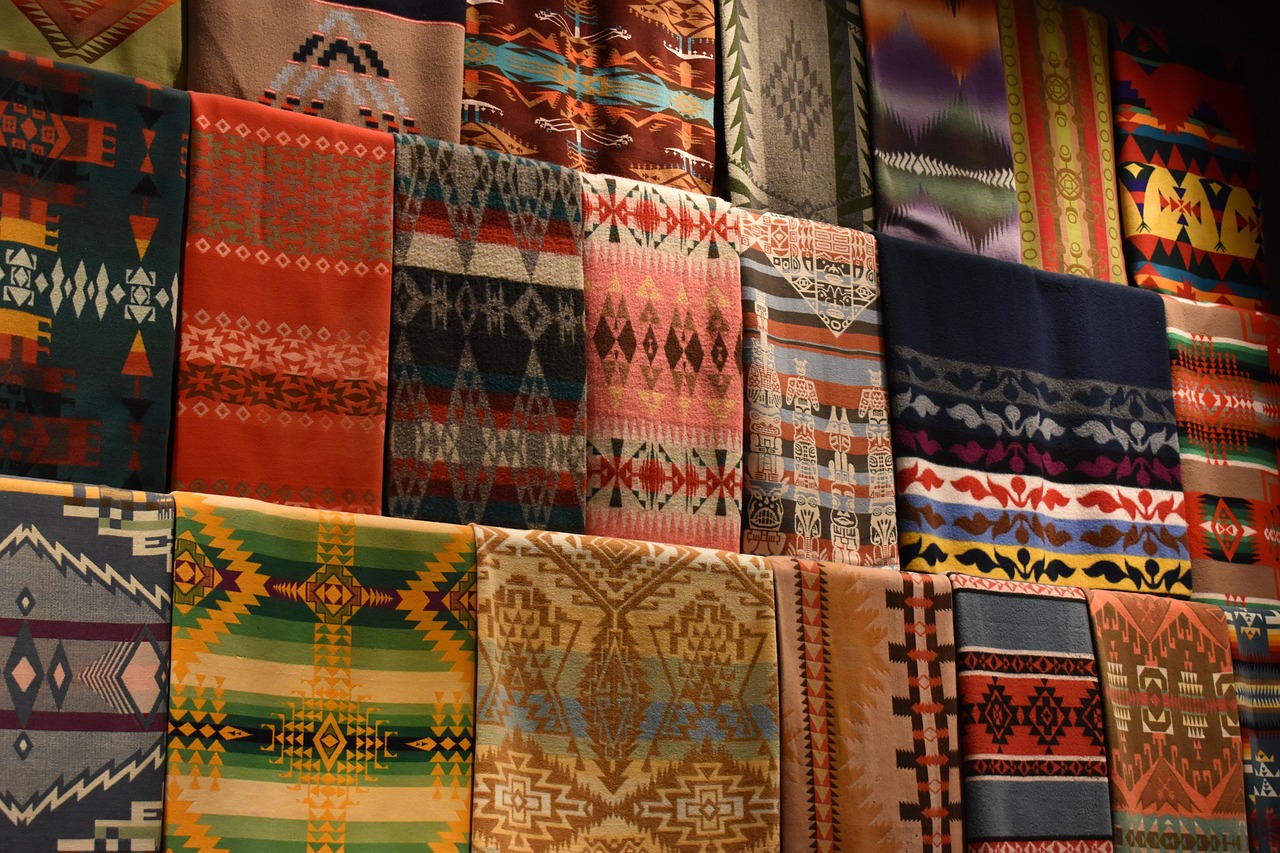
Textile Upcycling Projects
When you think about upcycling, your mind might immediately jump to furniture or home decor, but let’s not forget the incredible potential hidden in your old textiles! Old clothes, fabric scraps, and even worn-out linens can be transformed into stunning, functional pieces that not only save you money but also help reduce waste in our environment. Imagine taking that old pair of jeans you never wear and turning them into a trendy tote bag or transforming a faded tablecloth into beautiful throw pillows for your couch. The possibilities are endless!
One of the most exciting aspects of textile upcycling is how it encourages you to unleash your creativity. You can combine different fabrics, patterns, and textures to create unique items that reflect your personal style. For instance, if you have a collection of mismatched fabric scraps, why not stitch them together to create a vibrant patchwork blanket? Not only will it keep you warm, but it will also serve as a conversation starter. Plus, every piece you make tells a story, adding character to your home.
Here are a few inspiring ideas to get you started on your textile upcycling journey:
- DIY Tote Bags: Use old jeans or sturdy fabric to create stylish and functional tote bags. Simply cut and sew the fabric to your desired size, and you’ll have a unique accessory that’s perfect for shopping or a day out.
- Fabric Scraps Coasters: Take those leftover fabric scraps and turn them into coasters. Just cut them into circles, layer them, and sew or glue them together for a quick and easy project.
- Pillow Covers: Transform outdated or worn-out clothing into chic pillow covers. This project is a fantastic way to add a pop of color or pattern to your living space.
- Quilts from Old T-Shirts: Gather your favorite old t-shirts and create a cozy quilt. This project not only keeps you warm but also preserves memories associated with those shirts.
Remember, the key to successful textile upcycling is to have fun and experiment! Don’t be afraid to mix and match different materials, and let your imagination run wild. If you find yourself stuck, consider browsing online platforms like Pinterest for inspiration. You’ll be amazed at the innovative ideas out there that can spark your creativity.
As you embark on these textile upcycling projects, it’s essential to keep in mind the tools you might need. A good pair of fabric scissors, a sewing machine (or needle and thread for hand sewing), and some fabric glue can go a long way. Always ensure you have a clean workspace to avoid any accidents while working with sharp tools.
In conclusion, textile upcycling is not just a trend; it’s a movement towards sustainability and creativity. By repurposing old fabrics, you’re not only giving them a new life but also contributing to a more eco-friendly lifestyle. So, gather those old clothes and fabric scraps, and let’s get crafting!
Q1: What types of fabrics are best for upcycling projects?
A1: Almost any fabric can be upcycled! However, sturdy materials like denim, canvas, and cotton tend to work best for most projects. Just make sure the fabric is clean and in good condition.
Q2: Do I need to be an expert sewer to start upcycling textiles?
A2: Not at all! Many textile upcycling projects can be done with basic sewing skills or even fabric glue. Start with simple projects and gradually build your skills as you gain confidence.
Q3: Where can I find old textiles for upcycling?
A3: You can find old textiles at thrift stores, garage sales, or even in your own closet. Ask friends and family if they have any unwanted clothes or fabric scraps they’d be willing to give away.
Q4: What should I do with my finished upcycled projects?
A4: You can use them in your home, give them as gifts, or even sell them at local craft fairs or online marketplaces. Upcycled items often have a unique charm that others will appreciate!

Safety Tips for Upcycling
When diving into the exciting world of upcycling, safety should always be your top priority. After all, what's the point of creating something beautiful if you end up getting hurt in the process? Here are some essential safety tips to keep in mind while you unleash your creativity.
First and foremost, wear protective gear. This includes gloves to protect your hands from sharp edges or splinters, as well as goggles to shield your eyes from dust and debris. If you're working with paint or strong adhesives, consider using a mask to avoid inhaling harmful fumes. Remember, prevention is always better than cure!
Next, make sure your workspace is well-lit and organized. A cluttered area can lead to accidents, so take a few moments to clear your workspace before you start. Ensure that all your tools are within reach but safely stored away when not in use. Think of your workspace as your creative sanctuary—keeping it tidy can help you focus on your projects without distractions.
When handling tools, always follow the manufacturer’s instructions and guidelines. Whether you're using a saw, a drill, or even scissors, understanding how to use them properly can prevent injuries. If you're unsure about a tool, don’t hesitate to look up tutorials or ask for guidance. Knowledge is power!
Additionally, be cautious when working with materials that may contain hazardous substances. For instance, older furniture may have lead paint or chemicals that can be harmful. Always check for safety data sheets or labels, and if in doubt, consult with professionals on how to handle these materials safely.
Finally, don't rush through your projects. Take your time to ensure each step is completed correctly. This not only enhances the quality of your work but also minimizes the risk of accidents. Remember, upcycling is about enjoying the process as much as it is about the end product.
To summarize, here are key safety tips to keep your upcycling experience enjoyable and secure:
- Wear protective gear such as gloves and goggles.
- Maintain a clean and organized workspace.
- Follow tool instructions carefully.
- Be aware of hazardous materials.
- Take your time and enjoy the process!
By keeping these safety tips in mind, you can focus on what really matters: unleashing your creativity and transforming everyday items into stunning, functional pieces. So grab your tools, stay safe, and let your imagination run wild!
Q: What materials are safe to upcycle?
A: Most materials can be safely upcycled, but it's important to check for hazardous substances, especially in older items. Common safe materials include wood, glass, and fabric.
Q: Do I need special tools for upcycling?
A: While basic tools like scissors, glue, and paint can suffice for simple projects, having a few specialized tools like a drill or saw can expand your upcycling possibilities.
Q: Can I upcycle items that are broken?
A: Absolutely! Many broken items can be creatively repaired or repurposed. Just ensure that any repairs are safe and secure before using the item.
Q: Is upcycling expensive?
A: Upcycling can be very budget-friendly, especially if you use items you already have at home. The key is to be resourceful and creative!

Step-by-Step Upcycling Projects
Are you ready to unleash your inner artist and dive into the world of upcycling? This section is your gateway to a series of step-by-step projects that will not only spark your creativity but also help you make the most out of items you might otherwise toss away. Upcycling is like giving a second chance to your old belongings, turning them into something unique and functional. So, roll up your sleeves, grab those dusty items from the back of your closet or garage, and let's get started!
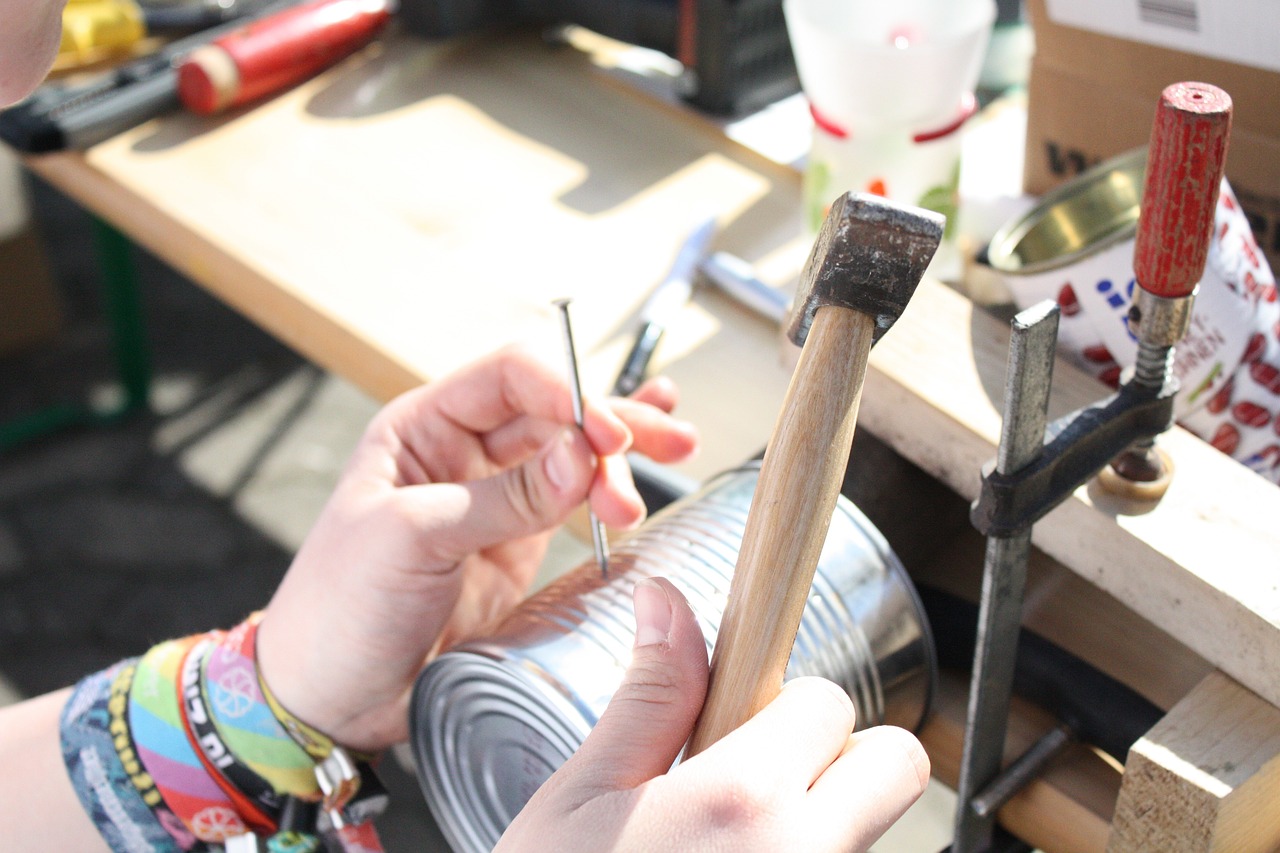
First up, we have a project that will add a splash of color to your home: creating decorative planters. Imagine transforming that old tin can or glass jar into a stunning planter that showcases your favorite succulents or herbs. Not only does this project breathe new life into forgotten containers, but it also adds a touch of nature to your decor. Here’s how to do it:
- Gather Your Materials: You’ll need old containers (like jars, cans, or even wooden boxes), potting soil, and your choice of plants.
- Prep the Containers: Clean your containers thoroughly. If you're using cans, be sure to smooth out any sharp edges.
- Add Drainage: Drill small holes at the bottom of your containers for drainage. If you don’t have a drill, you can use a hammer and a nail to create holes.
- Decorate: Get creative! Paint your containers, wrap them in twine, or use decoupage techniques to add a personal touch.
- Plant: Fill your containers with potting soil and plant your chosen greenery. Water them gently, and voila! You have a beautiful decorative planter.
Next, let's tackle the challenge of making stylish storage solutions. We all have items lying around that could use a home, and with a little bit of creativity, you can turn everyday objects into chic organizers. Think about those old shoe boxes or baskets that are just collecting dust. Here’s a simple approach to transform them:
- Choose Your Base: Pick an old shoe box, a wooden crate, or any container that can be repurposed.
- Cover and Decorate: Use wrapping paper, fabric, or paint to give your storage solution a fresh look. This is where you can let your creativity shine!
- Label: Add labels to your storage boxes to keep everything organized. You can use chalkboard paint on the box for a reusable label.
- Fill It Up: Now, organize your items inside! Whether it’s craft supplies, toys, or office materials, you’ll have a stylish way to keep everything tidy.
These projects are just the tip of the iceberg when it comes to upcycling. The beauty of upcycling is that it encourages you to think outside the box and see potential where others see waste. Each project can be tailored to your style and needs, making it a personalized experience. Plus, you’ll feel great knowing you’re contributing to a more sustainable environment by reducing waste.
Before you dive into your next upcycling adventure, remember to have fun with it! There’s no right or wrong way to create. Embrace the process, and don’t be afraid to experiment. You might just surprise yourself with what you can create from the items that were once considered trash!
Q: What types of materials can I upcycle?
A: You can upcycle a wide variety of materials, including glass jars, old furniture, fabrics, plastic containers, and even paper products. The possibilities are endless!
Q: Do I need special tools for upcycling?
A: While some projects may require basic tools like scissors, glue, or paint, many upcycling projects can be done with items you already have at home. Just get creative!
Q: Is upcycling expensive?
A: Not at all! In fact, upcycling can save you money. By repurposing items you already own, you can create beautiful and functional pieces without breaking the bank.
Q: Can I upcycle items that are damaged?
A: Absolutely! Many upcycling projects focus on transforming damaged or worn items into something new and beautiful. It’s all about seeing the potential in what you have.

Creating Decorative Planters
Are you ready to unleash your inner gardener while giving a second life to items that would otherwise end up in the trash? from upcycled materials is not only a fun and creative project, but it also adds a touch of personality to your home or garden. Imagine transforming an old teapot, a tin can, or even a wooden pallet into a stunning planter that showcases your favorite plants. It’s like giving your old belongings a fresh twist, and trust me, it feels fantastic!
To get started, you’ll need to gather some materials. Look around your home; you might be surprised by the treasures you can find! Here are a few ideas to spark your creativity:
- Old ceramic or glass containers
- Wooden crates or pallets
- Plastic bottles
- Teapots or kettles
- Old boots or shoes
Once you’ve rounded up your materials, the next step is to think about the design. The beauty of upcycling is that there are no strict rules; you can let your imagination run wild! For instance, if you choose to use an old teapot, you can leave it as is for a vintage feel or paint it in vibrant colors to add a modern twist. Just remember to drill a few holes in the bottom for drainage, as your plants will thank you for it!
Another fun idea is to use wooden crates to create a tiered planter. Stack a few crates on top of each other, secure them, and fill them with soil and plants. This not only saves space but also creates a stunning visual effect in your garden or on your balcony. You can even paint the crates in different colors to make them pop!
Don’t forget about the importance of drainage when making your planters. Without proper drainage, your plants can suffer from root rot. A simple solution is to add rocks or gravel at the bottom of your planter before adding soil. This allows excess water to escape while keeping your plants happy and healthy.
Once your planters are ready, it’s time to choose the right plants. Consider using herbs, succulents, or flowers that thrive in your climate. If you’re feeling adventurous, you can even create a mini herb garden using several small containers grouped together. This not only looks great but also provides you with fresh herbs for your cooking!
Finally, don’t shy away from personalizing your decorative planters. Adding decorative stones, paint, or even twine can make your planters truly unique. It’s all about expressing your style and making your space feel like home.
Q: What types of materials can I use for upcycling planters?
A: You can use a wide variety of materials including old pots, tin cans, wooden crates, and even shoes! Just ensure they have proper drainage.
Q: How do I ensure my plants get enough drainage?
A: Always drill holes in the bottom of your containers or add rocks and gravel to allow excess water to escape.
Q: Can I paint my upcycled planters?
A: Absolutely! Painting your planters can add a personal touch and make them stand out. Just use non-toxic paint to ensure the safety of your plants.
Q: What plants are best for upcycled planters?
A: Consider using herbs, succulents, or flowering plants that suit your climate and the size of your planter. Herbs like basil and mint thrive in smaller containers!
So, what are you waiting for? Grab those old items lying around your house and start creating your very own decorative planters. Not only will you enjoy the process, but you’ll also contribute to a more sustainable world, one planter at a time!
Making Stylish Storage Solutions
Are you tired of clutter taking over your living space? Do you wish you could find a way to organize your belongings without sacrificing style? Well, you’re in luck! Upcycling offers a fantastic opportunity to create stylish storage solutions that not only declutter your home but also reflect your unique personality. Imagine transforming an old wooden crate into a chic bookshelf or repurposing glass jars into elegant organizers. The possibilities are endless!
To get started, think about the items you already have lying around the house. Items like old suitcases, wooden pallets, and even tin cans can be upcycled into functional storage pieces. For instance, an old suitcase can be mounted on the wall as a quirky shelf, perfect for displaying books or plants. Alternatively, you can stack wooden crates to create a rustic shelving unit that adds character to any room.
When it comes to upcycling storage solutions, consider the following materials:
- Wooden Crates: Perfect for creating shelving units or storage boxes.
- Glass Jars: Great for organizing small items like buttons, screws, or craft supplies.
- Old Suitcases: Can be used as decorative storage or even as a coffee table.
- Tin Cans: Ideal for desk organizers or planters.
Once you’ve gathered your materials, the next step is to think creatively about how to enhance their functionality and appeal. Painting, staining, or adding decorative elements can transform the mundane into the magnificent. For example, you could paint glass jars in pastel colors and use them as stylish desk organizers, or you could wrap tin cans in jute twine for a rustic look that adds warmth to your decor.
Here’s a simple project to get you started: Creating a Multi-Tiered Storage Solution. All you need are a few wooden crates and some screws. Stack the crates in a way that suits your space, securing them together for stability. You can paint them in a color that matches your decor or leave them natural for a more rustic feel. This multi-tiered solution can hold anything from books to plants, making it both practical and visually appealing.
Finally, don’t forget to personalize your storage solutions. Adding labels, using decorative boxes, or incorporating your favorite colors can make your upcycled storage not only functional but also a reflection of your style. Remember, the goal is to create a space that feels organized and inviting, so let your creativity shine!
Q: What materials are best for upcycling storage solutions?
A: Common materials include wooden crates, glass jars, old suitcases, and tin cans. These items can be easily transformed into functional storage pieces with a little creativity.
Q: Do I need special tools for upcycling?
A: While basic tools like a screwdriver, paintbrush, and scissors are helpful, many projects can be done with minimal tools. Just be sure to have some glue or screws for assembly!
Q: How can I ensure my upcycled storage is safe and sturdy?
A: Always check the integrity of your materials before using them. If you’re stacking items, make sure they are securely fastened together to avoid accidents.
Q: Can I sell my upcycled storage solutions?
A: Absolutely! Many people love unique, handmade items, so consider selling your creations at local markets or online platforms.
Frequently Asked Questions
- What is upcycling?
Upcycling is the creative process of taking unwanted items and transforming them into new, useful products. It's all about reducing waste while sparking your creativity. Instead of throwing things away, you give them a new life, which can be both fun and environmentally friendly!
- Why should I consider upcycling?
Upcycling is not just a trend; it’s a sustainable lifestyle choice! By upcycling, you help reduce landfill waste, save money, and create unique pieces that reflect your personal style. Plus, it’s a great way to unleash your inner artist and try something new!
- What tools do I need to start upcycling?
To kick off your upcycling journey, you’ll need some basic tools. Here’s a quick list to get you started:
- Scissors
- Glue or adhesive
- Paint and brushes
- Screwdriver (for furniture projects)
- Sandpaper (for smoothing surfaces)
Having these tools on hand will make your projects much easier and more enjoyable!
- What materials can I upcycle?
You can upcycle a wide variety of materials! Some common items include:
- Glass jars
- Old furniture
- Fabric scraps
- Plastic containers
- Cardboard boxes
The possibilities are endless! Just look around your home, and you’ll be surprised at what you can transform.
- Are there safety tips I should follow while upcycling?
Absolutely! Safety should always come first. Here are some essential tips:
- Wear gloves when handling sharp objects.
- Use a mask when sanding or painting to avoid inhaling dust or fumes.
- Work in a well-ventilated area.
- Keep your workspace organized to prevent accidents.
By following these tips, you can ensure a fun and secure crafting experience!
- Can I find beginner-friendly upcycling projects?
Definitely! There are countless beginner-friendly upcycling projects available online. Whether you want to create decorative planters or stylish storage solutions, you can find step-by-step guides that make it easy to dive into the world of upcycling.


