
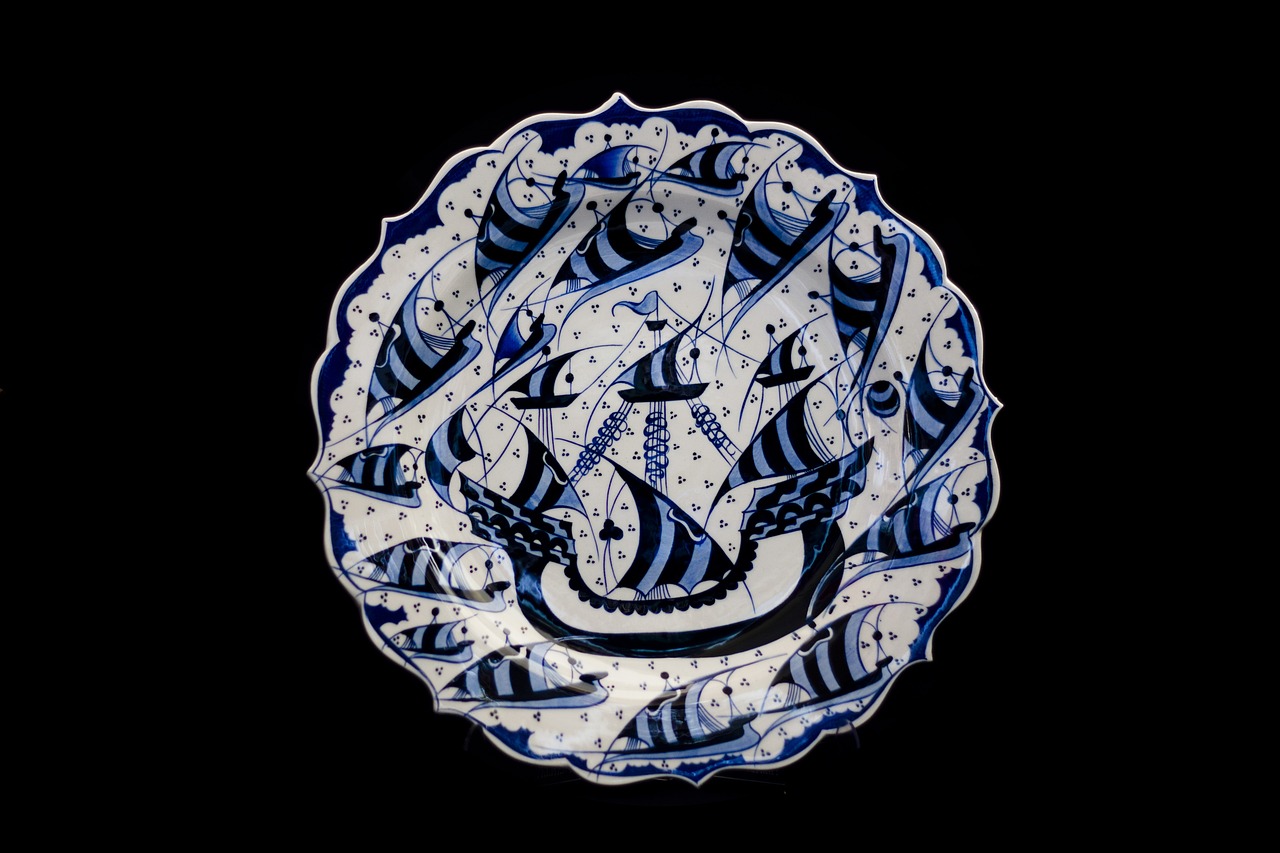
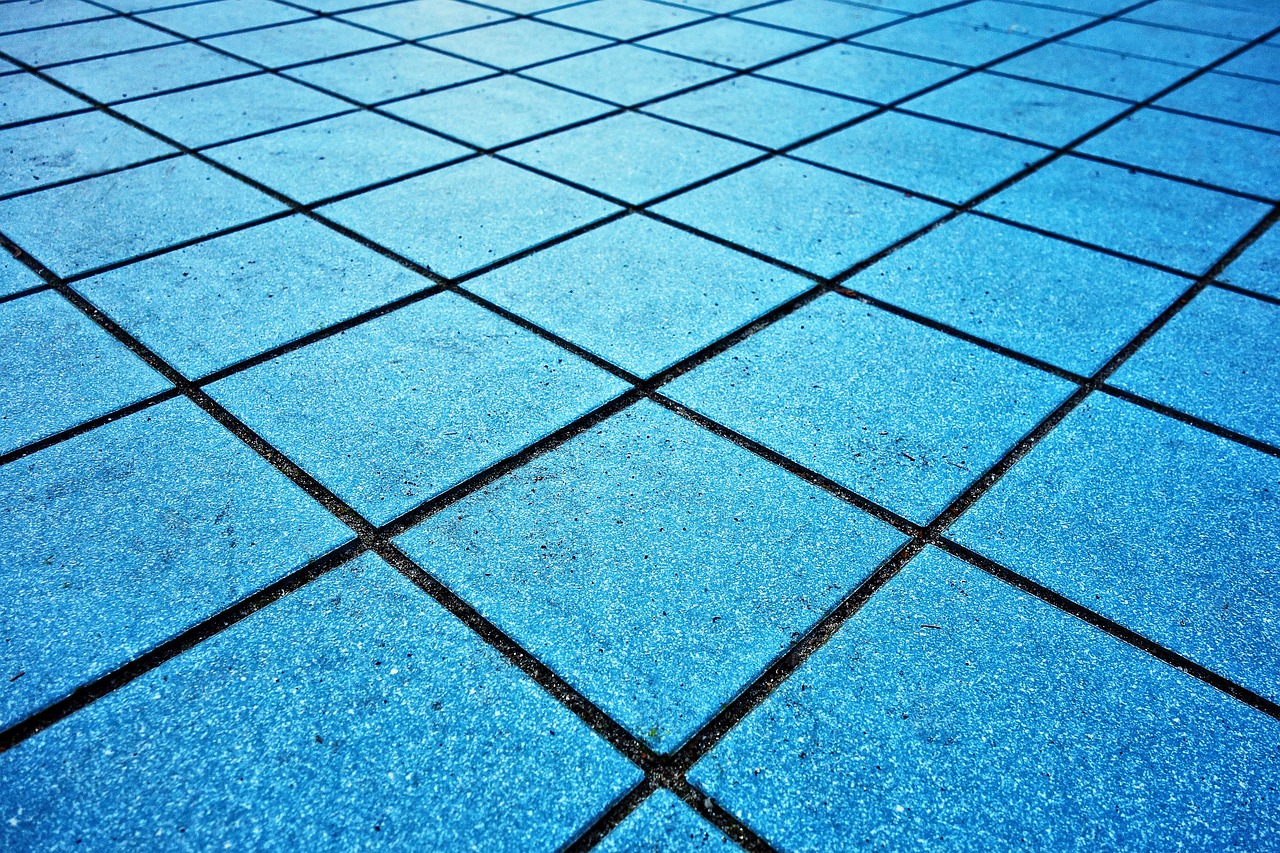
Creating Your Own Ceramic Tiles: A Guide
Have you ever looked at a beautiful ceramic tile and thought, "I wish I could make something like that!"? Well, guess what? You absolutely can! This article is your ticket to discovering the fascinating world of ceramic tile-making. From selecting the right materials to exploring various techniques and finishing touches, we will guide you through every step of the process. Imagine transforming a lump of clay into a stunning piece of art that can enhance your home decor or serve as a unique gift. Let’s dive into the vibrant universe of ceramic tiles and unleash your creativity!
Before you get your hands dirty, it’s essential to understand the materials that will form the backbone of your ceramic tiles. The two primary ingredients in tile-making are clay and glaze. There are various types of clay, each with its unique properties. For instance, earthenware is great for beginners due to its workability, while stoneware offers durability and strength. On the other hand, glazes come in a myriad of colors and finishes, allowing you to achieve the aesthetic you desire. Choosing the right combination of clay and glaze is crucial for achieving the desired textures, colors, and durability in your custom tiles. Here’s a quick overview of some popular types of clay and their characteristics:
| Type of Clay | Characteristics |
|---|---|
| Earthenware | Soft, porous, and easy to work with; great for beginners. |
| Stoneware | Durable, non-porous, and suitable for functional ware. |
| Porcelain | Strong and translucent; ideal for fine, detailed work. |
Now that you’re familiar with the materials, let’s talk about the tools you'll need to bring your vision to life. Having the right equipment is like having the right paintbrushes for a masterpiece. Here’s a list of essential tools to get you started:
- Clay Cutter: For slicing your clay into manageable pieces.
- Rolling Pin: To roll out your clay into flat slabs.
- Kiln: A must-have for firing your tiles and transforming them into durable ceramics.
- Glazing Tools: Brushes and sponges to apply your chosen glazes.
Each of these tools plays a vital role in the tile-making process, ensuring that you achieve quality results. Whether you’re a novice or an experienced artisan, investing in good tools will enhance your tile-making experience.
One of the most exciting aspects of ceramic tile-making is the variety of hand-forming techniques available. Two popular methods are slab building and pinch pots. These techniques allow you to create unique shapes and designs that reflect your personal style.
Slab building is a technique where clay is rolled out into flat sheets and then shaped into tiles. This method offers incredible versatility in tile design, making it perfect for beginners who want to create flat tiles with ease. Imagine rolling out your clay, cutting it into shapes, and then adding textures or patterns to make each tile truly one-of-a-kind!
On the other hand, pinch pots are a fantastic way to explore creativity. This simple technique involves pinching the clay into shape, allowing you to create decorative tiles with unique, textured surfaces. The beauty of pinch pots lies in their organic forms, which can add a rustic charm to your tile collection.
If you're looking for consistency in your designs, using molds can be a game-changer. Molds simplify the tile-making process, allowing you to create intricate shapes and patterns with ease. Whether you want to replicate a favorite design or experiment with new styles, molds can help you achieve professional-looking results.
Once your tiles are shaped and dried, it’s time to think about glazing. Glazing is essential not only for aesthetics but also for functionality. It provides a protective layer that enhances the durability of your tiles. There are various glazing methods and finishing techniques to explore, so let’s take a closer look!
When it comes to glazes, the options are virtually limitless. From matte finishes that evoke a natural feel to glossy glazes that reflect light beautifully, each type can dramatically change the appearance and texture of your finished tiles. Here’s a brief overview of some popular glaze types:
- Matte Glaze: Soft, non-reflective finish.
- Glossy Glaze: Shiny, reflective surface that enhances colors.
- Transparent Glaze: Allows the clay body to show through, adding depth.
Finally, firing is a critical step in the tile-making process. This is where your clay creations are transformed into durable ceramic tiles. Understanding the firing techniques and temperature settings is vital for achieving the best results. Typically, tiles are fired in a kiln at high temperatures, which can range from 1,800°F to over 2,300°F, depending on the type of clay and glaze used. Proper firing ensures that your tiles are not only beautiful but also durable enough to withstand the test of time.
Q: Can I make ceramic tiles at home?
A: Absolutely! With the right materials and tools, you can create beautiful ceramic tiles right in your home.
Q: What type of clay is best for beginners?
A: Earthenware is a great option for beginners due to its workability and ease of use.
Q: How long does it take to make ceramic tiles?
A: The process can vary, but expect to spend several hours shaping and glazing your tiles, plus additional time for drying and firing.
Q: Do I need a kiln to make ceramic tiles?
A: Yes, a kiln is necessary for firing your tiles, which transforms them from clay into durable ceramics.

Understanding Ceramic Materials
When it comes to creating your own ceramic tiles, understanding the materials you’ll be working with is absolutely essential. The heart of any ceramic project lies in the type of clay you choose, as it will dictate not only the aesthetics of your tiles but also their durability and functionality. There are several types of clay available, each with unique properties. For instance, earthenware is a popular choice for beginners due to its workability and vibrant colors. However, it’s not as durable as other options. On the other hand, stoneware is more robust and can withstand higher temperatures, making it ideal for tiles that will see heavy use.
In addition to clay, the glazes you select play a crucial role in the final appearance of your tiles. Glazes can enhance colors, add textures, and provide a protective layer that makes tiles more resistant to wear and tear. Here’s a quick overview of the common types of glazes:
| Type of Glaze | Description | Best Use |
|---|---|---|
| Matte | Non-reflective finish, soft texture. | Decorative tiles, low-traffic areas. |
| Glossy | Shiny finish that enhances colors. | High-traffic areas, easy cleaning. |
| Transparent | Clear glaze that shows the clay body beneath. | Layering effects, enhancing textures. |
Choosing the right combination of clay and glaze is like selecting the perfect ingredients for a recipe; it can make or break your project. For example, if you’re aiming for a rustic look with earthy tones, you might opt for a red earthenware clay paired with a matte glaze. Conversely, if you want a sleek, modern feel, stoneware with a glossy glaze could be the perfect match.
Another important aspect to consider is the firing temperature. Different clays and glazes require specific firing temperatures to achieve their optimal characteristics. For instance, earthenware typically fires at a lower temperature than stoneware. Understanding these requirements will save you from potential mishaps in the kiln, ensuring that your beautiful creations come out just as you envisioned.
In summary, the world of ceramic materials is rich and varied, offering endless possibilities for creativity. By familiarizing yourself with the different types of clay and glazes, you can make informed decisions that will elevate your tile-making experience. Remember, the right materials not only enhance the aesthetics of your tiles but also contribute to their longevity and functionality. So, roll up your sleeves and dive into the exciting world of ceramics!
Essential Tools for Tile Making
When it comes to creating your own ceramic tiles, having the right tools can make all the difference between a frustrating experience and a joyful, creative one. Think of your tools as the paintbrushes of a painter; they are essential for bringing your vision to life. First and foremost, you'll need a good quality clay that is suitable for tile making. There are several types of clay available, but stoneware or earthenware are popular choices due to their durability and ease of use.
In addition to clay, you’ll also need a few basic tools to shape and mold your tiles. A rolling pin is crucial for flattening your clay into slabs, while a cutting tool, like a wire cutter or a knife, will help you achieve clean edges. Don't forget about a sponge and a bucket of water; these will be your best friends when it comes to keeping your workspace clean and your clay workable. It’s also wise to invest in a sturdy work surface, like a wooden table or a dedicated ceramic board, to provide stability during your tile-making process.
Now, let’s talk about some specialized tools that can elevate your tile-making game. A tile cutter is a fantastic investment if you plan on making many tiles, as it allows for precision cutting. For those intricate designs, a set of carving tools will enable you to add details and textures to your tiles. And if you're feeling adventurous, consider getting a pottery wheel; while it’s not necessary for tile making, it can open up a whole new world of creative possibilities.
Once your tiles are shaped and dried, the next step is glazing and firing, which requires additional equipment. A kiln is essential for this process, as it provides the high temperatures needed to transform your clay into durable ceramic. If you don’t have access to a kiln, many local art studios offer firing services, so you can still achieve that professional finish. Lastly, a glazing brush or spray gun will help you apply your glazes evenly, ensuring that your tiles not only look beautiful but are also functional.
Here’s a quick summary of essential tools you might want to consider for your tile-making journey:
| Tool | Purpose |
|---|---|
| Clay | Base material for tiles |
| Rolling Pin | Flattens clay into slabs |
| Tile Cutter | For precise cutting of tiles |
| Carving Tools | Adds details and textures |
| Kiln | Fires the tiles to harden them |
| Glazing Brush | Applies glaze evenly |
In summary, having the right tools at your disposal will not only enhance your tile-making experience but also allow you to express your creativity fully. So gather your tools, roll up your sleeves, and get ready to dive into the exciting world of ceramic tile making!
Q: Do I need a kiln to make ceramic tiles?
A: Yes, a kiln is essential for firing your tiles to achieve durability. If you don’t have one, consider using a local pottery studio.
Q: Can I use regular clay for tile making?
A: While you can use regular clay, it’s recommended to use stoneware or earthenware for better results.
Q: What is the best way to apply glaze?
A: Using a glazing brush or spray gun allows for an even application of glaze, which is crucial for achieving a professional finish.
Q: How long does it take for tiles to dry before firing?
A: Tiles should be thoroughly dried for at least 24-48 hours before firing, depending on the thickness.
Hand-Forming Techniques
When it comes to creating your own ceramic tiles, open the door to a world of creativity and personalization. These methods allow you to mold and shape clay with your hands, giving you the freedom to create unique designs that reflect your personal style. Two of the most popular hand-forming techniques are slab building and pinch pots, each offering different advantages and artistic possibilities.
Let's start with the slab building technique. This method involves rolling out clay into flat sheets, or slabs, which can then be cut and shaped into various forms. Imagine rolling out a pizza dough; it’s similar, but instead of a delicious meal, you’re creating a canvas for your artistic expression. Slab building is particularly great for beginners because it allows for easy manipulation of the clay. You can create tiles of uniform thickness, which is essential for achieving a professional look in your finished products. Plus, this technique is incredibly versatile; you can add textures, patterns, and even incorporate other materials like glass or stones to enhance your designs.
On the other hand, we have the pinch pot technique. This technique is as simple as it sounds—just pinch the clay into shape! Think of it as molding a small ball of dough into a bowl with your fingers. It’s a fantastic way to create decorative tiles with unique, textured surfaces. The beauty of pinch pots lies in their organic forms; no two pieces will ever look the same. This method encourages experimentation, allowing you to add intricate details or embellishments as you go. You can even combine pinch pots with slab building for a mixed-media approach, resulting in truly one-of-a-kind tiles.
Whether you choose to work with slabs or pinch pots, the key is to embrace the process. Hand-forming techniques are not just about the end result; they’re about the joy of creation. Remember to keep your workspace organized and your clay moist to prevent cracking. As you practice and refine your skills, you’ll find that the possibilities are endless. So, roll up your sleeves and let your imagination run wild!
- What is the best type of clay for hand-forming? For beginners, earthenware clay is often recommended due to its workability and affordability.
- Can I use hand-forming techniques for larger tiles? Yes, but larger tiles may require more advanced techniques to ensure they remain structurally sound.
- How do I prevent my clay from drying out while working? Keep a damp cloth over your clay and work in small batches to maintain moisture.
Slab Building
Slab building is a fascinating technique in the world of ceramic tile making that opens up a realm of creativity and design possibilities. At its core, this method involves rolling out clay into flat sheets, which can then be cut and shaped into various forms. Imagine it as creating a canvas for your artistic expression, where the only limit is your imagination! This technique is particularly appealing for beginners because it allows for a straightforward approach to tile-making while still yielding stunning results.
To get started with slab building, you will need a few essential materials and tools. First, select your clay type; stoneware or earthenware is often recommended due to their versatility and durability. Next, gather your tools, which may include a rolling pin, a knife or clay cutter, and a smooth surface for working. Having these items on hand will make the process much smoother. Here’s a quick overview of the steps involved:
- Prepare the Clay: Begin by kneading your clay to remove air bubbles and create a uniform texture.
- Roll Out the Slab: Use a rolling pin to flatten the clay to your desired thickness, typically around 1/4 inch.
- Cut and Shape: Utilize a knife or cutter to create the shapes you want for your tiles. You can experiment with various shapes, such as squares, rectangles, or even more intricate designs.
- Drying: Allow the cut tiles to dry slowly and evenly to avoid cracking. Cover them with plastic to control the drying process.
- Finishing Touches: Once dry, you can smooth the edges or add texture before firing.
One of the most exciting aspects of slab building is the ability to incorporate textures and patterns into your tiles. You can press objects like leaves, fabric, or even textured rollers into the clay before it dries, creating unique designs that will stand out once glazed and fired. This method is not just about functionality; it's about infusing your personality into each piece. Whether you want rustic charm or modern elegance, slab building can accommodate your vision.
Additionally, slab building allows for larger tiles, which can be ideal for specific projects like tabletops or decorative wall pieces. The flexibility of this technique means you can create tiles that are not only visually appealing but also serve practical purposes. Imagine a stunning backsplash in your kitchen or a unique tabletop that sparks conversation. The possibilities are endless!
In summary, slab building is an accessible and rewarding way to make ceramic tiles. By mastering this technique, you can explore your creativity and produce beautiful, custom tiles that reflect your style and personality. So, roll up your sleeves, gather your materials, and let your artistic journey begin!
Q1: What type of clay is best for slab building?
A1: Stoneware and earthenware clays are excellent choices for slab building due to their workability and durability.
Q2: How thick should my slabs be?
A2: A thickness of about 1/4 inch is generally recommended, but you can adjust based on your project needs.
Q3: Can I add textures to my slabs?
A3: Absolutely! You can press various objects into the clay to create unique textures before firing.
Q4: How long should I let my slabs dry?
A4: Allow your slabs to dry slowly and evenly, usually for several hours to a day, depending on the thickness and humidity.
Pinch Pots
Pinch pots are one of the most delightful and accessible techniques in ceramic tile making. Imagine rolling a ball of clay in your hands and then gently pinching it to form a unique shape. This method is not only simple but also incredibly versatile, allowing you to create textured and personalized tiles that reflect your individual style. The beauty of pinch pots lies in their organic forms; no two will ever be exactly alike, which adds to their charm!
To get started with pinch pots, all you need is a lump of clay, your hands, and a bit of imagination. Begin by taking a small piece of clay, about the size of a golf ball. Roll it into a smooth ball and then use your thumb to press into the center, creating a small well. As you pinch the walls of the pot, rotate it to maintain an even thickness. This technique encourages creativity, as you can experiment with different shapes and sizes. You might even find that the imperfections give your tiles character!
One of the exciting aspects of using pinch pots for tile-making is the opportunity to add texture and embellishments. You can use tools or natural objects like leaves or fabric to imprint patterns onto the surface of your tiles. This not only enhances their aesthetic appeal but also makes each piece a unique work of art. Additionally, you can incorporate various colors and glazes to further personalize your tiles, making them perfect for decorative purposes or even functional uses like coasters or trivets.
When it comes to drying and firing your pinch pots, it's essential to follow the right steps to ensure they turn out beautifully. Allow your creations to dry slowly and evenly to prevent cracking. Once they are bone dry, they can be bisque fired, which transforms your soft clay into durable ceramic. After the first firing, you can apply glazes to your pinch pots, adding that final touch of color and shine before they undergo the glaze firing process. The result? Stunning, one-of-a-kind ceramic tiles that showcase your creativity and skill!
In conclusion, pinch pots are an excellent way to dive into the world of ceramic tile making. They offer a unique blend of simplicity and creativity, making them perfect for beginners and seasoned artists alike. So why not give it a try? You might just discover a new passion for creating beautiful, personalized tiles!
- What type of clay is best for making pinch pots? Generally, earthenware or stoneware clay is preferred for pinch pots due to their workability and durability.
- Can I use pinch pots for functional items? Absolutely! Pinch pots can be used to create functional items like bowls, coasters, or decorative tiles.
- How do I prevent my pinch pots from cracking while drying? To avoid cracking, ensure that your pots dry slowly and evenly, and consider covering them with plastic to retain moisture.

Using Molds for Tile Design
When it comes to creating stunning ceramic tiles, using molds can be a game changer. Molds not only simplify the tile-making process but also allow you to achieve consistent shapes and intricate designs that might be challenging to create by hand. Imagine being able to replicate your favorite patterns or create a themed set of tiles with ease! Whether you're a beginner or a seasoned ceramic artist, incorporating molds into your workflow can elevate your projects to the next level.
There are a variety of mold types available, each serving a unique purpose. For instance, flexible silicone molds are perfect for capturing detailed textures and patterns, while sturdy plaster molds are ideal for creating flat tiles. The choice of mold largely depends on the design and finish you envision for your tiles. By using molds, you can create tiles that are not only beautiful but also uniform in size, which is particularly important for larger installations.
To get started with mold-making, you’ll need to gather some essential materials. Here’s a quick look at what you might require:
- Clay for the original tile design
- Mold-making material (silicone or plaster)
- Release agent (to help remove the clay from the mold)
Once you have your materials, the process of creating a mold involves shaping your original tile design and then encasing it in your chosen mold material. After allowing the mold to cure, you can then use it to produce multiple tiles with the same design. This method not only saves time but also opens up endless possibilities for creativity. You can experiment with different textures, colors, and finishes by varying the clay and glazes used in conjunction with your molds.
Moreover, molds can also be used to create themed sets of tiles. For example, if you’re designing a kitchen backsplash, you can create a series of tiles that feature a cohesive theme—like ocean waves or floral patterns—using different molds. This not only adds a personal touch to your space but also showcases your artistic flair. The ability to replicate designs means you can create a harmonious look that ties your entire project together.
In conclusion, using molds for tile design is an effective way to unleash your creativity and streamline the tile-making process. Whether you’re crafting a single piece or a whole series, molds provide the flexibility and consistency needed to bring your artistic visions to life. So, gather your materials, choose your designs, and get ready to mold your way to beautiful ceramic tiles!
1. What type of clay is best for mold-making?
The best clay for mold-making is typically a low-fire clay, as it is easier to work with and allows for better detail capture. However, the choice of clay can depend on the specific project and desired finish.
2. How do I care for my molds?
To prolong the life of your molds, always use a release agent before pressing clay into them. Clean them gently with water and avoid harsh chemicals that might degrade the material.
3. Can I use molds for larger tile projects?
Absolutely! Molds are perfect for larger projects as they ensure uniformity in size and design, making them ideal for installations like backsplashes or floor tiles.
4. How do I achieve different textures with molds?
You can achieve different textures by using various mold materials or by adding textures to your original tile design before creating the mold. Experimenting with different techniques can yield unique results.
Glazing and Finishing Techniques
When it comes to creating your own ceramic tiles, glazing and finishing techniques play a pivotal role in defining their final look and functionality. Glaze not only adds a beautiful sheen to your tiles but also provides a protective layer that enhances durability. So, how do you choose the right glazing method? Let's dive into the fascinating world of ceramic glazes!
There are several types of glazes available, each offering unique characteristics that can dramatically alter the appearance of your tiles. For instance, matte glazes give a soft, non-reflective finish, perfect for a more rustic or organic look. In contrast, glossy glazes create a shiny surface that can brighten up any space and make colors pop. If you want to maintain some transparency, transparent glazes allow the underlying clay body to show through, showcasing any intricate textures or patterns you've created. Understanding these options is crucial as it impacts both aesthetics and functionality.
| Type of Glaze | Finish | Best For |
|---|---|---|
| Matte | Non-reflective | Rustic designs |
| Glossy | Shiny | Vibrant colors |
| Transparent | Clear | Showcasing textures |
Once you've selected your glaze, the next step is the application process. You can apply glaze using various methods, such as dipping, brushing, or spraying. Each technique has its own merits:
- Dipping: This method ensures an even coat and is particularly useful for larger pieces.
- Brushing: Ideal for detailed work, brushing allows for more control over the application.
- Spraying: This technique is great for achieving a smooth and even finish, especially on intricate designs.
After glazing, the final step is firing your tiles in a kiln. This process is crucial because it transforms your clay and glaze into a durable ceramic product. The firing temperature and duration will depend on the type of clay and glaze you are using. Typically, earthenware is fired at lower temperatures (around 1,830°F or 1,000°C), while stoneware and porcelain require higher temperatures (up to 2,400°F or 1,300°C). It's essential to follow the specific guidelines for your materials to achieve the best results.
In addition to glazing, consider applying finishing techniques like polishing or adding a sealant. Polishing can enhance the surface texture, making it feel smoother and more refined. Sealants, on the other hand, can provide additional protection against stains and moisture, which is particularly beneficial for tiles used in kitchens or bathrooms.
Ultimately, glazing and finishing techniques are where your creativity can truly shine. Don't be afraid to experiment with different glazes, application methods, and firing techniques. The beauty of making your own ceramic tiles lies in the journey of discovery and the joy of creating something uniquely yours!
Q: What is the purpose of glazing ceramic tiles?
A: Glazing provides a protective layer, enhances the aesthetic appeal, and can alter the texture of the tiles.
Q: Can I glaze tiles made from any type of clay?
A: While most clays can be glazed, it's essential to choose a glaze compatible with the specific type of clay you are using.
Q: How do I know the right firing temperature for my tiles?
A: The firing temperature depends on the type of clay and glaze. Always refer to the manufacturer's guidelines for the best results.
Types of Glazes
When it comes to ceramic tile making, glazing is more than just a finishing touch; it's an art form that can transform your tiles into stunning pieces of craftsmanship. The type of glaze you choose can significantly impact not only the appearance of your tiles but also their durability and functionality. So, let's dive into the world of glazes and explore the various options available to you!
There are three primary types of glazes that you might consider for your ceramic tiles:
- Matte Glazes: These glazes have a non-reflective finish, giving your tiles a soft, muted look. They are perfect for creating a natural or rustic feel. However, keep in mind that matte glazes can be more susceptible to staining and may require more maintenance over time.
- Glossy Glazes: If you're looking for a shiny, vibrant finish, glossy glazes are the way to go. They enhance colors and can make your tiles stand out. However, the reflective surface can highlight imperfections, so make sure your tiles are well-crafted before applying this type of glaze.
- Transparent Glazes: These glazes allow the underlying clay body or underglaze decoration to show through, creating a layered effect. They can be used over colored slips or underglazes to add depth and complexity to your tile designs. Transparent glazes can be glossy or matte, depending on your preference.
In addition to these primary types, there are also several specialty glazes that you might find intriguing:
- Raku Glazes: Known for their unique crackle effects, raku glazes are often used in a specific firing process that involves removing the pieces from the kiln while they are still glowing hot. This technique can produce stunning results, but it requires careful handling and safety precautions.
- Celadon Glazes: Originating from ancient China, celadon glazes are typically jade green and are known for their translucent quality. They can create a beautiful depth of color and are often used for more traditional tile designs.
- Engobe: While not a glaze in the traditional sense, engobe is a liquid clay slip that can be applied to tiles before glazing. It can add color and texture, providing another layer of creativity to your tile-making process.
Choosing the right glaze is crucial for achieving the desired aesthetic and practical qualities in your ceramic tiles. Consider how each type of glaze interacts with your tile's shape, color, and intended use. The right glaze can elevate your tiles from simple pieces of clay to breathtaking works of art that reflect your personal style and creativity.
As you experiment with different glazes, keep in mind that testing is key! Create small sample tiles to see how each glaze reacts with your clay body and firing technique. This way, you can ensure that the final product aligns with your vision before committing to larger pieces.
Q: Can I mix different types of glazes?
A: Yes, you can mix glazes, but be cautious! Mixing glazes can lead to unpredictable results, so it's always best to test your mixtures on sample tiles first.
Q: How do I know which glaze is best for my project?
A: Consider the intended use of your tiles. For high-traffic areas, a durable glossy glaze might be ideal, while a matte glaze may be suitable for decorative tiles. Always test first!
Q: What is the difference between underglaze and glaze?
A: Underglaze is a colored slip applied before glazing, while glaze is a glass-like coating applied over the entire tile. Underglazes can be used to add designs that are then enhanced with a clear glaze on top.

Firing Your Tiles
Firing your tiles is a crucial step in the ceramic tile-making process, transforming your clay creations into durable and functional pieces. This process involves heating the tiles in a kiln at high temperatures, which causes a series of chemical and physical changes. Understanding the firing techniques and temperature settings is essential for achieving the desired results. The firing process can be divided into two main stages: bisque firing and glaze firing.
The first stage, bisque firing, is typically done at a lower temperature, usually around 1,830°F (1,000°C). This initial firing removes moisture from the clay and hardens it, making it easier to handle and apply glazes. During this stage, the clay undergoes a transformation, becoming more robust and less porous. It's like a caterpillar turning into a butterfly—your tiles are starting to take on their final form!
Once the bisque firing is complete, it's time for glazing. This is where the magic happens! Glazing not only enhances the aesthetic appeal of your tiles but also adds a protective layer. The glaze firing occurs at a higher temperature, typically between 1,830°F (1,000°C) and 2,400°F (1,315°C), depending on the type of glaze used. This stage melts the glaze, allowing it to fuse with the surface of the tile, creating a smooth and often shiny finish.
To give you a clearer understanding, here's a simple comparison of the two firing stages:
| Firing Stage | Temperature Range | Purpose |
|---|---|---|
| Bisque Firing | 1,830°F (1,000°C) | Hardens clay, removes moisture |
| Glaze Firing | 1,830°F - 2,400°F (1,000°C - 1,315°C) | Melts glaze, fuses it to the tile |
It's important to note that temperature control is vital during the firing process. Too high a temperature can lead to warping or even melting your tiles, while too low can result in underfired pieces that are weak and porous. Therefore, investing in a reliable kiln with precise temperature settings is highly recommended.
After the glaze firing, let your tiles cool down gradually. Rapid cooling can cause cracking due to thermal shock. Patience is key here! Once cooled, your tiles are ready for use, showcasing the beauty of your hard work. Whether you plan to use them for a backsplash, coasters, or decorative art pieces, the firing process is what ultimately brings your creative vision to life.
- What is the difference between bisque and glaze firing? Bisque firing hardens the clay and removes moisture, while glaze firing melts the glaze and fuses it to the tile.
- How long does the firing process take? The firing process can take several hours to a full day, depending on the kiln and the type of firing.
- Can I fire my tiles in a regular oven? No, a kiln is necessary to reach the high temperatures required for firing ceramic tiles.
Frequently Asked Questions
- What materials do I need to make ceramic tiles?
To create your own ceramic tiles, you'll need various types of clay, glazes, and essential tools. Common materials include earthenware, stoneware, and porcelain clays. For glazes, you can choose from matte, glossy, or transparent options, depending on the finish you desire. Don’t forget the tools like rolling pins, molds, and a kiln for firing your creations!
- What are the different techniques for forming tiles?
There are several exciting techniques for forming tiles, including hand-forming methods like slab building and pinch pots. Slab building involves rolling out clay and shaping it into flat tiles, while pinch pots allow for more organic, textured designs. Both methods are perfect for unleashing your creativity and making personalized tiles!
- How do I glaze my ceramic tiles?
Glazing your ceramic tiles is crucial for both aesthetics and functionality. You can apply glaze using various methods, such as dipping, brushing, or spraying. Each technique can yield different results, so experiment to find the look you love. After glazing, don’t forget to fire your tiles in a kiln to set the glaze and enhance durability!
- What firing techniques should I use for my tiles?
Firing is a vital step in tile-making that transforms your clay into durable ceramics. The firing process typically involves bisque firing followed by glaze firing. Each type of clay has specific temperature settings, so make sure to follow the guidelines for the materials you're using. This ensures that your tiles are strong and ready for use!
- Can I use molds for tile making?
Absolutely! Using molds can simplify the tile-making process and help you achieve consistent shapes and patterns. You can create your own molds or purchase ready-made ones to replicate intricate designs. Molding is a great way to produce beautiful tiles without the hassle of hand-forming each piece!
- How can I ensure my tiles are durable?
To ensure your ceramic tiles are durable, pay attention to the materials and firing process. Choose high-quality clay and glazes, and make sure to fire your tiles at the appropriate temperatures. Proper glazing techniques will also protect your tiles from moisture and wear, making them last longer in your home!


