
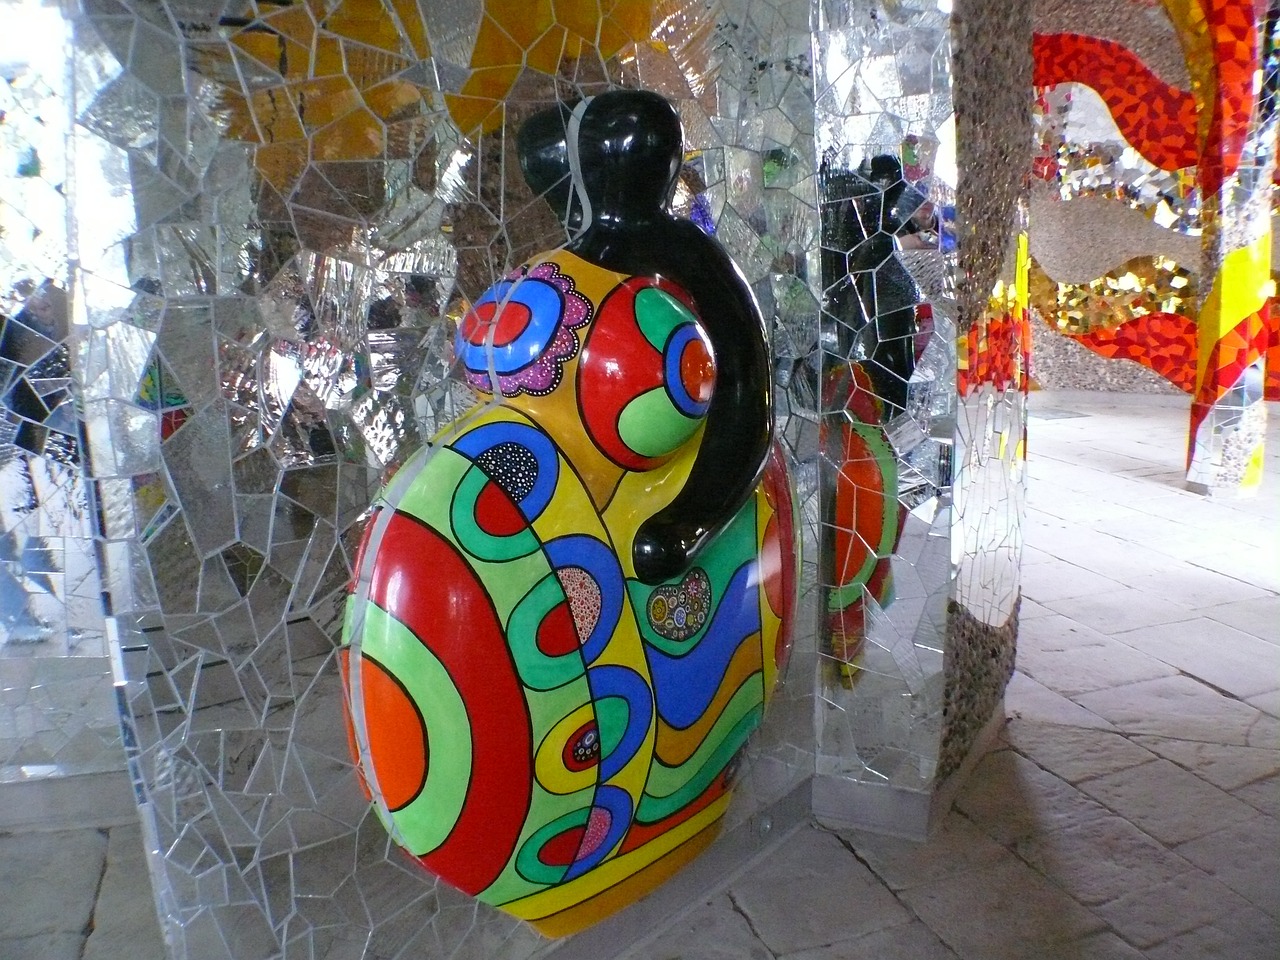
How to Create a DIY Mosaic Accent Wall
Creating a stunning DIY mosaic accent wall can transform any space in your home into a vibrant and artistic focal point. Whether you want to add a splash of color to your living room, a touch of elegance to your bathroom, or a unique design to your kitchen, a mosaic wall can do just that! The beauty of a mosaic lies not only in its stunning visuals but also in the creativity and personal touch you can bring to the project. In this article, we will guide you through the essential steps to design and create your own mosaic accent wall, ensuring that you have all the necessary materials, techniques, and tips for a successful project.
Before diving into the creative process, it's crucial to select the ideal spot for your mosaic accent wall. Think about areas that are highly visible, such as a wall in your living room or a backsplash in your kitchen. Consider how the lighting will interact with your mosaic; natural light can enhance the colors and textures of your tiles, making them pop. Additionally, take into account the overall design of your space. A mosaic wall should complement your existing decor, so choose a location where it can shine without overwhelming the other elements in the room. Remember, the right location can make a significant difference in how your mosaic is perceived!
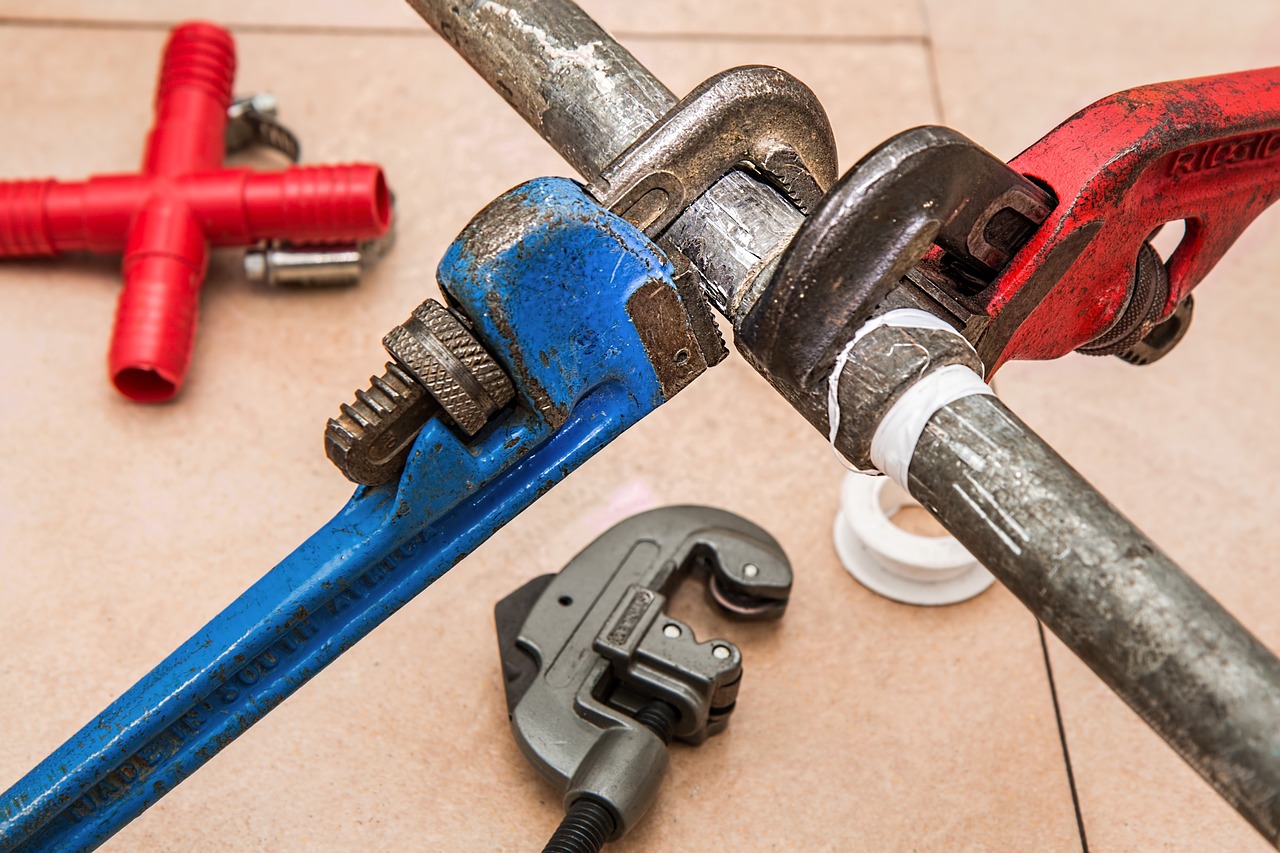
Now that you've chosen the perfect spot, it's time to gather the materials needed for your mosaic project. Understanding what you'll need is essential to ensure a smooth and enjoyable crafting experience. Here’s a quick rundown of the materials that will help you create a beautiful and durable accent wall:
- Mosaic Tiles: These can be glass, ceramic, or stone, each offering unique aesthetics and durability.
- Adhesives: A strong adhesive is crucial for keeping your tiles in place.
- Grout: This is used to fill in the gaps between your tiles and provides a polished look.
- Tools: You'll need tile cutters, a trowel, a sponge, and a level for precise installation.
With these materials in hand, you're ready to embark on your mosaic journey!
When it comes to choosing tiles for your mosaic, the options are vast. Let’s explore some popular types:
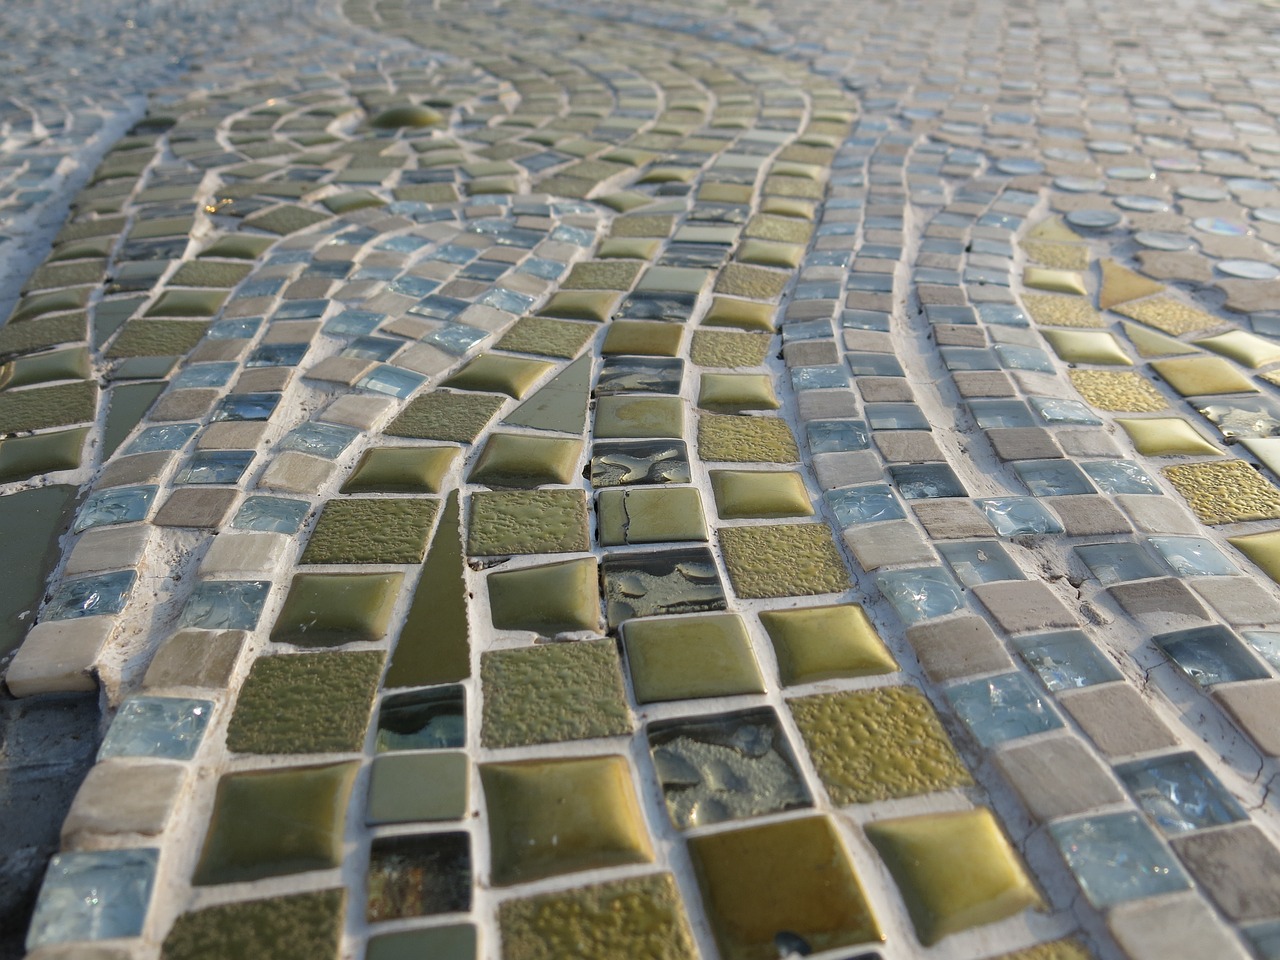
Glass tiles are a fantastic choice for those looking to add vibrant colors and reflective qualities to their mosaic wall. They catch the light beautifully, creating an eye-catching effect that can brighten up any room. Their versatility allows for endless creative patterns, making them a favorite among DIY enthusiasts.
Ceramic tiles are known for their durability and wide range of colors and styles. They can be easily cut and shaped to fit your desired mosaic design, allowing for greater flexibility in creativity. Plus, they are relatively easy to work with, making them perfect for beginners.
Selecting the right adhesives and grouts is vital for a successful mosaic installation. Different tiles require different adhesives, so it's important to choose one that is suitable for your specific tile type. Similarly, grouts come in various colors and consistencies, allowing you to customize the finish of your mosaic. Make sure to read the instructions carefully to ensure optimal adhesion and longevity of your masterpiece!
Now that you have your materials, it’s time to get creative! Designing a visually appealing pattern is key to a stunning mosaic wall. Start by sketching your design on paper. This will help you visualize the final outcome and make any necessary adjustments before you begin installation. You can also use templates to simplify the process. Templates can help maintain consistency and precision in your design, ensuring that your mosaic turns out just as you envisioned.
With your design in hand, it’s time to dive into the installation process. This step requires careful planning and execution to ensure that your mosaic wall is both beautiful and secure. Start by preparing the wall surface. Cleaning and priming the area is essential for optimal adhesion. Once your surface is ready, apply the tiles according to your design, paying close attention to spacing and alignment. Using a level can help ensure that your tiles are straight and evenly distributed.
After the tiles are installed, it's time for the finishing touches that will enhance the overall look of your mosaic wall. Grouting is a crucial step; it fills in the gaps between tiles and provides a polished appearance. Understanding proper grouting techniques will ensure that you apply grout evenly and effectively. Finally, sealing your mosaic wall will protect it from moisture and stains, maintaining its beauty over time. Choose the best sealing products and methods to keep your mosaic looking fresh and vibrant for years to come!
Q: What type of tiles should I use for my mosaic wall?
A: The choice of tiles depends on your personal style and the look you want to achieve. Glass tiles are vibrant and reflective, while ceramic tiles offer durability and versatility. Choose what speaks to you!
Q: How do I clean my mosaic wall?
A: Regular cleaning with a damp cloth is usually sufficient. For tougher stains, use a mild detergent and a soft sponge. Avoid harsh chemicals that can damage the tiles.
Q: Can I install a mosaic wall myself?
A: Absolutely! With the right materials and following the steps outlined in this guide, you can successfully create a DIY mosaic accent wall. Just take your time and enjoy the process!
Choosing the Right Location
When it comes to creating a stunning DIY mosaic accent wall, the first thing you need to consider is the location. Choosing the right spot is crucial because it sets the stage for the entire project. Think about where you want your mosaic to shine the brightest. Is it in your living room, bathroom, or perhaps a cozy nook in your kitchen? The location should not only be visible but also enhance the overall vibe of your space.
Lighting plays a significant role in how your mosaic will be perceived. A well-lit area can make your colorful tiles pop, creating a vibrant atmosphere. On the other hand, a dimly lit corner might not do justice to your hard work. So, look for a spot that receives ample natural light or consider adding some stylish lighting fixtures to illuminate your masterpiece.
Another factor to think about is the surrounding decor. Your mosaic should complement the existing elements in the room. For instance, if your space has a modern aesthetic, a sleek and contemporary mosaic design will fit right in. Conversely, if you have a rustic style, opt for earthy tones and natural materials in your mosaic. This harmonious blend will create a cohesive look that feels intentional and well-planned.
Additionally, consider the functionality of the space. If you’re thinking about a mosaic wall in a high-traffic area, ensure that the materials you choose are durable and easy to clean. For example, glass tiles are excellent for reflecting light and adding a touch of elegance, but they can also be prone to scratches. In contrast, ceramic tiles offer durability and a variety of styles, making them a practical choice for busy spaces.
To summarize, when choosing the right location for your mosaic accent wall, keep these key points in mind:
- Visibility: Ensure it’s in a place where it can be admired.
- Lighting: Look for areas with good natural light or consider adding lighting.
- Surrounding Decor: Choose a design that complements your existing decor.
- Functionality: Select durable materials for high-traffic areas.
By carefully considering these factors, you’ll set the foundation for a stunning mosaic accent wall that not only enhances your home but also reflects your personal style. So, take your time, survey your space, and envision how your mosaic will transform the area. The right location can make all the difference in achieving that wow factor!
Gathering Materials
Before diving into the exciting world of DIY mosaic accent walls, it's essential to gather all the necessary materials to ensure a smooth and enjoyable project. Think of this phase as assembling your toolkit for an adventure—having everything on hand will save you from those last-minute trips to the store that can interrupt your creative flow. The primary materials you’ll need include tiles, adhesives, grouts, and tools. Let’s break these down a bit further.
First up, tiles are the heart of your mosaic wall. You can choose from a variety of options, each with its unique flair. For instance:
- Glass Tiles: These are vibrant and reflective, adding a pop of color and light to your space.
- Ceramic Tiles: Durable and versatile, ceramic tiles come in countless designs and can be easily cut to fit your vision.
- Stone Tiles: If you’re aiming for a more natural look, stone tiles can bring an earthy elegance to your mosaic.
Once you’ve settled on your tile choice, the next crucial item is adhesives. The right adhesive will ensure your tiles stick securely to the wall. There are various types of adhesives available, such as thin-set mortar and tile adhesive, so be sure to select one that is compatible with the type of tiles you've chosen. Additionally, grout is vital for filling the gaps between tiles and providing a finished look. Choose a grout that complements your tiles; for instance, lighter grouts can brighten up darker tiles, while darker grouts can add depth to lighter tiles.
Now, let’s talk about the tools you’ll need. A basic toolkit for your mosaic project should include:
- Tile Cutter: Essential for shaping your tiles to fit your design.
- Notched Trowel: Helps in applying adhesive evenly.
- Sponge: Useful for cleaning excess grout and adhesive.
- Level: Ensures your tiles are aligned perfectly.
Lastly, don’t forget about protective gear! Safety glasses and gloves will keep you safe from sharp edges and dust while working. Having all these materials ready will not only streamline your process but also enhance the joy of creating something beautiful with your own hands. Remember, the right materials can make all the difference between a good project and a great one!

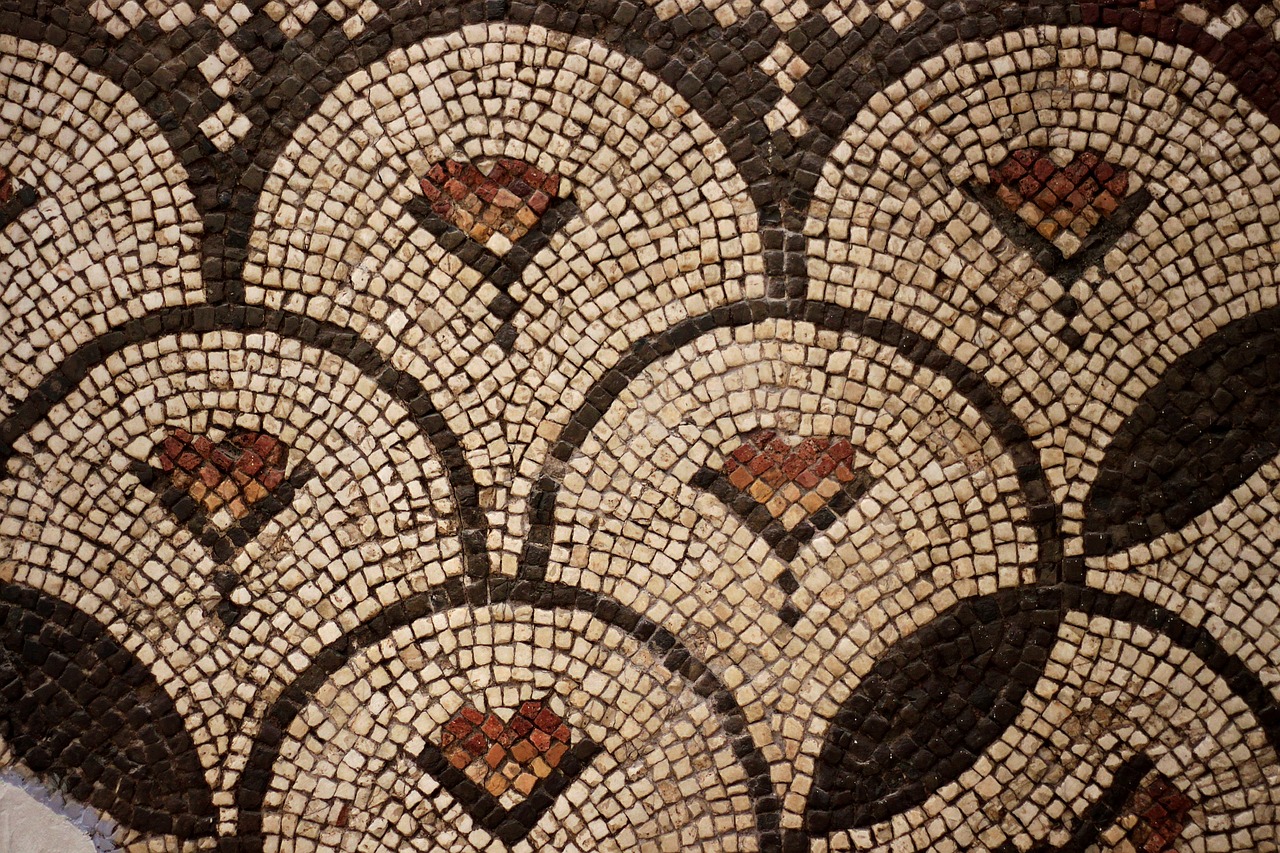
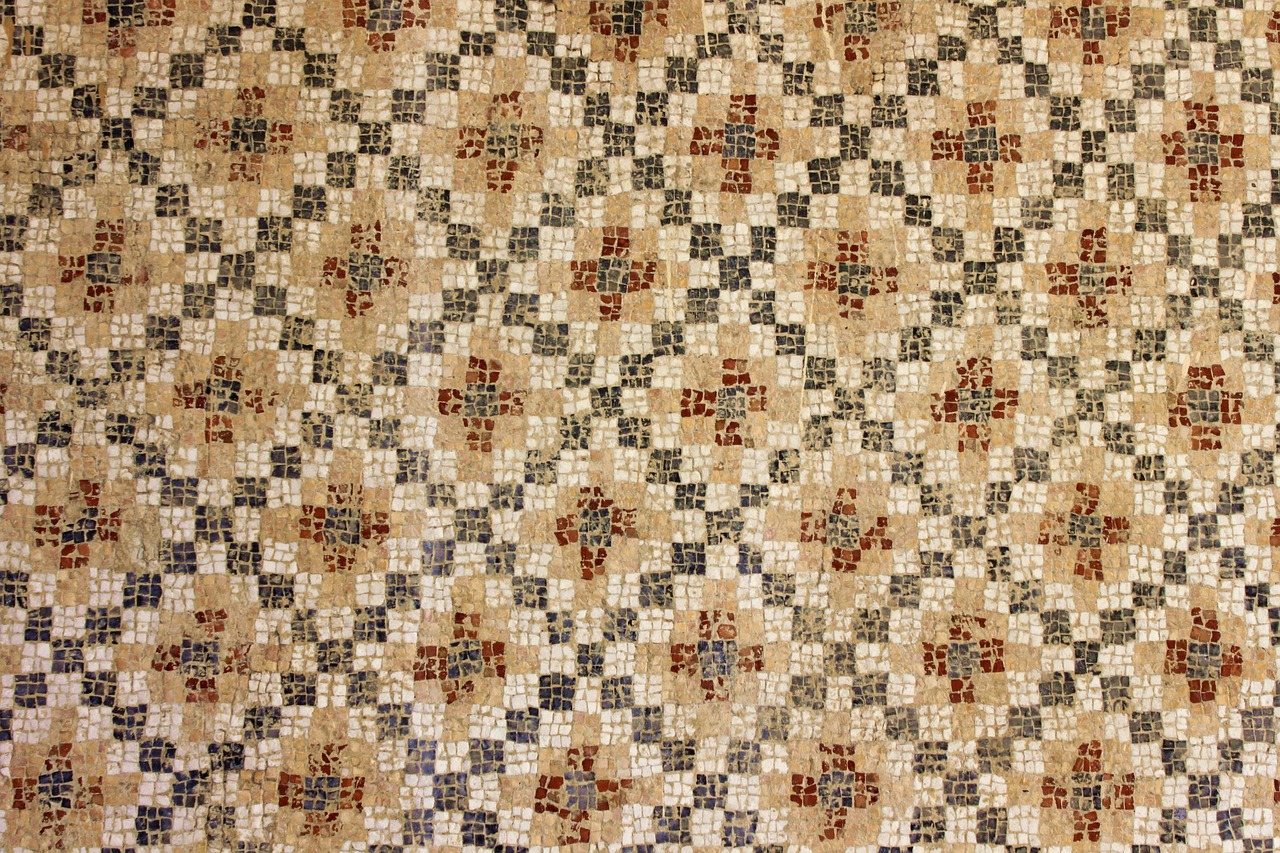
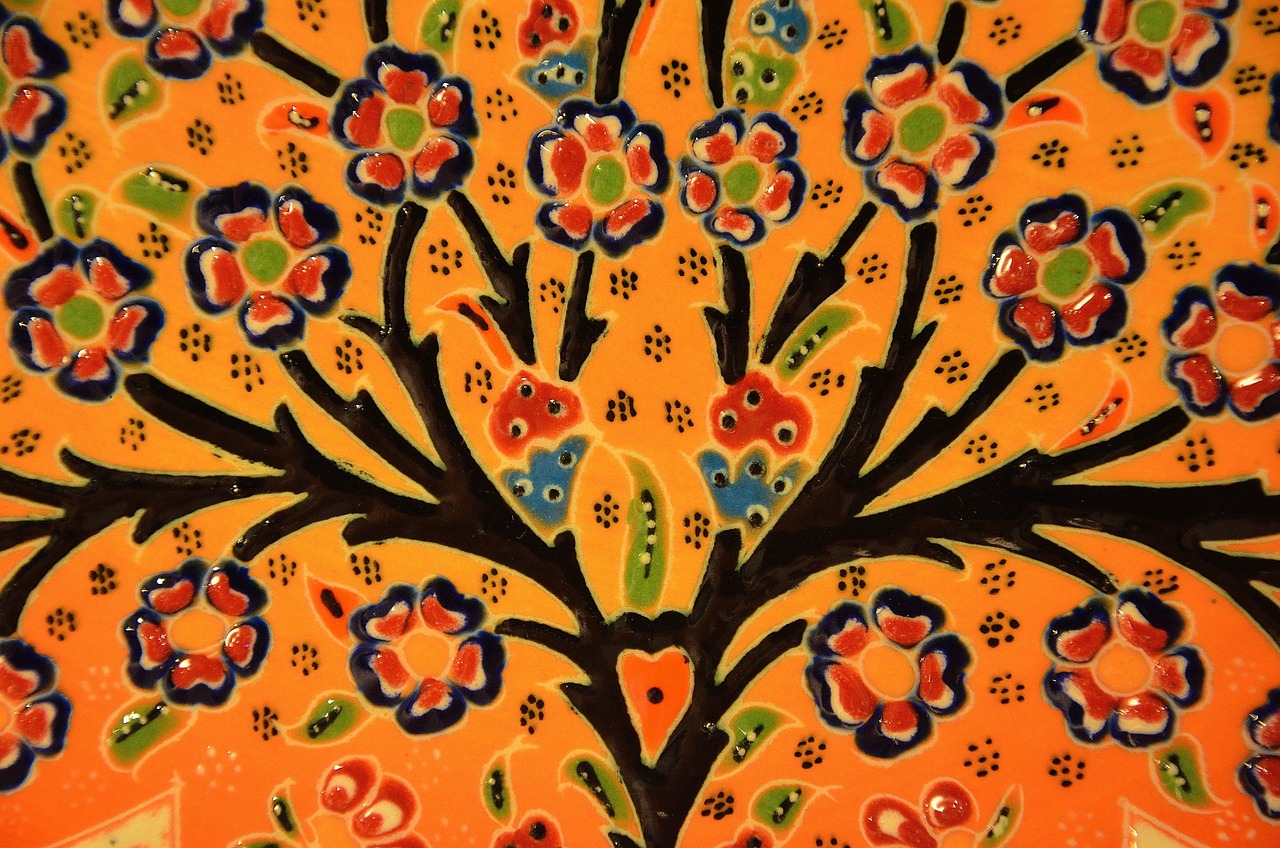
Types of Mosaic Tiles
When it comes to creating a stunning mosaic accent wall, choosing the right tiles is like picking the perfect ingredients for a gourmet dish. Each type of tile brings its own unique flavor to your design, and understanding these options is essential for achieving the look you desire. Let's dive into the three most popular types of mosaic tiles: glass, ceramic, and stone.
Glass tiles are a favorite among DIY enthusiasts and designers alike, thanks to their vibrant colors and reflective qualities. Imagine how a well-placed glass tile can catch the light, creating a dazzling effect that transforms your space. These tiles come in a myriad of colors, shapes, and sizes, allowing for endless creative possibilities. They’re particularly great for smaller areas, like a backsplash or a bathroom wall, where their luminosity can shine through. However, keep in mind that glass tiles can be a bit more fragile than their ceramic counterparts, so handling them with care during installation is essential.
Next up, we have ceramic tiles. These tiles are the workhorses of the mosaic world. Known for their durability, they come in a vast array of colors and finishes, making them incredibly versatile. Whether you want a glossy finish or a matte look, there’s a ceramic tile that fits the bill. One of the best things about ceramic tiles is how easy they are to cut and shape, making them perfect for intricate designs. If you're looking for a tile that combines beauty with resilience, ceramic is definitely the way to go.
Lastly, let’s talk about stone tiles. These tiles are the embodiment of natural beauty, bringing an earthy, organic feel to your mosaic wall. With options like slate, marble, and travertine, stone tiles offer unique textures and colors that can add depth to your design. However, they can be heavier and more challenging to install than glass or ceramic tiles. If you're feeling adventurous and want to create a rustic or luxurious look, stone tiles can be the perfect choice for your project. Just remember to consider the weight and ensure your wall can support them!
| Tile Type | Characteristics | Best For |
|---|---|---|
| Glass Tiles | Vibrant colors, reflective, delicate | Backsplashes, bathrooms |
| Ceramic Tiles | Durable, versatile, easy to cut | Any wall, intricate designs |
| Stone Tiles | Natural beauty, unique textures, heavier | Rustic or luxurious looks |
In summary, when selecting tiles for your mosaic accent wall, consider not just the aesthetics but also the practicality of each tile type. Will it withstand the test of time? Is it easy to work with? By weighing these factors, you can choose the perfect mosaic tiles that will not only beautify your space but also stand the test of time.
Glass Tiles
When it comes to creating a stunning DIY mosaic accent wall, are often the star of the show. Their vibrant colors and reflective qualities can transform any space, making it feel more lively and inviting. Imagine a wall that dances with light, casting beautiful reflections throughout the room—this is the magic of glass tiles. They come in a variety of hues, allowing you to unleash your creativity and design a mosaic that truly reflects your personality.
One of the best features of glass tiles is their versatility. You can find them in countless shapes and sizes, from tiny squares to larger rectangles, which means you can create intricate patterns or bold, modern designs. The smooth surface of glass tiles not only enhances their aesthetic appeal but also makes them easy to clean, ensuring that your masterpiece remains pristine over time. Plus, they are resistant to moisture, making them ideal for areas like kitchens and bathrooms where humidity can be a concern.
However, before diving into your project, it's essential to consider a few key factors when working with glass tiles:
- Color Selection: Choose colors that complement your existing decor. Bright, bold colors can add a pop of fun, while softer shades can create a calming atmosphere.
- Light Reflection: Consider how light will interact with your tiles. Glass tiles reflect light beautifully, so placement is crucial to maximize this effect.
- Installation Techniques: Glass tiles can be tricky to cut and install, so make sure you have the right tools and techniques at your disposal. Using a wet saw can help achieve clean cuts.
In summary, glass tiles are an excellent choice for anyone looking to create an eye-catching mosaic accent wall. Their vibrant colors, reflective qualities, and ease of maintenance make them a popular option among DIY enthusiasts. Just remember to plan your design carefully and consider the factors mentioned above to ensure your project is a resounding success.
Ceramic Tiles
Ceramic tiles are a fantastic choice for your DIY mosaic accent wall, offering a blend of durability and aesthetic appeal that few other materials can match. When you think of ceramic tiles, imagine a canvas of endless possibilities; they come in a wide range of colors, patterns, and textures, allowing you to unleash your creativity. Whether you want a sleek modern look or a rustic charm, ceramic tiles can help you achieve that vision.
One of the standout features of ceramic tiles is their durability. They’re not just pretty faces; these tiles can withstand the test of time, making them perfect for high-traffic areas or spaces that might experience moisture, like kitchens or bathrooms. Unlike some other materials, ceramic tiles are resistant to scratches and stains, which means your mosaic will look fabulous for years to come.
Another advantage is their versatility. Ceramic tiles can be easily cut and shaped to fit your specific design needs. This means that if you have a vision of a unique pattern, you can simply trim the tiles to achieve the desired effect. Plus, they can be combined with other materials like glass or stone to create a stunning contrast that adds depth to your design.
When selecting ceramic tiles for your mosaic, consider the following:
- Color: Choose colors that complement your existing decor. Bold colors can make a statement, while softer hues can create a calming atmosphere.
- Finish: Ceramic tiles come in various finishes, including glossy, matte, and textured. Glossy tiles reflect light beautifully, while matte finishes can offer a more understated look.
- Size: The size of the tiles can greatly affect the overall appearance of your mosaic. Smaller tiles can create intricate designs, while larger tiles can provide a more modern look.
Ultimately, ceramic tiles are a reliable and stylish option for anyone looking to create a mosaic accent wall. They not only enhance the visual appeal of your space but also offer practical benefits that make them a smart choice for DIY enthusiasts. So, whether you're a seasoned crafter or a newbie, ceramic tiles can help you turn your creative dreams into reality.
Q: Are ceramic tiles easy to install?
A: Yes, ceramic tiles can be installed by DIY enthusiasts with some basic tools and techniques. Proper preparation and following installation guidelines will yield great results.
Q: Can ceramic tiles be used in wet areas?
A: Absolutely! Ceramic tiles are water-resistant, making them suitable for kitchens, bathrooms, and even outdoor spaces, provided they're rated for such use.
Q: How do I clean ceramic tiles?
A: Cleaning ceramic tiles is simple. Regular sweeping and occasional mopping with a mild detergent will keep them looking fresh. Avoid abrasive cleaners that could scratch the surface.
Adhesives and Grouts
When it comes to creating a stunning mosaic accent wall, choosing the right adhesives and grouts is just as important as selecting the perfect tiles. The adhesive acts as the glue that holds your mosaic pieces in place, ensuring they stay put for years to come. There are several types of adhesives available, each suited for different materials and environments. For instance, if you're working with glass tiles, a thin-set mortar or a specialized glass tile adhesive is recommended to ensure a strong bond and prevent any potential slipping.
On the other hand, if you're using ceramic tiles, you might opt for a standard thin-set mortar that can handle the weight and provide a durable hold. It's essential to read the manufacturer's instructions carefully, as each adhesive has its unique drying times and application methods. Additionally, consider the environment where your mosaic wall will be installed; for areas exposed to moisture, such as bathrooms or kitchens, a waterproof adhesive is crucial.
Once your tiles are securely adhered to the wall, the next step is applying grout, which fills the gaps between the tiles and adds a finished look to your mosaic. There are various types of grout available, including sanded and unsanded options. Sanded grout is typically used for wider joints (greater than 1/8 inch) because it contains fine sand, which helps prevent cracking. Unsanded grout, on the other hand, is ideal for smaller joints as it provides a smoother finish and is easier to work with. Choosing the right grout not only affects the aesthetic appeal of your mosaic but also its durability.
Here’s a quick comparison table to help you decide on the best adhesive and grout for your project:
| Type | Best For | Features |
|---|---|---|
| Thin-set Mortar | Ceramic Tiles | Durable, versatile, suitable for various surfaces |
| Glass Tile Adhesive | Glass Tiles | Prevents slipping, strong bond |
| Sanded Grout | Wider Joints | Prevents cracking, adds strength |
| Unsanded Grout | Narrow Joints | Smoother finish, easier to apply |
In summary, investing time in selecting the appropriate adhesives and grouts will ensure that your mosaic wall not only looks fantastic but also stands the test of time. Remember, the right products can make all the difference in achieving that flawless finish you desire!
Q: How long does it take for adhesive to dry?
A: The drying time varies depending on the type of adhesive used, but generally, it can take anywhere from 24 to 48 hours before you can grout the tiles.
Q: Can I use regular tile adhesive for glass tiles?
A: It's best to use a specialized glass tile adhesive to ensure a strong bond and prevent any issues with slipping or cracking.
Q: How do I clean my mosaic wall after installation?
A: Use a damp cloth to gently wipe the tiles and grout. Avoid harsh chemicals that could damage the tiles or grout.
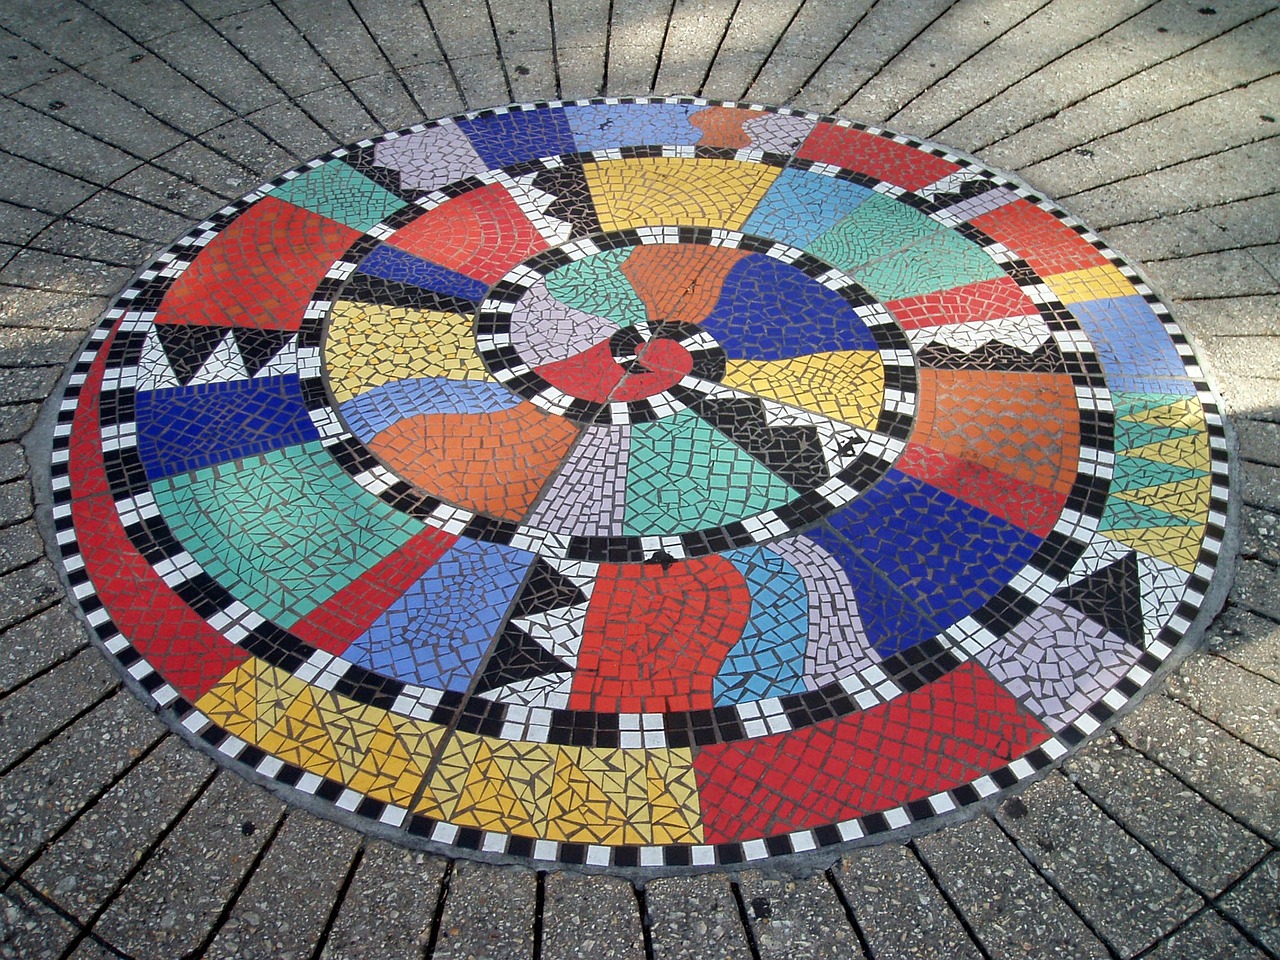
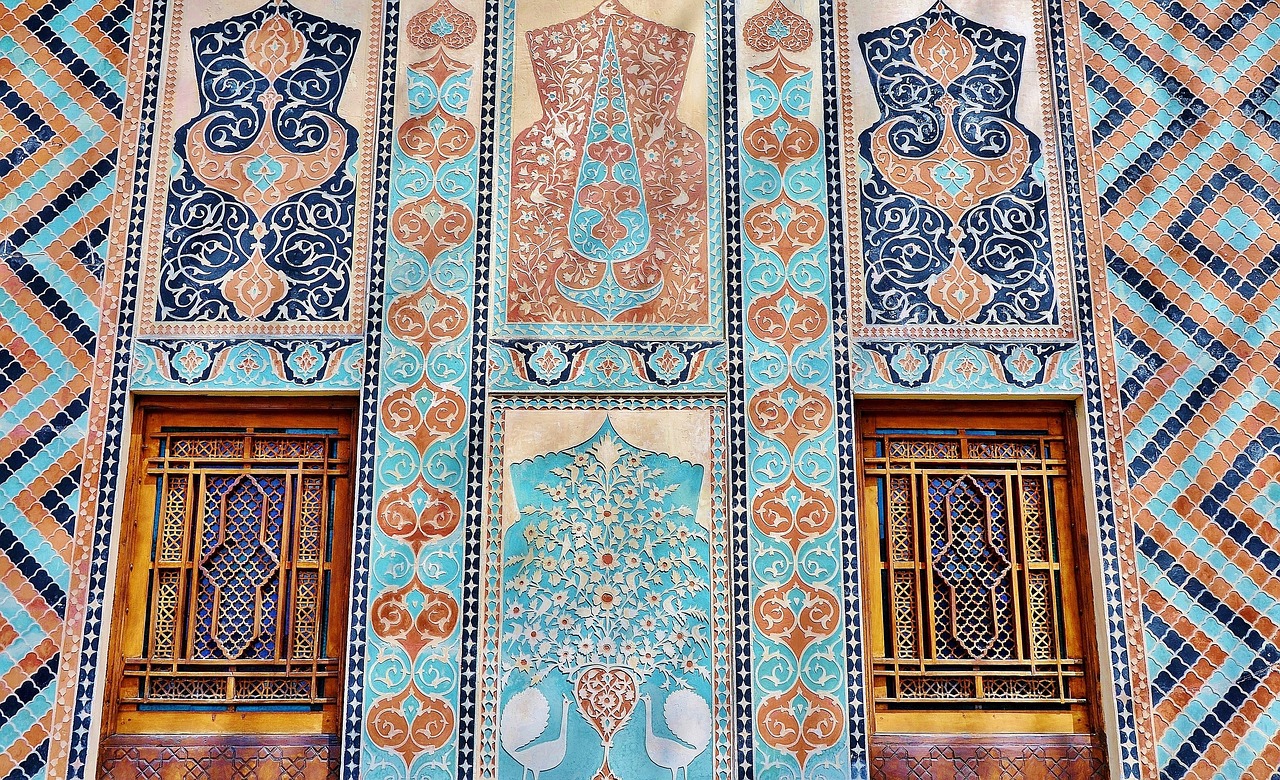
Designing Your Mosaic Pattern
Creating a visually appealing mosaic pattern is like composing a beautiful piece of music; it requires a keen sense of aesthetics and a touch of creativity. The first step in this artistic journey is to visualize your design. Think about the colors, shapes, and overall theme you want to convey. Are you aiming for a modern, sleek look, or perhaps something more traditional and intricate? This decision will guide the rest of your design process.
One effective way to start is by sketching your design on paper. Grab a pencil and let your imagination flow! Sketching allows you to play around with different arrangements and patterns without committing to anything just yet. You can create several drafts, adjusting sizes and colors until you find the perfect combination that resonates with your vision. Remember, this is your chance to experiment! Don't be afraid to make bold choices.
Additionally, using templates can significantly simplify the layout process. Templates help maintain consistency and precision, especially if you’re working with intricate designs. You can create templates by cutting out shapes from cardboard or using graph paper to map out your mosaic. This method not only saves time but also ensures that each piece fits perfectly into your overall design. Think of it as laying down the foundation of a house; a solid base will support the entire structure.
When designing your mosaic, consider the color palette as well. Choosing complementary colors can create a stunning visual impact, while contrasting colors can add a dynamic flair. A well-thought-out color scheme can transform a simple design into a captivating masterpiece. For instance, if you’re going for a beach-themed mosaic, shades of blue and sandy beige can evoke a serene atmosphere, while vibrant yellows and oranges can infuse energy and warmth.
Another essential aspect of your design is the scale and proportion of the tiles. Larger tiles can create bold statements, while smaller tiles allow for intricate detailing. Think about how these elements will interact with the surrounding space. You wouldn’t want a tiny mosaic in a vast room to get lost, nor would you want a massive piece to overwhelm a small area. Finding the right balance is key!
Lastly, don’t forget to take inspiration from the world around you. Nature, architecture, and even art can spark ideas for your mosaic pattern. You might find that a simple leaf shape or a geometric pattern from a building can translate beautifully into your design. Remember, the goal is to create something that not only reflects your personal style but also enhances the beauty of your space.
In summary, designing your mosaic pattern is a delightful process that combines creativity with planning. By sketching your ideas, using templates, choosing the right colors, and considering the scale, you can create a stunning mosaic accent wall that truly stands out. So grab your materials and let your artistic side shine!
- What type of tiles are best for beginners? Ceramic tiles are often recommended for beginners due to their durability and ease of handling.
- How do I choose the right colors for my mosaic? Consider the existing color scheme of your room and select colors that complement or contrast effectively.
- Can I use leftover tiles from other projects? Absolutely! Mixing leftover tiles can add a unique touch to your mosaic.
- What tools do I need for cutting tiles? A tile cutter or a glass cutter is essential for shaping your tiles accurately.
Sketching Your Design
Sketching your mosaic design is an exciting step in the creation of your DIY accent wall. It’s like laying the groundwork for a masterpiece! Before you dive into the actual installation, taking the time to sketch out your ideas can make a world of difference. Think of it as your blueprint; it helps you visualize the end result and allows for any necessary adjustments before you start placing tiles. Grab a pencil and some graph paper or just a plain sheet; the goal is to get your creative juices flowing!
Start by measuring the wall space where you plan to install your mosaic. Knowing the dimensions will help you accurately plan your design. Once you have your measurements, consider the following aspects:
- Color Scheme: What colors do you want to incorporate? Think about how these colors will complement the rest of your room.
- Pattern Style: Are you thinking of geometric shapes, floral designs, or maybe something abstract? The style can greatly influence the mood of the space.
- Tile Size: Will you use small tiles for intricate designs or larger tiles for a bolder look? This will affect both your sketch and the final installation.
As you sketch, don’t worry about perfection! This is your chance to experiment. Use different colors to represent various tiles, and feel free to make changes as inspiration strikes. If you're feeling adventurous, consider creating multiple sketches to explore different ideas. You might discover a design you love even more!
Once you have a design that you’re excited about, take a moment to visualize how it will look on the wall. Imagine the light reflecting off glass tiles or the warmth of ceramic tiles. If you’re unsure, you can even use software tools or apps designed for interior design to create a digital version of your mosaic. This can help you see how your design interacts with the overall aesthetics of your room.
In summary, sketching your design is not just about planning; it’s about unleashing your creativity! It sets the stage for a successful mosaic installation and ensures that you’re happy with the outcome. So, grab your materials, let your imagination run wild, and start sketching your dream mosaic wall!
Q: How detailed should my sketch be?
A: Your sketch doesn’t need to be overly detailed, but it should clearly represent your design, colors, and tile sizes. The more precise you are, the easier it will be during installation!
Q: Can I change my design after I start?
A: Absolutely! Flexibility is key in creative projects. Just be sure to adjust your plan before you start laying tiles to avoid confusion.
Q: What if I’m not good at drawing?
A: Don’t fret! The sketch is a tool for you. Even simple shapes and patterns can work. Alternatively, you can use digital design tools for a more polished look.
Using Templates
When it comes to creating a stunning mosaic accent wall, using templates can be a game changer. They act like a roadmap, guiding you through the intricate process of laying out your tiles with precision and flair. Imagine trying to piece together a puzzle without the picture on the box; it would be frustrating, right? That’s why templates can be your best friend in this DIY journey.
Templates help maintain consistency in your design, allowing you to visualize how your colors and shapes will interact before you even start sticking tiles to the wall. You can create a template by sketching your design on paper or using cardboard cutouts that mirror the shapes and sizes of your tiles. This way, you can easily rearrange the pieces until you find the perfect configuration that speaks to your creative vision.
Here’s a simple process to create and use templates effectively:
- Sketch Your Design: Before diving into the physical work, sketch your desired pattern on graph paper. This will give you a sense of scale and proportion.
- Cut Out Shapes: Use cardboard or heavy paper to cut out the shapes of your tiles. This will help you visualize how they will fit together on your wall.
- Layout on the Wall: Use painter's tape to temporarily stick your templates to the wall. This allows you to see how the design looks in the actual space and make any necessary adjustments.
- Mark the Wall: Once satisfied with the layout, mark the positions of the templates on the wall with a pencil. This will serve as a guide when you start applying the tiles.
Using templates not only enhances the aesthetic appeal of your mosaic but also minimizes the risk of errors during installation. It’s like having a safety net as you venture into the creative chaos of tile placement. So, grab your materials, unleash your creativity, and let those templates pave the way for a gorgeous mosaic wall that will undoubtedly become the focal point of your space!
Q: Can I create a mosaic wall without a template?
A: While it's possible, using a template helps ensure precision and can save you time and effort in the long run.
Q: What materials do I need for making templates?
A: You can use graph paper, cardboard, or even plastic sheets to create your templates.
Q: How do I ensure my template fits the wall correctly?
A: Measure your wall space carefully and adjust your template accordingly before marking it on the wall.

Installing Your Mosaic Wall
Installing your mosaic wall is an exciting phase of the project, and it’s where all your planning and creativity come to life! However, it’s essential to approach this step with careful planning and execution to achieve a stunning and durable result. First and foremost, you’ll want to ensure that you have all your materials ready and that your workspace is clean and organized. A well-prepared environment not only boosts efficiency but also minimizes the risk of mistakes. So, take a moment to gather everything you need, including your tiles, adhesive, grout, tools, and safety gear.
Before you start slapping tiles onto the wall, you need to prepare the surface properly. This preparation is crucial for ensuring that your tiles adhere well and that your mosaic lasts for years to come. Start by cleaning the wall thoroughly to remove any dust, grease, or old paint that could interfere with adhesion. If your wall is particularly rough or uneven, consider priming it with a suitable primer to create a smooth and even surface. This step is like laying a solid foundation for a house; skip it, and you might face problems down the line.
Once your wall is prepped, it’s time to apply the tiles. Begin by mixing your adhesive according to the manufacturer's instructions. Use a notched trowel to spread the adhesive onto a small section of the wall, ensuring an even layer. It’s best to work in small areas to prevent the adhesive from drying out before you can place your tiles. When placing the tiles, remember to leave small gaps between them for grout; this spacing is essential for both aesthetic reasons and practical purposes. You can use spacers to help maintain consistent gaps, which will make the grouting process much easier later on.
As you lay the tiles, periodically step back to check your alignment and spacing. It’s easy to get caught up in the details and lose sight of the bigger picture. Think of it like painting a mural; sometimes, you have to take a step back to see how everything is coming together. If you find any tiles that are misaligned, don’t hesitate to adjust them before the adhesive sets. Once you've completed a section, allow the adhesive to cure as per the manufacturer's recommendations before moving on to the next area.
After the tiles are securely in place, it’s time to move on to the grouting process. This step is where your mosaic truly starts to shine. Grouting fills the gaps between the tiles, providing a finished look while also protecting the edges of the tiles. Mix your grout according to the package instructions and use a rubber float to apply it. Spread the grout diagonally across the tiles to ensure it fills all the gaps. Once you’ve covered the entire surface, use a damp sponge to wipe away any excess grout from the tile surfaces, being careful not to remove it from the joints.
Finally, after the grout has cured, you’ll want to seal your mosaic wall. Sealing protects your masterpiece from moisture, stains, and dirt, ensuring it remains beautiful for years to come. Choose a high-quality sealer suitable for the type of tiles and grout you used. Apply it evenly with a brush or roller, following the manufacturer's instructions. This finishing touch not only enhances the durability of your mosaic but also brings out its colors, making it pop!
- How long does the adhesive take to dry?
Most adhesives take about 24 hours to set, but it's best to check the manufacturer's instructions for specific drying times. - Can I install a mosaic wall in a bathroom?
Absolutely! Just make sure to use waterproof adhesive and grout to withstand the moisture. - What tools do I need for installation?
Essential tools include a notched trowel, rubber float, sponge, tile cutter, and safety gear like gloves and goggles.

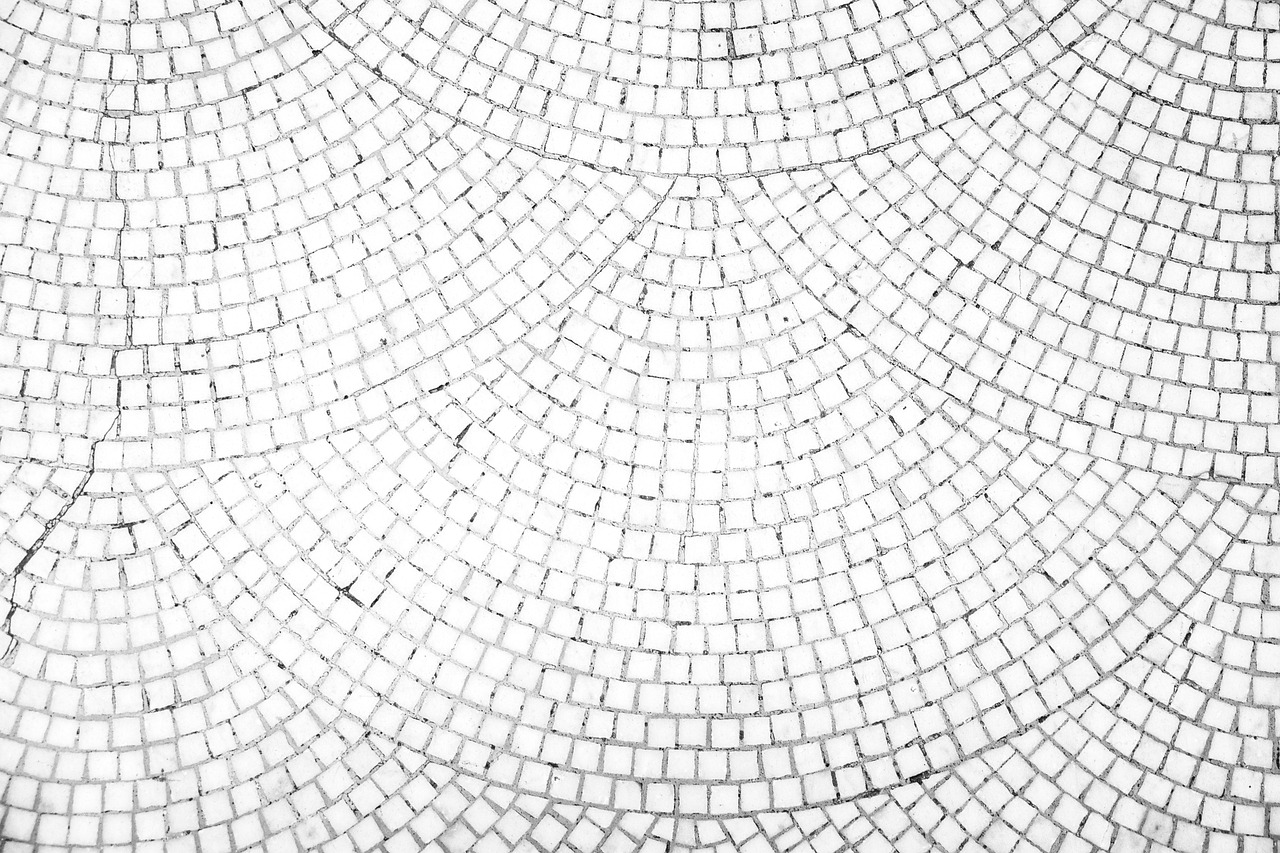
Preparing the Surface
Before diving into the exciting world of mosaic installation, it's crucial to give your wall the proper preparation it deserves. Think of this step as laying the foundation for a beautiful masterpiece. If the surface is not adequately prepared, even the most stunning tiles won't adhere properly, leading to a disappointing outcome. Start by cleaning the wall thoroughly to remove any dust, dirt, or grease. You can use a simple mixture of water and mild detergent to scrub the surface, ensuring that it’s as clean as a whistle.
Once you've cleaned the wall, it's time to inspect it for any imperfections. Look for cracks, holes, or uneven areas that could interfere with the installation process. If you find any, fill them with a suitable patching compound and allow it to dry completely. This step is akin to smoothing out the canvas before painting; it ensures that your mosaic will have a flawless foundation.
Next, consider applying a primer to the wall. A good primer not only enhances the adhesion of the tiles but also seals the surface, preventing moisture from seeping through. It's especially important if you're working in a bathroom or kitchen where humidity levels can fluctuate. Choose a primer that is compatible with your wall material, whether it’s drywall, plaster, or concrete.
After priming, give the wall ample time to dry. This is a crucial moment—impatience can lead to poor adhesion, which is the last thing you want for your mosaic. Once dry, you can lightly sand the surface to create a more textured area for the adhesive to grip onto. Just remember, the goal here is to create a surface that is smooth yet textured enough to hold your tiles securely.
Finally, before you start laying down your tiles, take a moment to measure and mark your design on the wall. Use a level to draw straight lines where necessary, ensuring that everything is aligned perfectly. This step will save you a world of trouble later on, as it helps you visualize the layout and avoid any misalignments during the installation process. Remember, a well-prepared surface is the first step to achieving a stunning mosaic accent wall!
- How long should I wait after cleaning the wall before starting the mosaic? It's best to wait at least 24 hours to ensure that the wall is completely dry and ready for the primer.
- Can I install mosaic tiles on wallpaper? It's not recommended. Wallpaper can prevent proper adhesion, so it's best to remove it before starting your project.
- What type of primer should I use? Choose a primer that is suitable for your wall material and compatible with the adhesive you plan to use for your tiles.
- Is it necessary to sand the wall? While it's not mandatory, sanding can help create a better grip for the adhesive, ensuring your tiles stay in place.
Applying Tiles
Now that you've got your design locked in and your materials ready, it's time to dive into the exciting part: applying the tiles! This step can feel a bit daunting, but don't worry—it's all about patience and precision. First, make sure you have your adhesive ready. You can use a thin-set mortar or a tile adhesive, depending on the type of tiles you've chosen. The key here is to apply the adhesive evenly to ensure that your tiles stick well and stay in place.
Start by using a notched trowel to spread the adhesive on a small section of your wall. The notches in the trowel help create grooves that allow for better adhesion. Aim for a thickness of about 1/8 to 1/4 inch. Once you've applied the adhesive, it's time to place your first tile. Gently press it into the adhesive, twisting slightly to ensure a good bond. Remember, this isn't a race; take your time to ensure each tile is aligned with your design.
As you continue to apply tiles, keep a few tips in mind:
- Spacing: Use tile spacers to maintain even gaps between your tiles. This not only helps with consistency but also makes grouting much easier later on.
- Alignment: Step back occasionally to check your alignment. It’s easy to get caught up in the process and lose sight of the bigger picture.
- Cutting Tiles: If you need to cut tiles to fit around outlets or edges, a tile cutter or a wet saw will be your best friend. Measure carefully and take your time cutting to avoid mistakes.
Once you've completed one section, allow the adhesive to set according to the manufacturer's instructions before moving on to the next area. This will help ensure that everything stays in place as you continue your project. After all the tiles are applied, give yourself a pat on the back! You've just completed a significant step in creating your mosaic accent wall.
In summary, applying tiles is about careful preparation and attention to detail. With the right tools and techniques, you'll be well on your way to achieving a stunning mosaic that reflects your personal style. So, roll up your sleeves and get ready to bring your design to life!
Q: How long does the adhesive take to dry?
A: Typically, it can take anywhere from 24 to 48 hours for the adhesive to fully cure, but this can vary based on the product used and environmental conditions.
Q: What if I make a mistake while applying the tiles?
A: Don’t panic! If you notice a tile is out of place, you can gently pry it off before the adhesive sets. Just be cautious not to damage the surrounding tiles.
Q: Can I use different types of tiles together?
A: Yes, mixing tile types can create a unique look, but ensure that they have similar thicknesses and are compatible with the same adhesive.
Finishing Touches
Once you've installed your stunning mosaic tiles, it’s time for those all-important finishing touches that will elevate your accent wall from good to absolutely breathtaking! Think of this stage as the cherry on top of your DIY project; it’s what brings everything together and ensures your hard work shines through. So, let’s dive into the essential steps that will help you achieve a professional finish.
First up is grouting. This process fills the gaps between your tiles, providing not only a polished look but also structural integrity. When applying grout, it's crucial to choose a color that complements your tiles. A contrasting grout can make your mosaic pop, while a matching hue can create a seamless look. To apply the grout, use a grout float to spread it across the tiles, ensuring you fill all the spaces evenly. After application, wipe away excess grout with a damp sponge, being careful not to disturb the filled gaps. This will leave you with a clean, professional finish.
Next, consider sealing your mosaic. Sealing is an essential step that protects your masterpiece from moisture, stains, and dirt. Without a proper seal, your beautiful mosaic can become dull over time. When selecting a sealant, look for products specifically designed for mosaic tiles. Apply the sealant according to the manufacturer’s instructions, usually using a brush or roller, ensuring even coverage across the entire surface. This not only enhances the colors but also adds a layer of protection that will keep your mosaic looking fresh for years to come.
Finally, don’t forget about the cleaning process. Once the grout has cured and the sealant has dried, give your mosaic wall a gentle clean. Use a soft cloth and a mild cleaner to wipe down the tiles, removing any dust or residue that may have accumulated during the installation process. This final step ensures your wall sparkles and showcases the intricate details of your mosaic work.
In summary, the finishing touches of grouting, sealing, and cleaning are what truly bring your DIY mosaic accent wall to life. These steps not only enhance the aesthetic appeal but also ensure the longevity of your masterpiece. So, roll up your sleeves and get ready to make that mosaic shine!
- How long does grout take to dry? Grout typically takes about 24 hours to dry, but it's best to wait 72 hours before sealing.
- Can I use any sealant on my mosaic wall? No, it's important to use a sealant specifically designed for the type of tiles you have used.
- What should I do if I get grout haze on my tiles? You can remove grout haze by using a damp sponge or a grout haze remover solution after the grout has fully cured.
Grouting Techniques
This article will guide you through the steps to design and create a stunning DIY mosaic accent wall, including materials needed, techniques, and tips for a successful project.
Selecting the ideal spot for your mosaic accent wall is crucial. Consider factors like visibility, lighting, and the overall design of your space to ensure it enhances your home.
Understanding the materials required for your mosaic project is essential. From tiles to adhesives, we'll outline everything you'll need to create a beautiful and durable accent wall.
Explore various types of mosaic tiles available, including glass, ceramic, and stone. Each option has its unique aesthetic and durability, influencing your final design.
Glass tiles offer vibrant colors and reflect light beautifully, making them a popular choice for accent walls. Their versatility allows for creative patterns and designs.
Ceramic tiles are durable and come in a wide range of colors and styles. They can be easily cut and shaped to fit your desired mosaic design.
Selecting the right adhesives and grouts is vital for a successful mosaic installation. Learn about different options and their suitability for various tile types.
Creating a visually appealing pattern is key to a stunning mosaic wall. We'll discuss techniques for designing your layout, including sketching and using templates.
Sketching your mosaic design on paper helps visualize the final outcome. This step allows for adjustments before starting the installation process.
Templates can simplify the process of laying out your mosaic. Learn how to create and use them to maintain consistency and precision in your design.
The installation process requires careful planning and execution. We'll provide step-by-step instructions to ensure your mosaic wall is both beautiful and secure.
Properly preparing the wall surface is essential for adhesion. We'll cover how to clean and prime the surface for optimal results.
Learn the best techniques for applying tiles to your wall, including spacing, alignment, and using adhesive effectively for a professional finish.
After the tiles are installed, finishing touches enhance the overall look. We'll discuss grouting, sealing, and cleaning to ensure your mosaic wall shines.
Understanding is crucial for filling gaps between tiles. Grout not only serves as a filler but also enhances the overall aesthetic of your mosaic. When applying grout, it’s essential to choose a color that complements your tiles; this can either create a seamless look or add contrast to emphasize the mosaic design.
First, prepare your grout according to the manufacturer's instructions. Once mixed, use a grout float to apply the grout at a 45-degree angle, ensuring it fills all the gaps between tiles. Be careful not to apply too much pressure, as this can displace the tiles. After applying the grout, use the edge of the float to scrape off any excess, leaving a smooth surface.
Once the grout has been applied, allow it to set for about 15 to 30 minutes. After this initial setting time, take a damp sponge and gently wipe the surface of the tiles to remove any grout haze. This step is crucial, as it prevents the tiles from becoming dull or cloudy.
Here are a few additional tips to keep in mind:
- Timing is key: Don’t let the grout dry completely on the tiles, or it will be much harder to clean.
- Use a sealant: Once the grout has cured, consider applying a sealant to protect it from moisture and staining.
- Regular maintenance: Clean your mosaic wall regularly to keep it looking fresh and vibrant.
Sealing your mosaic wall protects it from moisture and stains. Discover the best sealing products and methods to maintain your mosaic's beauty over time.
Q: How long does it take for grout to dry?
A: Typically, grout takes about 24 hours to dry, but it's best to refer to the manufacturer's instructions for specific drying times.
Q: Can I use any type of grout for my mosaic?
A: No, it's important to choose a grout that is suitable for the type of tiles you are using. For example, glass tiles often require a specific type of grout to avoid scratching.
Q: How do I clean my mosaic wall?
A: Use a mild detergent mixed with warm water and a soft sponge to gently clean your mosaic wall. Avoid harsh chemicals that could damage the tiles or grout.
Sealing Your Mosaic
Once you've painstakingly installed your mosaic tiles and grouted them to perfection, the next crucial step is . This process is essential for ensuring the longevity and beauty of your work. Sealing not only protects the tiles from moisture and stains but also enhances their colors, giving your mosaic a vibrant, polished look. Imagine pouring a glass of water on your beautiful mosaic wall and watching it bead off instead of soaking in—this is the magic of sealing!
Before you start, it's important to choose the right sealing product. There are various types of sealers available, each with its unique properties. For instance, you might opt for a penetrating sealer, which soaks into the grout and tiles, providing a strong barrier against moisture. Alternatively, a topical sealer sits on the surface and can add a glossy finish. When selecting a sealer, consider the type of tiles you've used as well as the overall look you wish to achieve.
Here's a simple guide to help you through the sealing process:
- Clean the Surface: Before applying any sealer, ensure your mosaic is clean. Use a damp cloth to wipe away any dust or debris that may have accumulated during installation.
- Test the Sealer: Always conduct a patch test on a small, inconspicuous area of your mosaic to see how the sealer interacts with the tiles and grout.
- Application: Using a paintbrush or a foam roller, apply the sealer evenly across the surface. Be sure to cover all areas, paying special attention to the grout lines.
- Drying Time: Allow the sealer to dry according to the manufacturer's instructions. This step is crucial, as rushing it can lead to uneven protection.
- Apply Additional Coats: Depending on the product, you may need to apply multiple coats for full protection. Always follow the guidelines provided on the sealer's packaging.
After sealing, your mosaic wall will not only be protected but will also maintain its stunning appearance for years to come. Remember, regular maintenance is key! Periodically check your mosaic for any signs of wear and reapply the sealer as necessary to keep it looking its best. In the end, a well-sealed mosaic accent wall can become a breathtaking focal point in your home, inviting admiration from all who see it.
Q: How often should I seal my mosaic wall?
A: It's generally recommended to reseal every 1-3 years, depending on the type of sealer used and the amount of wear and tear it experiences.
Q: Can I use any type of sealer on my mosaic?
A: No, it's important to choose a sealer that is compatible with the materials used in your mosaic. Always check the manufacturer's recommendations.
Q: What should I do if my mosaic gets stained?
A: For minor stains, try cleaning with a gentle soap and water solution. For tougher stains, you may need to use a specialized tile cleaner, but be cautious and test in a small area first.
Q: Is sealing necessary for outdoor mosaics?
A: Yes, sealing is particularly important for outdoor mosaics as they are exposed to the elements. A good sealer will help protect against moisture and UV damage.
Frequently Asked Questions
- What materials do I need to create a DIY mosaic accent wall?
To create a stunning DIY mosaic accent wall, you'll need a variety of materials. Key items include mosaic tiles (glass, ceramic, or stone), tile adhesive, grout, a trowel, a sponge, and a sealant. Don't forget tools like tile cutters, a measuring tape, and a level to ensure precision!
- How do I choose the right location for my mosaic wall?
Choosing the right location is crucial! Look for a spot that gets good visibility and complements your room's design. Consider factors like lighting, as well-lit areas will showcase your mosaic's colors beautifully. A focal point, like behind a sofa or in a hallway, can really make your mosaic pop!
- Can I use different types of tiles together?
Absolutely! Mixing different types of tiles can create a unique and dynamic look. Just make sure they share similar characteristics, such as weight and thickness, to ensure they adhere well together. Experimenting with textures and colors can lead to a stunning final design!
- What are the best techniques for applying tiles?
When applying tiles, start by spreading adhesive evenly on the wall using a trowel. Press each tile firmly into place, leaving consistent gaps for grout. Using spacers can help maintain even spacing and alignment. Take your time—this step is key to achieving a professional finish!
- How do I grout my mosaic wall?
Grouting involves filling the gaps between tiles to create a polished look. Use a grout float to spread the grout over the tiles, ensuring it fills all spaces. Wipe off excess grout with a damp sponge before it dries. This step enhances the overall appearance and stability of your mosaic!
- Do I need to seal my mosaic wall?
Yes, sealing your mosaic wall is essential! A good sealant protects against moisture, stains, and wear over time. Make sure to choose a sealant that is compatible with the type of tiles you used. Applying it after grouting will help maintain the vibrancy and durability of your beautiful mosaic!


