How to Create DIY Mason Jar Lights
Are you looking to add a touch of warmth and charm to your home decor? If so, creating your own DIY mason jar lights might just be the perfect project for you! Not only are these lights visually appealing, but they also provide a cozy atmosphere that can transform any space—from your living room to your backyard. Imagine sitting under a starlit sky, surrounded by the soft glow of your handmade mason jar lights. Sounds dreamy, right? In this article, we'll guide you through the entire process, from choosing the right jars to displaying your finished creations.
The beauty of DIY mason jar lights lies in their versatility. Whether you want to create a rustic centerpiece for your dining table or a whimsical outdoor lantern, the possibilities are endless. You can customize them to fit your personal style, using various colors, sizes, and decorative elements. Plus, making these lights can be a fun and engaging activity for family and friends, allowing you to bond over creativity while crafting something unique. Ready to dive in? Let’s get started on this illuminating journey!
Before we jump into the nitty-gritty, let’s take a moment to appreciate the sheer joy of DIY projects. They allow you to express your creativity and bring your ideas to life. Just like a painter with a blank canvas, you have the freedom to design your mason jar lights in any way you envision. So, roll up your sleeves, gather your materials, and let your imagination shine as brightly as your new lights!
Choosing the Right Mason Jars
When it comes to creating your stunning DIY mason jar lights, the first step is to choose the right mason jars. This might sound simple, but the selection of jars can significantly impact the overall look and functionality of your lighting project. You’ll want to consider several factors to ensure that your jars not only fit your aesthetic but also serve your lighting needs effectively.
First and foremost, think about the size of the mason jars. Mason jars come in various sizes, from tiny 4-ounce jars to large half-gallon ones. The size you choose will depend on where you plan to use the lights. For example, smaller jars can create a cozy atmosphere when grouped together, while larger jars can serve as striking standalone pieces. Consider the space where you’ll be placing them; a small jar might get lost on a large table, while a big jar could overwhelm a tiny nook.
Next, the shape of the jars also plays a crucial role. Traditional mason jars have a classic, round shape, but you can also find square or uniquely shaped jars that can add a modern twist to your decor. A round jar may diffuse light beautifully, creating a soft glow, while a square jar might provide a more contemporary look. Think about your personal style and how the shape of the jar will complement your existing decor.
Another important aspect is the glass quality. Not all mason jars are created equal! Some are designed for canning and are made from thicker glass, which can withstand heat better if you decide to use candles as your light source. Others may be more decorative and less heat resistant. If you plan on using electrical components, ensure that the glass can handle the heat generated by bulbs. Always check the specifications of the jars before making a purchase.
Additionally, you might want to consider the color of the glass. While clear glass is the most common choice, colored or frosted jars can add an extra layer of charm. Colored jars can cast beautiful hues of light, creating a warm and inviting atmosphere. If you're looking for something more unique, you can even find jars with intricate designs or patterns that can add a touch of elegance to your lighting project.
In summary, when choosing the right mason jars for your DIY lighting project, keep these key factors in mind:
- Size: Consider the space and purpose of your lighting.
- Shape: Choose between classic round or modern shapes.
- Glass Quality: Ensure durability, especially if using heat sources.
- Color: Decide between clear, colored, or frosted options for added flair.
By carefully selecting your mason jars based on these criteria, you’ll set a solid foundation for your DIY mason jar lights. The right jars can transform a simple lighting project into a stunning centerpiece that enhances your home decor and creates a warm, inviting ambiance. So, take your time, explore your options, and let your creativity shine!
Essential Materials and Tools
When embarking on your DIY mason jar lighting project, having the right materials and tools at your fingertips is absolutely essential. Think of it like preparing for a grand adventure; you wouldn't set off without your trusty gear, right? So, let's gather what you need to ensure your creative journey is smooth and enjoyable!
First and foremost, you'll need mason jars. These are the stars of your project, and they come in various sizes and shapes. Whether you prefer the classic quart-sized jars or the charming pint-sized ones, choose jars that resonate with your personal style. Consider the glass quality as well; thicker glass can withstand heat better if you plan to use candles.
Next, you can't forget about the light source. Depending on the ambiance you're aiming for, you might opt for LED fairy lights, which are energy-efficient and come in a plethora of colors, or traditional candles for that warm, flickering glow. If you choose to go the electrical route, make sure to gather battery packs or extension cords as needed.
In addition to the jars and light sources, having the right tools is crucial. Here’s a quick rundown of what you’ll need:
- Drill with a glass drill bit (if you plan to make holes for wiring)
- Wire cutters for trimming wires
- Hot glue gun and glue sticks for securing embellishments
- Paintbrushes if you want to add a splash of color to your jars
- Sandpaper for smoothing any rough edges
Don't forget about decorative elements that can really elevate your mason jar lights. Think twine, beads, or even seasonal decorations like pinecones for a cozy winter vibe. These little touches can transform a simple jar into a stunning piece of decor that reflects your personality.
Lastly, consider having a work surface that you don’t mind getting a little messy. A sturdy table covered with an old cloth or newspaper can be the perfect spot to unleash your creativity without worrying about spills or scratches.
In summary, your DIY mason jar lights will shine brightest when you have all your essential materials and tools ready. So, gather your jars, light sources, tools, and decorative elements, and let your imagination run wild. The creative possibilities are endless, and soon enough, you'll have beautiful lighting that adds charm and warmth to your home!
Preparing the Mason Jars
When it comes to creating stunning DIY mason jar lights, the preparation of your jars is a critical step that can make or break your project. First and foremost, you want to ensure that your mason jars are clean and free from any residue or labels. Start by soaking your jars in warm, soapy water for about 15 minutes. This will help loosen any stuck-on labels. After soaking, use a scrubber or sponge to remove the labels and any sticky residue. Rinse them thoroughly with clean water and let them dry completely. Remember, a clean jar is not just about aesthetics; it's about ensuring that your lighting fixture is safe and functional.
Once your jars are clean, you might want to consider adding a personal touch to them. This is where the fun begins! You can paint your jars to match your decor or even create a frosted effect. For painting, choose a glass paint that is designed for use on transparent surfaces. Apply a thin layer using a sponge brush and allow it to dry completely. If you're aiming for a frosted look, you can use a spray-on frosted glass coating, which gives an elegant, dreamy effect to your lights.
Another creative option is to decorate your jars with twine, lace, or even beads. Wrapping twine around the neck of the jar can give it a rustic vibe, while lace can add a touch of elegance. If you’re feeling extra crafty, consider using a hot glue gun to attach decorative beads or sequins to the jars. This not only enhances their visual appeal but also adds a unique character to each piece. Remember, the goal is to create something that reflects your personal style and complements your home decor.
Before you move on to the next steps, it's essential to check the integrity of your jars. Inspect for any cracks or chips, as these can pose safety hazards when you add lighting components. If you find any imperfections, it’s best to set those jars aside and select others that are in pristine condition. After all, safety should always be a top priority when working on DIY projects.
In summary, preparing your mason jars is an exciting and creative phase in the DIY process. By ensuring they are clean, adding personal touches, and checking for safety, you set a solid foundation for creating beautiful mason jar lights that will illuminate your space and showcase your creativity. So, grab those jars and let your imagination run wild!
Installing the Light Source
When it comes to in your DIY mason jar lights, the options are as varied as your creativity allows. The choice of light source can dramatically affect the atmosphere of your space, so let’s dive into the most popular options. You might be wondering, “Which one should I choose?” Well, it depends on the effect you want to achieve!
One of the most popular choices is LED lights. These energy-efficient lights come in various colors and styles, making them perfect for any occasion. They emit very little heat, which is a huge plus for safety, especially when working with glass jars. You can opt for string lights that fit snugly inside the jar, or use LED tea lights for a flickering candle effect without the worry of an open flame.
To install LED lights, simply follow these steps:
- Start by measuring the interior of your mason jar to ensure the lights will fit.
- Carefully thread the LED lights through the opening, ensuring the wiring is neatly arranged.
- If you’re using string lights, you can wrap them around the inside of the jar for a more dynamic look.
Another great option is candles. If you’re going for a more traditional or rustic vibe, using candles can create a warm and inviting glow. Just remember to use flameless candles if you’re concerned about safety, especially if you’re displaying them in areas where they might be knocked over.
For those who prefer a more modern touch, consider using solar-powered lights. These are fantastic for outdoor displays, as they charge during the day and illuminate your garden or patio at night. Just make sure to position them in a sunny spot during the day to maximize their charging potential.
Regardless of the light source you choose, safety should always be your top priority. If you're using electrical components, ensure that all connections are secure and that you’re using appropriate voltage for your lights. It’s always a good idea to check the manufacturer's instructions for any specific installation guidelines.
In summary, whether you opt for LED lights, candles, or solar-powered options, the key is to select a light source that complements your design vision while ensuring safety and functionality. Your DIY mason jar lights can become a stunning focal point in your home or garden, creating a magical ambiance that will delight your guests!
- Can I use regular candles in mason jars? Yes, but be cautious of the heat they generate. Flameless candles are a safer alternative.
- How do I power my LED lights? You can use batteries or plug them into an outlet, depending on the type of LED lights you choose.
- What’s the best way to clean my mason jars before starting? Wash them with warm soapy water and rinse thoroughly to remove any residues.
Adding Decorative Touches
When it comes to DIY mason jar lights, the magic truly happens when you start adding those decorative touches that reflect your personality and style. Think of your mason jars as a blank canvas, just waiting for your creative flair to bring them to life! Whether you're aiming for a rustic charm or a modern chic vibe, the options are endless. So, how do you go about it? Let’s dive into some exciting ideas!
One of the simplest ways to enhance the aesthetic of your mason jar lights is by incorporating twine or jute rope. Wrapping the neck of the jar with twine not only adds texture but also brings a warm, rustic feel to your lighting. You can secure it with a knot or even a cute bow for that extra touch of charm. Imagine how lovely a few of these jars would look hanging from your porch or adorning your dining table!
Another fun idea is to use beads or sequins to add a bit of sparkle. You can glue them onto the outside of the jar or even fill the bottom with colorful beads that catch the light. This not only adds a pop of color but also creates a stunning visual effect when lit up. If you’re feeling adventurous, consider using paint to create intricate designs or patterns on the jars. A splash of color can transform a plain jar into a vibrant centerpiece!
If you're working on a seasonal project, consider incorporating seasonal decorations into your mason jar lights. For instance, during autumn, you could fill the jars with small pumpkins or pinecones, while in winter, some faux snow or glitter can create a cozy, festive atmosphere. This way, you can easily switch up your decor throughout the year without much hassle!
To really make your mason jar lights stand out, think about using LED fairy lights. These tiny lights can be strung through the jar, creating a magical glow that’s perfect for any occasion. You can also use colored lights to set the mood—soft whites for a calming effect or vibrant colors for a party atmosphere.
Don't forget about the hanging options! You can suspend your mason jars from tree branches, hooks, or even a decorative ladder. This not only saves space but also creates an enchanting ambiance, especially when the lights are twinkling in the evening breeze. You could also group several jars together at varying heights to create a stunning visual display.
Lastly, remember that the beauty of DIY is in the details. Take your time to experiment with different materials and techniques. The more personalized your mason jar lights are, the more they will resonate with your unique style. So, gather your supplies, unleash your creativity, and let those decorative touches shine!
- What type of lights are best for mason jar lights? LED lights are highly recommended due to their safety and energy efficiency.
- Can I use real candles in mason jars? Yes, but ensure proper ventilation and never leave them unattended.
- How do I clean my mason jars before decorating? Simply wash them with warm soapy water and let them dry completely.
- What are some good materials for decorating mason jars? Twine, paint, beads, and seasonal decorations work wonderfully!

Creating Different Lighting Effects
When it comes to DIY mason jar lights, the magic truly happens in the way you manipulate light. Think of your mason jars as blank canvases waiting for your creative brush strokes. By experimenting with different lighting effects, you can transform a simple jar into a stunning centerpiece that captures attention and sets the mood. So, how do you achieve these enchanting effects? Let’s dive into some exciting techniques!
First off, let's talk about ambient lighting. This is the kind of soft, warm light that fills a room and makes it feel cozy and inviting. To create this effect, consider using frosted or painted mason jars. A light coat of frosted spray paint on the outside of the jar can diffuse the light beautifully, creating a gentle glow. You can also use colored glass jars, which can add a lovely tint to the light. Imagine a soft blue or green hue washing over your space; it’s like bringing a little piece of nature indoors!
Next, if you’re looking for something more vibrant, you might want to explore colored LED lights. These little gems come in a variety of colors and can be easily placed inside your jars. By using a remote control, you can change the colors to suit your mood or the occasion. For a party, you might set them to a lively red or green, while for a romantic dinner, a soft pink or warm white might be more appropriate. The versatility of colored lights allows you to create a dynamic atmosphere that can shift with your needs.
Another fun technique is to layer your lighting. This involves combining different types of light sources within the same jar. For example, you could place a small string of fairy lights along with a tea light candle. The fairy lights will twinkle and dance, while the candle provides a steady, warm glow. This layering creates depth and intrigue, making your mason jar lights not just a source of illumination but also a captivating focal point.
For those who love a bit of drama, consider using projectors or patterned filters. You can project shapes or colors onto your walls or ceilings by placing a small projector behind your mason jar. Alternatively, you can create your own filters by cutting shapes out of colored paper and placing them over the jar opening. The light will shine through, casting beautiful patterns around the room. This is particularly effective for themed parties or special occasions, where the ambiance can truly elevate the experience.
Lastly, don’t forget about the power of reflection and shadow. Using mirrors or reflective surfaces can amplify the light emitted from your mason jars. Placing your jars on a mirrored tray or a glass table can create a stunning visual effect, as the light reflects and bounces around the room. It’s like having your very own light show! Shadows can also add a dramatic flair; consider positioning your jars in a way that casts interesting shapes on the wall. This interplay of light and shadow can create a mesmerizing atmosphere that draws everyone’s attention.
In summary, creating different lighting effects with your DIY mason jar lights is all about experimenting and having fun. Whether you prefer the cozy warmth of ambient light, the vibrant energy of colored lights, or the dramatic flair of projections and reflections, there are endless possibilities to explore. So grab those jars, let your imagination run wild, and illuminate your space in style!
- What types of light sources can I use in mason jars? You can use LED lights, candles, fairy lights, or even small projectors for unique effects.
- How can I achieve a soft glow in my mason jar lights? Frosting the glass or using colored glass can help diffuse the light for a softer effect.
- Can I use mason jar lights outdoors? Yes, but make sure to use weatherproof light sources and secure your jars to prevent them from tipping over.
- What materials do I need to decorate my mason jar lights? Twine, beads, paint, and seasonal decorations can all enhance the aesthetic of your jars.

Safety Tips for DIY Lighting
When embarking on your exciting journey of creating DIY mason jar lights, safety should always be your top priority. After all, the goal is to enhance your home decor without compromising your well-being. First and foremost, if you're using electrical components, ensure you select high-quality materials that meet safety standards. This means looking for lights that are rated for the intended use and checking for any certifications, like UL (Underwriters Laboratories) approval.
Next, consider the wiring. If you're not familiar with electrical work, it might be wise to consult with someone who is or even watch a few tutorial videos to grasp the basics. Poor wiring can lead to short circuits or even fires, which no one wants in their cozy home. Always use insulated wires and connectors, and make sure everything is securely fastened to prevent any accidental contact.
Additionally, if you're using candles instead of electrical lights, keep in mind that they can pose a fire hazard. Always place candles in stable, heat-resistant holders and never leave them unattended. A good practice is to keep them away from flammable materials, such as curtains or paper decorations. You might also want to consider using LED candles, which provide the ambiance without the risk of flames.
When it comes to the mason jars themselves, ensure they are free from cracks or chips. Even a tiny imperfection can weaken the jar and lead to breakage, especially when heat is involved. If you plan to paint the jars, use non-toxic, heat-resistant paints to avoid any harmful fumes when the lights are on. After all, the last thing you want is to create a beautiful light fixture only to have it emit unpleasant odors or toxic substances.
Finally, it's vital to keep your creations out of reach of children and pets. While mason jar lights can be enchanting, they can also be fragile and dangerous if knocked over. Consider placing them on high shelves or using them as part of a centerpiece that’s out of reach. By following these simple yet effective safety tips, you can enjoy your DIY mason jar lights confidently, knowing that you've taken the necessary precautions.
Here are some common questions related to safety and DIY mason jar lights:
- Can I use regular light bulbs in my mason jar lights? It's best to use LED bulbs as they emit less heat and are safer for enclosed spaces.
- What should I do if my mason jar breaks? Carefully clean up the glass shards and dispose of them safely. Always wear gloves when handling broken glass.
- Are there specific types of paints I should avoid? Yes, avoid using spray paints or any paint that isn't labeled as non-toxic and heat-resistant.
Displaying Your Mason Jar Lights
Once you've crafted your stunning DIY mason jar lights, it's time to think about how to showcase them effectively. The way you display your lights can significantly enhance their charm and create a warm, inviting atmosphere in your space. Imagine walking into a room illuminated by soft, flickering lights, each jar telling its own story. It’s like having little stars scattered throughout your home!
First off, consider the location. You can place your mason jar lights in various spots to create different moods. For instance, hanging them from hooks or branches can add a whimsical touch to your outdoor gatherings. If you want to create a cozy reading nook, a cluster of jars on a side table can provide just the right amount of illumination. Think about the atmosphere you want to create and let that guide your placement.
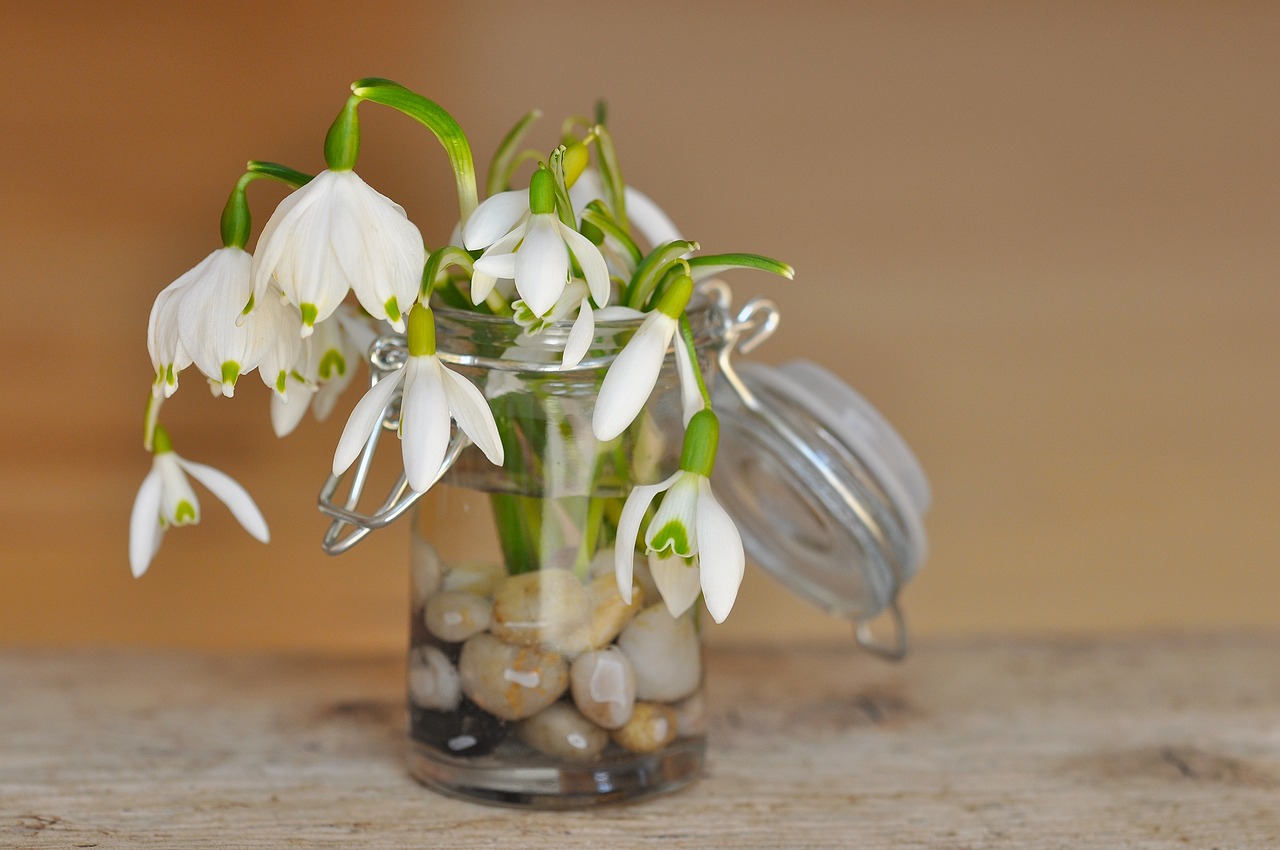
Another exciting option is to use a display tray or wooden crate. This not only organizes your lights but also allows you to add other decorative elements, such as seasonal flowers, stones, or even fairy lights intertwined with the jars. Here's a simple idea: arrange your mason jars of different heights on a rustic tray, and watch how they draw the eye and spark conversation.
For those who love a bit of creativity, consider using a ladder display. Lean a wooden ladder against a wall and place your mason jars on the rungs. This not only saves space but also gives a unique, artistic flair to your decor. You can even paint the ladder to match your home’s aesthetic, making it a true statement piece.
If you want to take your display outdoors, think about creating a mason jar chandelier. This can be as simple as hanging several jars from a sturdy branch or a DIY frame. Fill them with fairy lights or candles, and watch as they twinkle like stars against the night sky, creating a magical atmosphere for your outdoor gatherings.
Lastly, don’t forget about seasonal displays. You can change the contents of your mason jars to reflect different holidays or seasons. For instance, fill them with pinecones and faux snow for winter or colorful seashells for summer. This not only keeps your decor fresh but also allows you to express your creativity throughout the year.
In summary, displaying your mason jar lights is all about creativity and personal expression. Whether you choose to hang them, arrange them on a tray, or create a stunning chandelier, the possibilities are endless. So, let your imagination run wild and illuminate your space with your beautiful creations!
- Can I use regular light bulbs in mason jars? It's best to use LED lights or battery-operated candles, as traditional bulbs can get too hot and may cause the glass to break.
- How do I clean my mason jars before using them? Wash them with warm soapy water and rinse thoroughly. You can also soak them in vinegar to remove any stubborn residue.
- Can I use mason jar lights outdoors? Yes, but ensure that any electrical components are rated for outdoor use to prevent hazards.
Frequently Asked Questions
- What types of mason jars are best for DIY lights?
When it comes to choosing mason jars for your DIY lighting project, consider the size and shape that best fits your decor. Regular mouth jars are great for smaller lights, while wide mouth jars allow for more creative installations. Also, look for jars made from high-quality glass as they will provide better durability and aesthetic appeal.
- What materials do I need to create mason jar lights?
To make your own mason jar lights, you'll need a few essential materials: mason jars, light sources (like LED lights or candles), and electrical components if you're going the electric route. Additionally, gather decorative items like twine, beads, or paint to personalize your jars and make them truly unique.
- How do I prepare the mason jars for lighting?
Preparation is key! Start by thoroughly cleaning your mason jars to remove any residue. You can also paint or decorate them to create a stunning visual effect. Just ensure that any paint or adhesive you use is suitable for glass and won't interfere with the light source.
- Can I use candles in my mason jar lights?
Absolutely! Using candles can create a warm, inviting atmosphere. Just be sure to use them safely—never leave burning candles unattended and choose jars that are suitable for candle use to avoid any accidents.
- What are some decorative touches I can add to my mason jar lights?
There are endless possibilities for embellishing your mason jar lights! You can wrap twine around the neck, add beads or charms, or even seasonal decorations like leaves or snowflakes. Get creative and let your personality shine through your designs!
- How can I achieve different lighting effects?
Experimenting with various light sources and placements can yield beautiful results. For softer, ambient lighting, opt for warm-toned LEDs or dimmer switches. If you're looking to make a statement, try colored bulbs or layering multiple jars together for a vibrant display.
- What safety tips should I follow when creating DIY lighting?
Safety is crucial! Always ensure that any electrical components are properly insulated and installed. If using candles, place them on a stable surface and away from flammable materials. It’s also wise to keep your lighting out of reach of children and pets.
- How can I display my mason jar lights?
Displaying your mason jar lights can be just as fun as making them! Consider hanging them from trees or hooks, placing them on shelves, or using them as centerpieces for your dining table. The key is to showcase them in a way that highlights their charm and beauty.


