
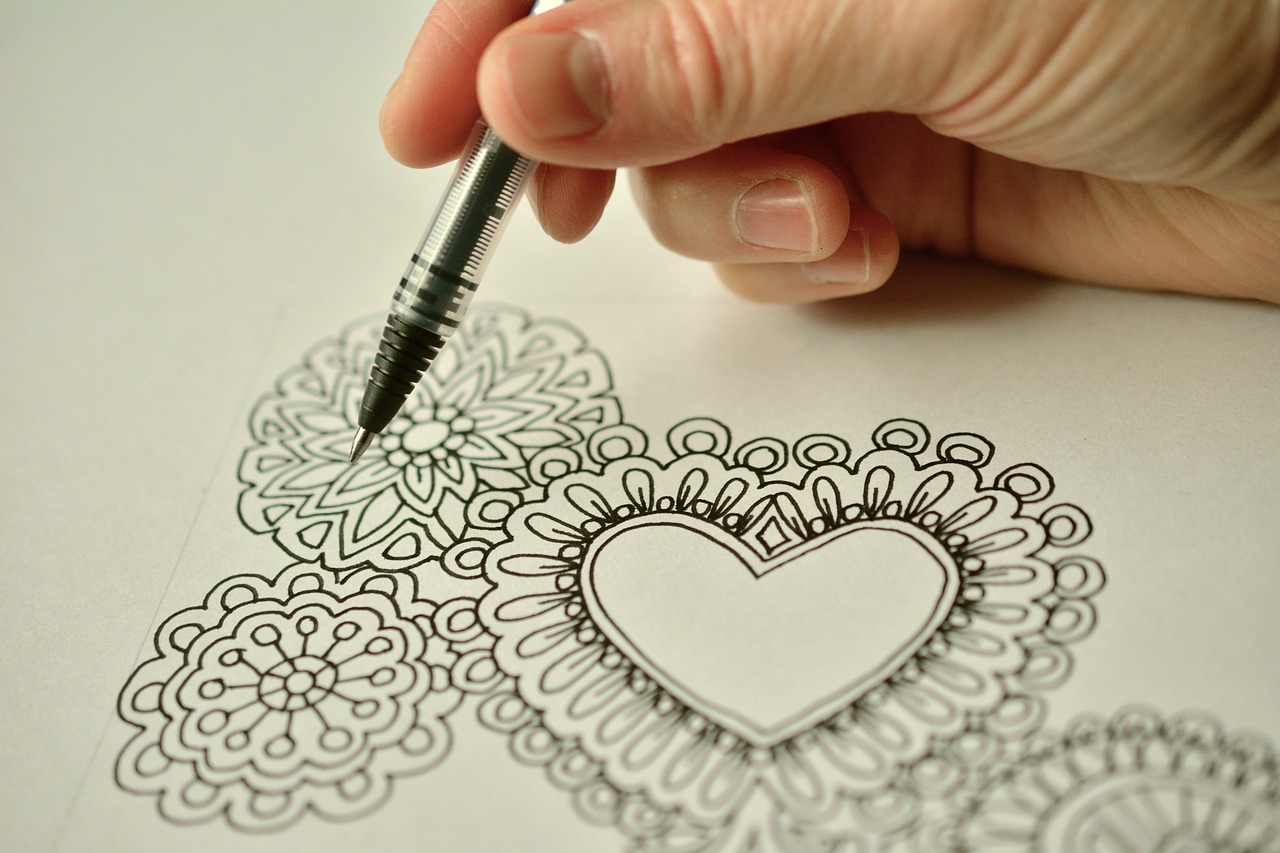
How to Draw with Cross Contour Lines
Have you ever gazed at a beautiful object and wished you could capture its essence on paper? Cross contour drawing might just be the technique you need to elevate your artistic game! This method is not just about outlining; it’s about understanding the very form and depth of the objects you are depicting. Imagine tracing the curves and planes of a three-dimensional shape as if you were feeling its surface with your fingers. That’s the magic of cross contour lines!
In essence, cross contour lines are lines that follow the form of an object. They wrap around it, illustrating its volume and giving a sense of depth that traditional contour lines often miss. While contour lines focus on the outline, cross contour lines dive deeper, allowing you to explore the texture and structure of your subject. Think of them as the threads that weave together the fabric of your drawing, creating a rich tapestry of visual information.
Why should you care about mastering this technique? Well, for starters, cross contour lines can transform flat sketches into dynamic representations of reality. They invite the viewer to engage with your artwork on a deeper level, encouraging them to explore the nuances of light, shadow, and form. So, whether you’re drawing a still life, a human figure, or even abstract shapes, incorporating cross contour lines can breathe life into your creations.
In this article, we’ll take a deep dive into the world of cross contour drawing. We’ll explore what these lines are, the materials you’ll need, and the techniques to get you started. We’ll also discuss how to apply this method to various subjects, including still life and figure drawing. Plus, we’ll cover common mistakes to avoid and how to incorporate color effectively. So grab your sketchbook and let’s get started on this creative journey!
Cross contour lines are essential for representing three-dimensional objects on a two-dimensional surface. Unlike traditional contour lines, which outline the shape of an object, cross contour lines travel across the surface of the object, following its curves and planes. This technique allows artists to convey a sense of volume and depth, making their drawings more lifelike.
To visualize this, think of a globe. The lines of latitude and longitude that wrap around its surface are akin to cross contour lines. They help to illustrate the globe’s roundness and provide a map of its features. Similarly, in drawing, these lines can help you understand and represent the form of an object more accurately.
Gathering the right materials is crucial for successful cross contour drawing. Here’s a quick rundown of what you’ll need:
- Paper: Choose a sketchbook or drawing paper that can handle various mediums.
- Pencils: A range of pencils (from hard to soft) will help you achieve different line qualities.
- Erasers: Kneaded erasers are great for subtle corrections without damaging the paper.
- Blending tools: Tools like tortillons can help smooth out your lines and create depth.
Having the right tools will set you up for success, allowing you to focus on honing your skills rather than worrying about your supplies.
Mastering the basic techniques is key to effective cross contour drawing. Start by observing the object you wish to draw. Notice how the light interacts with its surface and where the shadows fall. This will help you determine the direction of your cross contour lines.
Begin with light sketches, using gentle strokes to outline the major forms. Gradually add more lines that follow the contours of the object. Think of it as wrapping a piece of string around the object; each line should flow naturally, enhancing the sense of depth and volume. Practice makes perfect, so don’t hesitate to experiment with different objects and angles!
Still life subjects are ideal for practicing cross contour drawing. Arrange a few objects with varying shapes and sizes, and set up a light source to create interesting shadows. As you draw, focus on how the light and shadow interact with the surfaces of the objects.
For instance, if you’re drawing a round apple, your cross contour lines might curve around its surface, capturing its roundness and the way light reflects off it. This technique not only enhances your understanding of light and shadow but also improves your ability to depict texture, making your drawings more engaging.
Figure drawing presents unique challenges and opportunities for using cross contour lines. When drawing the human form, it’s essential to capture the proportions and movement. Cross contour lines can help you understand how the body moves and flows, emphasizing the curves of muscles and the angles of joints.
As you practice, pay attention to how the body twists and turns. Use cross contour lines to illustrate these movements, creating a dynamic representation of the figure that feels alive. This approach can transform a static pose into a vibrant expression of life and energy.
Even experienced artists can make mistakes with cross contour lines. Here are some common pitfalls to watch out for:
- Overcomplicating lines: Keep your lines simple and focused on the form.
- Ignoring light and shadow: Remember to observe how these elements affect your subject.
- Neglecting practice: Regular practice is essential for mastering any drawing technique.
By being aware of these mistakes, you can refine your technique and produce more compelling artwork.
Adding color can enhance the effectiveness of cross contour lines. When integrating color into your drawings, consider using a limited palette to maintain harmony. Watercolors, colored pencils, or markers can all work well.
As you add color, think about how it interacts with your cross contour lines. Use lighter colors to highlight areas where the light hits and darker shades to indicate shadow. This technique can create a sense of depth, making your artwork even more captivating.
Regular practice is essential for mastering any drawing technique. Here are some exercises to incorporate cross contour drawing into your daily routine:
- Daily sketches: Dedicate time each day to sketch objects around you using cross contour lines.
- Life drawing sessions: Attend figure drawing classes to practice capturing human forms.
- Still life setups: Create your own still life arrangements and draw them using this technique.
By committing to regular practice, you’ll see significant improvements in your skills and confidence as an artist.
Q: What is the difference between contour lines and cross contour lines?
A: Contour lines outline the shape of an object, while cross contour lines follow the surface of the object, illustrating its form and depth.
Q: Can I use cross contour lines with color?
A: Absolutely! Adding color can enhance the visual impact of your cross contour drawings. Just be mindful of how you apply color to maintain the integrity of the contour technique.
Q: How can I improve my cross contour drawing skills?
A: Regular practice is key. Try sketching different objects and figures, focusing on how light and shadow interact with their surfaces.
Q: Are there specific materials recommended for cross contour drawing?
A: You can use any drawing materials, but having a good range of pencils, quality paper, and erasers will help you achieve better results.

Understanding Cross Contour Lines
Cross contour lines are an essential tool for artists seeking to represent three-dimensional forms on a flat surface. Unlike traditional contour lines, which outline the edges of an object, cross contour lines weave across the surface of the object, mimicking the way light and shadow play on its form. Imagine tracing the curves of a mountain range on a map; each line represents a different elevation, helping you visualize the terrain without ever stepping foot on it. Similarly, cross contour lines allow you to convey depth and volume in your drawings.
These lines can be thought of as a roadmap of the object's surface, guiding the viewer's eye and enhancing their understanding of its shape. When you draw a cross contour line, you're not just outlining the object; you're engaging with its structure, suggesting how it might feel if touched. This technique invites the artist to think about the three-dimensionality of the subject, making it a vital skill for anyone looking to improve their drawing abilities.
To grasp the concept of cross contour lines fully, consider the difference between them and traditional contour lines. Traditional contour lines are typically used to create a flat representation of an object by outlining its silhouette. In contrast, cross contour lines are drawn in a way that reflects the object's surface contours, often following the curves and dips. This can be particularly useful when drawing organic subjects, such as a human figure or a piece of fruit, where the surface is not uniform.
In practice, cross contour lines can vary in spacing and thickness, which can affect how the viewer interprets the object's depth and texture. For instance, closely spaced lines might suggest a steep slope or a rapid change in form, whereas wider spaces can indicate a flatter area. By manipulating these lines, artists can create a sense of movement and dynamism in their work, making the subject appear more lifelike.
Furthermore, cross contour lines can also serve as a foundation for adding details and colors later. Once the basic structure is established, artists can layer additional elements, such as shading and color, to enhance the overall composition. This layering technique helps to maintain the integrity of the cross contour lines while adding richness and complexity to the artwork.
Ultimately, mastering cross contour drawing is about more than just technique; it’s about developing a deeper understanding of form and space. As you practice, you'll find that these lines not only improve your drawing skills but also enrich your appreciation for the three-dimensional world around you. So grab your pencil and paper, and start exploring the fascinating world of cross contour lines!
Frequently Asked Questions
- What is the main purpose of cross contour lines? Cross contour lines help artists depict the three-dimensionality of objects on a two-dimensional surface, enhancing the understanding of form and depth.
- How do cross contour lines differ from regular contour lines? While regular contour lines outline the edges of an object, cross contour lines move across the surface, following its curves and dips to represent its form more accurately.
- Can cross contour lines be used in figure drawing? Yes! Cross contour lines are particularly effective in figure drawing as they help capture the body’s volume, proportion, and movement.

Materials Needed for Cross Contour Drawing
To embark on your journey of cross contour drawing, it's essential to gather the right materials that will serve as your artistic arsenal. Think of these supplies as the foundation of a sturdy house; without them, your structure may crumble. The beauty of cross contour drawing lies in its ability to convey depth and form, and having the right tools can make all the difference. So, let’s dive into what you’ll need!
First and foremost, you'll need quality paper. The type of paper you choose can significantly influence the outcome of your artwork. For beginners, a smooth surface sketch paper is ideal, as it allows for easy pencil strokes and erasing. If you're feeling adventurous, consider using textured paper, which can add an extra dimension to your lines. Here’s a quick comparison of paper types:
| Paper Type | Texture | Best For |
|---|---|---|
| Sketch Paper | Smooth | Beginners, Pencil Work |
| Watercolor Paper | Rough | Mixed Media, Textured Effects |
| Newsprint | Very Smooth | Quick Studies, Practice |
Next up is your pencil selection. A range of pencils from hard (H) to soft (B) will give you the versatility needed for cross contour drawing. Hard pencils are great for fine lines, while softer pencils can create darker, bolder strokes. I recommend starting with a 2B pencil as it offers a good balance for both light and dark lines. Don't forget to have a good eraser on hand! A kneaded eraser works wonders for lifting graphite without damaging the paper.
In addition to pencils and paper, you might want to invest in a blending stump. This handy tool helps to smooth out your lines and create subtle transitions between shadows and highlights, enhancing the three-dimensional quality of your work. A ruler can also be useful for establishing straight lines and angles, especially when starting out.
Finally, consider your workspace. A well-lit area can make a world of difference in how you perceive your work. Natural light is ideal, but a good desk lamp can also do the trick. Comfort is key, so ensure your chair and desk are at the right height to avoid strain during long drawing sessions.
In summary, the materials you choose for cross contour drawing can greatly affect your ability to express depth and form. Here’s a quick recap of what you’ll need:
- Paper: Sketch paper or textured paper for variety.
- Pencils: A range from H to B, with 2B being a great starter.
- Eraser: A kneaded eraser for precision.
- Blending stump: For smooth transitions.
- Good lighting: To enhance visibility and detail.
With your materials ready, you’re well on your way to mastering the art of cross contour drawing. Remember, the journey is just as important as the destination, so enjoy the process and let your creativity flow!
Q: Do I need expensive materials to start cross contour drawing?
A: Not at all! While quality materials can enhance your experience, you can start with basic sketch paper and a simple pencil. The most important thing is to practice and develop your skills.
Q: How often should I practice cross contour drawing?
A: Regular practice is key! Aim for at least a few sessions each week to build your confidence and improve your technique.
Q: Can I use color with cross contour lines?
A: Absolutely! Once you feel comfortable with the technique, you can experiment with adding color to enhance your drawings.

Basic Techniques for Drawing Cross Contour Lines
When it comes to cross contour drawing, mastering the basic techniques is essential for effectively capturing the essence of three-dimensional forms on a flat surface. Unlike traditional contour lines that merely outline the shape of an object, cross contour lines weave around the object, following its surface and revealing its volume and depth. To get started, you'll want to familiarize yourself with a few key techniques that will set the foundation for your cross contour drawing journey.
First and foremost, observation is critical. Take a moment to closely examine the object you want to draw. Notice how the light interacts with its surface, creating highlights and shadows. This will help you understand how to apply cross contour lines effectively. As you observe, think of the object as a topographical map—the lines you draw should mimic the way the land rises and falls, capturing the essence of the form.
Next, start with light pressure on your pencil. This allows for more flexibility as you create your lines. You can always darken them later, but beginning with light strokes gives you the freedom to adjust your lines without damaging your paper. As you draw, let your lines flow naturally, following the curves and contours of the object. It’s important to keep your hand relaxed; tension can lead to stiff lines that fail to convey the fluidity of the form.
Now, let’s talk about the direction of your lines. Cross contour lines should move across the surface of the object in a way that reflects its form. For example, if you are drawing a cylindrical object, your lines should wrap around it horizontally, while a spherical object would require lines that curve both horizontally and vertically. This technique helps to create the illusion of depth and volume.
Another effective technique is to use varying line weights. Thicker lines can suggest areas of shadow or depth, while thinner lines can indicate highlights or areas that are more pronounced. This contrast not only adds interest to your drawing but also enhances the three-dimensionality of the object. As you practice, pay attention to how different line weights can change the perception of your drawing.
Incorporating gesture drawing can also be beneficial. Spend a few minutes sketching the object quickly, focusing on capturing its essence rather than perfecting details. This will help you loosen up and become more comfortable with the flow of cross contour lines. Remember, the goal is to convey the form and texture, not necessarily to create a photorealistic representation.
Lastly, don’t forget to practice regularly. Set aside time each day to draw using cross contour lines. The more you practice, the more intuitive the technique will become. Consider using a variety of objects to challenge yourself—everything from simple fruits to complex sculptures can provide unique opportunities for applying cross contour lines.
In conclusion, mastering the basic techniques of cross contour drawing involves a combination of observation, light pressure, directionality, varying line weights, gesture drawing, and consistent practice. By focusing on these elements, you will enhance your ability to depict depth and form effectively, leading to more dynamic and engaging artwork.
- What are cross contour lines? Cross contour lines are lines that follow the surface of an object, helping to convey its three-dimensional form on a two-dimensional surface.
- How do I practice cross contour drawing? Regular practice is key. Try drawing different objects, focusing on their form and how light interacts with them.
- Can I use color in cross contour drawing? Yes! Adding color can enhance your drawings, but it's important to maintain the integrity of the contour technique.
Applying Cross Contour Lines to Still Life
When it comes to still life drawing, applying cross contour lines can completely transform your approach to representing objects. Imagine you're looking at a simple bowl of fruit. At first glance, it may seem like just a collection of shapes and colors. However, by utilizing cross contour lines, you can reveal the underlying structure and depth of each piece of fruit, making your drawing not just a flat representation but a dynamic portrayal of form. This technique allows you to capture the essence of the objects, showcasing their volume and the way light interacts with their surfaces.
To begin, choose a still life arrangement that excites you. It could be anything from a classic vase of flowers to a more abstract collection of geometric shapes. The goal here is to observe how the objects relate to one another in space. As you start drawing, focus on the curvature and contours of each object. Cross contour lines will help you illustrate these curves effectively, guiding the viewer's eye around the composition. For instance, if you're drawing an apple, the lines should follow the roundness of its shape, wrapping around it to suggest its three-dimensional form.
As you draw, remember that cross contour lines are not just about outlining. They are about creating a sense of movement and flow within your drawing. Think of them as the muscles of your artwork, flexing and bending to give life to your objects. You can use varying line weights to enhance this effect; thicker lines can indicate areas of shadow or depth, while thinner lines can suggest highlights or less prominent features. This contrast will add a layer of realism to your still life.
Another key aspect to consider is the light source. Observe where the light falls on your still life and how it affects the shapes and contours. Use your cross contour lines to emphasize the areas where the light hits, creating a sense of volume and depth. For example, if the light shines on one side of an orange, your lines should curve more prominently on that side, tapering off as they move into shadow. This technique not only adds dimension but also guides the viewer’s eye to the focal points of your composition.
Don't hesitate to experiment with different objects and arrangements. Each still life presents unique challenges and opportunities to practice your cross contour drawing skills. You might find that certain materials, like glass or fabric, require a different approach to your lines. For instance, the smooth surface of a glass bottle will reflect light differently than the textured surface of a woven basket. Take the time to explore these variations, and soon you'll develop a keen eye for how to apply cross contour lines effectively across various subjects.
Finally, remember that practice is crucial. Set aside time to draw regularly, focusing on still life arrangements. Over time, you'll notice a significant improvement in your ability to convey form and depth through cross contour lines. As you refine your technique, you’ll find that your drawings not only look more realistic but also convey a sense of energy and life that captivates viewers. So grab your sketchbook, gather some interesting objects, and let the magic of cross contour drawing elevate your still life creations!
- What are cross contour lines? Cross contour lines are lines that follow the surface of an object, helping to represent its three-dimensional form on a two-dimensional surface.
- How do I practice cross contour drawing? Start with simple objects and gradually move to more complex arrangements. Focus on observing the curves and shapes, and use varied line weights to enhance depth.
- Can I use color with cross contour lines? Absolutely! Adding color can enhance your drawings. Just be sure to maintain the integrity of your contour lines.

Cross Contour Lines in Figure Drawing
When it comes to figure drawing, the challenge lies not just in capturing the likeness of a person but in conveying the depth and form of the human body. This is where cross contour lines shine as a powerful tool. Unlike traditional contour lines that merely outline the shape of a figure, cross contour lines delve deeper, tracing the curvature and volume of the body. Imagine wrapping a piece of string around a sculpted figure; the string would follow the contours of the form, revealing its three-dimensionality. That’s the essence of cross contour lines!
In figure drawing, using cross contour lines allows artists to depict the subtle shifts in form and the way light interacts with the body. For instance, when drawing an arm, instead of simply sketching the outline, you would use cross contour lines to illustrate the muscle structure and how it curves around the bone. This technique not only enhances the realism of your drawings but also helps you understand the anatomy of the human body on a deeper level.
To effectively utilize cross contour lines in figure drawing, consider the following tips:
- Study the Anatomy: Familiarize yourself with the underlying structures of the human body. Understanding how muscles and bones interact will inform your cross contour lines.
- Observe Light and Shadow: Pay attention to how light falls on the figure. The way shadows form will guide your cross contour lines, helping to create a sense of volume.
- Vary Line Weight: Use different thicknesses of lines to convey depth. Thicker lines can indicate areas of shadow, while thinner lines can suggest highlights.
As you practice, try to visualize the figure as a three-dimensional object. This mindset shift will allow you to apply cross contour lines more intuitively. Start with simple poses and gradually move to more complex positions. For example, when drawing a seated figure, observe how the body twists and turns, and let your lines reflect those movements.
Another effective exercise is to draw from life. Set up a still life with human figures or attend life drawing sessions. This real-time observation will sharpen your skills and help you apply cross contour lines in a way that feels natural. Remember, the goal is to capture the essence of the figure, and cross contour lines are your allies in achieving that goal!
In summary, incorporating cross contour lines into your figure drawing practice can lead to remarkable improvements in how you represent the human form. By focusing on the underlying structure and the play of light, you’ll create drawings that are not just flat images but dynamic representations of life and movement.
Q: What are cross contour lines?
A: Cross contour lines are lines that follow the form of a three-dimensional object, helping to illustrate its volume and depth on a two-dimensional surface.
Q: How do cross contour lines differ from regular contour lines?
A: Regular contour lines only outline the shape of an object, while cross contour lines indicate the internal structure and curvature, providing a sense of three-dimensionality.
Q: Can I use cross contour lines with color?
A: Absolutely! Adding color can enhance the effectiveness of cross contour lines, but it’s essential to maintain the integrity of the contours to keep the sense of depth.
Q: What materials do I need for cross contour drawing?
A: Basic materials include sketching paper, a variety of pencils (preferably with different hardness), and an eraser. You may also want colored pencils or markers for adding color.

Common Mistakes to Avoid
When diving into the world of cross contour drawing, even seasoned artists can stumble into some common traps. Understanding these pitfalls is crucial for developing your skills and enhancing the depth and texture in your artwork. One of the most frequent mistakes is over-reliance on traditional contour lines. While contour lines are important, cross contour lines serve a different purpose—they help convey the three-dimensionality of your subject. Instead of merely outlining the object, you need to think about how the lines wrap around the form, giving it volume.
Another common error is inconsistent line weight. Using the same thickness for all your lines can flatten your drawing, making it appear less dynamic. Varying your line weight not only adds interest but also helps to emphasize the shape and contours of the object. For example, thicker lines can denote areas of shadow or depth, while thinner lines can suggest highlights and lighter areas.
Many artists also forget to consider the direction of their lines. Cross contour lines should follow the form of the object. If you draw them straight or in random directions, you risk losing the three-dimensional effect. Think of it like wrapping a string around a ball; the string must follow the curvature of the surface to effectively represent its shape. This attention to direction can make a significant difference in the overall impact of your drawing.
Additionally, neglecting to observe light and shadow can lead to flat drawings. Cross contour lines can be used to indicate how light interacts with the surface of an object. Pay attention to where the light hits and where shadows fall, and let that inform your line work. This will not only help in creating depth but also give your drawing a more realistic feel.
Lastly, many artists tend to rush through the process. Drawing with cross contour lines requires patience and observation. Taking the time to really look at your subject and understand its form will yield much better results than hastily putting down lines. Remember, art is as much about the journey as it is about the final product!
To summarize, here are some common mistakes to keep in mind while practicing cross contour drawing:
- Over-reliance on traditional contour lines
- Inconsistent line weight
- Ignoring the direction of lines
- Neglecting light and shadow
- Rushing the drawing process
By being aware of these common mistakes and actively working to avoid them, you'll find that your cross contour drawings will improve significantly, allowing you to create more dynamic and engaging artwork.
Q: What are cross contour lines?
A: Cross contour lines are lines that follow the contours of a three-dimensional object, helping to represent its form and depth on a two-dimensional surface.
Q: How do I practice cross contour drawing?
A: Regular practice is key! Start with simple objects and gradually move to more complex forms. Use exercises that focus on observing light and shadow, and experiment with varying line weights.
Q: Can I use color with cross contour lines?
A: Absolutely! Adding color can enhance your drawings. Just ensure that the colors complement the cross contour lines and maintain the integrity of the form.
Q: What materials do I need for cross contour drawing?
A: Basic materials include sketch paper, a range of pencils (from hard to soft), and an eraser. You can also use colored pencils or markers if you plan to add color.
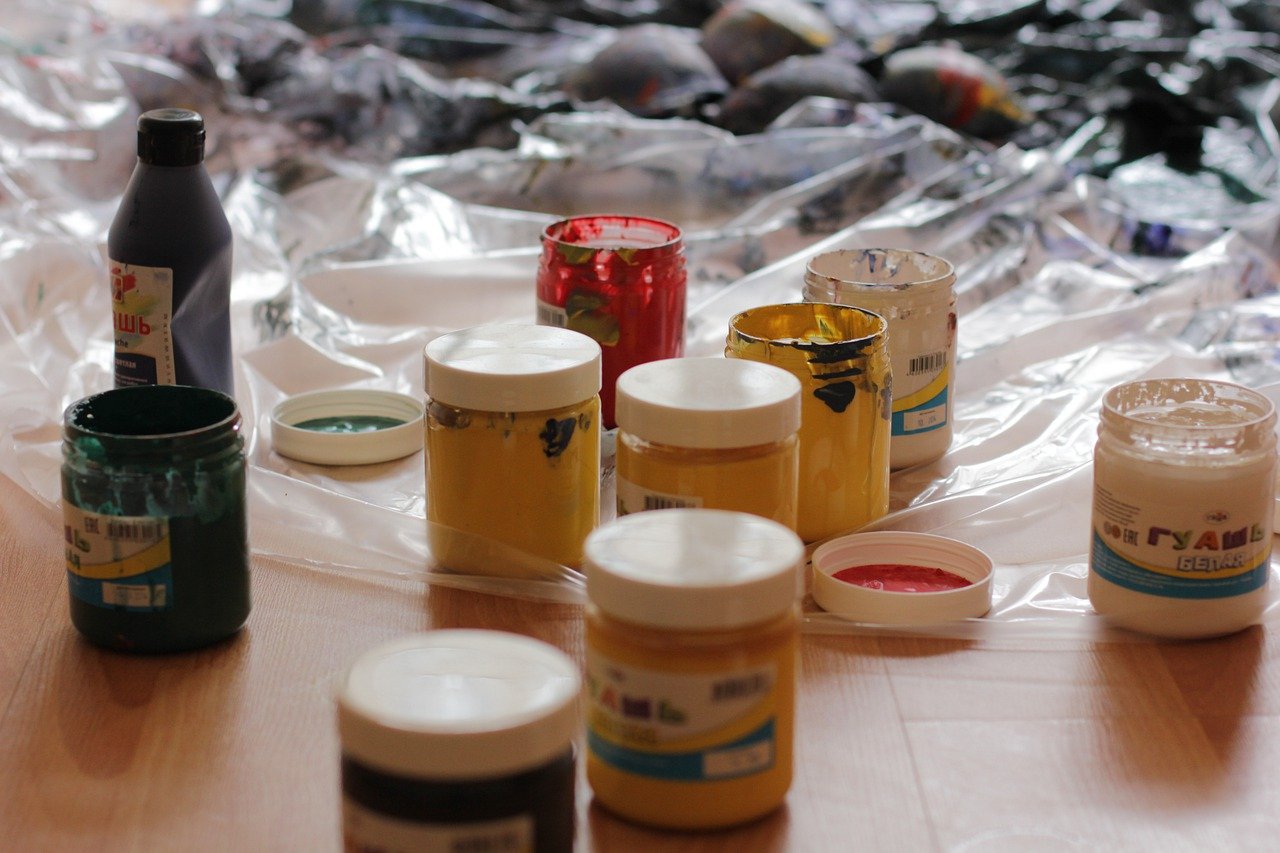
Incorporating Color with Cross Contour Lines
When it comes to cross contour drawing, adding color can elevate your artwork from good to extraordinary. Just imagine how a simple sketch can transform into a vibrant piece that captures the viewer's attention! The key is to understand how to integrate color without compromising the structure and depth that cross contour lines provide.
First off, let's talk about the importance of color. Color can convey emotions, set the mood, and even create a sense of depth in your drawings. When you apply color to cross contour lines, you’re not just filling in spaces; you’re enhancing the visual narrative of your artwork. Think of it like seasoning a dish—too much can overwhelm, but just the right amount can bring out the flavors.
To effectively incorporate color into your cross contour drawings, consider the following steps:
- Choose Your Color Palette: Select colors that complement each other and align with the mood you want to convey. For example, warm colors can evoke feelings of energy and passion, while cool colors can create a calm and serene atmosphere.
- Layering Technique: Start with a light wash of color to establish your base. Gradually build up layers to add depth and richness. This approach mimics the way light interacts with surfaces in the real world.
- Use Color to Define Form: Apply darker shades along the edges of your cross contour lines to create shadows and enhance the three-dimensional effect. Conversely, lighter hues can be used to highlight areas where light hits the object.
One effective method to maintain the integrity of your contour lines while adding color is to use transparent media like watercolors or colored pencils. These mediums allow the underlying lines to remain visible while still adding vibrancy to your piece. Think of it as putting a sheer veil over a beautiful painting; the details still shine through while adding an extra layer of beauty.
Here's a quick table summarizing the best practices for incorporating color into your cross contour drawings:
| Practice | Description |
|---|---|
| Color Palette | Select complementary colors that enhance the mood. |
| Layering | Start with light washes and build up to darker tones. |
| Defining Form | Use darker shades for shadows and lighter shades for highlights. |
| Transparent Media | Utilize watercolors or colored pencils for a delicate effect. |
As you practice, don’t be afraid to experiment! Mixing different colors and techniques can lead to surprising results. Just like in life, art is about exploration and finding what resonates with you. Remember, the goal is to enhance your cross contour lines, not overshadow them. So, keep your lines bold and your colors vibrant, and watch your artwork come to life!
Q: Can I use markers for cross contour drawing?
A: Absolutely! Markers can provide bold, vibrant colors, but be mindful of their opacity. Use them in a way that allows your contour lines to shine through.
Q: What if I make a mistake while coloring?
A: Mistakes are part of the artistic process! Use an eraser for pencils or a white gel pen to correct areas in ink or markers. Embrace the imperfections; they can lead to unique outcomes!
Q: How do I choose the right colors for my subject?
A: Observe the subject closely! Consider the environment and lighting. Use a color wheel to find complementary colors, and don’t hesitate to test colors on a scrap piece of paper before applying them to your artwork.

Practicing Cross Contour Drawing
Regular practice is essential for mastering any drawing technique, and cross contour drawing is no exception. Just like learning to ride a bike, the more you practice, the more natural it becomes. The beauty of cross contour lines lies in their ability to reveal the underlying structure of objects, helping you to see beyond the surface. So, how do you incorporate this technique into your daily routine? Let's dive into some effective strategies!
First and foremost, set aside dedicated time for your drawing practice. Just as you would schedule a workout session, block off some time each day or week specifically for cross contour drawing. Consistency is key! Even if it’s just 15 minutes a day, you’ll be surprised at how quickly your skills improve.
To kickstart your practice, begin with simple objects around your home. Grab a fruit bowl, a coffee mug, or even a shoe! The idea is to focus on how the cross contour lines wrap around these objects. Start by observing the shape and volume, then gently sketch the lines that follow the contours of the object. This exercise not only enhances your observational skills but also helps you understand how light interacts with different surfaces.
Another fun way to practice is by using reference photos. Look for images that showcase interesting shapes and textures. You can create a small sketchbook dedicated to cross contour drawings, where you can experiment with different subjects and styles. It’s like a personal gallery of your progress! As you develop your skills, try to challenge yourself with more complex subjects, such as intricate still lifes or dynamic figures.
Don’t forget to mix things up! Incorporate various materials into your practice sessions. For instance, try using charcoal for a softer look, or colored pencils to add a pop of color. Experimenting with different mediums can lead to exciting discoveries and keep your practice sessions fresh and engaging.
Lastly, consider joining a community of artists. Whether it’s an online forum, a local art class, or a social media group, sharing your work and receiving feedback can be incredibly beneficial. The encouragement from fellow artists can motivate you to keep pushing your boundaries. Plus, you might pick up new techniques and tips that you hadn't considered before!
In summary, practicing cross contour drawing is all about consistency, observation, and exploration. By dedicating time to this technique, experimenting with various subjects and materials, and engaging with a community, you'll not only improve your skills but also deepen your appreciation for the art of drawing. Remember, every stroke you make is a step towards mastering this fascinating technique!
- What is cross contour drawing? Cross contour drawing involves creating lines that follow the surface of an object, helping to depict its three-dimensional form on a two-dimensional plane.
- How can I improve my cross contour drawing skills? Regular practice, studying various objects, and experimenting with different materials are great ways to enhance your skills.
- Can I use cross contour lines in digital art? Absolutely! The principles of cross contour drawing apply to digital art as well, allowing for a versatile approach to creating depth and texture.
Frequently Asked Questions
-
What are cross contour lines?
Cross contour lines are lines that traverse the surface of an object, helping to illustrate its three-dimensional form on a two-dimensional surface. Unlike traditional contour lines that outline the shape, cross contour lines show the volume, depth, and texture of the object.
-
What materials do I need for cross contour drawing?
For cross contour drawing, you will need a few essential materials: quality drawing paper, a range of pencils (preferably from H to B grades for different shading effects), an eraser, and possibly colored pencils or markers if you plan to incorporate color.
-
How can I start practicing cross contour drawing?
Begin by selecting simple objects for practice, such as fruits or basic shapes. Focus on observing the object's form and use your pencil to create lines that follow its contours. Regular practice is key, so try to draw daily, gradually increasing the complexity of your subjects.
-
What are common mistakes to avoid when drawing cross contour lines?
Some common mistakes include drawing lines that are too rigid or not following the form of the object accurately. Another pitfall is neglecting the light and shadow, which can diminish the three-dimensional effect. Always remember to keep your lines fluid and consider the object's volume.
-
Can I use color with cross contour lines?
Absolutely! Adding color can enhance the visual impact of your cross contour drawings. Just be mindful to maintain the integrity of the contour lines and ensure that the colors complement the form you’ve depicted.
-
How do cross contour lines help in figure drawing?
In figure drawing, cross contour lines assist in capturing the human form’s volume and movement. They help you understand the body's proportions and can convey a sense of dynamism, making your figures appear more lifelike and three-dimensional.
-
What exercises can I do to improve my cross contour drawing skills?
Try exercises like drawing from life, focusing on different objects each time, or creating a series of sketches that emphasize various textures. You can also practice drawing the same object from multiple angles to better understand its form and contours.


