
DIY Projects: Creating Photo Wall Collages
Are you ready to transform your blank wall into a stunning visual narrative? Creating a photo wall collage is not just about hanging pictures; it’s an art form that allows you to express your personality, memories, and style. Imagine walking into a room where every glance at the wall tells a story, evokes a memory, or simply makes you smile. Whether you’re a seasoned DIY enthusiast or a newbie looking to dip your toes into the world of home decor, this guide will lead you through the exciting process of crafting personalized photo wall collages.
First things first, let’s talk about the magic of choosing the right photos. This is where your collage begins to take shape. Think about the themes that resonate with you—maybe it’s a collection of travel memories, family moments, or even your favorite quotes paired with images. Consider how the colors in your photos will work together. A cohesive color scheme can elevate your collage, making it a true work of art. For example, if you have a series of black-and-white photos, they can create a classic and timeless feel, while vibrant, colorful images can bring energy and warmth to your space.
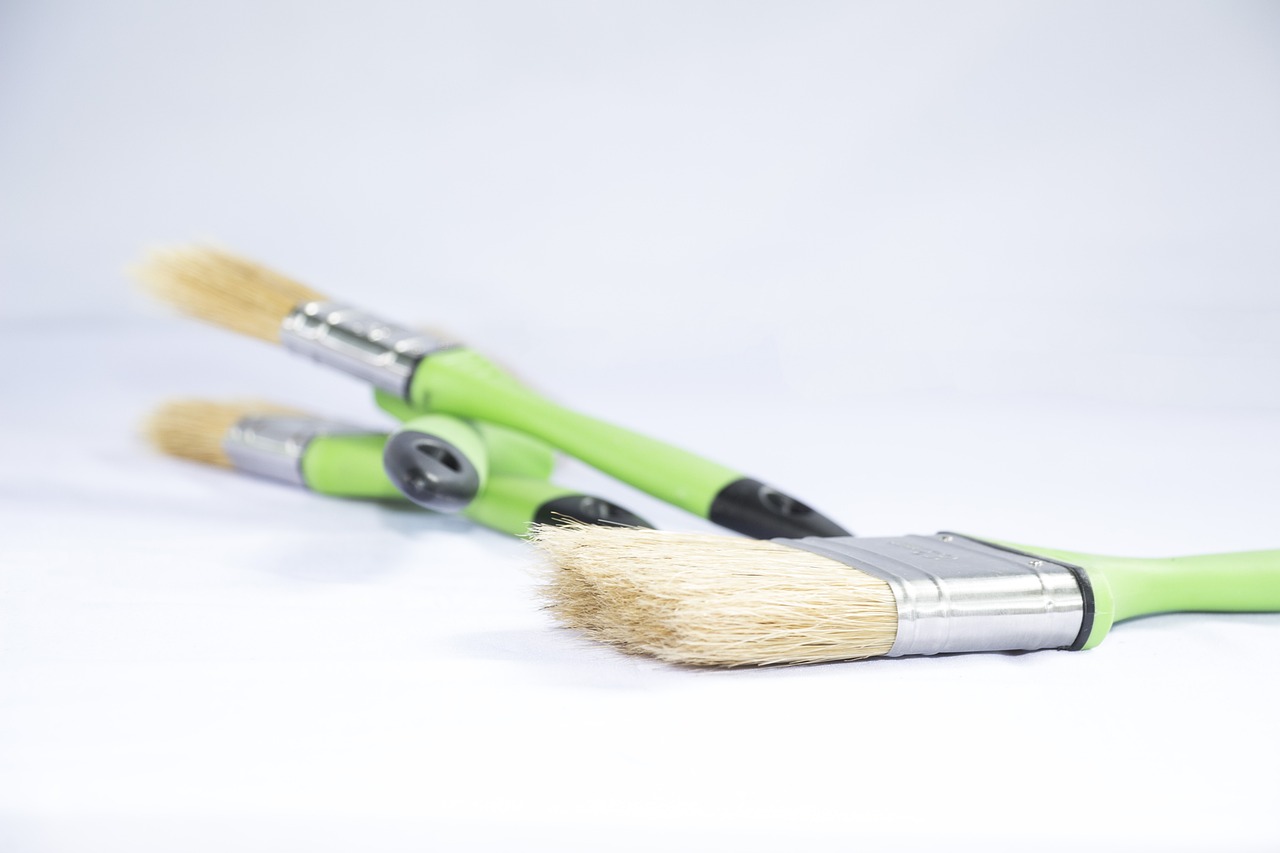
Now, let’s gather our materials. Having the right supplies is key to a successful project. You’ll need a variety of frames, adhesives, and perhaps some decorative elements to make your collage pop. Below is a quick overview of what you might consider gathering:
| Materials | Purpose |
|---|---|
| Photo Frames | To display your photos in style |
| Adhesives | For mounting photos directly on the wall |
| Decorative Elements | Adds personality and flair to your collage |
| Measuring Tape | Ensures proper spacing and alignment |
Once you’ve got your materials, it’s time to dive into the fun part: arranging your photos! The layout can drastically change the vibe of your collage. You might opt for a grid pattern for a clean and organized look, or go for a more freeform design that feels spontaneous and artistic. Think of your collage as a puzzle—each piece needs to fit together in a way that feels balanced and visually appealing. Play around with different arrangements on the floor before committing to the wall; sometimes, what looks good in theory may need a little tweaking in practice.
But wait, there’s more! To truly elevate your photo wall collage, consider incorporating text and art. Adding quotes that inspire you, or even small illustrations can enhance the narrative of your collage. When choosing fonts, make sure they complement your photos. A whimsical font might work well with playful images, while a sleek, modern font pairs perfectly with contemporary photos. The colors of your text should also harmonize with your images—think of it as a conversation between the visuals and the words.
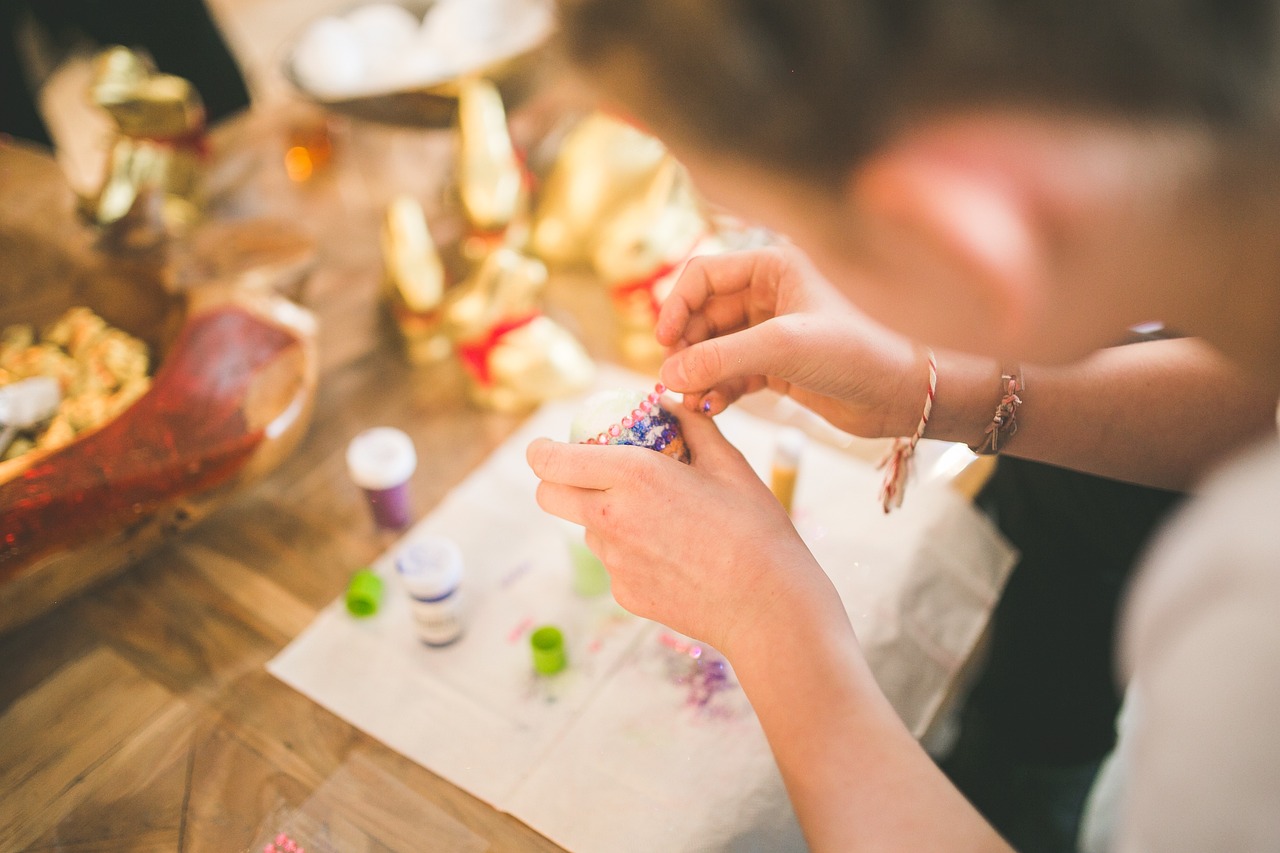
Adding decorative elements can also take your collage to the next level. Think about incorporating stickers, drawings, or even fabric swatches. These elements can fill in gaps and add texture to your collage, making it more dynamic and engaging. The key is to blend these elements seamlessly, so they enhance rather than distract from your photos.
Once you’ve assembled your masterpiece, don’t forget the final touches. Hanging techniques can vary from traditional nails to modern adhesive strips. Consider the lighting in your space, as well; good lighting can highlight your collage beautifully, creating a focal point in the room. And remember, maintenance is key! Dust your collage occasionally to keep it looking fresh and vibrant.
Q: How do I choose the right photos for my collage?
A: Select photos that resonate with you personally, and consider a cohesive theme or color scheme for a more polished look.
Q: What if I don’t want to use frames?
A: You can create a stunning frame-free collage using clips, washi tape, or adhesive strips to mount photos directly on the wall.
Q: How can I add text to my collage?
A: Use quotes or phrases that inspire you. Choose fonts and colors that complement your photos for a cohesive design.
Q: What materials do I need for a photo wall collage?
A: Basic materials include photo frames, adhesives, decorative elements, and tools like measuring tape for alignment.
Now that you’re armed with all this knowledge, it’s time to unleash your creativity and start crafting your own photo wall collage. Happy decorating!

Choosing the Right Photos
When it comes to crafting a stunning photo wall collage, the selection of photos is paramount. Think of your collage as a visual storybook; each image is a page that contributes to the overall narrative. So, how do you choose the right photos that not only resonate with you but also create a cohesive look? Start by considering a theme that reflects your personality or the mood you want to convey. For instance, you might opt for a travel theme, featuring pictures from your adventures around the world, or a family theme, showcasing cherished moments with loved ones.
Next, pay attention to color schemes. A well-curated color palette can unify your collage, making it visually appealing. You can select photos that share similar tones or hues, or you might want to go for a more eclectic mix that still feels harmonious. Imagine a beautiful sunset photo paired with a vibrant beach snapshot; the warm colors can create a lovely flow throughout your collage.
Another crucial aspect is the personal significance of the photos. Each picture should evoke a memory or emotion, creating a deeper connection with your wall art. For example, a photo from your wedding day or a snapshot of your child’s first birthday can hold immense sentimental value. When you look at these images, they should bring a smile to your face or transport you back to that moment in time.
To help you visualize the process, consider the following tips:
- Mix different types of photos: Combine candid shots, posed portraits, and landscape images to add variety.
- Use black and white photos alongside color images for a striking contrast.
- Incorporate photos from different stages of your life to create a timeline effect.
Ultimately, the key to selecting the right photos is to ensure that they reflect your unique story and style. As you gather your images, lay them out on the floor or a table to experiment with different arrangements. This will give you a sense of how they work together before you commit to a final design. Remember, your photo wall collage is a reflection of you, so make it as personal and meaningful as possible!
Materials Needed
Creating a stunning photo wall collage requires more than just creativity; it demands the right materials to bring your vision to life. First and foremost, you'll need to gather your photos. These can range from cherished family moments to breathtaking landscapes, but ensure they resonate with you personally. Once you have your photos, think about the frames or lack thereof. Choosing the right frames can dramatically alter the aesthetic of your collage. You might opt for traditional frames, sleek modern designs, or even go frame-free for a contemporary twist.
Next on your list should be adhesives. If you're going the frame-free route, adhesive strips or washi tape can provide a playful touch while keeping your photos secure. If you're using frames, consider whether you want to use clips, hooks, or nails to hang them. Additionally, having a measuring tape on hand is essential for ensuring everything is aligned perfectly on your wall.
Don't forget about decorative elements! Stickers, washi tape, or even pieces of fabric can enhance your collage and add a unique flair. These embellishments can help fill in gaps or simply add a pop of color. You might also want to include some tools, like scissors for cutting, a level to ensure everything hangs straight, and maybe even a hammer if you're nailing anything into the wall.
| Material | Purpose |
|---|---|
| Photos | Core elements of your collage |
| Frames | Enhance the visual appeal |
| Adhesives | Secure photos to the wall or frames |
| Decorative Elements | Add personality and flair |
| Tools | Assist in the assembly process |
In summary, gathering the right materials is crucial for a successful photo wall collage. By selecting meaningful photos, choosing suitable frames or adhesives, and incorporating decorative elements, you will create a stunning visual story that reflects your personality and style. So, take a moment to gather everything you need and get ready to transform your wall into a masterpiece!
Types of Frames
When it comes to creating a stunning photo wall collage, the type of frame you choose can make all the difference. The right frame not only enhances the beauty of your photos but also ties the entire collage together, creating a cohesive look that draws the eye. There are various styles of frames to consider, each with its own unique vibe and aesthetic appeal. Let’s dive into some popular frame types that can elevate your collage game.
Modern Frames are sleek and chic, often featuring clean lines and minimalistic designs. These frames are perfect for contemporary spaces and can complement a wide range of decor styles. Think about using frames with metallic finishes or bold colors to add a touch of sophistication to your collage. They work beautifully with vibrant photos, allowing them to take center stage without overwhelming the overall design.
On the other hand, Vintage Frames can add a nostalgic charm to your collage. These frames often come with intricate details and ornate designs, making them ideal for showcasing cherished memories. You might find them at thrift stores or flea markets, each with its own history and character. Using a mix of vintage frames can create an eclectic look that tells a story, enhancing the personal touch of your collage.
If you're leaning towards a more simplistic and understated approach, Minimalist Frames are your best bet. These frames typically feature a simple color palette and a straightforward design, allowing your photos to shine without distraction. They’re perfect for those who want to keep things clean and organized, and they work exceptionally well in smaller spaces where you want to avoid visual clutter.
Another option is to explore Gallery Frames, which are designed to display multiple photos in a unified manner. These frames often come in sets, making it easy to create a harmonious look on your wall. They can be arranged in various patterns, allowing you to customize the layout according to your preference. This type of frame is fantastic for those who want to showcase a series of related photos, such as family portraits or travel memories.
Lastly, consider Shadow Box Frames, which provide depth and dimension to your collage. These frames allow you to display not just photos but also three-dimensional objects, like souvenirs or small keepsakes. By incorporating these elements, you can create a collage that tells a richer story, capturing the essence of your experiences in a unique way.
In summary, the type of frame you choose for your photo wall collage is crucial in defining its overall look and feel. Whether you opt for modern, vintage, minimalist, gallery, or shadow box frames, each option has its own charm and can significantly impact the visual narrative of your collage. So, take your time exploring these styles, and let your creativity flow as you curate the perfect frame combination for your space!
DIY Frame Ideas
Creating your own frames can be an incredibly rewarding part of the photo wall collage process. Not only does it allow you to express your creativity, but it also adds a personal touch that store-bought frames simply can't match. Imagine walking into a room and seeing frames that you crafted with your own hands, housing memories that are dear to you. It's like telling a story where every element is uniquely yours!
One of the simplest DIY frame ideas is to use wooden pallets. These can be easily sourced and can be cut down to size to fit your photos perfectly. A little sanding and a coat of paint or stain can transform a rough pallet into a rustic frame that adds charm and character to your collage. You can even leave the wood raw for a more natural look, which can be particularly striking against a colorful wall.
If you're looking for something more colorful, cardboard frames are a fun and inexpensive option. Simply cut out the desired shape and size, and then decorate them with paint, markers, or even fabric scraps. This method not only allows for endless customization but also makes it easy to change up your collage whenever you feel inspired. You could even create a theme for your frames based on the seasons or holidays!
For a more modern twist, consider using washi tape. This decorative tape comes in a myriad of colors and patterns, making it perfect for framing photos directly on the wall. Just stick the tape around the edges of your photo to create a frame that can be easily removed or replaced without damaging your walls. It's a fantastic way to keep your collage fresh and updated!
Lastly, don’t overlook the power of upcycling. Old window frames, for example, can be turned into stunning photo displays. Simply remove the glass, paint the frame if desired, and use the sections to showcase your pictures. This not only gives your collage a vintage vibe but also acts as a conversation starter when guests come over. It’s like turning a piece of history into a canvas for your memories!
In summary, DIY frame ideas can range from rustic wooden pallets to modern washi tape applications. The key is to let your imagination run wild and choose materials that resonate with your personal style. Remember, the more unique your frames, the more they will enhance the overall aesthetic of your photo wall collage!
Q: What materials do I need for DIY frames?
A: Depending on the type of frame you choose to create, you might need materials such as wood, cardboard, washi tape, paint, scissors, and a glue gun. Gather what resonates with your design vision!
Q: Can I change my collage layout later?
A: Absolutely! One of the joys of creating a DIY photo wall collage is that you can easily rearrange your photos and frames. Just be mindful of how you adhere them to the wall if you want to avoid leaving marks.
Q: How do I ensure my frames match my decor?
A: Consider your room’s color scheme and style. You can paint your frames to match or use materials that complement your existing decor. For example, if your room has a lot of natural wood, wooden frames will fit right in!
Using No Frames
For those who crave a more modern and minimalist aesthetic, creating a photo collage without frames can be a game changer. Imagine walking into a room where your memories are not confined by traditional boundaries, but rather dance freely across the wall, inviting conversation and admiration. The beauty of a frame-free collage lies in its ability to blend seamlessly with your wall, creating an organic and vibrant atmosphere.
One of the most appealing aspects of a frame-free collage is its versatility. You can use various materials to mount your photos directly onto the wall, giving you the freedom to experiment with different arrangements and styles. For instance, consider using washi tape to create colorful borders around your photos. This not only adds a pop of color but also allows for easy adjustments. If you’re feeling particularly creative, you can even use clips or string lights to hang your photos, adding an element of whimsy to your design.
Another technique is to utilize adhesive strips. These strips are fantastic because they hold your photos securely while allowing you to reposition them without damaging your walls. This is especially useful if you like to change things up frequently. Just imagine how fun it would be to rotate your favorite vacation snapshots or family gatherings every few months!
When going frame-free, consider the layout carefully. The arrangement can significantly influence the overall feel of your collage. You might opt for a grid pattern for a structured look, or perhaps a more freeform design that reflects your personality. To help visualize your arrangement, you can sketch it out on paper or use painter's tape on the wall to mark where each photo will go. This way, you can step back and see how everything flows together before making it permanent.
Lastly, don’t shy away from adding other decorative elements to enhance your frame-free collage. Incorporate small shelves for displaying knick-knacks, or attach fabric swatches that complement the colors in your photos. The idea is to create a layered effect that draws the eye and tells a story. By embracing a frame-free approach, you’re not just decorating a wall; you’re crafting a unique narrative that reflects your life and experiences.

Arranging Your Photos
When it comes to creating a stunning photo wall collage, arrangement is everything. The way you place your photos can either enhance their beauty or create a chaotic look that distracts from the overall message. Think of your collage as a beautiful tapestry woven together with memories; each photo is a thread that contributes to the larger picture. So, how do you decide on the best arrangement for your photos? Here are some techniques that can help you create a visually appealing layout.
First, consider the grid pattern. This method is popular for its clean and organized appearance. By aligning your photos in a symmetrical grid, you create a sense of order that can be very pleasing to the eye. You can use frames of the same size or mix and match for a bit of fun. Just remember to maintain consistent spacing between each photo to keep that uniform look. If you're unsure about how it will look, lay your photos out on the floor first to get a feel for the arrangement before making it permanent on the wall.
On the other hand, if you’re feeling a bit more adventurous, you might want to try a freeform design. This approach allows for more creativity and can give your collage a more dynamic feel. You can place photos of various sizes at different angles, creating a sense of movement and spontaneity. This method works particularly well if you have a variety of photos, such as travel snapshots, family portraits, and candid moments. Just be mindful of balance; even in chaos, there should be a sense of harmony. You can achieve this by clustering similar colors or themes together.
Another technique to consider is the focal point method. Choose one standout photo that you want to highlight, and arrange the other images around it. This could be a large print of a family portrait or a breathtaking landscape shot. By making it the centerpiece, you draw the viewer’s eye immediately to that image, creating a natural flow to the rest of the collage. You can even use a larger frame for this focal point to emphasize its importance.
Lastly, don’t forget about the importance of spacing. Whether you’re going for a grid or freeform design, the space between each photo is crucial. Too close together can look cluttered, while too far apart can make the collage feel disconnected. Aim for a balance that feels right to you. A good rule of thumb is to leave about 2-4 inches between each photo, but feel free to adjust based on the size of your images and the overall look you’re going for.
In summary, arranging your photos is about finding the right balance between structure and creativity. Experiment with different layouts, and don’t be afraid to change things up until it feels just right. After all, this collage is a reflection of you and your unique story. So, grab those photos, let your imagination run wild, and create a visual masterpiece that you’ll be proud to display!
- What is the best way to hang my photo collage? Using adhesive strips or hooks can help avoid damage to your walls. Make sure to measure and plan your layout before hanging!
- Can I mix different sizes of photos in my collage? Absolutely! Mixing sizes can add depth and interest to your collage. Just ensure that the arrangement remains balanced.
- How do I maintain my photo collage? Regularly dust the area and check for any loose frames or photos. If you're using adhesive, ensure it remains secure to avoid any accidents.

Incorporating Text and Art
When it comes to creating a photo wall collage, the addition of text and art can truly elevate your project from ordinary to extraordinary. Think of your collage as a canvas where each photo tells a story, and the text and art serve as the narrative threads that weave those stories together. By integrating quotes, illustrations, or decorative elements, you can enrich your collage, making it a unique reflection of your personality and experiences.
Imagine walking into a room where the walls are adorned with not just photos, but also meaningful phrases that resonate with you. It’s like stepping into a visual diary that captures moments and emotions. To achieve this, consider incorporating text in a way that complements your photos. For instance, you might want to use a favorite quote from a book or a lyric from a song that holds significance. This can be done using various styles of typography that not only enhance the aesthetic but also add depth to your collage.
When selecting fonts and colors for your text, aim for visual harmony. The right combination can make your collage pop while also ensuring that it remains cohesive. For example, if your photos feature soft pastel colors, you might choose a delicate, cursive font in a matching hue. On the other hand, if your photos are bold and vibrant, a clean, sans-serif font in a contrasting color could create a striking effect. Remember, the goal is to create a seamless blend where the text feels like an integral part of the artwork rather than an afterthought.
In addition to text, incorporating decorative elements can add layers of interest to your collage. Think about using stickers, small drawings, or even fabric swatches that resonate with the theme of your photos. For instance, if you have photos from a beach vacation, you could include illustrations of seashells or beach umbrellas. This not only enhances the visual appeal but also adds a tactile element that invites viewers to engage more deeply with your creation.
To effectively integrate these elements, consider the following tips:
- Balance is Key: Ensure that the text and decorative elements do not overpower the photos. They should complement rather than compete.
- Layering: Experiment with layering text over photos or placing art in the background. This can create a sense of depth and intrigue.
- Consistency: Maintain a consistent style throughout your collage. Whether it’s through color schemes, font styles, or decorative motifs, consistency will tie everything together beautifully.
Ultimately, the incorporation of text and art into your photo wall collage is about expressing your unique story. It’s about creating a space that feels authentically you, where every glance at the wall brings back memories and evokes emotions. So grab your materials, let your creativity flow, and transform your wall into a stunning narrative that you can cherish for years to come!
Q: What types of text can I incorporate into my collage?
A: You can use quotes, song lyrics, personal anecdotes, or even captions that describe the photos. Just ensure they resonate with the overall theme of your collage.
Q: How do I choose the right font for my collage?
A: Consider the mood of your photos. For a playful theme, you might choose a fun, whimsical font, while a more serious theme might call for a classic serif font. Always aim for readability!
Q: Can I mix different styles of art in my collage?
A: Absolutely! Mixing styles can add visual interest, but be mindful of maintaining some level of cohesion through color or theme to avoid a chaotic look.
Choosing Fonts and Colors
When it comes to crafting a stunning photo wall collage, choosing the right fonts and colors is just as important as selecting the photos themselves. Think of your collage as a visual storybook; every element needs to work together to create a harmonious narrative. The fonts you choose can evoke different emotions, while the colors can set the overall mood of your display. Have you ever walked into a room and felt instantly uplifted by the colors around you? That’s the power of color!
First, let’s talk about fonts. The typeface you select can dramatically influence the vibe of your collage. For a modern look, consider using clean, sans-serif fonts like Arial or Helvetica. On the other hand, if you’re aiming for a more vintage feel, serif fonts such as Times New Roman or Garamond could be your best bet. Playful, handwritten fonts can add a personal touch, making your collage feel even more intimate. But remember, readability is key! You want your quotes or captions to be easily legible from a distance.
Next up is color selection. Colors can either clash or complement, so it’s essential to choose wisely. Start by identifying a color palette that resonates with you. You might want to consider the following:
- Monochromatic Schemes: Different shades of a single color create a cohesive and sophisticated look.
- Complementary Colors: Colors opposite each other on the color wheel, like blue and orange, can create striking contrasts.
- Analogous Colors: Colors next to each other on the wheel, such as blue, green, and teal, can offer a harmonious blend.
To help visualize your choices, you might want to create a simple table to compare your font and color options:
| Font Style | Color Palette | Vibe |
|---|---|---|
| Arial | Blue, Gray | Modern and Clean |
| Garamond | Brown, Cream | Vintage and Elegant |
| Brush Script | Pink, Yellow | Playful and Fun |
Once you’ve settled on your fonts and colors, it’s time to experiment! Don’t be afraid to play around with different combinations until you find the perfect match. You can even create mock-ups of your collage on paper or digitally to see how everything looks together. Remember, this is your space, and it should reflect your unique personality and style. So go ahead, unleash your creativity!
Adding Decorative Elements
When it comes to creating a stunning photo wall collage, adding decorative elements can truly elevate your design from ordinary to extraordinary. Think of your collage as a blank canvas where you can express your personality and creativity. By incorporating various decorative elements, you not only enhance the visual appeal but also add depth and meaning to your collage. So, what are some ways to effectively integrate these elements?
First off, consider the use of stickers. These playful additions can be thematic, such as floral designs or geometric shapes, and can help to fill in blank spaces while also adding a pop of color. You could even create a story with your stickers, linking them to the photos they accompany. For instance, if you have a photo from a beach vacation, a few seashell stickers can enhance that memory.
Another fantastic way to bring your collage to life is through drawings or handwritten quotes. Imagine the warmth of a hand-drawn heart or a personal note that speaks directly to you and your loved ones. This personal touch not only makes the collage unique but also serves as a conversation starter. You might want to use a variety of mediums—colored pencils, markers, or even watercolors—to create different textures and effects.
If you’re feeling particularly crafty, you might want to incorporate fabric swatches into your collage. This could be a piece of a favorite old shirt or a vibrant fabric that matches the color scheme of your photos. Fabric can add a tactile element that draws the viewer in. Just remember to secure the fabric properly so that it stays in place and looks neat.
Moreover, consider using frames and shadow boxes as decorative elements. These can add a three-dimensional aspect to your collage, making it visually interesting. You might want to create a shadow box around a particularly cherished photo, allowing it to stand out even more. This layering effect can create a sense of depth that draws the eye across your collage.
Finally, don’t overlook lighting as a decorative element. Soft fairy lights can add a magical touch to your collage, especially if you want to create a cozy atmosphere in your space. You could weave them around the edges of your collage or place them strategically to highlight certain photos. Just be sure to choose lights that complement the overall theme and color palette of your collage.
In summary, adding decorative elements to your photo wall collage is not just about embellishment; it's about creating a narrative and an emotional connection. By thoughtfully selecting and integrating these elements, you can transform your collage into a beautiful reflection of your life and experiences. Remember, the key is to ensure that every piece you add serves a purpose and resonates with the story you want to tell.
- What types of decorative elements can I use in my collage? You can use stickers, drawings, fabric, frames, and even lights to enhance your collage.
- How do I choose the right decorative elements? Consider the theme and colors of your photos, and select elements that complement your overall design.
- Can I change the decorative elements later? Absolutely! Collages are meant to be personal and can be updated as your style or memories evolve.
Final Touches and Display Tips
Once you’ve painstakingly crafted your photo wall collage, it’s time to step back and consider those all-important final touches that can elevate your creation from good to absolutely stunning. Think of this as the icing on the cake; it’s the little details that can make a big difference. First off, let’s talk about hanging techniques. You want to ensure that your collage is not only visually appealing but also securely mounted. Consider using adhesive strips for a damage-free hanging option or traditional nails for a more permanent solution. If you’re feeling adventurous, why not try a gallery-style hanging system? This allows for easy rearrangement and gives your collage a professional touch.
Next, let’s shed some light on your masterpiece. Lighting can dramatically alter the mood of your collage. A well-placed spotlight can highlight certain photos, while softer lighting can create a warm ambiance. You might consider using LED strip lights around the edges of your collage for a modern feel or a decorative lamp nearby for a cozy touch. Remember, the goal is to draw the eye to your collage without overwhelming it.
Now, let’s not forget about maintenance. Your photo wall collage will likely be a focal point in your home, so keeping it looking fresh is essential. Regularly dusting the frames or photos will keep them vibrant and free from grime. If you’ve used any decorative elements like fabric or stickers, ensure they’re securely attached and not fading over time. It might also be a good idea to periodically change out some photos to keep the collage feeling dynamic and reflective of your current life events.
Lastly, consider the overall layout of the space where your collage is displayed. Does it complement the surrounding decor? You might want to incorporate a few plants or decorative items nearby to create a cohesive look. Think of it as creating a visual story; every element should work together harmoniously. By paying attention to these final touches, you’ll ensure that your photo wall collage stands out as a stunning focal point in your home.
- How do I choose the best photos for my collage?
Consider themes, color schemes, and personal significance. Choose images that resonate with you and create a cohesive story. - What materials do I need for a photo wall collage?
You’ll need photos, frames (if desired), adhesives, scissors, and possibly decorative elements like stickers or washi tape. - Can I create a collage without frames?
Absolutely! You can use clips, washi tape, or adhesive strips to mount photos directly on the wall for a modern look. - How can I maintain my photo wall collage?
Regularly dust the photos and frames, and consider changing out some images periodically to keep it fresh and engaging.
Frequently Asked Questions
- What types of photos work best for a collage?
When choosing photos for your collage, think about a cohesive theme. You can use family photos, travel snapshots, or even artistic shots that resonate with you. Consider color schemes and personal significance to create a collection that tells your unique story.
- What materials do I need to create a photo wall collage?
To get started, you'll need a few essential materials: photos, frames (if you choose to use them), adhesive (like glue or tape), scissors, and a ruler. Optional materials include decorative elements such as stickers, washi tape, or string lights to add a personal touch to your collage.
- How do I arrange my photos for the best visual impact?
Arranging your photos can be a fun process! You can opt for a grid layout for a structured look or go for a freeform design for a more eclectic vibe. Lay out your photos on the floor first to experiment with different arrangements before committing to the wall.
- Can I create a collage without frames?
Absolutely! A frame-free collage can look modern and fresh. You can use clips, washi tape, or adhesive strips to mount photos directly on the wall. This approach allows for more flexibility and creativity in your design.
- How can I incorporate text or art into my collage?
Adding text or artwork can elevate your collage's narrative. Consider using quotes that inspire you or illustrations that complement your photos. Choose fonts and colors that align with your overall theme to ensure visual harmony.
- What are some tips for displaying my collage?
Once your collage is assembled, think about how to hang it. Use picture hooks or adhesive strips for easy mounting. Also, consider the lighting in the room; a well-lit area can enhance the beauty of your collage. Regular maintenance, like dusting, will keep it looking fresh!


