
How to Set Up Your Pottery Workspace at Home
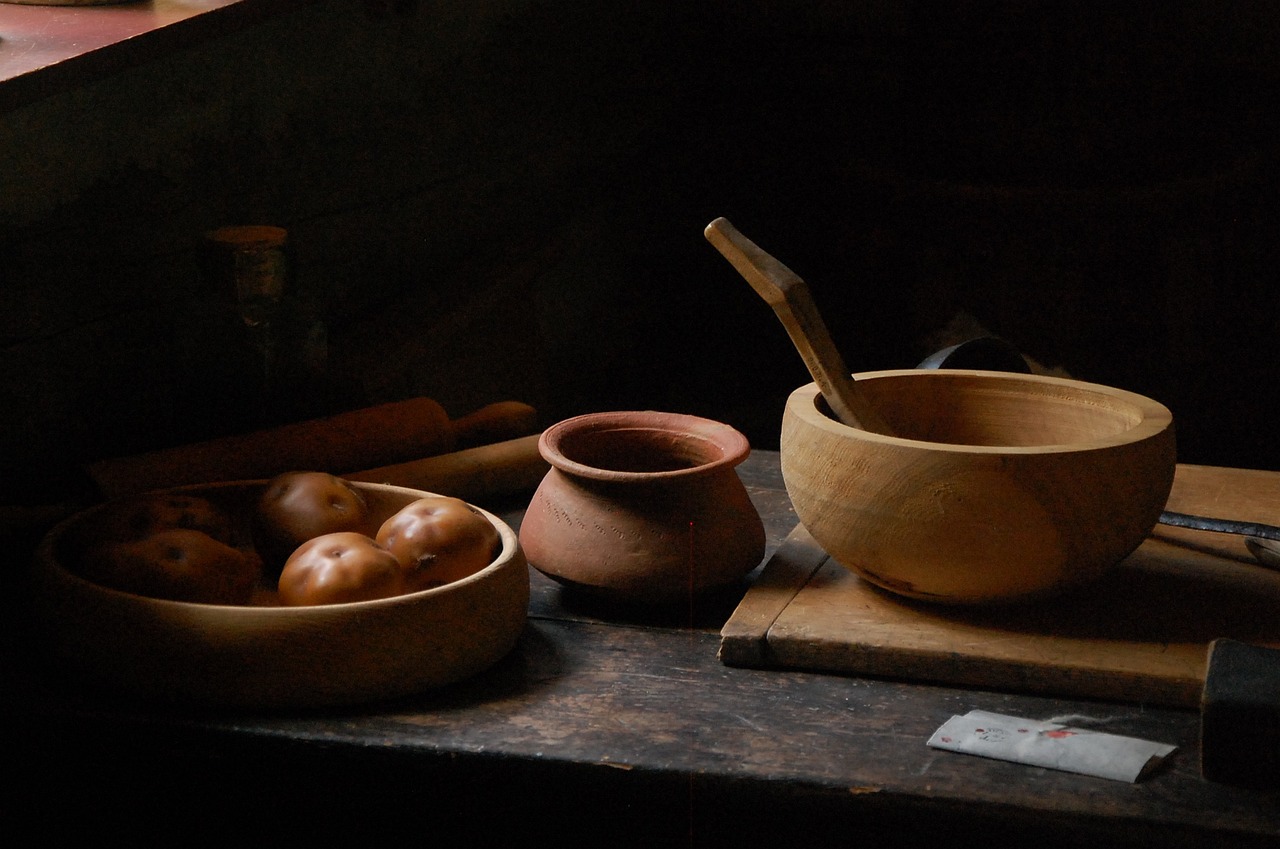
Creating a dedicated pottery workspace can enhance your creativity and productivity. Imagine walking into a space that not only inspires you but also makes your pottery practice feel effortless. It’s more than just a corner of your home; it’s a sanctuary where your artistic visions come to life. This guide will cover essential elements for setting up an efficient and inspiring home pottery studio, ensuring that every time you step into your workspace, you feel motivated and ready to create.
Selecting an appropriate space for your pottery workspace is crucial. Think about it: would you want to create beautiful art in a dimly lit, cramped corner of your home? Probably not! Consider factors such as natural light, ventilation, and accessibility to ensure a comfortable and functional environment for your craft. Natural light not only brightens your workspace but also helps you see the true colors of your clay and glazes. A well-ventilated area is essential, especially when working with materials that may release fumes or dust. If possible, choose a space that is easily accessible, so you can move materials in and out without hassle.
Having the right tools is vital for any potter. Imagine trying to bake a cake without the proper utensils; it would be a disaster! This section will outline the must-have equipment, including wheels, kilns, and hand tools, to help you create beautiful pottery pieces. Here’s a quick overview of essential tools:
| Tool/Equipment | Purpose |
|---|---|
| Pottery Wheel | For shaping clay into desired forms. |
| Kiln | To fire and harden your pottery. |
| Hand Tools | For carving, trimming, and finishing pieces. |
| Glazes | To add color and finish to your pottery. |
Choosing the right pottery wheel can greatly affect your crafting experience. Think of it as selecting the right car for your journey; the wrong choice can make the ride bumpy! Explore different types of wheels, their features, and how to select one that suits your needs.
Understanding the differences between electric and kick wheels will help you make an informed choice. Each has unique advantages, depending on your style and preferences in pottery making. Electric wheels are convenient and require less physical effort, while kick wheels can provide a more traditional experience, allowing you to feel more connected to the clay. It’s like choosing between a modern bike and a vintage one; both can get you to your destination, but the journey will feel different!
For those with limited space, portable pottery wheels offer flexibility and convenience. These wheels are designed for easy setup and takedown, making them ideal for small apartments or shared spaces. Discover options that allow you to create pottery without a permanent setup, giving you the freedom to craft wherever you feel inspired.
The choice of clay and glaze can significantly impact your pottery's final appearance. It’s like choosing the right paint for a masterpiece; the wrong shade can alter the entire vibe! Learn about different types of clay and glazes to enhance your artistic expression. Experimenting with various combinations can lead to unique results, making each piece a reflection of your creativity.
An organized workspace layout promotes efficiency and creativity. Picture yourself in a cluttered space, struggling to find your tools—frustrating, right? This section will provide tips on arranging your tools, materials, and equipment for optimal workflow. Keep frequently used items within arm’s reach, and consider using a large table as your main workspace, allowing you to spread out your materials comfortably.
Effective storage is essential for maintaining an organized workspace. Explore various storage options to keep your tools and materials easily accessible yet neatly tucked away. You might want to invest in shelving units, toolboxes, or even repurpose old furniture to create a functional and stylish storage solution. Remember, a tidy workspace can lead to a tidy mind!
Safety should never be overlooked in your pottery studio. Working with clay and various tools can pose risks if proper precautions aren't taken. Always wear protective gear, such as gloves and masks, especially when working with glazes and chemicals. Ensure your workspace is well-lit to avoid accidents, and keep a first-aid kit nearby for minor injuries. After all, you want your pottery journey to be as smooth as possible!
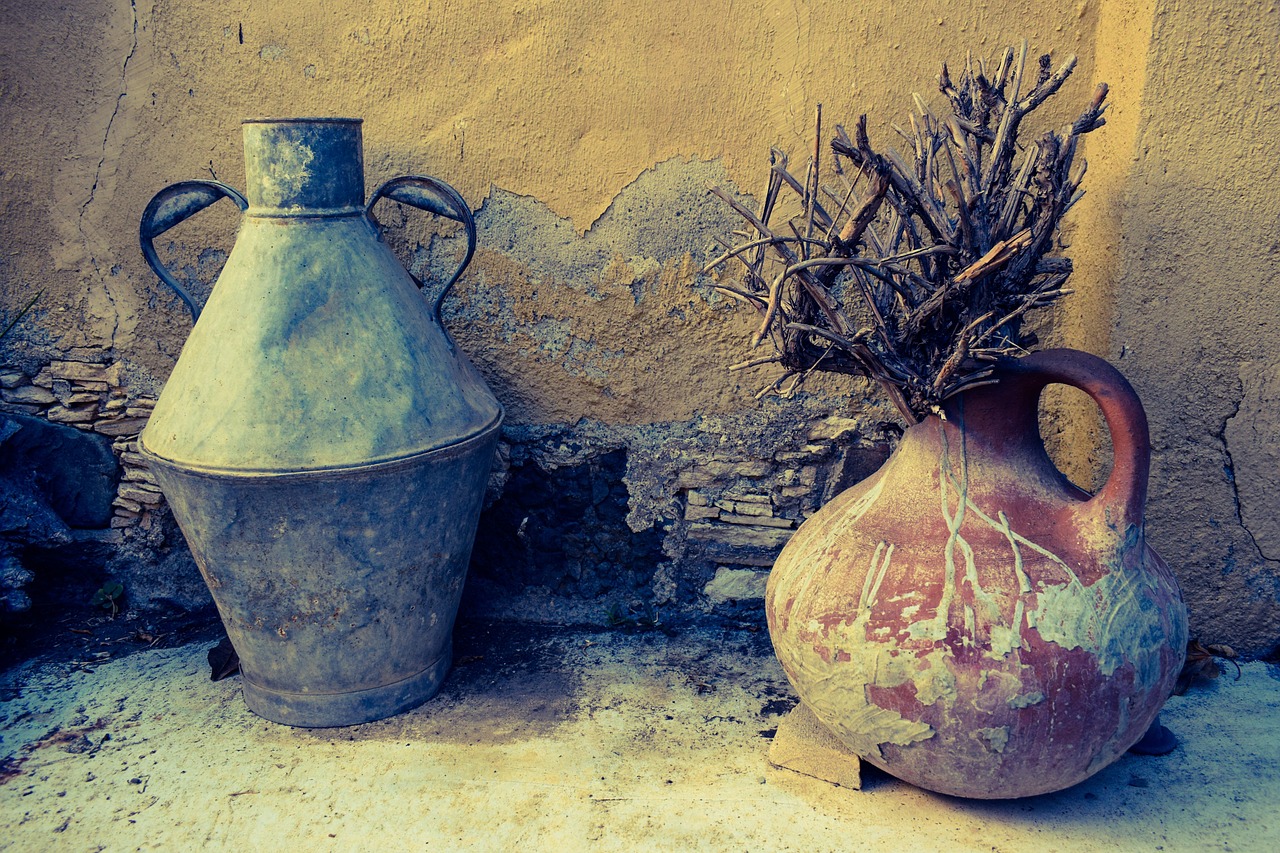
Adding personal elements to your workspace can inspire creativity. Discover ways to customize your studio with decor, plants, and artwork that reflect your artistic vision. Whether it’s hanging your favorite artworks on the wall, adding a splash of color with vibrant plants, or showcasing your previous pieces, these touches can transform your studio into a true reflection of you.
- What type of clay is best for beginners? Earthenware is often recommended for beginners due to its forgiving nature.
- Do I need a kiln at home? While having a kiln is beneficial, you can also use community kilns or local studios if you're just starting out.
- How can I keep my workspace clean? Regularly clean your tools and surfaces, and consider using a vacuum or wet wipes to manage dust and debris.

Choosing the Right Location
When it comes to setting up your pottery workspace, the location you choose is more than just a place to set your tools; it's the foundation of your creative journey. Imagine walking into a space that not only inspires you but also makes your pottery process smoother and more enjoyable. So, what should you consider when picking the perfect spot? Let's dive in!
First and foremost, natural light is a game changer. Pottery is an art form that thrives on visual inspiration, and having ample sunlight can significantly enhance your creativity. Look for a room with large windows or a space that allows for plenty of daylight. This not only helps you see your colors and textures better but can also uplift your mood as you work. Think of it as painting a canvas; the right lighting can transform the way you perceive your materials.
Another crucial factor is ventilation. Working with clay and glazes can release particles and fumes that aren’t exactly friendly to your lungs. A well-ventilated area ensures that you can breathe easy while you mold your masterpieces. If you’re in a basement or a room with limited airflow, consider investing in a good exhaust fan or opening windows to keep the air fresh. Just like a garden needs air to thrive, so does your creative space!
Accessibility is also key. You want your pottery studio to be easily reachable, not just for you but also for your materials and tools. If you find yourself lugging heavy bags of clay across the house, it might be time to rethink your setup. Ideally, your workspace should be close to water sources, storage for your materials, and even a place to clean up after a long day of crafting. Think of your pottery space as a well-oiled machine—everything should flow seamlessly.
To help you visualize the perfect pottery workspace, here’s a simple table outlining the essential elements to consider:
| Element | Importance |
|---|---|
| Natural Light | Enhances creativity and helps in color perception. |
| Ventilation | Ensures safety by keeping air fresh and free from harmful particles. |
| Accessibility | Facilitates easy movement of materials and tools. |
Moreover, consider the size of your workspace. If you’re just starting out, a small corner of a room might suffice. However, if you envision creating larger pieces or working with multiple materials, you may want a more spacious area. Think of your workspace as a stage where your creativity takes center stage; it should be big enough to accommodate your artistic flair without feeling cramped.
Lastly, don’t forget about your personal comfort. A space that feels good to you will naturally boost your productivity. Think about the temperature, the noise levels, and even the aesthetics of the room. You might want to add a comfy chair for breaks, or perhaps some plants to bring life into your studio. Just as a painter chooses their palette, you should curate your environment to reflect your style.
In summary, choosing the right location for your pottery workspace involves a balance of natural light, ventilation, accessibility, size, and personal comfort. When these elements come together, you create not just a workspace, but a sanctuary for your creativity to flourish. So, go ahead and scout out that perfect spot—your pottery journey awaits!
Essential Tools and Equipment
Having the right tools is vital for any potter. Imagine trying to paint a masterpiece without your brushes or canvas; it just wouldn't work, right? The same principle applies to pottery. To create beautiful pieces, you'll need a well-equipped workspace filled with essential tools and equipment. Let’s dive into what you really need to get started on your pottery journey.
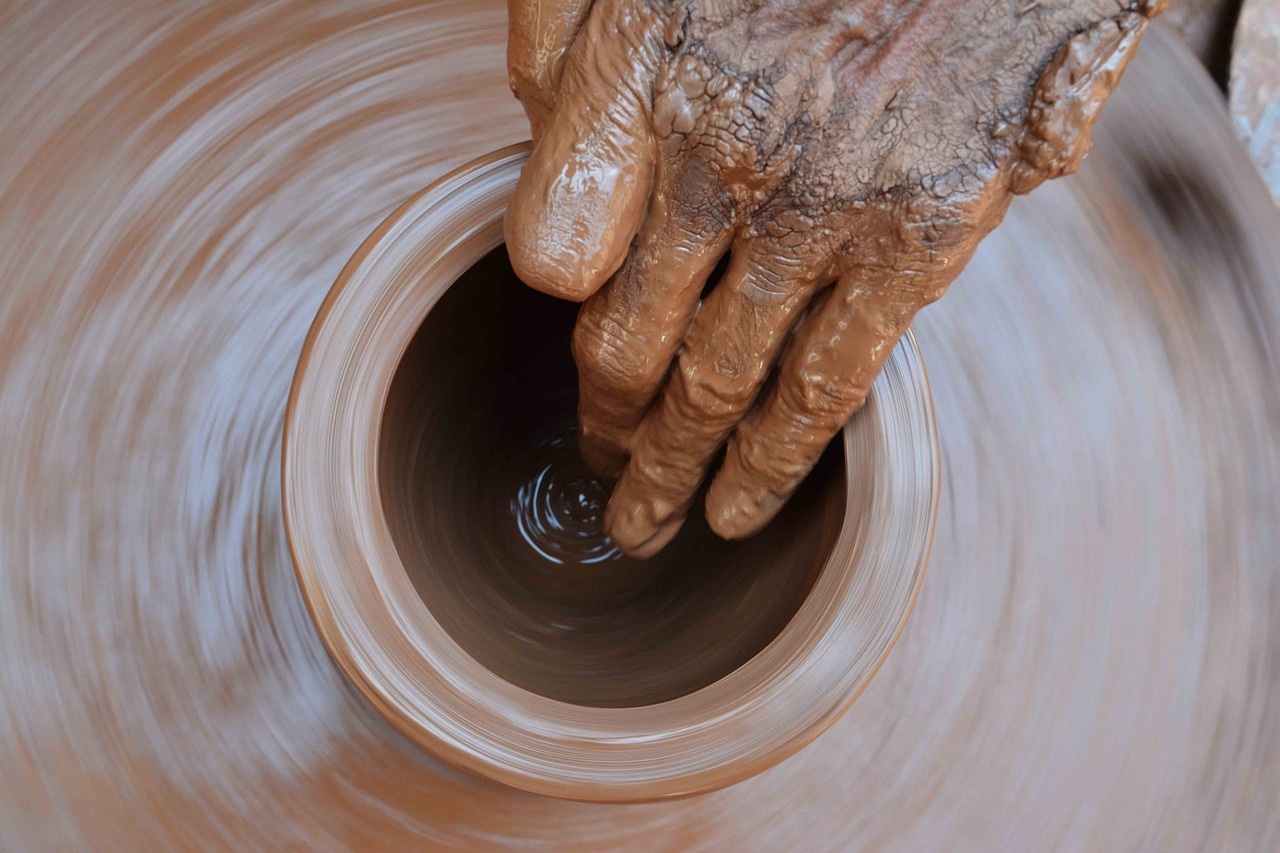
First and foremost, a pottery wheel is a must-have. This is where the magic happens! Whether you're throwing pots or shaping clay, a reliable wheel will be your best friend. There are various types of wheels available, and choosing the right one can greatly affect your crafting experience. Electric wheels are popular for their ease of use and consistent speed, while kick wheels offer a more traditional approach, allowing you to feel the rhythm and connection with the clay.
When selecting a pottery wheel, consider your style and the space you have available. If you're unsure where to start, check out the table below for a quick comparison:
| Type of Wheel | Advantages | Best For |
|---|---|---|
| Electric Wheel | Easy to use, adjustable speed, consistent results | Beginners and those who prefer convenience |
| Kick Wheel | More control, traditional experience, no electricity needed | Experienced potters and those looking for a workout |
| Portable Wheel | Space-saving, easy to move, versatile | Potters with limited space or those who like to travel |
Next up, let’s talk about clay and glazes. The choice of clay can significantly impact your pottery's final appearance and texture. There are several types of clay, each with its unique properties. For instance, earthenware is great for beginners due to its forgiving nature, while stoneware offers durability and a smooth finish. If you’re looking to explore, you might want to try porcelain, which is known for its elegance and translucence.
When it comes to glazes, the options are nearly endless! Glazes can transform your pottery from a simple clay form into a stunning work of art. They can add color, texture, and even functionality to your pieces. Experimenting with different glazes can be a fun way to express your artistic vision, but remember that some glazes require specific firing temperatures, so always check compatibility with your clay.
In addition to your wheel and clay, you'll want to invest in some essential hand tools. These tools will help you refine your pieces and add intricate details. Here are a few must-haves:
- Wire cutter: Perfect for slicing off your clay from the wheel.
- Ribs: Great for smoothing and shaping your pottery.
- Needle tools: Ideal for trimming and adding details.
- Sponge: Useful for adding moisture and smoothing surfaces.
With these tools in hand, you'll be well-equipped to bring your pottery visions to life. Remember, the right tools not only enhance your creativity but also make the process more enjoyable. So, invest in quality equipment that resonates with your style, and watch your pottery skills flourish!
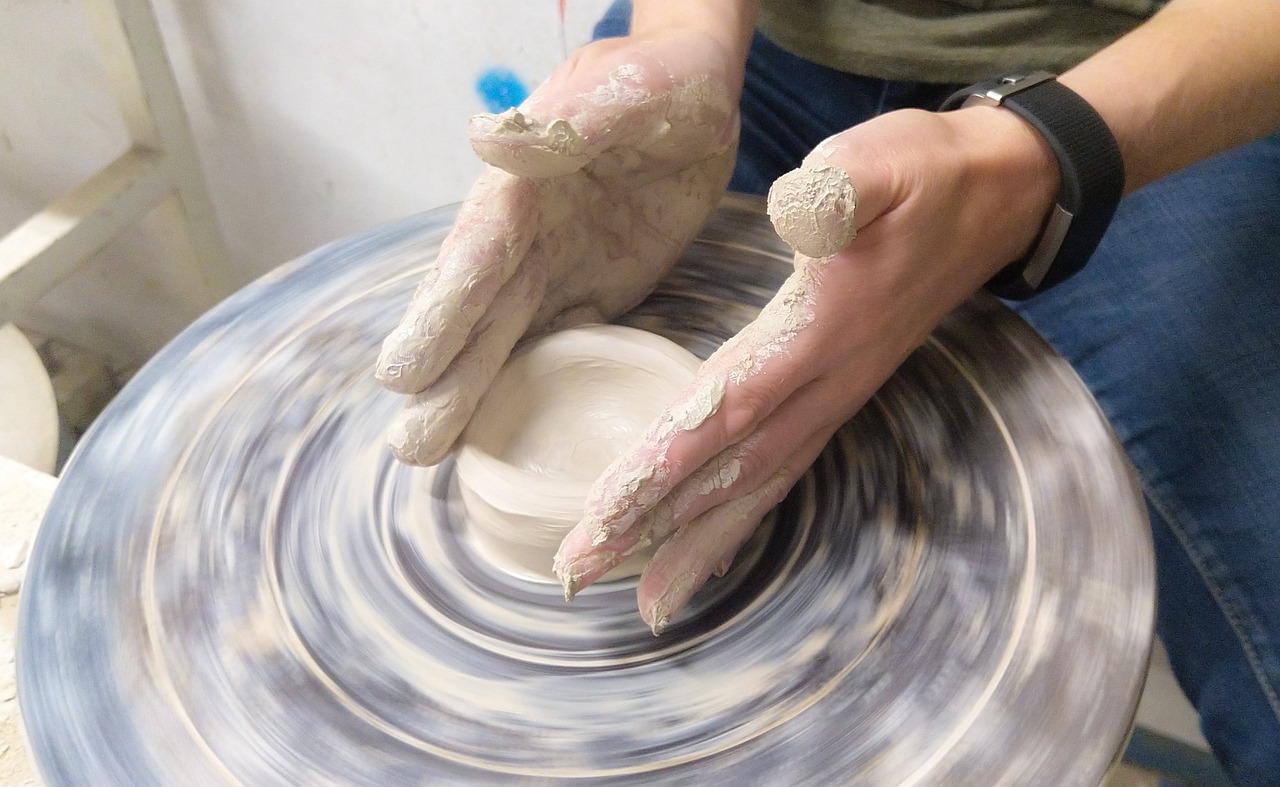
Pottery Wheel Options
When it comes to pottery, the pottery wheel is often the heart of your creative process. Choosing the right wheel can significantly enhance your crafting experience, allowing you to express your artistic vision with ease. But with so many options available, how do you decide which one is right for you? Let's dive into the world of pottery wheels and explore the different types that can elevate your pottery game!
First off, it's essential to understand the two primary categories of pottery wheels: electric wheels and kick wheels. Each type offers unique advantages that cater to different styles and preferences. Electric wheels are renowned for their convenience and consistency. With just the push of a pedal, you can control the speed effortlessly, allowing you to focus entirely on shaping your clay. This can be particularly beneficial for beginners who might find it challenging to maintain a steady rhythm.
On the other hand, kick wheels present a more traditional approach to pottery making. They require you to manually kick a pedal, which can be a fantastic workout! Many potters appreciate the tactile connection they have with the wheel, as it allows for a more organic feel during the crafting process. If you enjoy the idea of engaging both your body and mind while creating, a kick wheel might be the perfect fit for you.
For those of you who might be working with limited space or are constantly on the move, portable pottery wheels are a game changer. These compact wheels offer the flexibility to create pottery in various locations without needing a permanent setup. Imagine being able to set up your workspace in your living room one day and in your backyard the next! Portable wheels come in various designs, often lightweight and easy to transport. They may not have all the features of their larger counterparts, but they can still deliver a satisfying pottery experience.
To help you navigate through your options, here’s a quick comparison of the two main wheel types:
| Feature | Electric Wheel | Kick Wheel |
|---|---|---|
| Power Source | Electric | Manual |
| Speed Control | Variable | Dependent on kicking |
| Space Requirement | More space needed | Less space needed |
| Portability | Less portable | Highly portable |
| Skill Level | Beginner-friendly | Best for experienced potters |
Ultimately, the choice of pottery wheel boils down to your personal preferences and needs. Whether you opt for the convenience of an electric wheel or the traditional feel of a kick wheel, both can help you create stunning pottery pieces that reflect your unique style. So, take your time, try out different options if possible, and choose the wheel that resonates with you the most!
Remember, the journey of pottery making is just as important as the final product. So, invest in a wheel that inspires you, and watch your creativity flourish!
Q: What is the best pottery wheel for beginners?
A: For beginners, an electric wheel is often recommended due to its ease of use and speed control. However, if you prefer a more hands-on approach, a kick wheel can also be a great choice.
Q: Can I use a portable wheel for professional work?
A: Yes, many professional potters use portable wheels for their flexibility and convenience. Just ensure that the wheel you choose meets your specific needs for size and functionality.
Q: How much should I expect to spend on a pottery wheel?
A: Prices can vary widely based on the type and brand of the wheel. Generally, you can find decent electric wheels starting around $300, while kick wheels can range from $200 to $1000 depending on quality and features.

Electric vs. Kick Wheel
When it comes to choosing a pottery wheel, the debate between electric and kick wheels is a hot topic among potters. Each type has its own unique set of features, advantages, and drawbacks that cater to different styles and preferences. So, which one should you choose for your home pottery studio? Let’s break it down!
First up, the electric pottery wheel. These wheels are powered by electricity and are known for their speed and ease of use. They allow for consistent rotation and are perfect for potters who want to focus on their craft without worrying about the physical exertion that comes with foot-powered options. Just plug it in, adjust the speed, and you’re ready to throw! Electric wheels are ideal for beginners and professionals alike, as they provide the convenience of variable speed control, making it easier to achieve precise shapes and forms.
On the flip side, we have the kick wheel, which operates using a foot pedal to control the wheel's rotation. This traditional method requires a bit more physical effort, but many potters swear by it for the connection it fosters with the clay. Kick wheels are often praised for their simplicity and reliability. They don’t require electricity, which makes them a great option for those who want to create pottery in off-grid locations or those who appreciate a more hands-on approach to their craft. Plus, the workout you get while using a kick wheel can be a nice bonus!
To help you decide, here’s a quick comparison of the two:
| Feature | Electric Wheel | Kick Wheel |
|---|---|---|
| Power Source | Electricity | Foot-powered |
| Ease of Use | Very easy; just plug in and go | Requires physical effort to kick |
| Speed Control | Variable speed settings | Speed depends on the user's kicking |
| Portability | Less portable due to power needs | More portable; no power required |
| Connection with Clay | Less tactile feel | More tactile and intimate |
Ultimately, the choice between an electric wheel and a kick wheel boils down to your personal preferences and workspace setup. If you prioritize convenience and speed, an electric wheel might be the way to go. However, if you enjoy a more traditional approach and don’t mind putting in a little extra effort, a kick wheel can be a rewarding choice. Remember, the best pottery wheel is the one that feels right for you and inspires your creativity!
Q: Can I use an electric wheel if I want to create large pieces?
A: Yes! Electric wheels can handle larger pieces, especially those with a higher torque. Just ensure that your wheel is rated for the size of the work you plan to create.
Q: Are kick wheels suitable for beginners?
A: Absolutely! While they require a bit more physical effort, many beginners find the tactile experience of a kick wheel beneficial for learning the basics of centering and shaping clay.
Q: Do I need a special setup for an electric wheel?
A: Yes, you’ll need access to an electrical outlet. It’s also a good idea to have a sturdy table or workbench to support the wheel.
Q: What maintenance is required for each type of wheel?
A: Electric wheels generally require minimal maintenance, mostly keeping the motor and electrical components clean. Kick wheels may need occasional lubrication of the kick mechanism and ensuring the wheel head is secure.
Portable Wheels
When it comes to pottery, having the right tools can make all the difference, especially if you're working in a limited space. Portable pottery wheels are a fantastic solution for those who want to indulge in their creative passion without committing to a permanent setup. Imagine being able to wheel your pottery station into the sunshine on a beautiful day or tucking it away when you need the space for other activities. Isn’t that a dream come true?
Portable wheels come in various designs and functionalities, catering to different skill levels and preferences. They are typically lightweight and easy to move, making them ideal for small apartments, shared spaces, or even outdoor use. Some models are designed to be compact, allowing you to set them up on a kitchen table or a sturdy workbench. This flexibility means you can create your masterpieces wherever inspiration strikes!
Here are a few key features to consider when choosing a portable pottery wheel:
- Weight: A lightweight wheel is easier to transport, but ensure it’s sturdy enough to handle your projects.
- Power Source: Some portable wheels are electric, while others are manually operated. Think about your preferences and where you plan to use it.
- Size of the Wheelhead: A larger wheelhead allows for bigger pieces, but a smaller one can be more convenient for smaller projects.
Many potters also appreciate the affordability of portable wheels. They often come at a lower price point than traditional studio wheels, making them accessible for beginners or hobbyists who may not want to invest heavily right away. Plus, they can be a great option for kids or students just starting their pottery journey.
When selecting a portable wheel, it’s essential to think about your specific needs. Do you want something that can handle heavier clay? Or perhaps you need a wheel that’s easy to disassemble for storage? Researching different brands and reading reviews can provide valuable insights into what might work best for you.
Ultimately, a portable pottery wheel opens up a world of possibility, allowing you to create art wherever you feel inspired. Whether you’re a seasoned potter or just starting, these wheels can elevate your craft and keep your creativity flowing!
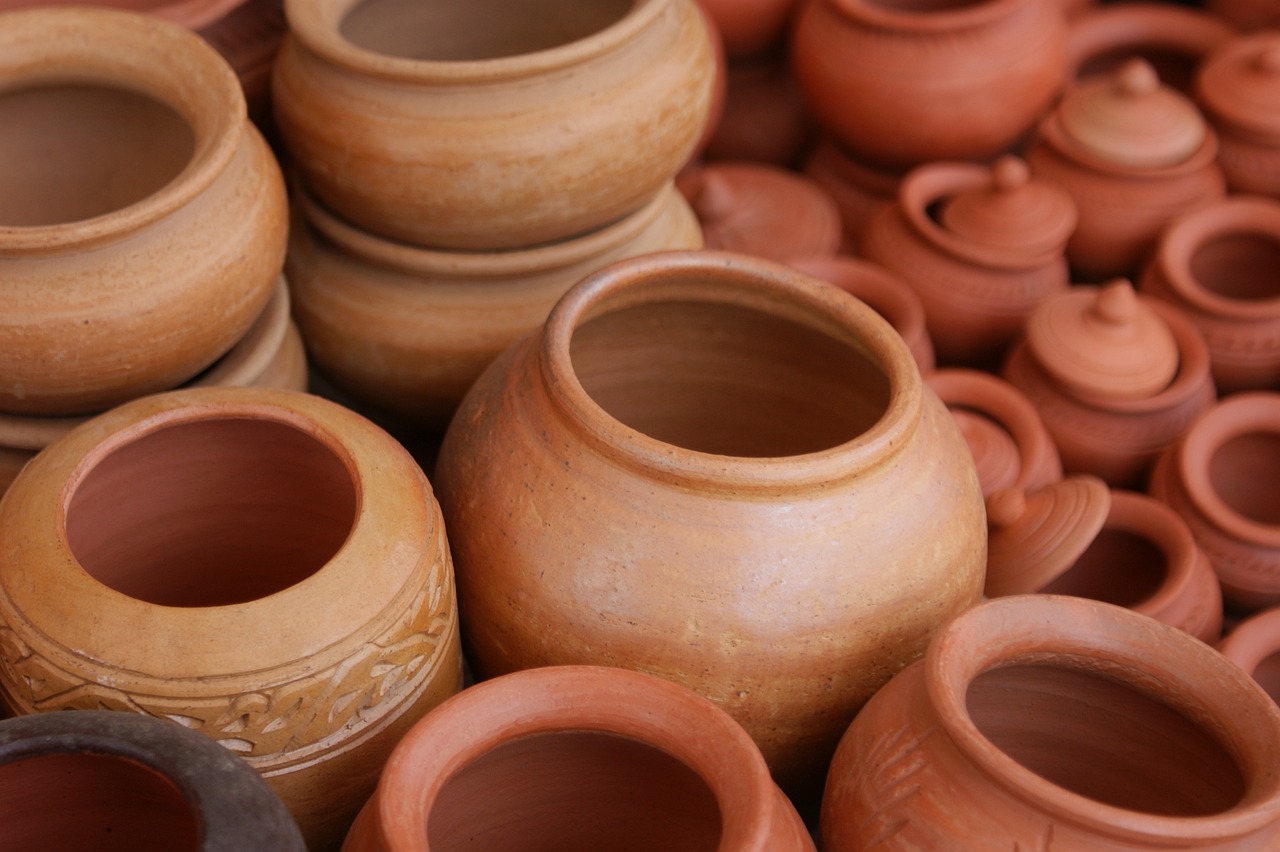
Clay and Glaze Selection
When it comes to pottery, the choice of clay and glaze is more than just a matter of preference; it’s about finding the right materials that resonate with your artistic vision. Imagine walking into a vibrant art gallery, each piece telling a unique story through its colors and textures. That’s the kind of impact the right clay and glaze can have on your pottery. So, how do you navigate this world of endless possibilities? Let’s dive in!
First off, let’s talk about clay. There are several types of clay, each with distinct properties that affect your work. For instance, earthenware is known for its earthy tones and is usually fired at lower temperatures, making it perfect for beginners. On the other hand, stoneware is more durable and can withstand higher temperatures, allowing for a wider range of glazes. If you’re looking for something versatile, porcelain is a fantastic option. Its fine texture and ability to hold intricate details can elevate your creations to a whole new level.
Here’s a quick comparison of the three types of clay:
| Type of Clay | Firing Temperature | Characteristics |
|---|---|---|
| Earthenware | Low (around 1,800°F) | Soft, porous, often red or brown |
| Stoneware | Medium to High (around 2,200°F) | Durable, non-porous, often grey or brown |
| Porcelain | High (around 2,400°F) | Translucent, smooth, often white |
Now, let’s shift gears and talk about glazes. The glaze you choose can dramatically alter the look of your pottery. It’s like the icing on a cake; it can make a good piece great! There are various types of glazes, including glossy, matte, transparent, and opaque. Each type has its own unique finish and can affect the color and texture of your final piece. For instance, a glossy glaze can give your pottery a shiny, polished look, while a matte finish offers a more subdued, earthy aesthetic.
When selecting a glaze, consider the firing temperature as well. Some glazes are specifically formulated for low-fire clays, while others work best with high-fire clays. Mixing and matching can lead to unexpected and beautiful results, but it’s crucial to do your research first. Always test your glazes on a small piece before committing to a larger work.
In conclusion, the selection of clay and glaze is a fundamental part of your pottery journey. It’s about experimenting, learning, and finding what resonates with your creative spirit. Don’t be afraid to mix different types of clay and glazes; sometimes, the most stunning pieces come from a little bit of risk and a lot of imagination!
- What type of clay is best for beginners? Earthenware is often recommended for beginners due to its lower firing temperature and ease of use.
- Can I mix different types of clay? Yes, but be cautious! Different clays have different firing temperatures and shrinkage rates, which can affect the final outcome.
- How do I choose the right glaze? Consider the firing temperature, the effect you want to achieve, and always test on a small piece first.
Creating a Functional Layout
When it comes to setting up your pottery workspace, the layout is everything. Imagine trying to create a masterpiece in a cluttered environment—it's like trying to paint a stunning landscape while standing in the middle of a hurricane! A well-organized workspace not only enhances your creativity but also boosts your productivity. So, let’s dive into how to create a functional layout that will make your pottery sessions as enjoyable as they are productive.
First and foremost, think about the flow of your workspace. You want to arrange your tools, materials, and equipment in a way that allows you to move seamlessly from one task to another. For instance, if you're working on the pottery wheel, having your clay, tools, and glaze within arm's reach can save you a lot of time and effort. Consider setting up a work triangle—a layout that connects your main work areas (like your wheel, drying area, and glazing station) to minimize unnecessary movement.
Next, let’s talk about storage solutions. You’ll need a place to store all those essential tools and materials without cluttering your workspace. Here are some effective storage options:
- Cabinets and Shelves: Install wall-mounted shelves or cabinets to keep your tools organized and off your work surface.
- Tool Carts: A mobile cart can hold frequently used tools and can be moved around as needed.
- Baskets and Bins: Use labeled baskets or bins for sorting clay types, glazes, and other materials.
Now, don’t forget about your workspace surface. A sturdy table or workbench is essential for your pottery projects. Make sure it’s at a comfortable height, so you’re not straining your back while working. If possible, consider a table with a smooth surface that can be easily cleaned after a messy day of crafting. You might even want to add a splash guard or some protective covering to catch any clay or glaze spills.
Another crucial aspect of your layout is lighting. Good lighting can make all the difference when you’re shaping clay or glazing your pieces. Natural light is fantastic, but if your workspace doesn’t get ample sunlight, invest in some bright, adjustable lamps. Task lighting can help illuminate your work area and reduce eye strain, allowing you to focus on the details of your creations.
Lastly, think about incorporating comfort elements into your workspace. A comfortable chair or stool, perhaps with a cushion, can make long hours of pottery work much more enjoyable. Additionally, consider adding some personal touches, like artwork or plants, to create an inviting atmosphere. After all, a space that feels good to be in can spark your creativity and inspire your next project!
In summary, creating a functional layout for your pottery workspace involves thoughtful organization and planning. By considering the flow of your workspace, implementing effective storage solutions, ensuring proper lighting, and adding comfort elements, you can create an environment that not only enhances your productivity but also fuels your creativity. So roll up your sleeves, get your space set up, and let the magic of pottery unfold!
Q: What is the best way to organize my pottery tools?
A: Organizing your pottery tools can be done effectively by using labeled storage bins, tool carts, and wall-mounted shelves. Keep frequently used items within reach to streamline your workflow.
Q: How can I improve lighting in my pottery workspace?
A: If natural light is limited, consider adding bright, adjustable lamps that provide task lighting. This will help illuminate your work area and reduce eye strain.
Q: What type of table is best for pottery work?
A: A sturdy workbench or table at a comfortable height is ideal. Look for surfaces that are easy to clean and can withstand spills from clay and glaze.
Storage Solutions
When it comes to setting up your pottery workspace, effective storage solutions are essential for maintaining an organized and efficient environment. Imagine trying to create a masterpiece while tripping over tools or searching for that elusive glaze! A clutter-free space not only enhances your productivity but also sparks your creativity. So, let’s dive into some practical storage ideas that can help you keep your pottery studio in tip-top shape.
First off, consider investing in modular shelving units. These versatile pieces can be adjusted to fit your specific needs and can hold everything from clay to glazes and tools. You can customize them to fit your space, making them a fantastic option for studios of all sizes. Plus, having everything visible and within arm's reach can save you precious time during your creative process.
Another clever solution is to use storage bins and containers. Clear plastic bins are particularly useful because they allow you to see what’s inside without having to open each one. Labeling is key here; a simple label maker can work wonders. You might categorize your bins by type of clay, tools, or even by project. This way, you’ll always know where to find what you need, and you won’t waste time rummaging through piles of materials.
Don't overlook the importance of vertical space! Utilizing walls for storage can free up valuable table space. Consider hanging pegboards or magnetic strips to hold tools and small items. This not only keeps them organized but also adds a unique aesthetic to your studio. You can even personalize your pegboard with colors or patterns that inspire you!
For those who love to keep their workspace neat, a rolling cart can be a game-changer. These carts can be easily moved around your studio, allowing you to have your most-used tools and materials right where you need them. You can dedicate one cart for glazing supplies and another for your sculpting tools, making it easy to switch between tasks without the hassle of shifting everything around.
Lastly, don’t forget about safety and accessibility. Make sure that heavy items are stored lower down to prevent accidents, and keep frequently used items within easy reach. A well-organized space not only looks good but also promotes a safe working environment.
To summarize, here are some key storage solutions to consider for your pottery workspace:
- Modular shelving units
- Clear storage bins with labels
- Pegboards or magnetic strips for tools
- Rolling carts for mobility
- Strategic placement for safety
By implementing these storage solutions, you’ll create a workspace that not only looks great but also enhances your pottery-making experience. Remember, a well-organized studio can lead to more inspired creations!
1. What are the best materials for shelving in a pottery studio?
It's best to use sturdy materials like wood or metal that can support the weight of your tools and materials. Ensure that the shelves are secured properly to avoid accidents.
2. How can I keep my pottery workspace dust-free?
Regular cleaning is essential. Use a damp cloth to wipe down surfaces and consider covering your clay and tools when not in use to minimize dust accumulation.
3. Should I invest in a dedicated storage system for my glazes?
Absolutely! A dedicated storage system for glazes helps keep them organized and prevents spills. Consider using clear containers and labeling them for easy access.
4. How can I maximize small spaces for pottery storage?
Utilize vertical space with wall-mounted shelves and pegboards. Rolling carts can also help in maximizing space while keeping your tools accessible.
Workspace Safety Tips
Creating a pottery workspace is not just about unleashing your creativity; it's also about ensuring your safety while you mold and shape your artistic visions. Safety should always be at the forefront of your mind, especially when working with tools and materials that can pose risks. First and foremost, always wear appropriate protective gear. This includes gloves to protect your hands from sharp tools and rough clay, as well as goggles to shield your eyes from dust and debris. You might think, "Oh, I’ll be careful!" but accidents can happen in the blink of an eye.
Moreover, it's essential to maintain a clean workspace. A cluttered area not only makes it hard to find your tools but can also lead to accidents. Regularly clean your surfaces and organize your materials. You could even create a simple cleaning schedule to keep your studio in top shape. Remember, a clean workspace is a happy workspace!
When it comes to handling clay and glazes, make sure to read all safety labels and follow the manufacturer's instructions. Some clays contain materials that can be harmful if inhaled or ingested. If you’re using glazes, especially those that contain chemicals, ensure that you are in a well-ventilated area. You might want to invest in a good quality ventilation system or even use a fan to circulate the air. Not only will this help keep you safe, but it will also make your workspace more comfortable.
Additionally, be mindful of your posture while working at the pottery wheel or when hand-building. Poor posture can lead to strain injuries over time. Consider using an ergonomic chair or stool, and take regular breaks to stretch and move around. Your body will thank you later!
Lastly, don’t underestimate the importance of having a first-aid kit handy. Accidents can happen, whether it's a small cut or a more serious injury. Having a well-stocked first-aid kit can make all the difference. Here’s a quick checklist of items you might want to include in your kit:
- Adhesive bandages
- Antiseptic wipes
- Gauze and tape
- Scissors
- Pain relievers
By following these safety tips, you’ll not only protect yourself but also create a more enjoyable and productive pottery experience. Remember, safety is not just a rule; it’s a way to ensure that your creative journey continues without unnecessary interruptions.
Q: What should I wear while working with pottery?
A: It's best to wear old clothes that you don't mind getting dirty. Additionally, wear gloves and goggles to protect your hands and eyes from dust and sharp tools.
Q: How can I ensure my workspace is safe?
A: Keep your workspace clean and organized, use protective gear, and ensure proper ventilation, especially when handling glazes.
Q: What should I include in my first-aid kit for pottery?
A: Include adhesive bandages, antiseptic wipes, gauze, scissors, and pain relievers to handle minor injuries.

Incorporating Personal Touches
When it comes to your pottery workspace, adding personal touches is like sprinkling a bit of magic dust over your creative haven. Think of your studio as a canvas waiting for your unique flair. Personalizing your space not only makes it visually appealing but also helps to ignite your creativity and keep you inspired. So, how can you transform a simple workspace into a reflection of your artistic soul?
First off, consider the color scheme of your studio. Colors have a profound impact on our mood and creativity. Warm colors like reds and oranges can energize you, while cool colors like blues and greens can promote calmness. Choose a palette that resonates with your artistic vision. You might even want to paint an accent wall or use colorful decorations to set the tone.
Next, think about incorporating artistic decor. This could be anything from your favorite pottery pieces to inspiring artwork that speaks to you. Hang up some of your finished pieces on the walls or display them on shelves. Not only will this showcase your talent, but it will also serve as a constant reminder of your creative journey. You could even create a small gallery wall featuring your favorite artists or pottery styles.
Plants are another fantastic way to breathe life into your workspace. They not only purify the air but also add a touch of nature that can be incredibly soothing. Consider placing a few potted plants on your workbench or windowsill. Succulents are a great option as they require minimal maintenance and come in various shapes and sizes, making them perfect for any space.
Moreover, think about your workspace organization. Use storage solutions that reflect your personality. For instance, you could repurpose vintage crates or colorful baskets to store your tools and materials. This not only keeps your space tidy but also adds a charming aesthetic. You might even label your storage containers with fun, quirky tags that make you smile every time you reach for your supplies.
Lastly, don't forget to include elements that connect you to your pottery community. This could be photographs from workshops, notes from fellow potters, or even a bulletin board where you pin inspiring quotes. Surrounding yourself with reminders of your passion and the people who share it can create an uplifting atmosphere that fuels your creativity.
In summary, incorporating personal touches into your pottery workspace is all about creating an environment that feels uniquely yours. By thoughtfully selecting colors, decor, plants, and organizational tools, you can craft a studio that not only enhances your productivity but also serves as a sanctuary for your creativity. So, go ahead and let your personality shine through in every corner of your pottery haven!
- What are some budget-friendly ways to personalize my pottery workspace? You can use items you already own, such as old picture frames, fabric scraps for curtains, or even paint leftover from other projects!
- How can I maintain a balance between functionality and aesthetics? Choose decor that also serves a purpose, like decorative storage solutions or multi-functional furniture.
- Are there specific plants that are best for a pottery studio? Yes! Consider low-maintenance plants like succulents, snake plants, or pothos that thrive in various lighting conditions.
Frequently Asked Questions
- What is the best location for my pottery workspace?
Choosing the right location is essential! Look for a spot with plenty of natural light and good ventilation. You want a space that feels comfortable and inspires creativity, so think about accessibility and how often you'll be using it.
- What essential tools do I need to start pottery?
To kickstart your pottery journey, you'll need some basic tools like a pottery wheel, kiln, and hand tools such as ribs, sponges, and trimming tools. These will help you shape and fire your creations beautifully!
- Should I choose an electric or kick pottery wheel?
This really depends on your style! An electric wheel is great for speed and ease, while a kick wheel offers a more traditional experience and can be quieter. Think about what feels right for you and your pottery goals.
- What types of clay and glaze should I use?
There are many options! For beginners, earthenware or stoneware clay is often recommended. As for glazes, consider starting with a basic clear glaze to showcase the clay’s natural beauty, then experiment with colors as you gain confidence.
- How can I create an efficient workspace layout?
Think about workflow! Arrange your tools and materials in a way that makes sense for how you work. Keep frequently used items within arm's reach and organize everything else to minimize clutter. A clear space equals a clear mind!
- What are some good storage solutions for my pottery tools?
Consider using cabinets, bins, or shelves to keep your tools organized. You can also repurpose jars or boxes to store smaller items. The key is to find a system that works for you and keeps everything easily accessible.
- How can I ensure safety in my pottery workspace?
Safety is crucial! Always wear a mask when working with dust, use gloves when handling chemicals, and keep your workspace tidy to prevent accidents. It's also wise to have a first aid kit on hand, just in case!
- What personal touches can I add to my pottery studio?
Make your space feel like yours! Add plants, artwork, or even a cozy chair for breaks. Personal touches can spark creativity and make your studio a place you love to spend time in.


